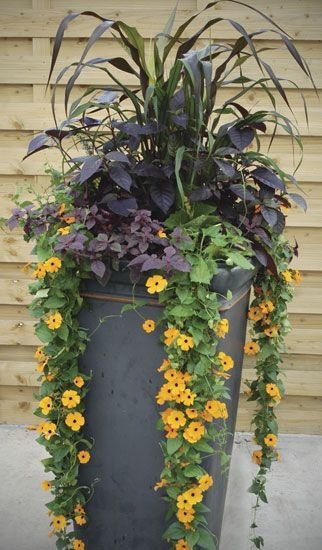
Planting Big and/or Tall Containers
Advice for the Home Gardener From the Contra Costa Master Gardeners' Help Desk
Client's Question and Request for Advice:
CCMG Help Desk's Advice:
Thank you for contacting Contra Costa Master Gardeners' Help Desk.
Before you decide how to handle the container, you'll need to decide what you will plant in it. Some plants may benefit by having a deep rooting area, in which case you wouldn't want to use fill material below the potting soil. (If you need some help in determining if your target plants fit that category, you could inquire at the nursery where you buy your plants or check back with us.)
If you're planning to use the containers for annual flowers or other plants that are shallow rooted or for seasonal display, the deeper planting zone is probably unnecessary. In this situation, for reasons I'll explain below, you shouldn't simply put a filler material in the bottom of the container and then put your potting soil directly on top of the filler.
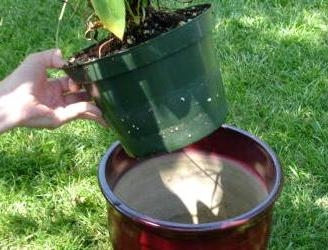
Instead, plant in an inexpensive plastic plant container that will fit inside your deeper ornamental container. Choose a container that is large enough to support your plants, but more shallow than the deep ornamental planter. You can then use a filler material in the bottom of the deep container and put the inexpensive container on top of the filler. If you use some sphagnum moss or a mulch around your plants at the top of the container, you probably won't see the inexpensive container and it will look as though the plants have been planted directly into the deep decorative planter. And when it's time to replace your annual plants (or repot any perennials), it will be easy to remove the inexpensive container and refill it with fresh potting soil and new plants.
Here's why you shouldn't put the soil mixture directly into the deep container on top of some type of fill material. Many years ago, it was customary to place pebbles or broken pieces of clay pots in the bottom of planting containers below the potting soil. The thought at the time was that those materials would help the containers drain better. But scientific studies have shown that instead of improving drainage, the pebbles or broken-up clay chars in the bottom of a container actually interfere with drainage and can cause the potting soil to stay over-saturated with water.
Also, I've seen suggestions to fill the bottom of deep containers with Styrofoam packing peanuts (or other pieces of broken up Styrofoam) and put your potting soil on top. The problem with placing potting soil directly over such fill material is that the roots of the plants may start growing down into the Styrofoam fill. Because the Styrofoam won't absorb water, the roots in that area will dry out quickly and not supply the plant with water. Also, the Styrofoam area will have no plant nutrients needed by the plant so you don't want to encourage roots to grow into such fill materials.
If you use the “pot inside the pot” method described above, you can fill the lower part of the deep ornamental container with any type of fill material that doesn't interfere with drainage from the container in which you plant your plants. Be sure that both the deep ornamental container and the container in which you plant your plants have drainage holes and that they are not being blocked by the fill material. (If the container holes are so large that fill material or potting soil will fall through the holes, you can cover the drainage holes with landscape fabric or light-weight screen. The fabric or screen will keep the fill materials or soil from falling through the holes but won't interfere with water drainage.
You could use Styrofoam peanuts or broken up pieces of Styrofoam in the bottom of the ornamental container below the inexpensive container in which you have the plants. The plant roots will be contained in the planning container and won't grow into the Styrofoam. If you choose to use that type of fill, first check to be sure that the Styrofoam materials don't start dissolving when you place them in water. Some of the newer types of Styrofoam-like material is constructed so that it starts breaking down in water. You don't want to use that type of material as fill since it will start shrinking as it disintegrates.
Also, be careful not to make the ornamental container top-heavy. If you need more weight to keep the ornamental container stable, you could use pebbles or rocks or other heavy items as the fill material so long as you're careful not to block the drainage holes. You could put some heavy materials in the bottom, then add a Styrofoam layer and then insert your planting container on top.
Hope you find this information to be helpful and that you create a lovely container display.
Contra Costa Master Gardeners Help Desk
Note: The Contra Costa Master Gardener Help Desk is available year-round to answer your gardening questions. Except for a few holidays, we're open every week, Monday through Thursday for walk-ins from 9:00 am to Noon at 75 Santa Barbara Road, 2d Floor, Pleasant Hill, CA 94523. We can also be reached via telephone: (925) 646-6586, email: ccmg@ucanr.edu, or on the web at http://ccmg.ucanr.edu/Ask_Us/


Posted by Angelika on May 14, 2019 at 7:24 AM