NTGB staging
Winter 2025
"Anyone who thinks that gardening begins in the spring and ends in the fall is missing the best part of the whole year.
For gardening begins in January with the dream."
— Josephine Nuese
As we step into a fresh new year, let’s take a moment to celebrate the magic of gardening and how it connects us to the rhythms of nature. Each season brings its own unique gifts, and winter—often underrated—is no exception. Our winter collection of articles is here to spark your creativity, provide practical advice, and inspire you to embrace the beauty and potential of this quieter season.
So, let’s bundle up and dive into the joys of winter gardening! Discover the wonders of detaining precious rainfall to nurture your garden instead of letting it wash away. Explore how to create cozy habitats for wildlife braving the chilly months and learn how to protect our magnificent local oaks. Plus, prepare to be amazed by the hidden universe beneath our feet as plants in our sometimes messy gardens quietly work their magic, even while appearing dormant or wilted.
Feeling the winter chill and not quite ready to head outdoors? No problem! Why not try something new? Growing microgreens is a fun and easy way to bring fresh, delicious veggies to your table—and let’s be honest, it’s way more exciting than scrubbing dirt off your gardening tools!
With shorter days and longer nights, you’ve got the perfect excuse to catch up on reading. Dive into our blog for informative articles, plan a fire-safe garden for the future, or explore our website. There’s no shortage of inspiration to keep you dreaming and planning until spring arrives.
Here’s to a new year filled with growth, learning, and the joy of cultivating harmony with nature. Let’s make it our best gardening year yet!
Hedwig Van Den Broeck and Robin Mitchell, editors - Contact Us
Winter 2025
As we step into a fresh new year, let’s take a moment to celebrate the magic of gardening and how it connects us to the rhythms of nature. Each season brings its own unique gifts, and winter—often underrated—is no exception. Our winter collection of articles is here to spark your creativity, provide practical advice, and inspire you to embrace the beauty and potential of this quieter season.
So, let’s bundle up and dive into the joys of winter gardening! Discover the wonders of detaining precious rainfall to nurture your garden instead of letting it wash away. Explore how to create cozy habitats for wildlife braving the chilly months and learn how to protect our magnificent local oaks. Plus, prepare to be amazed by the hidden universe beneath our feet as plants in our sometimes messy gardens quietly work their magic, even while appearing dormant or wilted.
Feeling the winter chill and not quite ready to head outdoors? No problem! Why not try something new? Growing microgreens is a fun and easy way to bring fresh, delicious veggies to your table—and let’s be honest, it’s way more exciting than scrubbing dirt off your gardening tools!
With shorter days and longer nights, you’ve got the perfect excuse to catch up on reading. Dive into our blog for informative articles, plan a fire-safe garden for the future, or explore our website. There’s no shortage of inspiration to keep you dreaming and planning until spring arrives.
Here’s to a new year filled with growth, learning, and the joy of cultivating harmony with nature. Let’s make it our best gardening year yet!
Hedwig Van Den Broeck and Robin Mitchell, editors - Contact Us
"Anyone who thinks that gardening begins in the spring and ends in the fall is missing the best part of the whole year.
For gardening begins in January with the dream." — Josephine Nuese
Protecting Our Local Oaks
By David George
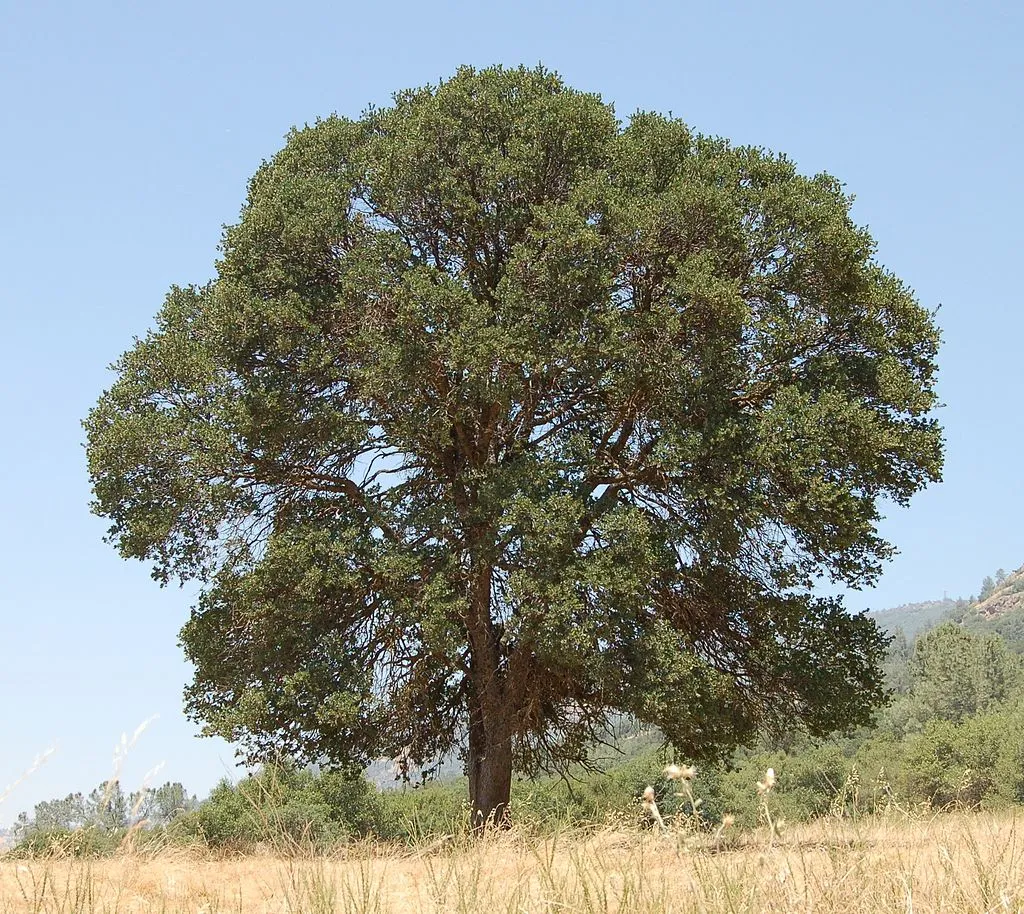
The native oak trees that grace our Contra Costa County gardens face constant threats from habitat loss, imported diseases, nasty pests, and the effects of climate change. These threats destroy thousands of local oaks each year. However, we can all play a vital role in protecting these magnificent trees from destruction and ensuring they thrive in our region for generations to come.
Loss of Natural Habitat

We are fortunate to have five local varieties of oak because of our varied Contra Costa microclimates. Each of these five varieties has distinct needs. The evergreen coast live oak (Quercus agrifolia) grows best in cooler coastal conditions such as west Contra Costa and the East Bay hills but also tolerates shadier inland locations. Massive valley oaks (Q. lobata) love warmer inland locations where summer heat fuels growth. Their lateral spreading roots seek reliable underground water sources, such as stream beds or shallow water tables in alluvial plains near rivers. Black oaks (Q. kelloggii) can be found on north-facing slopes in the East Bay hills, where soil retains water longer into summertime. Hot weather-loving blue oaks (Q. douglasii) and interior live oaks (Q. wislizeni) populate the slopes of Mt. Diablo and Central Valley foothills. Blue oaks have adapted to dry conditions by going dormant in mid-summer if soil dries out, while interior live oaks halt growth and retain water with a thick waxy coating on their leaves.
The availability of water is key to these oak varieties and is also one of their threats. They adapt to dry conditions but cannot tolerate wet soil which can cause root rot, especially in summer months. To protect them in your garden, keep irrigated water to a minimum under tree canopies (“drip lines”), remove excess soil or mulch from their root crowns, plant low-water-use landscaping under them, such as California natives and succulents, or leave the tree’s drip line area unlandscaped.
Diseases
Oak root rot is caused by a fungus (Armillaria mellea). The fungus grows into the tree’s root system when soil is excessively wet for extended periods. It is the most common cause of oak tree decline and death in our area and can spread to other plantings around infected oak roots. It disrupts the flow of water and nutrients through the roots. Water sparingly around oaks to prevent it.
Sudden oak death (SOD) is caused by an introduced non-native pathogen, Phytopthora ramorum. It has grabbed headlines by killing over a million oaks in large tracts throughout coastal central and northern California and has now spread to coastal Oregon also. Bay laurel trees, tanoaks, rhododendrons, and camellias are common host plants for P. ramorum (they become infected but survive), so remove those species near your oak tree and also avoid planting cultivars of these species near oaks. Don’t aid the pathogen’s spread by relocating or harvesting limbs for firewood from host trees within affected regions.
Mistletoe (Phoradendron flavescens) is a hemiparasitic plant that grows on a wide variety of host trees but primarily infects stressed oak trees in our local region. Hemiparasitic means it creates its own food through photosynthesis but obtains water and nutrients from the host tree. Over many years, this theft can cause an oak to lose vitality and eventually kill it. Mistletoe is toxic to humans, especially its berries. To combat mistletoe, make sure the oak has sufficient (but not too much) water and full sunshine. If you can reach it, periodically prune back mistletoe plants to the branch bark to slow its growth and reduce its damage, or remove the infected limb at the trunk.
Pests
Oaks are amazingly resilient against pests and in fact, support more beneficial creatures than are threatened by dangerous pests. They are called a “keystone” species because of this essential relationship with the ecosystem. Many common pests in our area such as aphids and oak moth caterpillars damage or kill oak leaves but do not kill whole trees. With time, oaks will produce a fresh crop of replacement leaves. But several pests can mortally wound oaks, and, if found, deserve professional treatment.
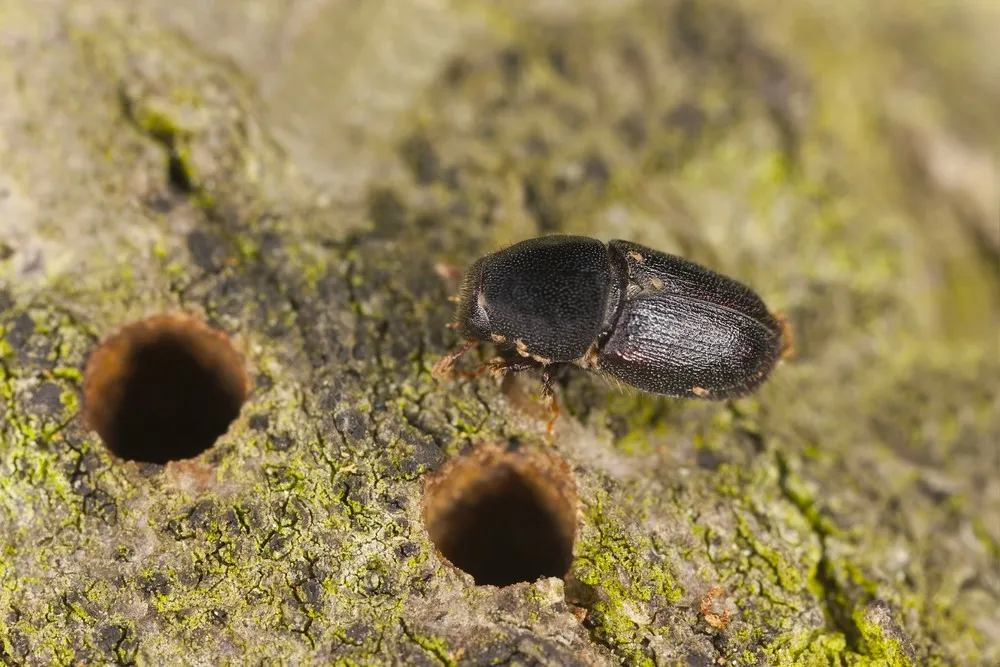
Oak bark and ambrosia beetles attack oaks and certain other broadleaf trees including California buckeyes and tanbark oaks. Like fir tree borers, the adults drill small holes in the bark to lay eggs in or near a tree’s vascular system. Larvae feed on vascular tissue and eventually cut off the flow of water and nutrients to the tree. Adult beetles (dark and about the size of rice grains) chew their way out through the bark and leave more holes. Call a professional if you see sap oozing from small holes in the bark as they can treat the tree and prevent the tree from dying.
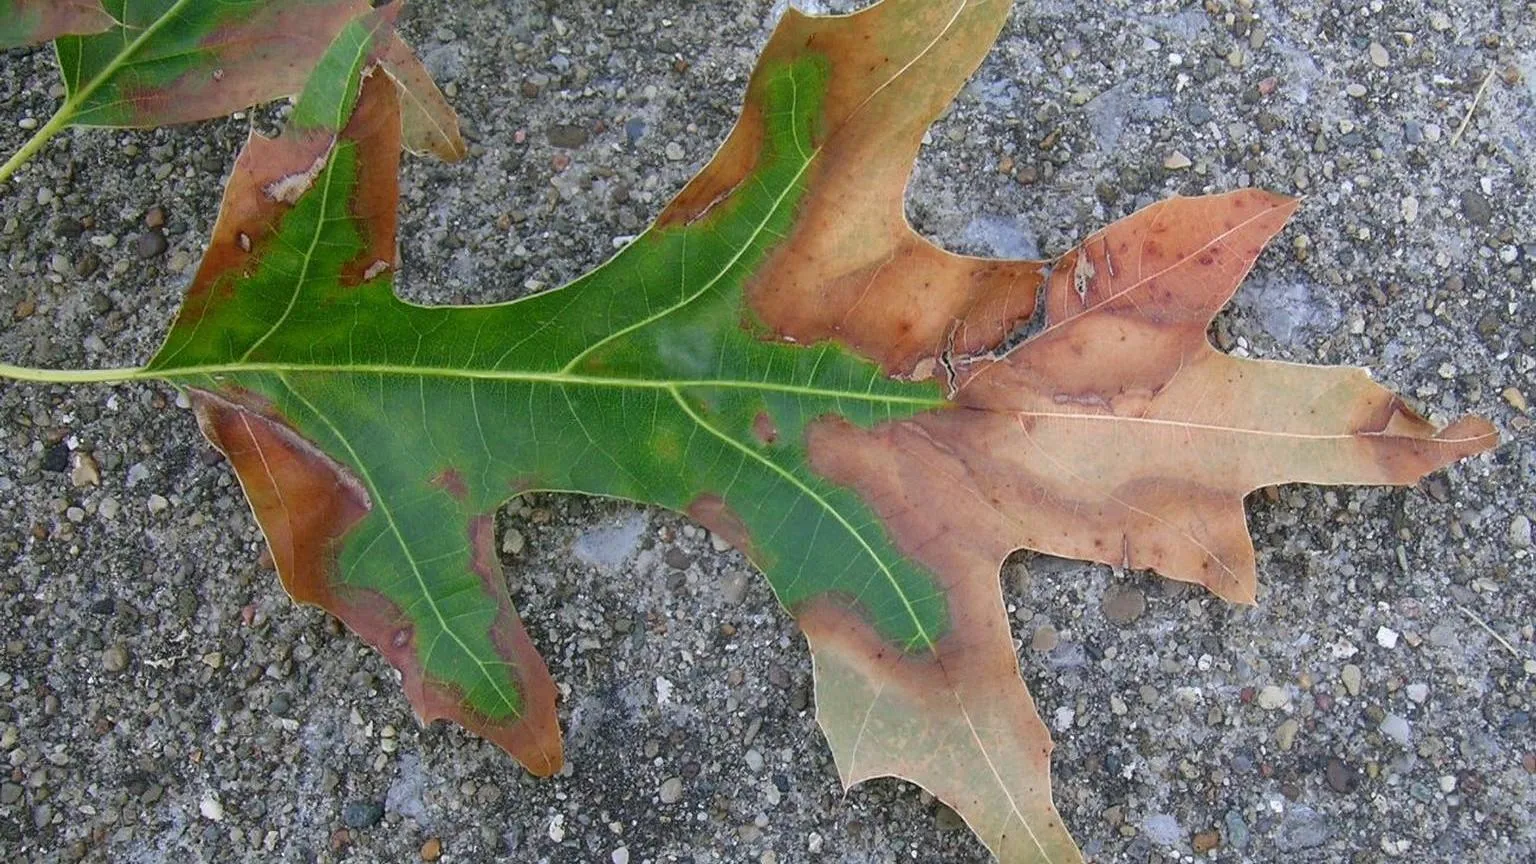
The glass-winged sharpshooter is a large leafhopper that feeds on an oak tree’s fluids and nutrients. The pest by itself does not kill oaks, but it can introduce and spread a pathogenic bacterium called Xylella fastidiosa. X. fastidiosa can cause bacterial leaf scorch in oaks. If you notice leaves that look to be scorched by heat but without a heat wave, call a professional arborist to diagnose the pathogen.
Climate Change
Is our region becoming warmer and wetter over time? Many non-native pathogens and pests thrive in warm wet climates, which creates new challenges for local oaks. In the past, frost and freezing temperatures helped kill many disease spores and pests before they could cause real damage to oaks, while dry weather retarded the spread of wet soil pathogens. As these natural defenses diminish, time will tell whether our local oaks are resilient and adaptable enough to survive. The urgency to protect our local oaks has never been greater.
Follow these links for more information about native oak tree care and threats:
How to Manage Pests in Gardens and Landscapes: Oak
https://ipm.ucanr.edu/PMG/GARDEN/PLANTS/oak.html
Oak Tree Management and Pest Resources
https://ucanr.edu/sites/gsobinfo/resources/oak_tree_management_and_pest_resources/
Search results for "Oaks" from UCANR
https://anrcatalog.ucanr.edu/Items.aspx?search=oaks [LINK removed]
California Oak Mortality Task Force
https://www.suddenoakdeath.org/about-california-oak-mortality-task-force/
Landscaping for Fire Safety in Zone 2
by Pam Schroeder and Robin Harper
Unfortunately, living with the threat of wildfire is a fact of life for Californians. While we cannot control wildfire, we can help minimize its potential destruction by practicing fire-safe strategies that harden the landscape by reducing the vulnerability of your home and property to wildfire.
Hardening the Landscape
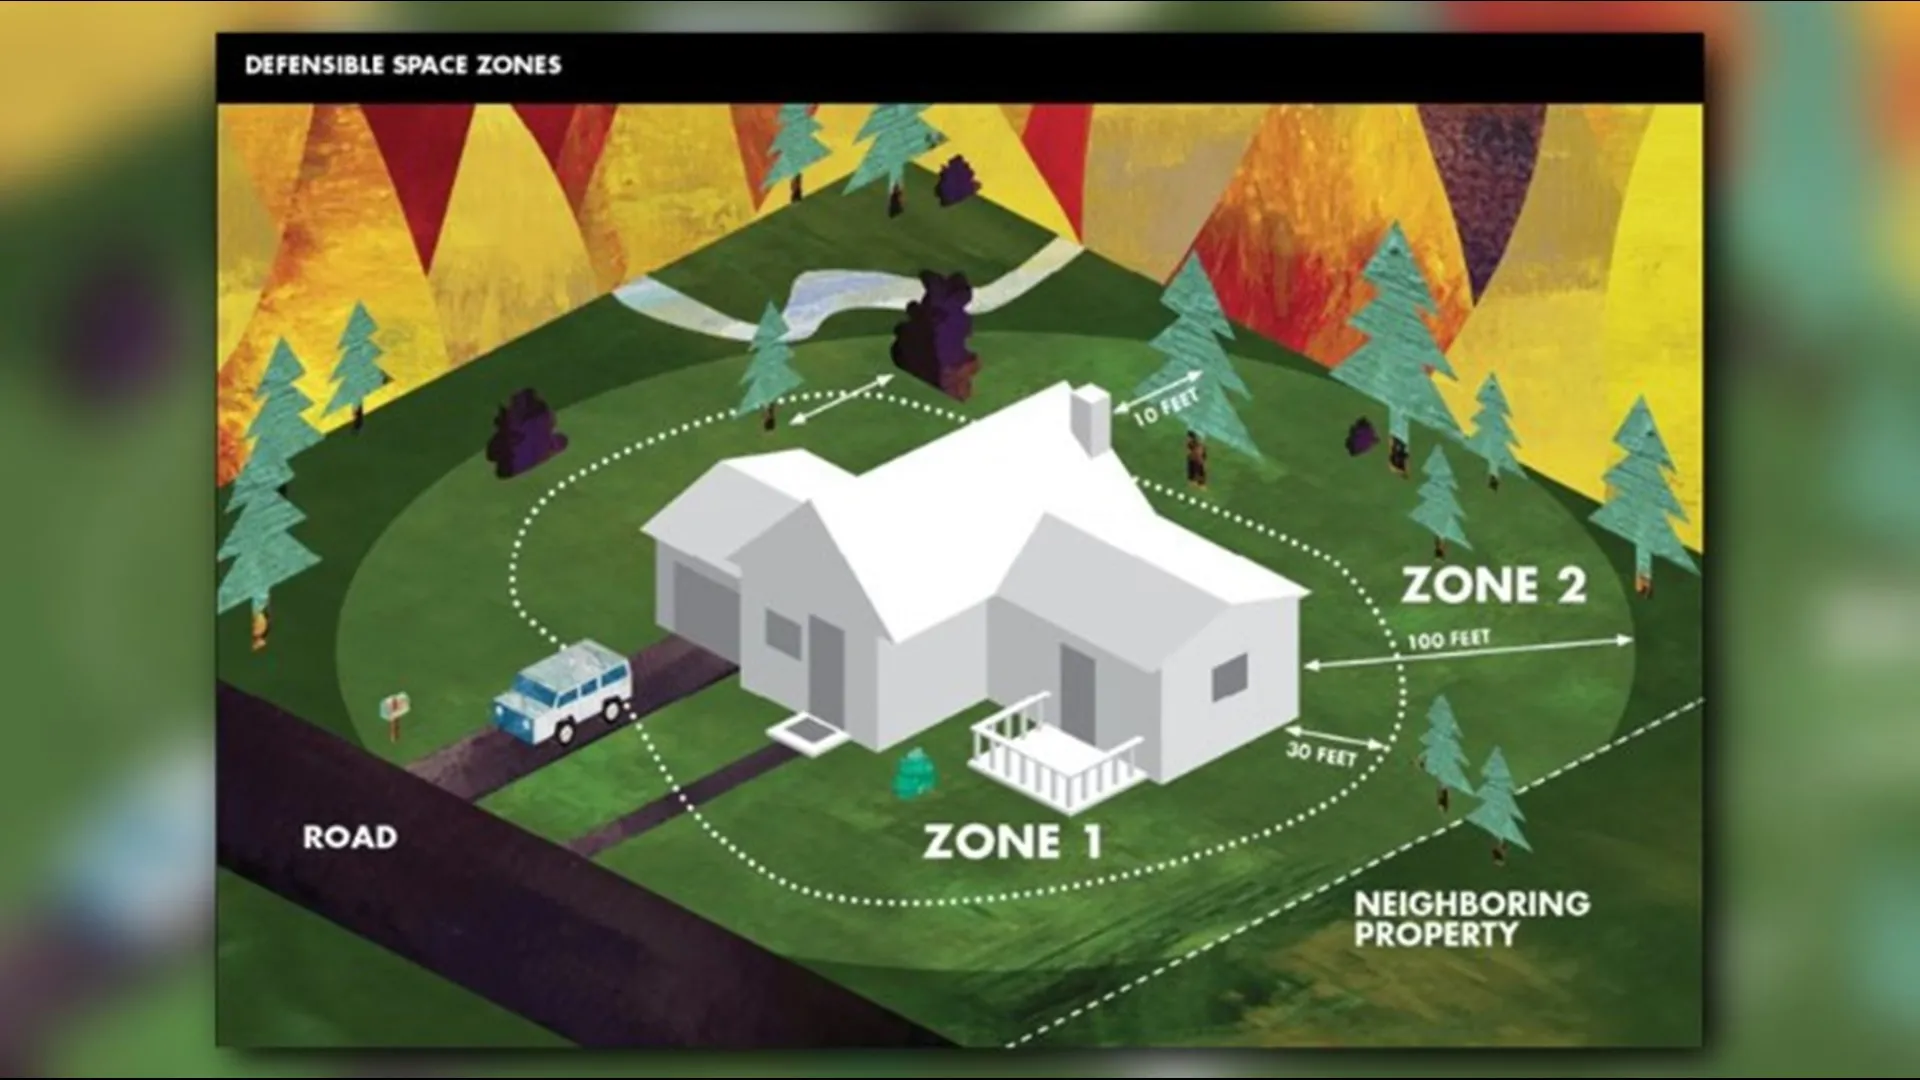
Creating a beautiful and functional landscape as well as a fire-protected property can be accomplished using the concept of Defensible Zones. Your property can be viewed as 3 Defensible Zones each with its own unique characteristics. Zone 0 (0-5 feet from the house) and Zone 1(5-30 feet from the house) have been covered in prior issues of “News to Grow By”. In the event you missed those articles the links are here:
Understanding Defensible Zone 0
Understanding Defensible Space Zone 1
For an illustration of all 3 zones and information on creating defensible space:
Introduction to Home Landscaping for Fire Safety
https://ucanr.edu/sites/fire/Preparedness/Landscaping/DefensibleSpace/
Zone 2, the Reduced Fuel zone
Zone 2 covers the outermost area of your property and represents the furthest reach of your responsibility. It is defined as 30-100 feet out from the buildings, structures, and decks of your home or up to your property line.

The goal is to reduce the fuel load (anything flammable) in this zone to slow down or stop the approach of a potential fire before it ever gets to your home. Fuel is anything that will burn including dead vegetation, downed branches, overgrown areas, low-hanging trees, flammable plants, furniture and wooden fencing.
Keeping this area clear of dead material, spacing plants properly, reducing density (both horizontally and vertically), and adding hardscape will help eliminate fuel load and help slow or stop a wildfire from spreading across your property.
Where to Start
Before creating an action plan for firescaping, start by familiarizing yourself with the fire codes and ordinances specific to your fire district, as these standards vary and are enforced by local authorities.
Walk your property in zone 2 from 30-100 feet out from your house, then create a strategy, and make an action plan:
Create a Strategy
Walk around your property and identify problem areas to include in your plan
- Note the sloped areas on your property (see below for more details)
- Identify plants that need to be removed
- Be aware of the dead vegetation on your property
- Identify areas that may need new or additional irrigation
Make a Plan
Create a written plan that incorporates:
- Fire-safe planting and spacing (both vertical and horizontal)
- A list of plants/trees that need to be removed on sloped areas
- Areas where annual grasses have dried out
- What fire-safe plants can replace those that are to be removed
- Where you might want to add hardscape
- Irrigation to keep plants and trees from drying out
Take Action
Time to execute your plan:
- Remove all trees, plants, and vegetation that you have identified above
- Trim up low-hanging branches and thin out overgrown trees especially where there is undergrowth on the ground
- Think about hiring an expert for help with tree removal and/or above-roof pruning of branches
- Add plants that are fire-safe to your new fire-scaping plan and plant in an island format
- Trim all annual grasses to 3 inches or down to bare soil
- Make liberal use of hardscaping (rocks, cement, gravel, rock walls, boulders, etc.)
Recognize the Impact of Slope

In a hilly area, fire will travel faster, and flames will shoot higher uphill; therefore it is important to add 10 feet of additional space between trees for every 10% increase in slope. This extra space can help keep the fire from laddering from tree to tree up the hill.
Remove Flammable Plants
Fire-prone plants are plants/trees that:
- Have leaves that are dry due to low moisture content and are small, fine, or needle-like. Examples are Cypress and Juniper
- Have natural aromatic or resinous oils. An example is rosemary which is highly flammable
Plants that produce a lot of debris increase fire danger as well. For example, eucalyptus trees have bark that is loose and papery, which creates a lot of debris making these trees very dangerous.

Mulch Strategically
Mulch plays an important role in your landscape. Besides looking good it provides many benefits including:
- water retention
- soil temperature control
- weed inhibition
- soil erosion prevention
Keep in mind that some mulches can also be a highly combustible material in your landscape. The bigger and heavier the pieces the better. But remember, with enough heat, it all burns.
Maintenance - the final element in a fire-safe landscape
Be diligent in your maintenance efforts to keep your property fire-safe.
Ongoing:
- Remove dead plants, leaves, and branches
- Remove vines from trees and fences
- Compost or remove all debris
Annually:
- Thin vegetation and remove weeds or cut weeds back to 3 inches
- Cut back woody plants
- Ensure sufficient space between shrubs, house, outbuildings, and trees
Every few years:
- Cut back vines, groundcovers
- Prune tree branches to 10’ above ground and 10” above roof
Conclusion
This concludes our series on Home Landscaping for Fire Safety. By following the series guidelines, you can dramatically reduce the risk of fire spreading, creating a safer, more resilient landscape that not only protects your home but also strengthens the safety of your entire community. Fire safety starts with you—every action you take has the power to make a life-saving difference.
More Firewise information:
About the Fire Network
https://ucanr.edu/sites/fire/Home_430/
Creating a defensible space
https://ucanr.edu/sites/fire/Preparedness/Landscaping/DefensibleSpace/
CalFire information, including creating checklists
https://readyforwildfire.org/
More information on fire-safe planting
https://ucanr.edu/sites/fire/Preparedness/Landscaping/Plant_choice/
UCANR.edu information on Mulch
UCANR Fire Network: Maintenance of Trees
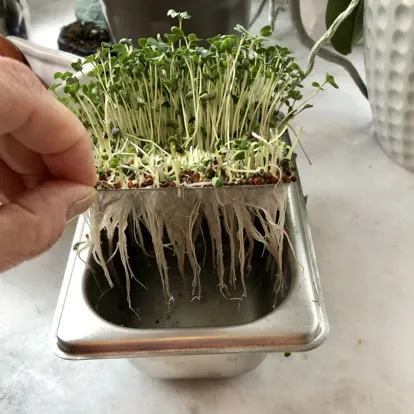
Growing Microgreens
by David George

What are Microgreens?

Getting Started
Seed packets can be purchased in garden centers or online. A word of advice: buy organic (untreated) seeds and check packet expiration dates. You will need one or more shallow 1-2” growing trays with bottom holes for water drainage and absorption. Or you can use sealed hydroponic trays with a fine mesh separating seeds on top from a water basin. You will also need a spray bottle for tap water spritzes, sterilized scissors for harvest, a location with 6+ hours per day of indirect light (or a grow lamp), and a tray cover for the first week or so. Aluminum foil works well for this.
Growing Technique

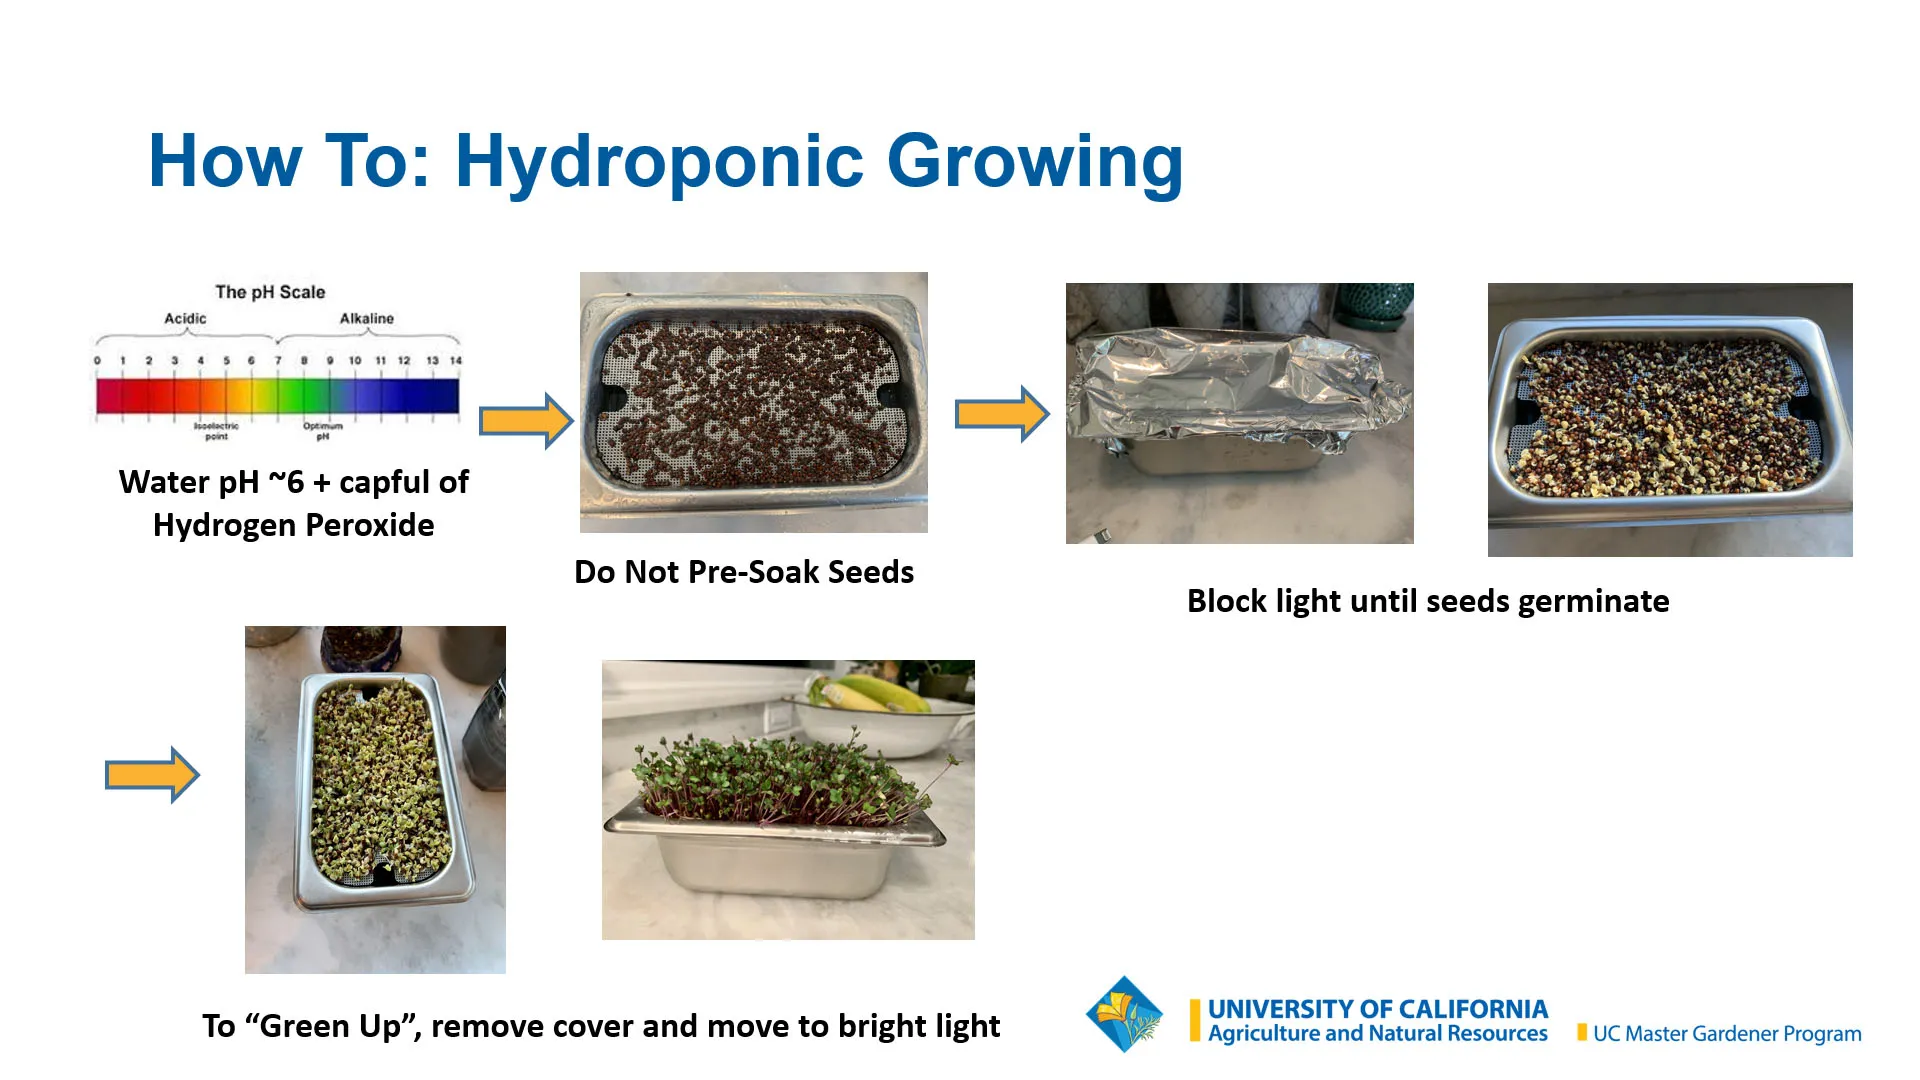
Harvest time varies by plant type but generally is about 2 weeks after germination when seedlings are 2-4” tall, and starter leaves are fully formed and green. Use scissors to clip seedlings just above soil level and wrap them in paper towels (without washing them) and they’re ready to eat, but they can be refrigerated for up to a week. Compost the remaining plant material and throw out the old growing medium. Sanitize reusable trays in a dishwasher or hot soapy water.
Good Choices to Get Started
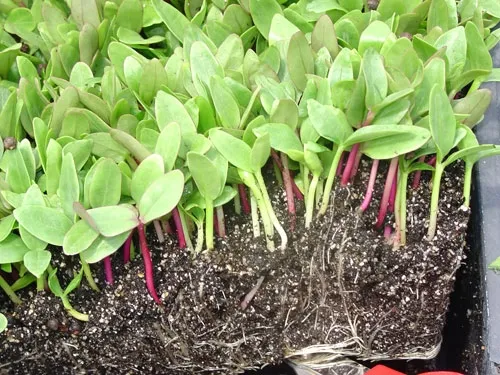
Microgreens can spice up morning eggs, salads, pasta, taco salads, spring rolls, or other entrees. They add freshness, taste, color, variety, and interest to any meal.
Link to webinar: Growing Microgreens, by Andrea Salzman
https://www.youtube.com/watch?v=QHq968jFyA0
Short video demonstration of Growing Microgreens, by Andrea Salzman (3:32 mins.)
Detaining the Rain


How much of the rain that falls on your property is “just passing through?” Does it hit the roof, driveway, walkways, and other impermeable surfaces, flowing directly into the gutter storm drains and onward into the bay or the delta? Allowing this “liquid gold” to just flow away and not reap its benefits is like being offered a buffet meal and not putting anything on your plate.
This article is the third of a three-part series of articles. The goal is to convince you that enough rain falls in Contra Costa County to sustain your landscape either well into the dry season, or all the way through it, depending on where you live in the county and how much water your landscape requires.
The central theme and goals of these three articles is the following:
- Capture rainwater passively using the landscape itself as a container (“Planting the Rain: A Guide for Passive Rainwater Harvesting”, fall issue of News to Grow By.) *
- Hold onto captured water as long as possible by putting a “lid” of mulch on the landscape “container” (“The Magic of Mulch”, summer issue of News to Grow By and webinar available on our YouTube channel.) *
- Capture roof water in barrels, tanks, or cisterns for use if/when the landscape “container” is empty (“Detaining the Rain”, discussed in this article).
(*) The links to these articles and the webinar can be found at the end of this article.
The focus of this article is on capturing and storing rainwater in barrels, tanks, and cisterns. Unlike passive storage, this method requires a bit of planning, designing, purchasing components, and careful installation. It’s particularly useful for properties on a slope where water naturally runs downhill when not actively detained.
Rainwater harvesting does sound cool. But other than being cool, why should we do it? Let’s begin by addressing why we should even care about putting forth the effort to capture and store rainwater in the first place.
In the past several years we have been experiencing wild swings in our climate between drought and deluge. Furthermore, the droughts are getting longer and drier and the deluges are getting fiercer. Each end of this scale carries consequences that have us scrambling to deal with either the lack of or the overabundance of water.
Drought is a pervasive reality in California. The following graphic shows the state’s drought profile from the Drought Monitor website https://droughtmonitor.unl.edu/Maps/MapArchive.aspx
for most of this century (2001-2021). The graphics show a snapshot of the level of drought in November for each of the indicated years.
Here is a guide to the color-coding of the graphics:
Yellow: Abnormally dry
Beige: Moderate drought
Orange: Severe drought
Red: Extreme drought
Dark brown: Exceptional drought
The important thing to note is that in all but 5 years out of the first 21 years in this century (2005, 2006, 2010, 2011, 2017), California was in some level of drought. That’s 76% of the time!

That’s one end of the scale. At the other end, we have experienced bumper crops of rainfall in the past two winters, with deluge in the form of atmospheric rivers wreaking havoc by causing flooding, landslides, fallen trees, property damage, and other storm-driven consequences.
Capturing rainwater is a solution to both drought and deluge. During drought, stored water can keep our gardens alive and thriving when the drinking water supply is diminished and/or restricted. During a deluge, it helps to reduce the overwhelm of our stormwater management systems and protects against the calamities caused by floods. In both cases, rainwater harvesting reaps and stores a precious resource essential to all life.
When we’re talking about creative ways to provide water to your landscape during the dry season (generally May through October) it’s a great idea to establish just how much water your landscape needs to not only survive but to thrive. How much water does your landscape require during the dry season? It’s best to think of this number in terms of inches. Rainfall is measured in inches. Likewise, plant water requirement is measured in inches. And when we’re talking about inches of water, this pertains to any size of the area of your property. It could be a few plants or the whole property. We only need to convert to gallons once we start trapping water in containers. So let’s keep it simple and talk inches for now.
The tables below show the plant water requirement in inches per month during the dry season for representative cities in the three climatic regions of our county. The top table is for moderate-water plants, and the bottom table is for low-water plants.
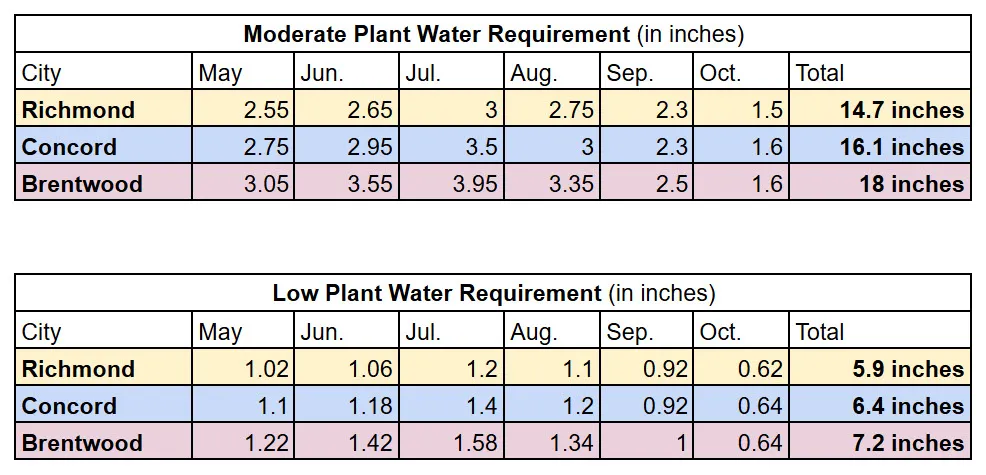
Below is the amount of rainfall that these cities get historically. The data was acquired from the US climate data website https://www.usclimatedata.com/climate/california/united-states/3174.
Average annual rainfall
Richmond: 24.9 inches
Concord: 16.5 inches
Brentwood 13.2 inches
Comparing the annual rainfall with the amount of water required by the landscape, we can see that both Concord and Richmond get enough rainfall to provide for low-water and moderate-water plantings all the way through the dry season. The only shortfall above is that Brentwood’s annual rainfall comes up short by almost five inches of rain for moderate-water plantings (13.2 as opposed to 18).
Now we can start talking in gallons. One inch of rain falling on 1,000 square feet of roof will yield 620 gallons. Here is the formula for calculating rainwater yield off a roof:
Gallons of rainwater = Inches of rain x Roof square footage x 0.62
Common sizes of rain barrels range from 50 to 90 gallons. So storage space is gobbled up quickly when using rain barrels. It would take more than 12 fifty-gallon barrels to store one inch of rain from a 1,000 square-foot roof (620 gallons 50 gallons per barrel = 12.4 barrels). Slimline tanks are taller and narrower, and sit up against a building to conserve space. They hold around 200 to 300 gallons. So you would need at least two of those to store one inch of rain from a 1,000-square-foot roof.
Sometimes, water districts offer rebates on rain barrels, but currently, neither EBMUD nor Contra Costa Water District offers them. The cost of rain barrels and tanks ranges from $1 to $3 per gallon of capacity. Permits may also be required for their installation in certain cities and counties. Check with your local agency to get information on codes and regulations. If the barrel or tank requires a concrete base to sit on, or that it be strapped to a building for stability, you’ll need to factor in the cost of hiring a professional to do the work. Additionally, consider the tasks of modifying the rain gutters and downspouts, excluding debris from the storage containers, and distributing the water from the barrels to your landscape.
Given the complexity and cost of watering landscapes with rainwater captured off a roof and stored in barrels, tanks, and cisterns, I recommend prioritizing passive rainwater harvesting using the landscape itself first. This method leverages the free water that falls from the sky most efficiently. Then, if you’re so inclined, look into also providing extra water storage in the form of barrels, tanks, or cisterns. Remember, when it rains, your landscape is getting the water it requires—and much more. So that should be the container you think about first. The water is already being captured and stored in the landscape without any actions on your part. The trick is to hold onto it as long as possible. You can do that with a generous layer of mulch.
In conclusion, detaining the rain by whatever means you choose is a great idea. In times of drought, it provides water when it is being restricted or is unavailable. In times of deluge, it helps relieve the extensive damage done by torrential rainfall. In both cases, it reduces the strain on the public drinking water supply during the dry months and lowers your water bills. Below are links to extensive free information on rainwater-harvesting systems, the articles mentioned above, and more.
SF Public Utilities Commission (SFPUC) Rainwater Harvesting Manual
https://www.sfpuc.gov/sites/default/files/learning/RWH_Manual_Final-APR2018.pdf
Bay Area Stormwater Management Agencies Association (BASMAA) Rain Barrel Fact Sheet
https://www.ebmud.com/application/files/6915/8992/7018/BASMAA_Rain_Harvesting_Fact_Sheet.pdf
Newsletter article: “Planting the Rain: A Guide for Passive Rainwater Harvesting.” https://ccmg.ucanr.edu/News_to_Grow_By/?story=2816
Newsletter article: “The Magic of Mulch” https://ccmg.ucanr.edu/News_to_Grow_By/?story=2768
Webinar: “The Magic of Mulch: Water Conservation at its Best” https://www.youtube.com/watch?v=W28fWlgypwY&t=21s
A captivating 27-minute documentary on the work of Brad Lancaster, Rainwater Harvesting Guru
https://www.youtube.com/watch?v=iIYoU2PTPLk
Winter at 'Our Garden'
by Joie Spinelli
“Anyone who thinks gardening begins in the spring and ends in the fall is missing the best part of the whole year;
for gardening begins in January with a dream.” ~ Josephine Nuese
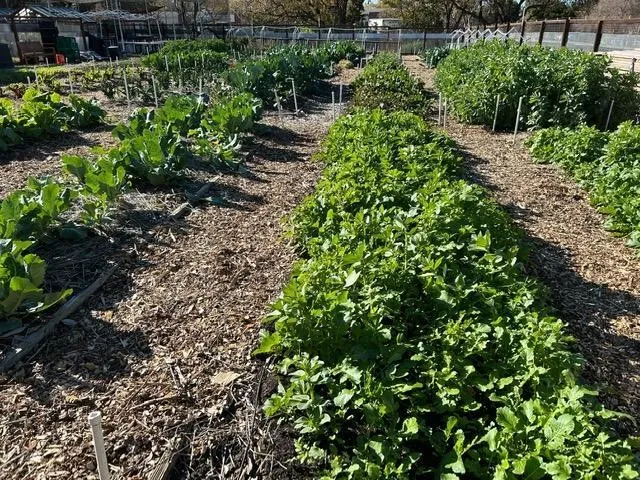

Thanks to 'Our Garden' leadership’s implementation of the nourishing composting-in-place practice these last few years, our composting crew is still able to produce close to 5 cubic yards of compost. That compost was made from shredding all the shrubbery and pollinator plants surrounding the grounds, as well as oak tree cuttings, trimmings from our productive vineyard and orchard, and the September through November harvesting of tomatoes, peppers, and brassicas.
“Don’t think the garden loses its ecstasy in winter.
It’s quiet but the roots are down there riotous.” ~ Rumi
Composting in place, especially with the designated cover crops, does create a soil sponge of activity which enriches the diverse soil microbiome, creating a deeper passage of roots, a highway for nutrient activity. All to improve soil health, enhance water infiltration, and reduce or mitigate soil compaction.
UC Master Gardener volunteer John Fike’s voice echoes all this ‘riotous’ activity beneath our feet in an online webinar where he identifies that in one teaspoon of soil, there are 4 billion bacteria, 400 million actinomycetes, millions of fungi, nematodes, and algae, all competing, interacting, recycling and enriching ‘The Soil Beneath our Feet’, alive and riotous indeed!
"Nature Does Not Hurry, Yet Everything Is Accomplished." ~ Lao Tzu
Each year, our composting efforts create an additional blanket for each garden bed when using the composting-in-place method. Compost is most effective when made from the very site to which it is applied, using the local inoculum to enhance the protective immunity provided by native microorganisms. Nature creates the compost — we simply provide the space and do the work to support it.
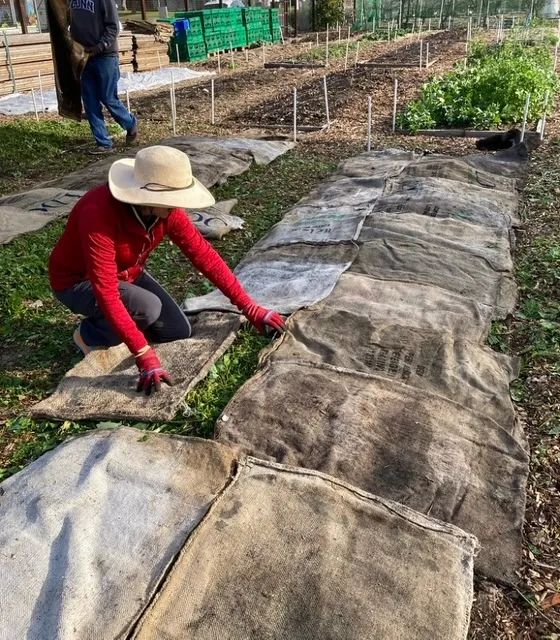
We always communicate with what 'Our Garden' surroundings offer each week. In mid-December, it was a leaf gathering. We filled the 2 bins with leaves from the fruit trees in the orchard and another with generous oak leaf droppings around the garden gates, a practice we repeated till year’s end. We need that carbon material year-round for composting, mulching, and enriching the ground beneath our feet.
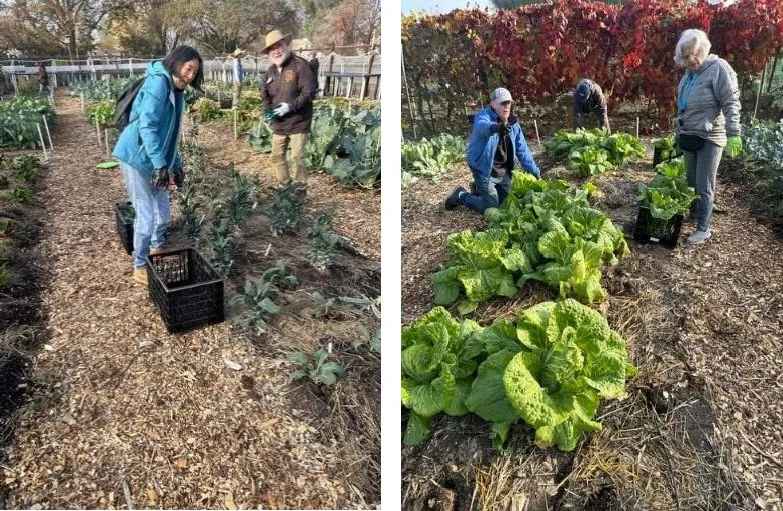
All our demonstration gardens in West County, East County, and 'Our Garden' in Central County are masterfully led by knowledgeable UC Master Gardener volunteers of Contra Costa County with the mission to extend research-based knowledge and information on home horticulture, pest management, and sustainable landscaping practices to the residents of our community.
In seed time learn, in harvest teach, in winter enjoy. ~ William Blake
Creating a Winter Habitat for Wildlife by Providing Food and Shelter


Winter in Contra Costa County tends to be mild, but it is still important to think about supporting wildlife in our urban and suburban gardens during this season. The term “wildlife” can have different meanings, in the context of this article however, it refers to birds, bees, butterflies, reptiles, amphibians, insects, but not necessarily mammals, especially those that are considered pests. Mammals, such as squirrels, mice, rats, deer, and raccoons, thrive in our urban environments because their populations aren’t naturally controlled by their predators. Creating a habitat for that wildlife is generally not advisable as it can disrupt our gardens and communities.
With that context in mind, the primary habitat needs for winter wildlife are shelter and food. While many articles about wildlife habitat also mention water as a key element, providing water for wildlife can be problematic since it needs to be cleaned and refilled often to prevent the spread of disease. Additionally, because winter is our rainy season, water should be generally available for wildlife, unless there is a drought.
Both food and shelter are best provided through native plants, which the native wildlife have evolved with and are adapted to.
Shelter
Many insects are dormant during our winter. For example, many native bees spend the winter sheltering underground, or in dead plant material, (such as leaf-cutter bees.) https://ucanr.edu/sites/ccpestmanagement/files/237336.pdf. This is why it’s important to leave some ground bare for ground-nesting bees.
For birds, it is important to have shrubs and trees which provide shelter from both weather and predators. Evergreen, dense shrubs and trees will provide the best protection.
Food
You can provide food for wildlife with native plants, which naturally produce nectar, pollen, seeds, and fruit, rather than relying on artificial feeding stations to provide that service.
Most native plants provide food for birds, depending on their diet. Letting plants go to seed in the fall will provide food for seed-loving birds into the winter. Leaving leaves on the ground (see the article “Messy is Good for the Planet” in this newsletter), which provide habitat for various stages of insects, will be consumed by insect-eating birds. And berry-producing plants will provide food for many different birds.
The western population of the Monarch butterfly spend their winters on the California coast, and their needs during that time are not milkweed, because that is food for their caterpillars, and the butterflies should be in reproductive diapause (i.e., not producing caterpillars) when overwintering. What they need most is nectar from plants that bloom in the winter.
Native plants that provide shelter and food

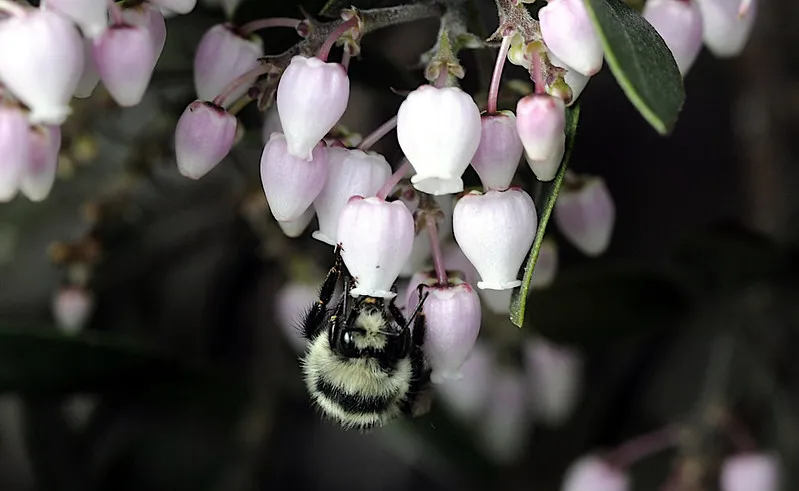
Many plants native to Contra Costa County offer both food and shelter for wildlife in the winter. As discussed in the article Winter Blooms for Garden Pollinators, several shrubs and small trees can provide both shelter and food.
These include:
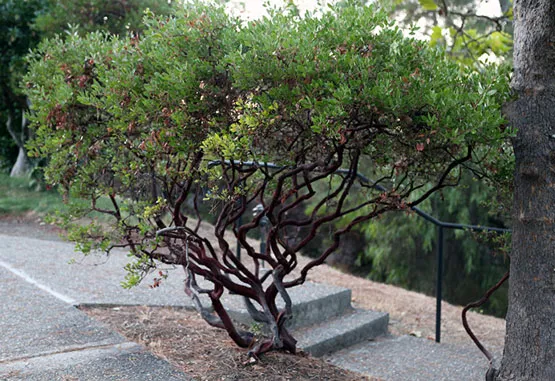
- Manzanita (Arctostaphylos manzanita): Their winter blossoms provide nectar for Monarch butterflies, native bumble bees, and hummingbirds; their berries are food for birds; their dense foliage provides shelter for birds.
- California Lilac (Ceanothus): winter and early spring blossoms provide pollen and nectar for bees and other insects; their berry-like fruits provide food for birds; their dense foliage provides shelter
- Toyon (Heteromeles arbutifolia): Their bright red fruits mature in fall and winter and provide food for many bird species
- Silktassel (Garrya elliptica): Coast silktassel flowers in winter and early spring, providing pollen and nectar for native bees and butterflies; later the small berry-like fruits provide food for birds and other wildlife
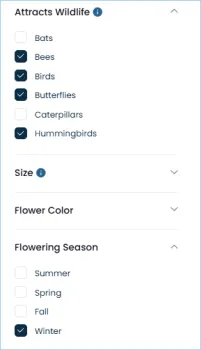
You can use Calscape, the web-based native plant database developed by the California Native Plant Society, to filter for plants that bloom in the winter, are wildlife-friendly, and are local to a specific area.
Resources
Winter Blooms for Garden Pollinators
https://ccmg.ucanr.edu/News_to_Grow_By/?story=2705
Plant Native Shrubs Now for Winter and Spring Bloom
https://ccmg.ucanr.edu/News_to_Grow_By/?story=2664
Winter Gardens for the Birds
https://ccmg.ucanr.edu/News_to_Grow_By/?story=2663
Creating a Wildlife Habitat
https://ccmg.ucanr.edu/News_to_Grow_By/?story=2461
California Native Bees
https://files.constantcontact.com/c2115e3d101/cf28e3ea-97b4-4111-af36-12a27317389d.pdf
Gardening for Butterflies
https://files.constantcontact.com/c2115e3d101/b67fe1b6-e9ce-428f-8602-a37a20b37052.pdf
Gardening Odds & Ends
Bermuda Buttercup
by Susan Heckly
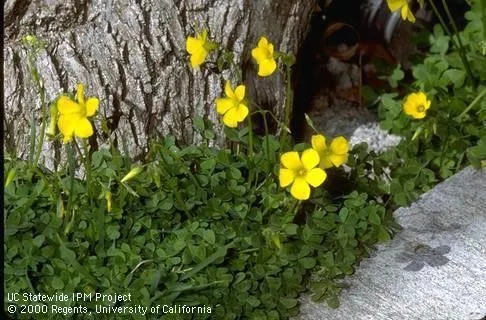
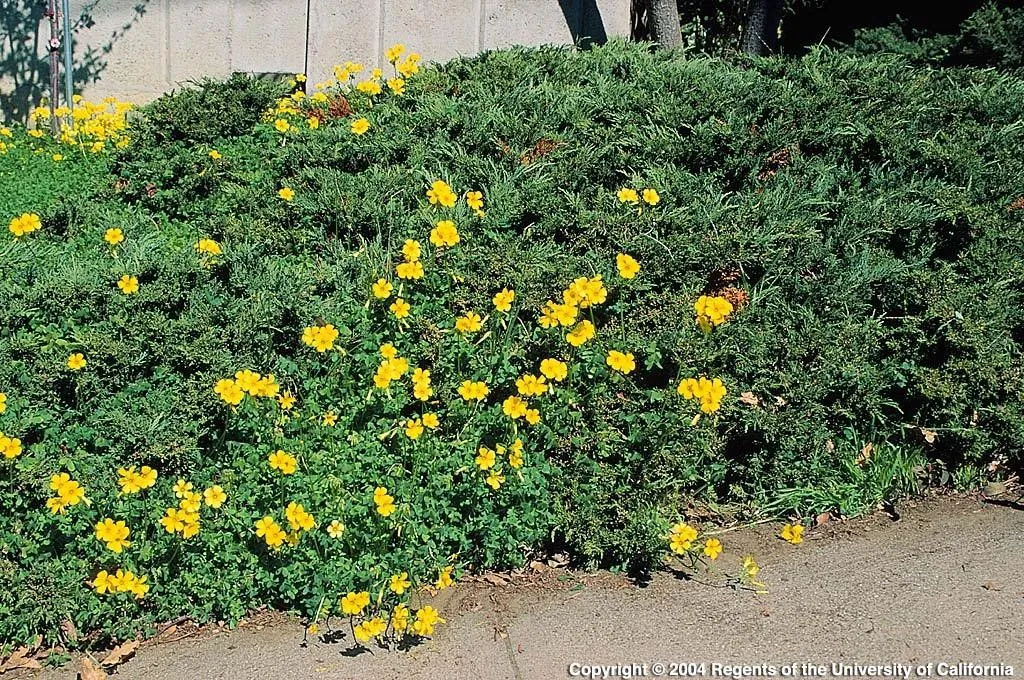
Bermuda buttercup (Oxalis pes-caprae) has become a tenacious and frustrating weed throughout California. From November through April, bright yellow flowers on leafless stalks and green shamrock-like leaves pop up in many of our landscapes. While it was brought from South Africa as an ornamental plant, it escaped cultivation on its route to being a chronic nuisance. It competes with other plants and is very difficult to control. In contrast, it is a rare and endangered plant in its home range.
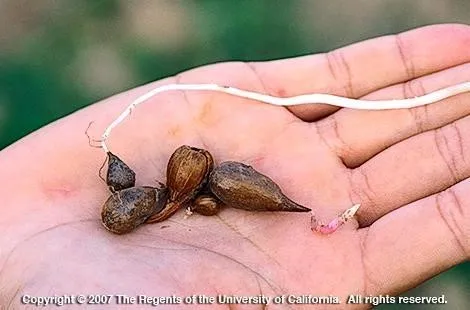
Bermuda buttercup develops from underground bulbs that produce a single vertical stem. A loose rosette of leaves will appear at soil level after the first rain. Small, whitish bulblets develop on the stem, and new bulbs form underground. Each plant can produce about a dozen small bulbs each year that easily detach from the plant and will increase the plant’s spread quickly.
A couple of our favorite vertebrate pests (gophers and voles) consider oxalis bulbs to be a yummy food source and can spread the bulbs to new locations as they carry them back to their underground dens. Western scrub jays also relish oxalis bulbs and can be seen carrying them to new locations to plant.
The best way to control Bermuda buttercup is to prevent its introduction into your garden. Don’t move soil or plants from an infested site to another location that is free of the weed. Unfortunately, for many of us, it’s too late for that tactic. So, what can we do when faced with the cheery yellow flowers popping up throughout the landscape?
Hand pulling can provide control if the entire plant is removed, including the underground rhizome and bulb. It’s difficult to find all the bulbs without sifting the soil very carefully. Repeatedly removing the tops of the plants will eventually deplete the bulb’s resources, but it can take years to be successful. It’s important to remove the tops of the plants before they flower and form new bulbs.
It is difficult to smother Bermuda buttercup with thick mulch or even weed block cloth because it is a strong plant. If cardboard covered with a thick layer of mulch is used to try to smother the weed, continued vigilance in monitoring and pulling new growth will be needed in subsequent years. In one garden, weed cloth was laid under a brick walkway. The following winter, Bermuda buttercup pushed its way up through the weed cloth between the bricks. This made removing the plants even more difficult because the plants were being held in place by the weed cloth.
A study was done in 2004 and written up by the California Invasive Plant Council comparing several methods for control of oxalis. Between using a hula-hoe to cut off the tops, removal by hand, or covering with a black tarp, only the tarp achieved a measure of success. Their conclusion was that 6 mm polyethylene black sheeting applied 4 weeks after oxalis emerges after the first rains is the most successful method. Most oxalis stems had died within 6 to 8 weeks of tarping. The downside to this method is there will be damage to any other plants under the plastic and you will be looking at black plastic for several months.
Several herbicides will effectively kill the tops of the plants, but will not kill the bulbs, so regrowth will occur.
Whatever method you choose to combat a Bermuda buttercup invasion, you will need to be persistent and prepared to continue in subsequent years.
For more information about managing Bermuda buttercup, see this web page: https://ipm.ucanr.edu/PMG/PESTNOTES/pn7444.html
Read other articles on our Blog, and check the top FAQs [LINK removed] provided by our Help Desk as well as the Checklist of Winter Gardening and Landscape Tasks
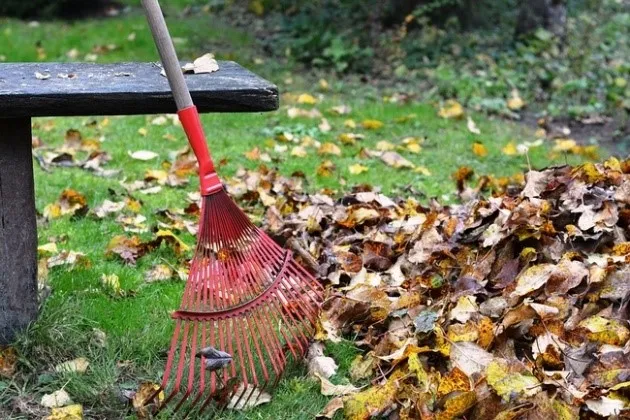
Messy is Good for the Planet
by Pamela Austin
"Every leaf speaks bliss to me, fluttering from the autumn tree." - Emily Brontë
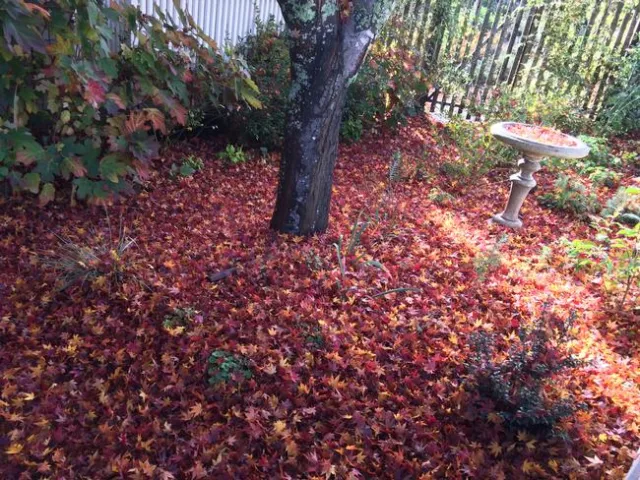
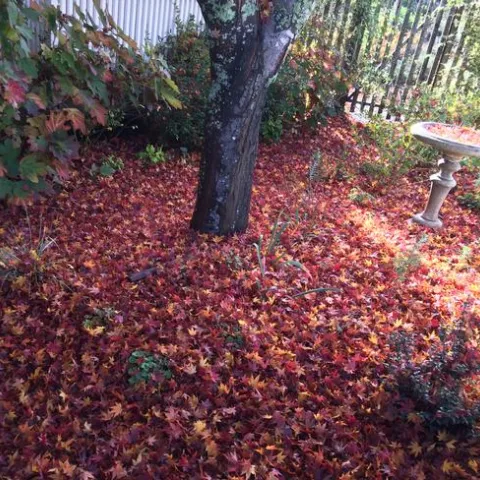
The leaves that drop in the fall are an asset to your garden, they are helpful to insects, pollinators, invertebrates, microorganisms, and the soil.
Fallen leaves contain fifty to seventy percent of the nutrients that trees have absorbed from the earth. Why let all those valuable nutrients be hauled away? Leaves are truly a gift to gardeners—so why not put them right back to work in your landscape?
These are the ways fallen leaves benefit wildlife.
Habitat

Leaves, fallen branches, flower stems, and dried seed pods provide a habitat for insects and invertebrates. The availability of overwintering habitat is crucial in determining the survival and population levels of native bees and beneficial insects. It can also provide abundant food for songbirds, butterflies, wasps, moths, fireflies, and ground beetles. Salamanders find protection from predators and weather in leaf litter and brush piles that help the soil remain moist. Butterflies lay their eggs on fallen leaves, while hollow-cut stems offer refuge to insect larvae, pupae, or overwintering adults. Many of these insects are essential pollinators and come spring, they will be beneficial to your garden flowers. Caterpillars that hatch in the spring provide food for baby birds.
If you must tidy up your yard, gently move leaves to garden beds or around the base of trees.
Compost
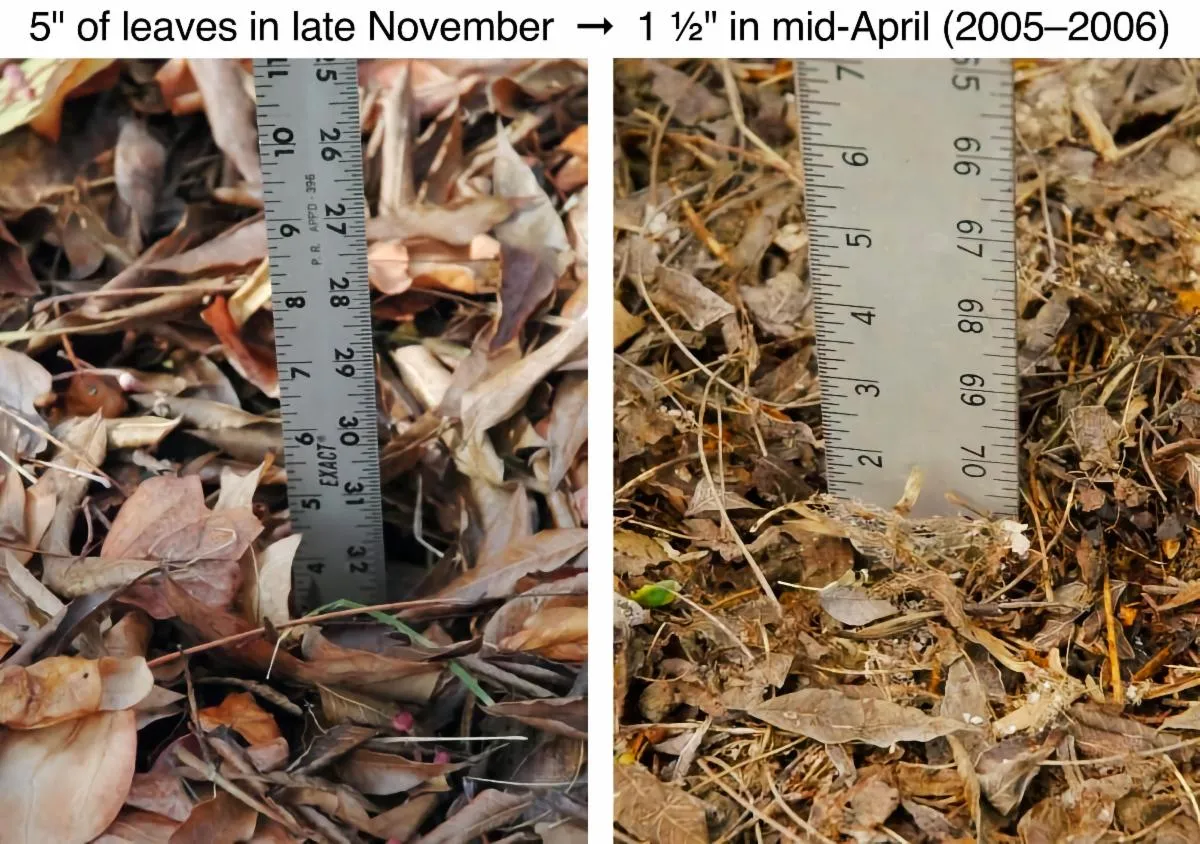
Leaf mold is a soil amendment made from decomposed leaves of deciduous trees and shrubs. It is a fungal-driven decomposition process. It improves soil structure, making it easier for plant roots to access oxygen, water, and nutrients. Leaf mold is created by allowing leaves to decompose on their own, without other organic matter.
Natural “composters” such as millipedes and worms break down organic matter, in this case, fallen leaves, into its basic elements, enriching the soil. Additionally, composting boosts the activity of earthworms and other natural soil organisms that promote plant growth. These organisms surface to feed and then return to the soil, where they continue to nourish plants in the spring.
Although low in essential nitrogen, fallen leaves still contain small amounts of all the nutrients plants need and are a valuable source of soil-improving organic matter like calcium, magnesium, nitrogen, and phosphorus.
Pound for pound, the leaves of most trees contain twice as many minerals as manure. For example, the mineral content of a sugar maple leaf is over five percent and even common pine needles have two and a half percent of their weight in calcium, magnesium, nitrogen, and phosphorus, along with other trace elements.
Sending leaves to the landfill is a waste of valuable natural resources. By composting leaves instead, we can recycle these organic materials back into the environment.
Mulch
Using the leaves that fall in your garden can save you from buying mulch. Mulching suppresses weeds, retains moisture, and boosts nutrition. Roughly 70% of native bees nest in bare soil, such as digger bees and mining bees, which create burrows in exposed, sandy, or well-drained areas. Other native bees, like bumblebees, often prefer dense vegetation, where they can nest in abandoned rodent burrows or among thick grass and plant roots.
Mulch can protect the roots of your plants from the cold and shade the soil to keep plant roots cooler. Two to four inches of mulch is all you need.
Leave the leaves as they are. It isn’t necessary to chop them up in the fall as this practice risks destroying habitat for insects and eggs.
Conclusion
By supporting nature’s ecosystem, you're helping both wildlife and human communities thrive. So, sit back, relax, and let nature work its magic in your garden.
Resources
Turn Fallen Leaves into Compost
University of California Agriculture and Natural Resources
https://ucanr.edu/blogs/blogcore/postdetail.cfm?postnum=29186
Leave the Leaves to Help Pollinators
https://campusgrown.ucdavis.edu/blog/leave-leaves-help-pollinators
Permission to Leave the Leaves
https://ucanr.edu/blogs/blogcore/postdetail.cfm?postnum=60894