Tips & Techniques
Tips and Techniques

Edible gardens are a world unto themselves in the landscape. There are many strategies unique to vegetable gardens that extend growing times, keep the garden healthy, and maximize crop yields. Here's a cheat sheet of common edible garden lingo and strategies.
Succession garden
Think of a succession garden as a master plan for the garden from season to season. For instance, in June, you can plan to clear some spring vegetables and plant summer crops. Or you can sow and transplant alongside waning spring vegetables with a view to next season's produce.
Succession planting
The primary purpose of succession planting is to provide continuous crop output within the season by sowing seed of a given crop at 1 to 2 week intervals. For instance, you can stagger corn production by making a subsequent planting when the first is 1 to 2 inches tall. Beans, turnips, seasonal lettuce, and beets are well-suited to this practice.
Companion planting

Companion plants like aromatic herbs or flowers are purported to repel pests in the vegetable garden. Although there is a lack of science behind companion planting, growing a wide variety of pollinator-friendly herbs alongside edible crops does help attract beneficial insects and natural enemies.
Intercropping
This involves planting early maturing crops between rows of late maturing crops to increase production in a small area. For example, beans, radishes, green onions, or seasonal leaf lettuce may be planted between rows of tomatoes, peppers or corn. The quicker-maturing plants will be harvested before the others become large.
Crop rotation
Crop rotation is the practice of changing the location of edible crops from year to year. Rotating crops in the garden enhances soil fertility and lowers risk of pests and diseases. Backyard gardeners with limited space should at least avoid planting exactly the same crop or crops from the same plant familyyear after year in the same part of the garden. For example, do not follow melons with cucumbers or squash, and do not plant peppers, eggplant, or potatoes where tomatoes grew the year before.
Cold frames

Like mini-greenhouses, cold frames are structures that create a stable environment for frost-tender seedlings by protecting them from big temperature swings. Keeping delicate seedlings in cold frames helps them thrive until winter temperatures stabilize. Cold frames also work to protect seedlings from pests, including birds, cutworms, earwigs, slugs, and snails. Cold frames are easy to assemble and can be made from inexpensive or recycled materials. Because they are better acclimated from the outset, plants that start life in cold frames often do not experience the transplant shock that many plants face. Among the most transplant-vulnerable seedlings are basil, beans, cabbage-family plants, lettuce and peas.
To make a standalone cold frame:
• Place an old window pane or a rigid sheet of plastic on top of a four-sided box filled with soil.
• Be sure that the box receives plenty of sunlight.
• The box can be made out of any material that holds the soil in place, including wood, straw bales, metal, cinder block, or brick.
• If you want to reuse your cold frame every winter, consider adding a hinge to one side so you can easily open and close it.
Floating row covers

Floating row cover is a white, lightweight, synthetic fabric with a gauze-like appearance. Air, sunlight, and water can penetrate the material. Vegetable gardeners drape it over and enclose individual plants or groups of plants and secure it to the ground with pins, bricks, rocks, soil, etc. The cover “floats” directly on top of the growing crop. Some gardeners install simple frames to support floating row covers, creating a dome effect. Row covers are often used in the winter to protect plants from frost, and in summer to provide some shade.
Floating row covers provide many benefits:
• Provides frost protection in early spring and late fall/early winter
• Encourages faster plant growth due to increased temperature and humidity under the cover
• Prevents insects, deer, birds, and other pests from eating your plants
• Inexpensive
• Reusable: can be re-used for two to three years
BACK TO EDIBLES
> What Edible Gardens Need
> Best Choices for Marin
> How to Prepare
> How to Plant
> Edibles in Containers
> Planting Calendar
> Grow & Care Sheets for Vegetables, Herbs & Fruits
> Tips & Techniques
> How to Maintain
> Fruit Trees
> Top 20 Edible Garden Problems
> Cover Crops & Soil Enhancements in the Off-season
> Conserving Water
•••••••••
Visit our EDIBLE DEMO GARDEN at IVC Organic Farm & Garden
News from the Edible Demo Garden
Seasonal Advice and Happenings at our Edible Demonstration Garden
Every month, the team at the Edible Demonstration Garden chronicles what's happening in the garden - planting, harvesting, problems and more. Check out our stories!
> BACK TO THE EDIBLE DEMO GARDEN


May 2025: Drip Irrigation Troubleshooting
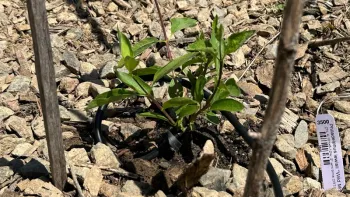
When the winter rains end, it’s time for gardeners to focus on providing spring and summer edibles with the water they need to grow and produce. While hand watering may be the simplest way to adjust watering to the needs of individual plants, it’s not the most efficient means for getting the right amount of water to an entire garden.
Drip irrigation has proven to be the best option for home gardeners. It is particularly suitable for edible gardens because it delivers the water at the soil level and avoids water on the plant leaves which can lead to problems with mold and mildew.
Drip irrigation is also waterwise, reducing loss by evaporation and runoff and maintaining a desirable balance of air and water in the soil through slow application of water to plant roots.
What can go wrong with drip irrigation?
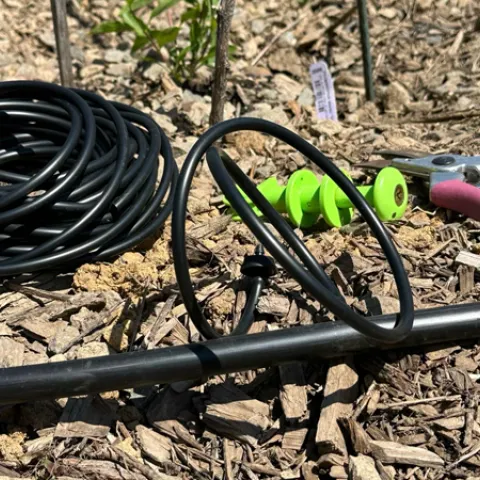
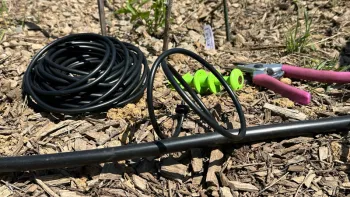
Whether installed by professionals or as a do-it-yourself project, drip irrigation requires routine maintenance. It’s recommended that the lines be checked monthly when the system is operating. It is especially critical when the drip irrigation is first turned on in the spring. Here are some common problems to look for:
- Leaks. The dreaded geyser is a sure sign that there is a break in the line somewhere. It could be a dislodged emitter or a damaged line. Thirsty rodents like to chew on the tubing and lines can be unintentionally broken by shovels and spades.

Finding a wet spot where there is no emitter can signal a problem in the supply line. If the line is buried, it will take some digging to find the leak. This was a recent problem in the Edible Demo Garden. The drip irrigation was installed some time ago and it was unclear which lines led to which bed. The search for this particular leak is still continuing.
- Blocked lines and emitters. Lines may get clogged, and emitters can be plugged by debris, mineral buildup, and algae. Pinched lines, especially the smaller feeder lines, can also be a problem. Periodically walking the circuit and checking flow from the emitters while the system is running is a good way to spot irrigation problems before plants start showing signs of distress.
- Low water pressure. Drip irrigation operates at 15-25 pounds per square inch (psi) which is much lower than sprinkler systems which can require up to 50 psi, and household systems running at 50-80 psi. A pressure regulator is needed to reduce the incoming household pressure to that for which the drip systems are designed. However, pressure in the lines can be lowered further by elevation gain, friction in the tubing, and long line lengths. It is recommended that 1/2” supply lines be limited to 200 feet in a single zone and the number of one gallon per hour emitters per line not exceed 200. If a drip emitter at the end of a line is not delivering sufficient water, it could be a low-pressure problem.
Fixing drip problems
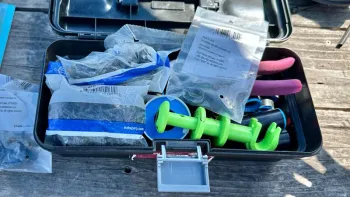
With the right supplies, many common irrigation problems can be easily fixed. An emergency drip repair kit should include spare flow emitters of different sizes, connectors (both straight and elbow), line plugs, end caps, and tubing. It’s also handy to have a tool for cutting tubing, a punch to make holes in 1/2” line, and metal staples for securing the lines. The same supplies are useful when drip lines need to be added for new plants.
Lines can be flushed to remove debris, and clogged emitters can be cleaned or replaced. Small holes in lines can be plugged. Larger damaged sections in lines can be removed and connectors used to join the undamaged sections.
A water pressure test gauge, available at hardware stores, is helpful in determining if the pressure in the drip system is in the right range. Low pressure problems due to overly long lengths of supply line or too many drip emitters might involve changing the drip line layout or adding another zone to the system.
Controlling drip irrigation
Drip systems require control valves to direct water into the system. These are generally automated with an AC or battery powered controller/timer that makes it easy to set irrigation frequency and duration. These devices range from simple timers to more complicated “smart” controllers. All these devices include the option to run the system manually, allowing gardeners to conduct their periodic system maintenance checks.
Click here for more information on irrigation systems.


October 2024: Herbs Among the Edibles
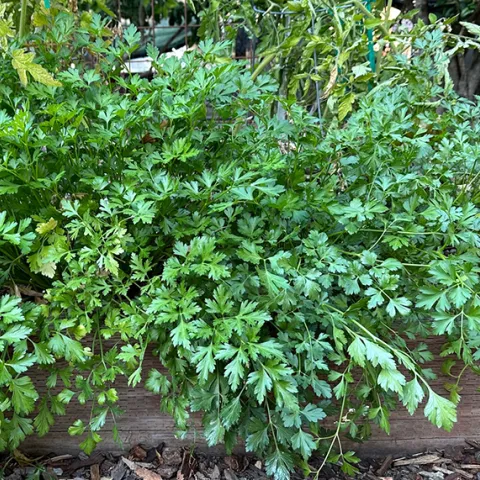

The supporting cast of herbs in the Edible Demo Garden includes basil, oregano, thyme, lemon verbena, chives, Mexican tarragon, anise hyssop, chocolate mint, lavender, pineapple sage, and rosemary. Some are harvested and sold fresh at the Indian Valley Organic Farm and Garden farm stand and others are dried and offered as seasonings and teas. They are among the most reliable plants in the garden.
What is an Herb?
The word “herb” can be applied to any non-woody plant with leaves, seeds, or flowers used for seasoning, medicine, or fragrance. It’s the culinary uses that most commonly interest home gardeners. Herbs are considered different from spices based on the part of the plant that is used. Spices are derived from the roots, bark, fruit, berries, and seeds of plants. Some plants can be both an herb and a spice. Coriandrum sativum, also known as Chinese parsley, is called cilantro when the green leaves are used as an herb and coriander when the seeds are used as a spice.
Why Grow Herbs?

- Herbs make good neighbors with other plants and can be easily integrated into both edible and landscape gardens. They are attractive enough to do double duty as ornamentals.
- Herbs are cost-effective. They are inexpensive to grow and can be harvested in the amounts required for a recipe. No need to spend money at the supermarket on packages of herbs.
- The blossoms on herbs attract pollinators and other beneficial insects.
- Herbs are usually not bothered by pests and diseases. Some herbs have been shown to repel pests affecting companion plants. An example is the ability of basil to deter thrips from invading tomato plants.
- Deer usually leave herbs alone, especially those with strong tastes and scents.
- Herbs grow well in containers and are a good choice when garden space is limited.
Tips on Growing Herbs

Some herbs are started from seed while others are easy to grow from cuttings. Information on the growing needs of common edible herbs can be found at http://marinmg.ucanr.edu/EDIBLES/EDIBLES_GROW_SHEETS/
Check the upcoming events listings on this website to register for a hands-on public workshop on growing and using popular edible herbs. There will be a workshop held on the College of Marin Indian Valley Campus on November 2, 2024, from 10:00 am to 12:00 pm.