Tips & Techniques
Tips and Techniques

Edible gardens are a world unto themselves in the landscape. There are many strategies unique to vegetable gardens that extend growing times, keep the garden healthy, and maximize crop yields. Here's a cheat sheet of common edible garden lingo and strategies.
Succession garden
Think of a succession garden as a master plan for the garden from season to season. For instance, in June, you can plan to clear some spring vegetables and plant summer crops. Or you can sow and transplant alongside waning spring vegetables with a view to next season's produce.
Succession planting
The primary purpose of succession planting is to provide continuous crop output within the season by sowing seed of a given crop at 1 to 2 week intervals. For instance, you can stagger corn production by making a subsequent planting when the first is 1 to 2 inches tall. Beans, turnips, seasonal lettuce, and beets are well-suited to this practice.
Companion planting

Companion plants like aromatic herbs or flowers are purported to repel pests in the vegetable garden. Although there is a lack of science behind companion planting, growing a wide variety of pollinator-friendly herbs alongside edible crops does help attract beneficial insects and natural enemies.
Intercropping
This involves planting early maturing crops between rows of late maturing crops to increase production in a small area. For example, beans, radishes, green onions, or seasonal leaf lettuce may be planted between rows of tomatoes, peppers or corn. The quicker-maturing plants will be harvested before the others become large.
Crop rotation
Crop rotation is the practice of changing the location of edible crops from year to year. Rotating crops in the garden enhances soil fertility and lowers risk of pests and diseases. Backyard gardeners with limited space should at least avoid planting exactly the same crop or crops from the same plant family year after year in the same part of the garden. For example, do not follow melons with cucumbers or squash, and do not plant peppers, eggplant, or potatoes where tomatoes grew the year before.
Cold frames

Like mini-greenhouses, cold frames are structures that create a stable environment for frost-tender seedlings by protecting them from big temperature swings. Keeping delicate seedlings in cold frames helps them thrive until winter temperatures stabilize. Cold frames also work to protect seedlings from pests, including birds, cutworms, earwigs, slugs, and snails. Cold frames are easy to assemble and can be made from inexpensive or recycled materials. Because they are better acclimated from the outset, plants that start life in cold frames often do not experience the transplant shock that many plants face. Among the most transplant-vulnerable seedlings are basil, beans, cabbage-family plants, lettuce and peas.
To make a standalone cold frame:
• Place an old window pane or a rigid sheet of plastic on top of a four-sided box filled with soil.
• Be sure that the box receives plenty of sunlight.
• The box can be made out of any material that holds the soil in place, including wood, straw bales, metal, cinder block, or brick.
• If you want to reuse your cold frame every winter, consider adding a hinge to one side so you can easily open and close it.
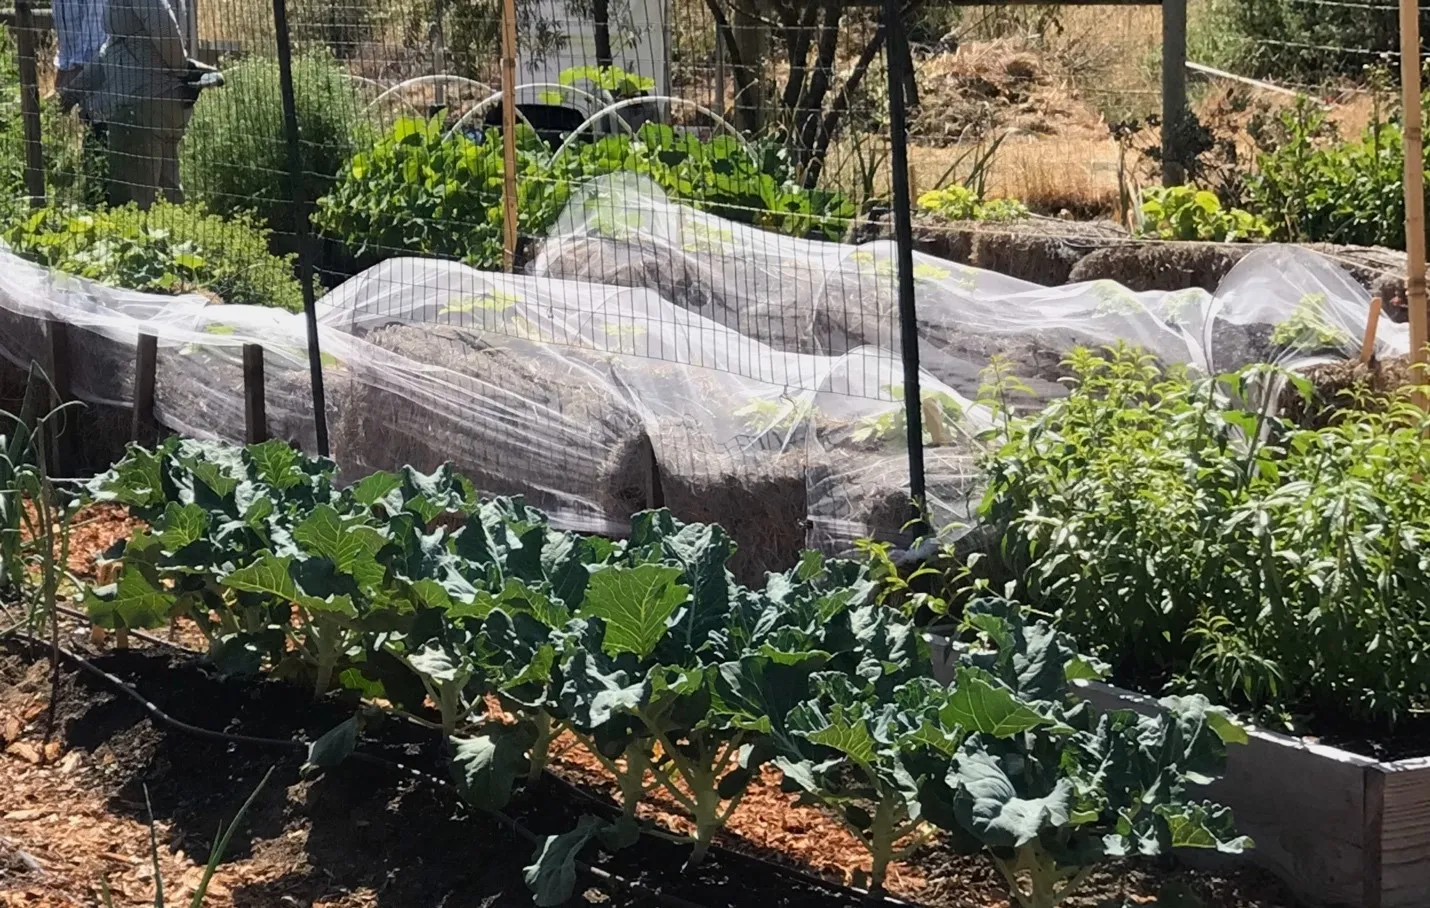
Floating row covers

Floating row cover is a white, lightweight, synthetic fabric with a gauze-like appearance. Air, sunlight, and water can penetrate the material. Vegetable gardeners drape it over and enclose individual plants or groups of plants and secure it to the ground with pins, bricks, rocks, soil, etc. The cover “floats” directly on top of the growing crop. Some gardeners install simple frames to support floating row covers, creating a dome effect. Row covers are often used in the winter to protect plants from frost, and in summer to provide some shade.
Floating row covers provide many benefits:
• Provides frost protection in early spring and late fall/early winter
• Encourages faster plant growth due to increased temperature and humidity under the cover
• Prevents insects, deer, birds, and other pests from eating your plants
• Inexpensive
• Reusable: can be re-used for two to three years
BACK TO EDIBLES
> What Edible Gardens Need
> Best Choices for Marin
> How to Prepare
> How to Plant
> Edibles in Containers
> Planting Calendar
> Grow & Care Sheets for Vegetables, Herbs & Fruits
> Tips & Techniques
> How to Maintain
> Fruit Trees
> Top 20 Edible Garden Problems
> Cover Crops & Soil Enhancements in the Off-season
> Conserving Water
•••••••••
Visit our EDIBLE DEMO GARDEN at IVC Organic Farm & Garden
News from the Edible Demo Garden
Seasonal Advice and Happenings at our Edible Demonstration Garden
Every month, the team at the Edible Demonstration Garden chronicles what's happening in the garden - planting, harvesting, problems and more. Check out our stories!
> BACK TO THE EDIBLE DEMO GARDEN
November 2023: The Versatile Eggplant
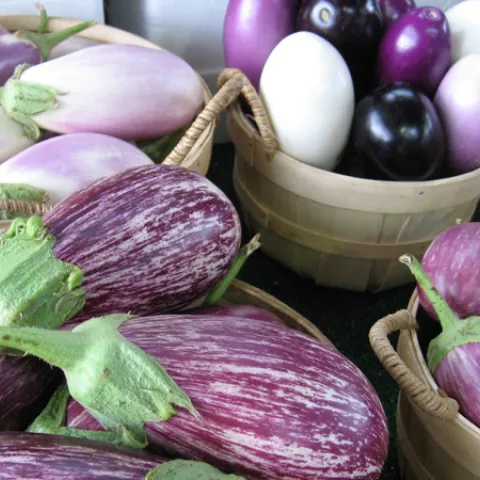

What is Eggplant?
Eggplant belongs to the Solanaceae, or nightshade family and the species commonly grown in the US is Solanum melongea. Like its close relative, the tomato, eggplant is botanically classified as a berry, rather than a vegetable. It was first cultivated in southeast Asia and, by the early Middle Ages, was grown throughout the Mediterranean area. It was brought to the Americas by the Europeans.
Why Grow Eggplant?
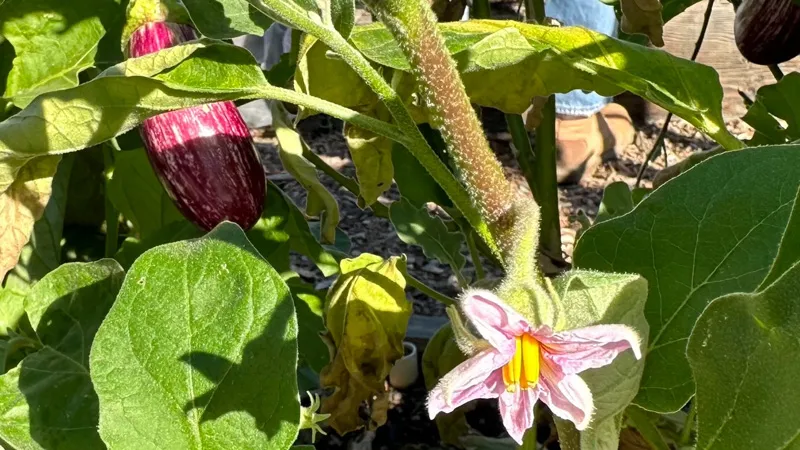
Eggplant doesn’t deserve to be underrated. It is an attractive plant, with large purple tinged leaves and lavender flowers, pretty enough to double as a landscape plant. Its fruit is versatile and used in the cuisine of many different countries. It can be saute’ed, baked, stewed, or fried and it is low in calories and a good source of vitamin C and potassium. In Asia and the Mediterranean, eggplant ranks among the five most important vegetable crops. It’s the basic ingredient in international favorites like moussaka, ratatouille, and baba ghanoush.
How to Grow Eggplant

Eggplant fruits do not have to reach full size to be harvested. They should be picked when they are 6 to 8 inches long and still firm and shiny. Once they turn dull and brownish, they are too mature and no longer tasty. Picking regularly encourages the plant to keep producing fruit.
Click here for more information on growing edibles like eggplant.
October 2023: An Abundance of Squash
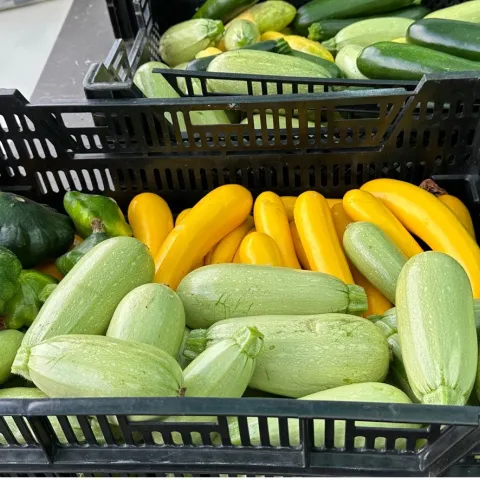

How can you tell when squash is ready for harvest?
The timing of the harvests for summer and winter squashes differs in relation to the maturity of the developing fruit. Summer squash (zucchini, patty pan, yellow, crookneck) is picked before it is fully mature, and the rind hardens. Winter squash (pumpkin, butternut, acorn, delicata) should be allowed to fully mature on the vine. Here are some general harvesting guidelines for each type.
- Summer Squash: The smaller the squash the more tender and tastier it will be. Pick straight and crookneck varieties when they are 2 inches or less in diameter and 6 to 8 inches long. Pick patty pan or scallop types when they are 3 to 4 inches in diameter. Because summer squash matures very rapidly after pollination, it is important to pick often before they get too large. When summer squash become too large, hard, and seedy, they sap strength from the plant and reduce production. Sometimes finding the developing squash before they get too large is challenging. It’s easy to miss one among the vines only to find an oversized one that got away.

- Winter Squash: In contrast to summer squash, winter squash should stay on the vine until it is at maximum size and the shell is hard and dull in color. Wait until the color on the stem changes from green to brown, then the squash is ready for harvest. When it comes to winter squash, it is better to leave them on the vine too long than not long enough. If the vines are dying, it’s time to harvest.
To sum it up - harvesting summer squash requires vigilance and harvesting winter squash involves patience!
General Harvesting Rules:
- Harvest in the early morning hours – produce harvested in the morning tends to stay crisp and fresh longer. Plants retain moisture overnight and veggies picked during the heat of the day are more likely to wilt.

- Be gentle when harvesting – If the vegetable is not easily picked, use a knife, scissors, or pruner. Summer squash can be harvested with regular pruners, but heavy pruners or a sharp knife is best for harvesting winter squash. Leaving a short stem attached prolongs storage life. Leave 2 to 4 inches of stem intact on winter squash. Handle summer squash gently to prevent wounds to the skin.
- Pick frequently to prolong the harvest – Keep in mind that a plant’s goal is to reproduce. When fruit is allowed to fully mature, then it signals to the plant that there is no need to continue flowering and fruit production will diminish.
For more information on growing summer and winter squash visit our webpage!
March 2023: Straw Bale Gardening
Setting up straw bales for growing spring and summer veggies has become an annual event in the Edible Demonstration Garden. Over the years, a number of different edibles have been tried in the straw bales but the most successful have been tomatoes, peppers, and cucurbits such as cucumbers and summer and winter squash. The bales give them the freedom they need to spread out without taking over other garden bed areas. Straw bales are a great way to add garden space, but they need preparation for the best results. In the Edible Garden, the process starts in late January and early February with the acquisition and placement of the bales.
How to Prepare Straw Bales for Planting Edibles
- Purchase straw bales at local feed stores. It’s important to buy straw rather than hay bales to avoid the seeds that are often found in hay bales. Straw is what is left over after grain crops are harvested and rice straw is the best choice for edible gardening.
- Place the bales with the narrow side up making sure that it is the cut end rather than the folded end that is up. Check by sticking a trowel into the end of the bale. If it goes in easily, then it will be the end that will best absorb water and amendments.
- Space the bales far enough apart to allow adequate room for plant growth and harvesting. The bales are heavy, so you need to put them in the position you want for the season.
- Secure the bales in position and set up wiring and trellises to accommodate plant growth. Gophers are a problem in the Edible Demo Garden, so the bales are wrapped in chicken wire. Not only does this keep out critters, but it also keeps the bales from falling apart when they become saturated with water and start to decompose.
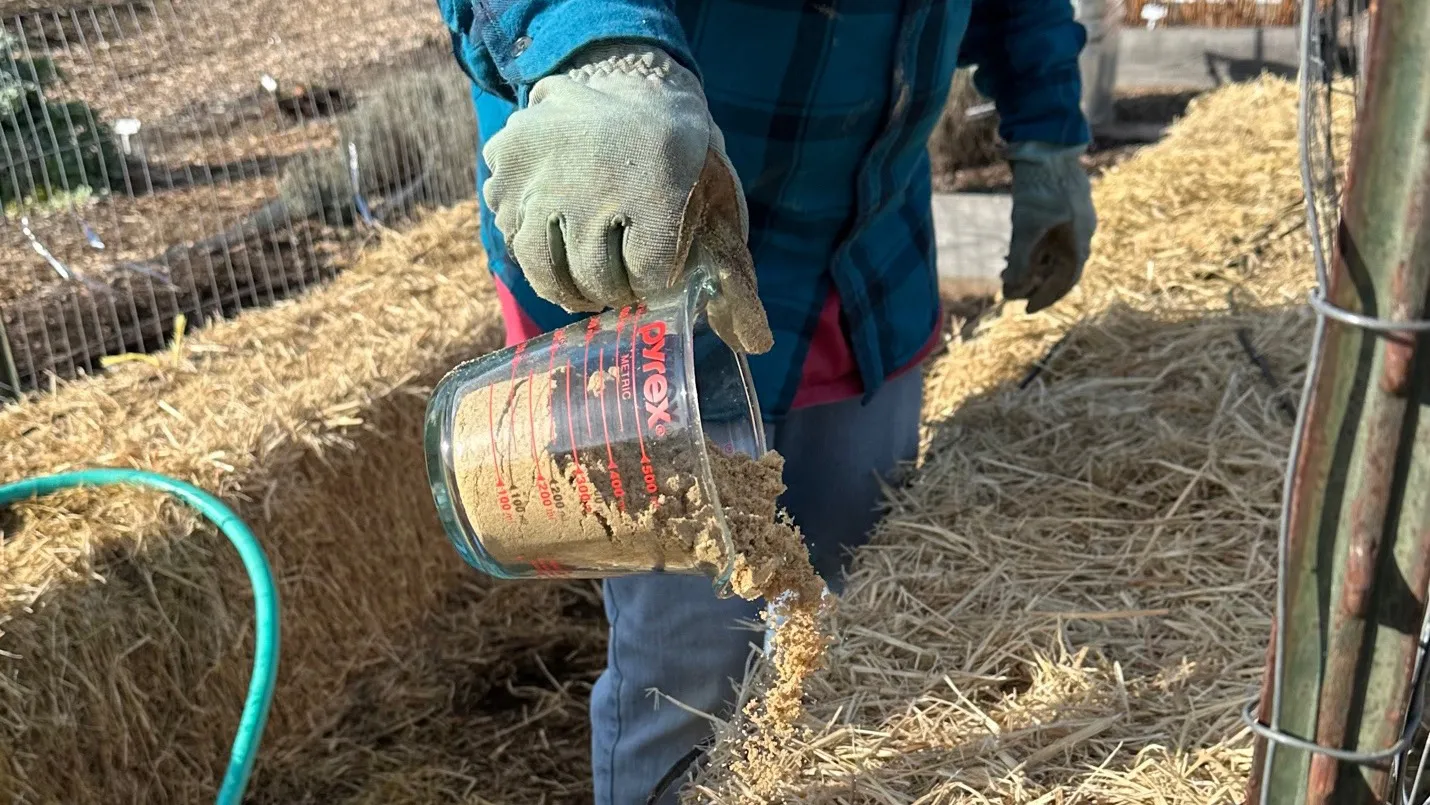
- Season the bales. There are not sufficient nutrients in the straw to support plant growth, so amendments are needed. Because the bales are high in carbon, the addition of a nitrogen containing fertilizer is important to promote the bacterial growth that initiates the composting process. In the Edible Demo Garden, organic feather meal fertilizer is added regularly over a two-week period. The feather meal is watered in consistently so that the bales remain saturated during the seasoning process.
- Once the bales have been seasoned, planting can begin. Soil mix will need to be added for direct seeding. Seedlings can be tucked inside the straw and soil added as needed.
- Keep the bales moist but don’t overwater. Too much water will wash away nitrogen and other nutrients. Drip lines work best for maintaining consistent moisture. In the Edible Demo Garden, parallel drip lines are placed along the upper length of the bales and the plants are nestled in between them.
- Fertilize periodically during the growing season with a complete fertilizer to ensure that the plants have adequate levels of phosphorus, potassium, and other nutrients.
What are the Advantages of Straw Bales?
- Straw bales are an inexpensive way to add raised garden space.
- Weeds are rarely a problem in straw bales.
- It’s possible to plant earlier in straw bales because the straw temperature is higher than the soil temperature. The increased temperature results from decomposition during the seasoning process along with increased sun exposure to the raised bed.
- Harvesting is easier when plants are in straw bales. There is less stooping and bending involved.
- There are fewer problems from soil borne diseases and insects.
- Straw bales are recyclable.
What are the Disadvantages of Straw Bales?
- Straw bales are a one season and done gardening option. Although some gardeners report reusing straw bales, the bales tend to fall apart at the end of the season and are best used for compost and mulch.
- Not All plants are suitable for straw bales. Bales are not an option for perennial plants. Corn and okra can grow too tall and become top heavy. Root crops such as potatoes, onions, and carrots also don’t work well in straw bales.
- Moisture needs to be maintained consistently and nutrients added more frequently to achieve the best results when growing edibles in straw bales.
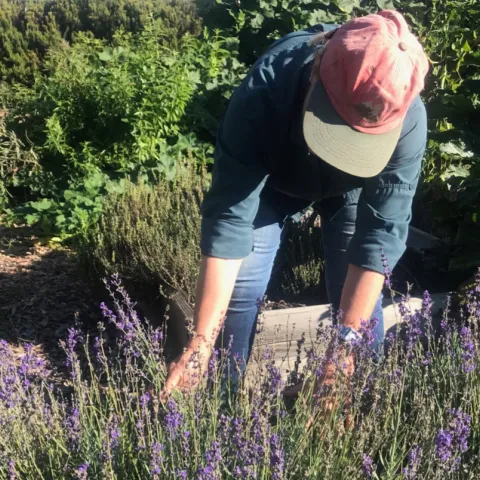
April 2023: A Year in the Garden

There is always something to do in the garden. Even during rainy March, Master Gardener volunteers were busy readying the garden for spring. Last calendar year, volunteer hours in the Edible Demo Garden totaled 932. That’s an average of about 20 hours a week of gardening activities performed by a dedicated group of 10 to 12 volunteers. There is a rhythm in the garden with a focus for each season and many overlapping tasks.
Spring
- Preparing garden beds – Compost and organic amendments are added to all the existing beds, and the straw bales are properly seasoned. Tilling is kept minimal to avoid disturbing beneficial soil organisms.
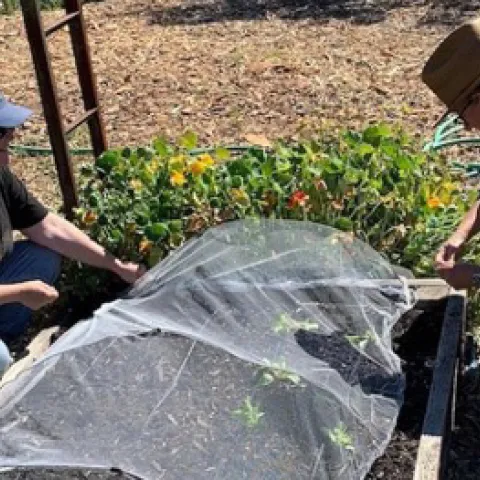
- Planting – Plants with larger seeds, can go directly into the ground when the soil is warm enough. Many, however, benefit from an earlier start in the greenhouse and will be ready for transplanting in about six weeks. Flowers are planted along with the edibles to attract pollinators and add interest to the garden.
- Protecting tender plants – Newly planted beds are covered with tulle fabric to protect the seedlings from the hungry birds. Tulle has proven to be the ideal bird deterrent. It is inexpensive and allows in sun and water.
- Checking irrigation lines – Drip irrigation is utilized throughout the garden and the lines and emitters are checked to ensure all the plants will be sufficiently watered.
Summer

- Harvesting – The ripened vegetables and fruit are picked, weighed, and boxed up for distribution in CSA (community supported agriculture) boxes or readied for sale at the IVC farm stand. All volunteers are trained to follow the strict standards for harvesting organic produce for public consumption.
- Planting – Edibles for late summer and fall are started in the greenhouse and planted in fallow beds.
- Feeding the plants – The well-prepared soil and seasoned straw bales reduce the need for additional fertilization. Organic amendments are added when planting seeds and new starts. Heavy feeders, like tomatoes, are given an occasional boost.
- Watering – Extra hand watering is needed to supplement the drip irrigation on hot summer days
Fall
The harvest extends into fall and preparations for winter begin. In fall volunteers are busy:
- Harvesting – The remainder of the annual summer edibles are picked along with the winter squash and cool season greens. Late harvests are donated to Homeward Bound.
- Cleaning up – Post harvest annual vines and plants are removed, and perennials are cut back. Garden trimmings are chopped up and added to compost. The straw bales are dismantled, and the straw spread as mulch.
- Planting – Winter crops such as cabbage, cauliflower, and beets are planted. Cover crops are sown in new and fallow beds to protect and enrich the soil.
Winter

- Planning – Plans begin for the next garden year. In collaboration with IVOF&G, seeds are ordered for the varieties to be planted in the spring.
- Mulching – Cardboard is used for sheet mulching in areas where weeds are a problem. Wood chips are added to the garden paths.
- Installing straw bales – New straw bales are obtained and placed in the garden in preparation for spring planting.
Tasks for All Seasons
- Weeding, weeding, and more weeding
- Composting
- Checking for disease and insect damage
- Protecting plants from critters, particularly gophers and birds
- Taking care of the worms in the worm bins
- Keeping accurate records to meet MOCA (Marin Organic Certified Agriculture) requirements
What Happens in the Garden Doesn’t Stay in the Garden
The primary goal for the garden is education. What is learned in the garden is shared with other Master Gardeners and the public through workshops, media, presentations, demonstrations, and other outreach efforts. The produce is a bonus. The estimated dollar value of edibles harvested during the last fiscal year was $4,183 and it is expected the amount will be higher this year. All the garden harvest is donated to the IVOF&G for the farmstand or community supported agriculture boxes. When they are not operating, the produce goes to Homeward Bound.
An Open Invitation
Visitors are always welcome in the garden whenever the volunteers are at work. Drop by anytime between 9 and 11 am on the first Friday of the month and enjoy a tour and an explanation of what is currently growing.
June 2023: Gardening Organically

The Edible Demonstration Garden is located within the Indian Valley College Organic Farm and Garden and is subject to the same organic growing guidelines as the larger farm. The Marin County Department of Agriculture is accredited by the United States Department of Agriculture (USDA) as an official organic certification agency. Marin Organic Certified Agriculture (MOCA) was developed to uphold the USDA National Organic Program standards through the documentation and verification of agricultural practices in the county.
Volunteers in the Edible Demo Garden, soon come to appreciate the rigor of the MOCA requirements and understand the importance of gardening in cooperation with nature and not relying on synthetic products. Organic gardening is earth friendly and it involves learning how to manage plant pests without reaching for a spray can and growing tasty tomatoes without chemical fertilizers.
TIPS FOR GARDENING ORGANICALLY
Soil consists of a mixture of organic and inorganic ingredients. Both are needed in the right amounts to provide optimal growing conditions. Essential minerals, such as nitrogen, phosphorus, and potassium require the work of living organisms in the soil to become available for plants to use. In the Edible Demo Garden, only organic matter amendments are used to improve the soil and provide the needed nutrients. In contrast to synthetic fertilizers that may harm microorganisms in the soil, organic matter added as compost and mulch, provides a slow and steady supply of plant nutrition. The philosophy is to feed the soil so that it can feed the plants.
Keeping soil conditions healthy for the many creatures that live in it is key to successful organic gardening. Organic mulch and cover crops protect against temperature extremes, loss of moisture, and erosion. Tilling or turning the soil should be avoided as much as possible and amendments layered on top where they can decompose slowly.
Select the right plants
Plants in the Edible Demo Garden start out as organically grown seeds planted in a soil mixture of compost and organic amendments called the “breakfast mix”. Seeds and plants should be certified organic, meaning they have met the USDA National Organic Program standards. Some plants sold in nurseries have been treated with neonicotinoids, a persistent type of pesticide that harms pollinators and beneficial insects. The organic label indicates that the plants have not been treated with pesticides.

Organic gardeners strive to anticipate and defend against pests and diseases rather than react to problems after they have occurred. This means staying ahead of the critters by using barriers such as gopher baskets and bird netting and rotating crops to avoid the build up of pathogens affecting certain plants. Vigilance is an essential line of defense. Every workday in the Edible Demo Garden starts with a garden tour to check on the health of the plants and develop a plan of action. Some pests can be removed mechanically either by hand or washed off with water. Diseased plants or plant parts can be promptly removed to prevent the spread of infections. An important benefit of an earth friendly garden is the presence of beneficial insects to help in controlling predators. There are some natural pesticides which meet the criteria for use in organic gardens, but these are a last resort and rarely used in the Edible Demo Garden.
Organic gardening can require more time in fertility and pest management compared to conventional gardening. However, organic gardening is more environmentally sustainable and a very satisfying way to garden.
Find out more on earth-friendly gardening!
September 2023: Starting With Seeds

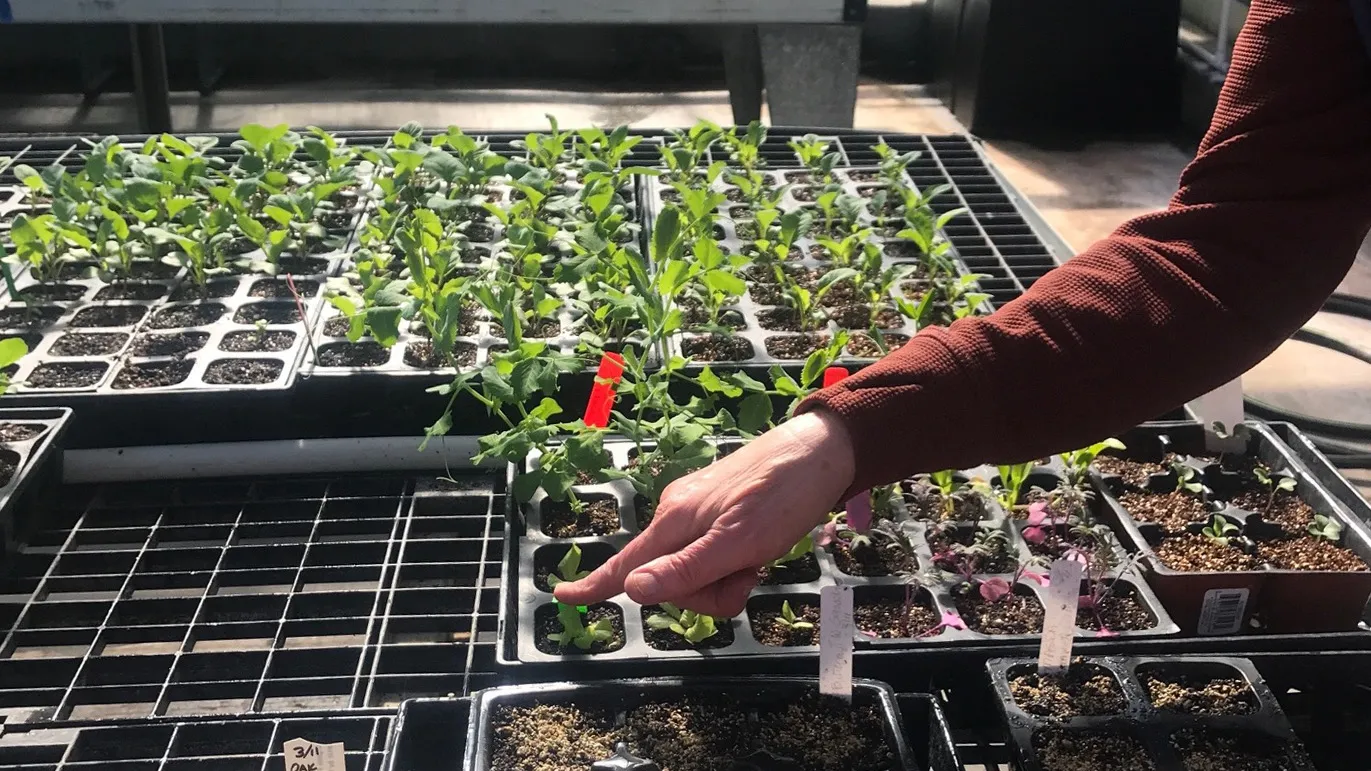
Planting starts
In August, seeds for cool season edibles such as fennel, beets, cabbage, kale, radish, and lettuce were planted in seedling trays and placed in the greenhouse. Usually, 2 or 3 seeds are planted in each cell in the tray in case some don’t germinate. A special planting mix, aptly named “breakfast mix”, is used to give these seeds a good start. Breakfast mix is a combination of compost, vermiculite, peat moss, and small amounts of nutrients such as feather meal. A mild, slow-release organic fertilizer is also added. In the controlled light, moisture, and heat in the greenhouse, the seeds can germinate and grow sufficiently to survive the harsher outdoor climate. Home gardeners who don’t have access to a greenhouse can start seeds indoors or in an outdoor cold frame.
When are starts ready to go outside?

Seedlings are fragile and benefit from gradual exposure to outdoor temperatures and sunlight. Bringing the plants outdoors during the day for longer periods of time over a week or more, is a “hardening off” process in preparation for transplanting. New transplants will still need protection from birds, insects, and other hungry garden dwellers. In the Edible Demo Garden, tulle fabric is used to cover newly transplanted starts.
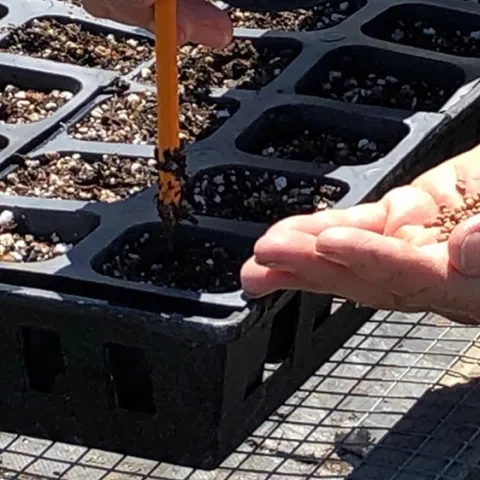
Sowing seeds directly

At the end of July, carrots and chives were sown directly in raised beds in the Edible Demo Garden. Plants that grow vigorously or transplant poorly are better direct seeded. Root crops like carrots are not easily transplanted.
Direct planted seedlings also need protection and consistent moisture. They are vulnerable to pests and competition from weeds and other plants. Plants growing from seeds that have been scatter sown will need to be thinned so that the strongest plants will have room to grow.
The advantages of starting with seed
- Organic gardening - In organic gardens, such as the Edible Demo Garden, starting with organic seeds ensures that the produce grown is free from synthetic contaminants.
- Variety - Probably the best reason for starting with seeds is the variety of plants available. There is a much wider selection of seeds than plant starts obtained in nurseries.
- Cost - Growing from seeds is less expensive than buying starts.
- Timing - Better control of timing is another advantage. Desired plants may not be available in nurseries at the best time needed for planting in the garden.
- Enjoyment – It’s rewarding to nurture seeds and watch them grow into tiny plants.
For more information on starting plants from seeds, visit our webpage on how to plant starts!
August 2023: In Praise of Rhubarb
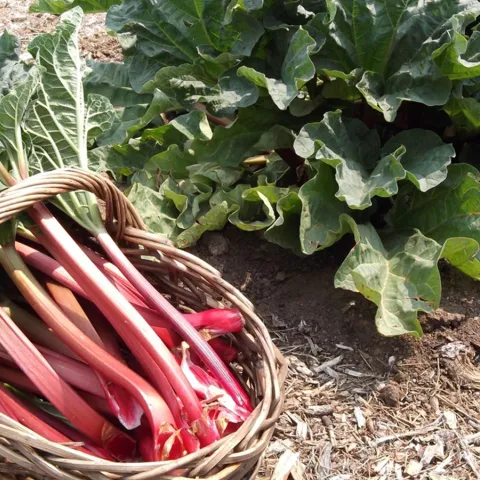
What is Rhubarb?
Rhubarb is a vegetable that is often prepared and eaten as fruit. The leaf stalks, or petioles, are the edible part of the plant. Originating in Siberia and China, rhubarb is a member of the Polygonaceae family, a grouping of herbaceous perennial plants which also includes buckwheat and sorrel. It was first used by the Chinese for medicinal purposes but has been cultivated for its unique tart sour taste for centuries.
Nutritionally, rhubarb is an excellent source of vitamin K. It is also high in vitamin C, calcium, and antioxidants. Eaten alone, it is low in calories, but it is often combined with fruits or sweeteners to counterbalance its tartness. The classic combination is rhubarb and strawberries often mixed as a pie filling. In fact, rhubarb’s use in baking has earned it the label of “ple plant”.
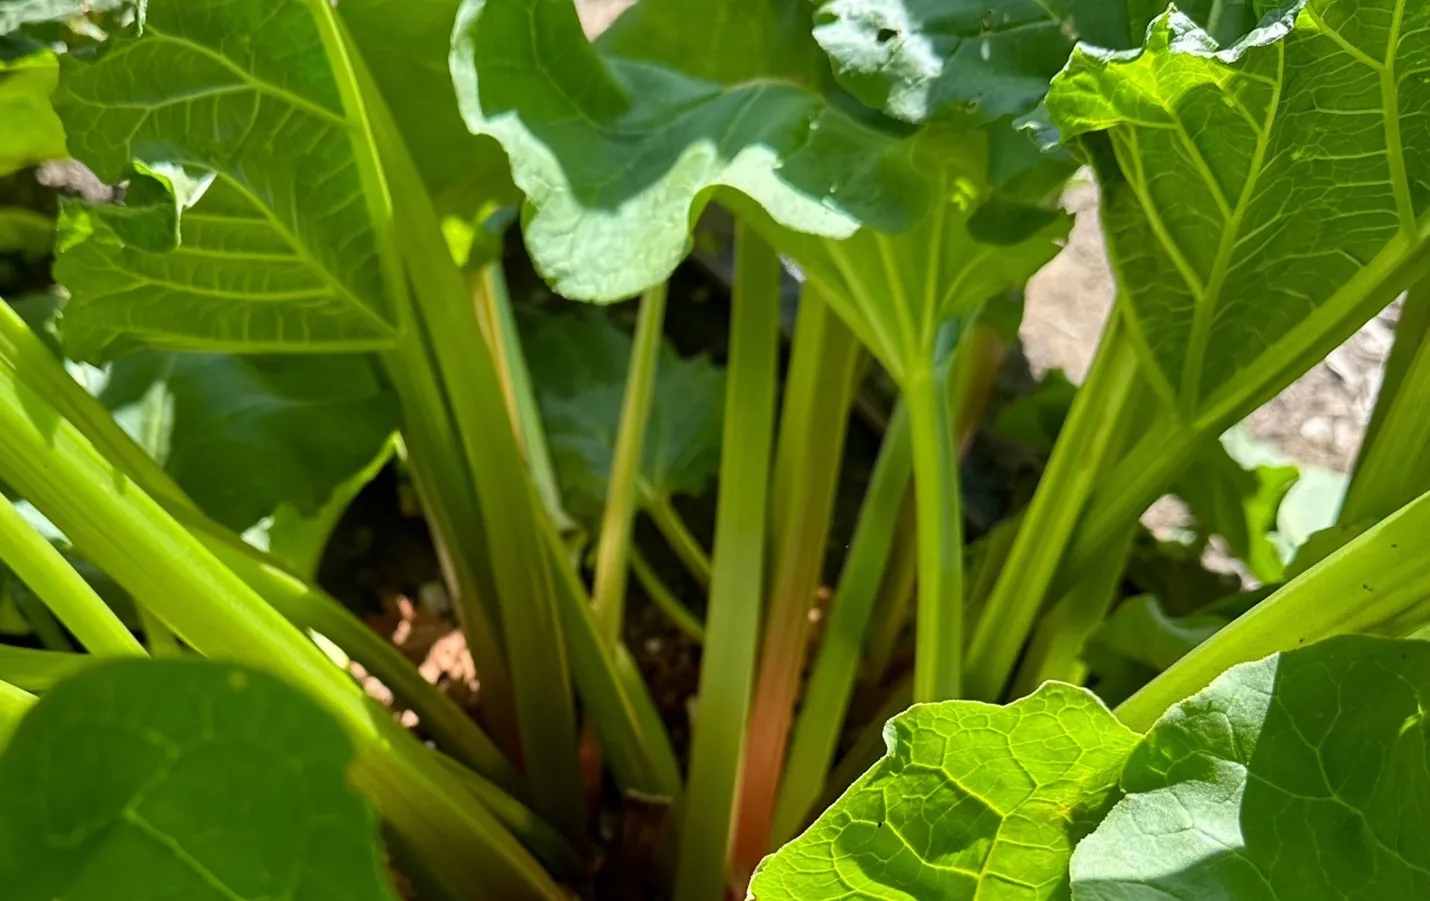
Like many edible plants, rhubarb contains oxalic acid, and this may contribute to its taste. However, oxalic acid is much more highly concentrated in rhubarb leaves, and it is at a level considered to be poisonous. Only the leaf stems should be harvested for food.

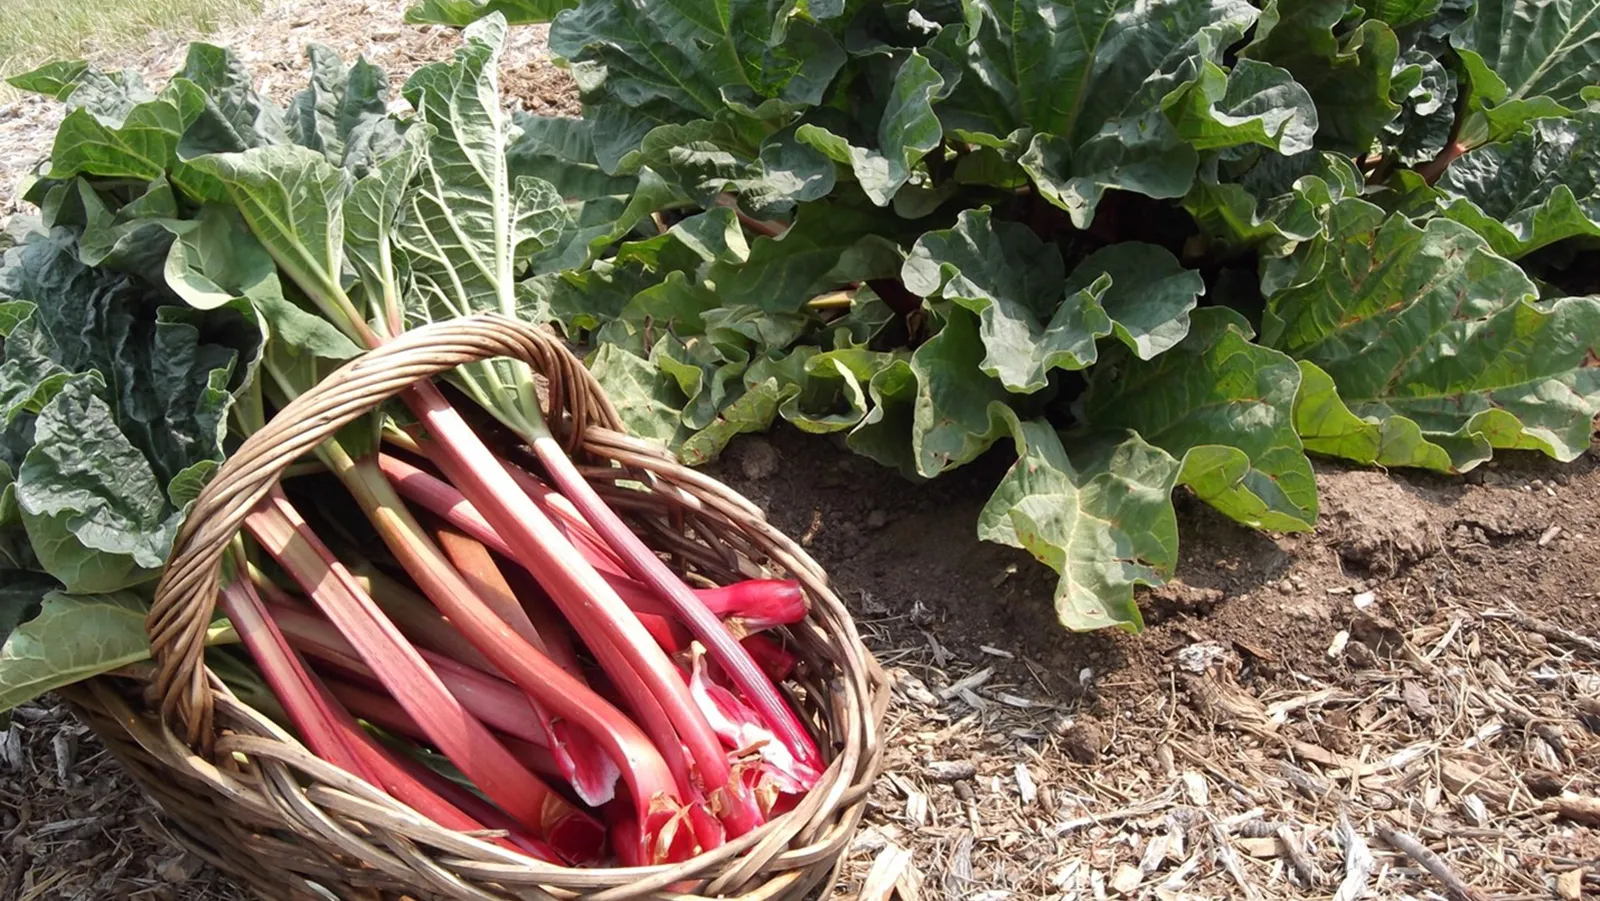
Rhubarb plants are large perennials and can grow for 5 to 10 years before they need to be divided. Rhubarb also needs space. Plants typically grow 3 feet tall and up to 6 feet wide. Therefore, choosing the right place to plant it is important. Rhubarb can also double as an ornamental landscape plant, so it doesn’t need to be confined to a designated vegetable garden.
Rhubarb grows best in full sun with some partial shade where summers are hot. It grows vigorously from early spring to midsummer and then goes dormant. It doesn’t mind cold or shade in winter when it is dormant, and it needs some winter chill to stimulate new growth and produce the thickest and reddest leaf stalks.
Fertile, well-drained soil with a pH of 6.0 to 6.8 is best for growing rhubarb. In areas with less-than-ideal soil conditions, the soil should be amended deeply enough prior to planting to accommodate the roots and prevent future drainage problems.
How to Grow Rhubarb
- Planting - Rhubarb grows from rhizomes and is started as rootstock or a division of an existing plant. Plant crowns 1 to 2 inches below the surface in soil that has been mixed with compost. Keep soil moist but not soggy.
- Fertilizing – Organic fertilizer along with compost should be added annually in the spring.
- Watering – Rhubarb needs regular water but once established, it is hardy enough to tolerate some drought conditions.
- Harvesting – It’s recommended to wait at least until the second season of growth before harvesting. Remove only a few stalks per plant in the spring of the first harvest. More stalks can be removed in the following seasons, but never more than a third of the leaves on the plant. Harvest the thickest stems when the leaves have just opened. Gently pull or twist the stems to remove them. Cutting the stems may leave a stub that will rot. The leaves should be removed from the stems as soon as they are harvested.
- Pests – Healthy plants attract few pests. Aphids, flea beetles, and leafhoppers can cause problems if plants are stressed. The area around the plants should be kept free of weeds as rhubarb does not grow well in a weedy environment.
Rhubarb Varieties
Not all rhubarb varieties have bright red stems. There are flavorful green varieties and others with red speckled stalks. In the milder Bay Area climate, some of the red varieties will produce paler stems since more chill time is needed for the deep red color. Varieties with low chill requirements are best suited to the region.
July 2023: Trellises for Plants that like to Climb
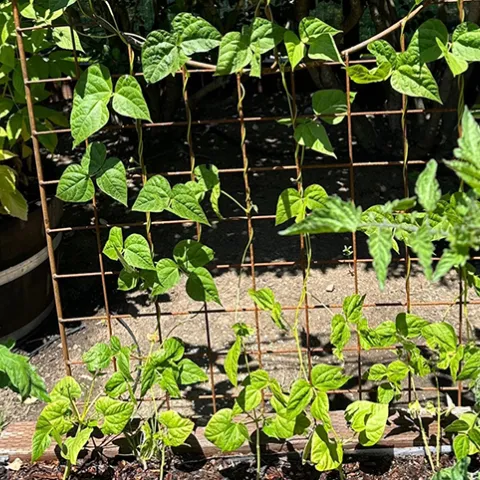

Why build a trellis?
There are many good reasons to provide trellis support for edible plants:
- Saving space. Plants that can grow vertically leave more space for ground level plants.
- Increasing production. Climbing crops have more access to sunlight and pollinators making bigger yields possible.
- Easier harvesting. Crops at eye level are more accessible for monitoring and picking.
- Esthetic appeal. Vining plants just look tidier when supported to grow upward instead of sprawling along the ground.
- Damage control. It is easier to spot and manage pest problems when plants are above ground level. Harm to vegetables and fruits from contact with the soil is prevented.

Any structure that can support upward plant growth can serve as a trellis. The options range from the elaborate ornamental trellises found in upscale nurseries to the simple repurposing of an old ladder. In the classic combination of corn and pole beans, the corn plants provide a living trellis for the beans. A-frame or tepee structures can be easily constructed using wood or bamboo poles. Wire fencing or wooden latticework are other possibilities. Two dimensional trellises that supply both vertical and horizontal support are the most versatile. While beans use only vertical supports, peas and cucumbers use both vertical and horizontal ones. Tomato cages are essentially circular trellises.
Helping plants to climb

To make best use of your garden space, do not grow horizontally what you can grow vertically. The right trellis can be the answer to a more productive and attractive garden.
May 2023: Sharing the Garden with Birds

Birds are both garden friends and garden pests. It’s hard to imagine a thriving garden without them. They can do a lot of good in ridding the garden of harmful insects and weeds. The damage they do to plants is just a consequence of their efforts to survive and feed their young. Sometimes the damage is minimal. A few bites out of the leaves of mature plants or an occasional peck marked pear can be tolerated. But when the losses increase, tolerance wanes.
Controlling bird damage in the garden
The primary bird deterrent options for home gardeners are scare tactics and exclusion. The goal is to redirect rather than harm the birds.
- Scare tactics - Shiny objects or noisemakers can frighten birds away from garden crops. Fake predators like plastic owls or hawks and snakes are also deterrents. Visual scare devices are more effective when combined with sound. Because birds are smart and will become accustomed to scare tactics, these need to be varied and changed regularly. The classic scarecrow in the corn field is unlikely to keep fooling birds for long.
- Exclusion – Netting has proven to be the most effective method for controlling bird damage in the Edible Demo Garden. Tulle fabric is an inexpensive fine mesh netting that works very well to protect seedlings and newly seeded beds from hungry birds. It is draped over metal hoops and allows both sun and water to penetrate. Once plants begin to flower, however, the tulle needs to be removed to allow access to pollinators. Usually by then the plants have become less tempting for the birds.
Individual plant covers are another exclusion option. Plant cloches are domed wire or plastic cages, open on the bottom and designed to fit over a single plant or group of plants. These can be purchased or made from chicken wire, plastic jugs, or other recycled containers. A fruit tree can be enclosed in netting or paper bags can be secured over the ripening fruit.
The ideal solution for preventing bird damage would be fully enclosed garden beds. Lacking that, most gardeners opt for one or more of the methods described and resign themselves to sharing a little of their produce with the birds. The squash and cucumbers have been replanted in the straw bales. This time they are protected with tulle.
February 2023: Growing Veggies in Bags
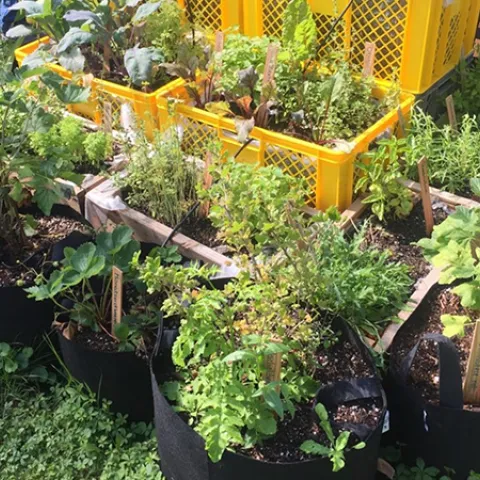

What are Grow Bags?
Grow bags are fabric bags designed to hold water and soil. They are constructed from nonwoven felt type fabric made from natural and synthetic fibers. Grow bags intended for edible plants should be BPA-free and food safe. Increasingly popular for starting gardens or adding space to existing gardens, grow bags are available in a range of sizes and shapes. Some are designed for specific types of plants such as those for potatoes with a flap near the bottom to allow an easy harvest. There are also grow bags with self-watering systems. Most grow bags come with sturdy handles making them easy to move around.
 How to Use Grow Bags
Plants that grow well in containers are the best choices for grow bags. The size of the bag determines the number and types of plants that can be accommodated. Most annual edible plants can be easily grown in 10-to-15-gallon bags. Smaller bags can be used for herbs and greens but would be too small for tomatoes. Larger bags provide more space but can be too heavy to relocate.
Grow bags should be filled with a potting soil mixture rather than garden soil. Garden soil can become compacted. Good mixtures contain peat or coir and perlite or vermiculite to retain moisture while allowing sufficient drainage. Compost and supplemental fertilizers can be added to promote plant growth. Grow bags can be placed directly on ground or pavement, however there will be leakage so a saucer underneath can prevent staining on decks or patios. Construction pallets work well to keep bags off the ground when invading roots from other plants might be a problem.
When the growing season is over, the soil can be emptied into the garden or compost pile and the bag cleaned and stored. With new soil added each season, there is less risk of built-up soil pathogens. Grow bags usually last for several seasons before they begin to deteriorate and need to be replaced.
 Grow Bag Advantages
- Healthier roots – Because the fabric bags are breathable, roots are less likely to become root bound. When roots reach the air and drier soil at the edge of the bag, they stop growing in that direction. It’s a process known as “air pruning”.
- Excellent drainage – The porous bag fabric enables water movement and prevents problems due to overwatering.
- Location options – Grow bags can be put anywhere and moved as needed to take advantage of sun and shade. They are an inexpensive way to expand garden space and productivity.
- Heat control – Grow bags don’t get as hot in the summer sun as plastic or metal containers decreasing the risk of heat damage to roots.
Grow Bag Disadvantages
- Increased water needs – Because the soil drains well, it also dries out faster, so more frequent watering is required.
- Heavy bags – Larger bags can be challenging to move around easily reducing options for relocating them during weather changes.
- Appearance – Grow bags can be considered less aesthetically pleasing than other types of containers
- Need for replacement – Grow bags need to be replaced periodically as they don’t last as long as containers made of other materials..
- Environmental concerns – Some grow bags contain polypropylene or polyethylene fibers making them non-biodegradable.
Although grow bags may seem like a new idea, centuries ago the ancient Egyptians and the early Greeks were growing plants in woven containers.
For tips about growing edibles in containers, check this website at https://marinmg.ucanr.edu/EDIBLES/ContainerEdibles.