Tips & Techniques
Tips and Techniques

Edible gardens are a world unto themselves in the landscape. There are many strategies unique to vegetable gardens that extend growing times, keep the garden healthy, and maximize crop yields. Here's a cheat sheet of common edible garden lingo and strategies.
Succession garden
Think of a succession garden as a master plan for the garden from season to season. For instance, in June, you can plan to clear some spring vegetables and plant summer crops. Or you can sow and transplant alongside waning spring vegetables with a view to next season's produce.
Succession planting
The primary purpose of succession planting is to provide continuous crop output within the season by sowing seed of a given crop at 1 to 2 week intervals. For instance, you can stagger corn production by making a subsequent planting when the first is 1 to 2 inches tall. Beans, turnips, seasonal lettuce, and beets are well-suited to this practice.
Companion planting

Companion plants like aromatic herbs or flowers are purported to repel pests in the vegetable garden. Although there is a lack of science behind companion planting, growing a wide variety of pollinator-friendly herbs alongside edible crops does help attract beneficial insects and natural enemies.
Intercropping
This involves planting early maturing crops between rows of late maturing crops to increase production in a small area. For example, beans, radishes, green onions, or seasonal leaf lettuce may be planted between rows of tomatoes, peppers or corn. The quicker-maturing plants will be harvested before the others become large.
Crop rotation
Crop rotation is the practice of changing the location of edible crops from year to year. Rotating crops in the garden enhances soil fertility and lowers risk of pests and diseases. Backyard gardeners with limited space should at least avoid planting exactly the same crop or crops from the same plant family year after year in the same part of the garden. For example, do not follow melons with cucumbers or squash, and do not plant peppers, eggplant, or potatoes where tomatoes grew the year before.
Cold frames

Like mini-greenhouses, cold frames are structures that create a stable environment for frost-tender seedlings by protecting them from big temperature swings. Keeping delicate seedlings in cold frames helps them thrive until winter temperatures stabilize. Cold frames also work to protect seedlings from pests, including birds, cutworms, earwigs, slugs, and snails. Cold frames are easy to assemble and can be made from inexpensive or recycled materials. Because they are better acclimated from the outset, plants that start life in cold frames often do not experience the transplant shock that many plants face. Among the most transplant-vulnerable seedlings are basil, beans, cabbage-family plants, lettuce and peas.
To make a standalone cold frame:
• Place an old window pane or a rigid sheet of plastic on top of a four-sided box filled with soil.
• Be sure that the box receives plenty of sunlight.
• The box can be made out of any material that holds the soil in place, including wood, straw bales, metal, cinder block, or brick.
• If you want to reuse your cold frame every winter, consider adding a hinge to one side so you can easily open and close it.
Floating row covers

Floating row cover is a white, lightweight, synthetic fabric with a gauze-like appearance. Air, sunlight, and water can penetrate the material. Vegetable gardeners drape it over and enclose individual plants or groups of plants and secure it to the ground with pins, bricks, rocks, soil, etc. The cover “floats” directly on top of the growing crop. Some gardeners install simple frames to support floating row covers, creating a dome effect. Row covers are often used in the winter to protect plants from frost, and in summer to provide some shade.
Floating row covers provide many benefits:
• Provides frost protection in early spring and late fall/early winter
• Encourages faster plant growth due to increased temperature and humidity under the cover
• Prevents insects, deer, birds, and other pests from eating your plants
• Inexpensive
• Reusable: can be re-used for two to three years
BACK TO EDIBLES
> What Edible Gardens Need
> Best Choices for Marin
> How to Prepare
> How to Plant
> Edibles in Containers
> Planting Calendar
> Grow & Care Sheets for Vegetables, Herbs & Fruits
> Tips & Techniques
> How to Maintain
> Fruit Trees
> Top 20 Edible Garden Problems
> Cover Crops & Soil Enhancements in the Off-season
> Conserving Water
•••••••••
Visit our EDIBLE DEMO GARDEN at IVC Organic Farm & Garden
News from the Edible Demo Garden
Seasonal Advice and Happenings at our Edible Demonstration Garden
Every month, the team at the Edible Demonstration Garden chronicles what's happening in the garden - planting, harvesting, problems and more. Check out our stories!
> BACK TO THE EDIBLE DEMO GARDEN
March 2022: Growing Blueberries
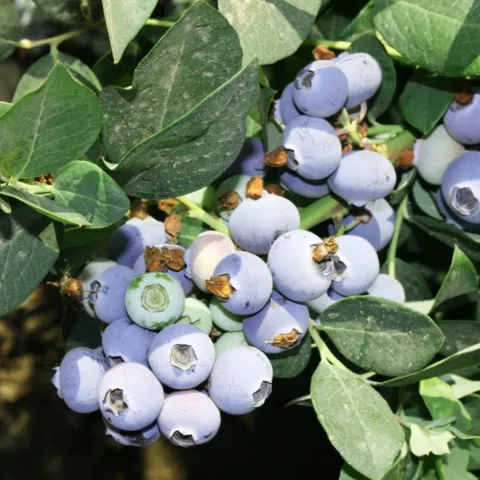

Growing Conditions for Blueberries
Blueberries are in the Ericaceae family and are related to rhododendrons and azaleas and thrive under similar conditions. They need:
- Full sun with some shade protection in hot weather
- Acid soil (pH 4.5 to 5.5)
- Ample water
- Good drainage
Much of our Marin garden soil is not sufficiently acidic for blueberries so it’s necessary to create it using pH lowering organic amendments such as peat moss or elemental sulfur. A layer of organic mulch will help keep the soil cool and moist and will protect the shallow roots. Regular feeding with acid-forming complete fertilizers will provide nutrients and help maintain the low pH.
Selecting the Best Varieties
Blueberries native to the northeastern US require too many annual chill hours (hours with temperatures between 32 to 45 degrees), to grow well in Marin. Fortunately, there are many cultivars with low chilling requirements available. Ripening time is another consideration. There are early season, midseason, and late season varieties. Planting at least two different varieties improves pollination and increases production, so choosing kinds that ripen at different times increases harvest length. Two hybrid “varieties were chosen for the edible demo garden:
- ‘Misty’. Classified as southern highbush variety, it produces very early, large, good-flavored fruit. It has a 150 to 300 chill hour requirement and tolerates a higher than usual soil pH.
- ‘Blueray’. It is a southern highbush midseason variety with a chill requirement around 500 hours. It produces large, flavorful berries and is more tolerant of summer heat than some other varieties.
Promoting Production
The best fruit production requires patience and careful pruning. Removing blossoms the first year or two allows the plant to focus its energy on vigorous growth. Initially pruning all branches back to about 30% also promotes new growth. In following years, older branches or weak shoots can be removed, but fruit is produced on 1-year old wood so excessive pruning will reduce yield.
For more information, see our grow sheets on blueberries!
If the edible demo garden blueberry project is a success, the next problem will be keeping the birds from devouring the crop.
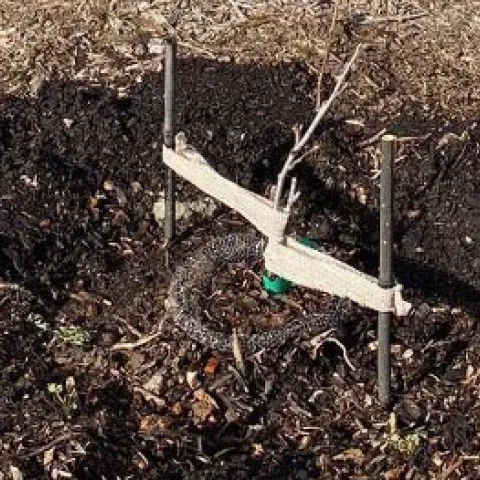
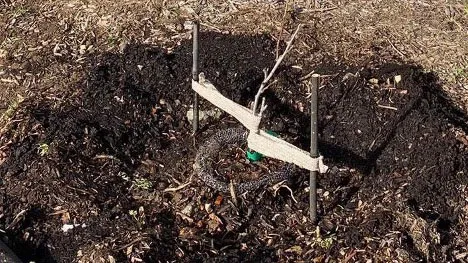
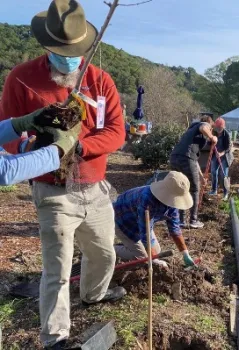
February 2022: Getting Bare Root Fruit Trees Off to a Good Start
• Braeburn apple
• Pink Pearl apple
• Ambrosia pomegranate
• O'Henry peach
• Shinseki Asian pear
• Blackjack fig
Bare root fruit trees are readily available during winter and early spring and there are advantages to planting them at this time of year. Not only are they less expensive, but they can also establish more quickly in the natural garden soil because they have not been previously grown in containers.
Bare root planting tips
If you are not able to plant right away, “heel in” the plants by placing them in a hole or shallow trench and covering the roots with moist soil or sawdust. Soak the roots in water for 1 to 2 hours prior to planting. Trim off any dead, twisted or broken roots
Dig the right-sized hole
Dig the planting hole large enough to easily accommodate all the healthy roots. Don’t make the hole any deeper than the roots of the tree but allow enough width for the roots to spread out. If gophers are a problem, as they are in the Edible demonstration garden, encase the roots in a wire basket large enough to allow the roots to grow for several years. Make sure the top extends above the soil level.
Plant at the right depth
Make a small cone of soil in the center of the hole and place the tree so that the roots fan out around the cone. The root crown should be at the soil level. Allow for some settling after planting. Orient the tree so that the graft union faces north or northeast to reduce heat stress and sunburn.
Fill the hole
Hold the tree in place while backfilling with clod free soil removed from the site. Don’t add amendments or fertilizers. Firm the soil around the sides of the root system to remove air pockets but don’t pack too tightly. Add compost or mulch to the soil surface keeping it away from the base of the tree. Make a slightly raised ridge of soil around the outer edge of the planting hole to create a basin.
Water thoroughly
Water slowly and gently until the soil is completely moistened and the tree is settled in place. After the initial watering, water only as needed when rainfall is insufficient. New trees need enough water to encourage root growth, but overwatering can kill them. Drip irrigation can be installed after planting.
Prune the tree
Cut back the branches to about knee height. This promotes lower branching and a smaller and stronger tree. Controlling the tree height makes later fruit harvesting much easier. More on pruning.
Add stakes if needed
Stakes can protect and support the trunk during the first year or so. Stakes should be placed so the trunks can flex some with the wind in order to develop strength. See staking trees for more information.
For more information see: How to plant a bare root tree
January 2022: Choosing Bare Root Fruit Trees
December and January are the best months to purchase bare root trees. The supply is much better and you will have more choices. So what does the home gardener need to consider before purchasing a fruit tree?
Climate Considerations: Chill Hours
The successful growing of deciduous tree fruits (not citrus) requires that you know how many cumulative chill hours (temperatures between 32°F and 45°F) that your area gets in the winter season. Each kind of fruit tree requires a specific number of chill hours in order to break dormancy and begin growing again in spring.
See the table below for specific hours for some popular fruits.
| Type of Fruit | Approx. chill hours needed to break dormancy | Equiv. time if continuously exposed to <45°F |
| Apple | 1200-1500 | 7-9 weeks |
| Apricot | 700-1000 | 4-6 weeks |
| Cherry (sweet) | 1100-1300 | 6-8 weeks |
| Fig | a few hours | --- |
| Olive | 200-300 | 8-13 days |
| Peach/Nectarine | 650-850 | 4-5 weeks |
| Pear | 1200-1500 | 7-9 weeks |
| Persimmon | <100 | 4 days |
| Plum European | 800-1100 | 5-6 weeks |
| Plum, Japanese | 700-1000 | 4-6 weeks |
| Pomegranate | 200-300 | 8-13 days |
| Quince | 300-400 | 2-3 weeks |
* Table adapted from UC's The California Backyard Orchard
There are also low chill varieties (usually less than 300 hours) that have been developed for apples, apricots, pears, peaches, and plums.
In general, Northern California gets about 800-1500 chill hours each winter. Any good bare root nursery should be able to advise you about the suitability of a particular fruit tree that you want to purchase for the area where you live.
Environmental Considerations
• Light: at the very least, 6-8 hours of sunlight daily
• Space: the right sized tree for the right space
Note: dwarf trees bear fruit earlier, but are more fussy, requiring more frequent irrigation, careful pruning, and better soil fertility. You can grow a smaller tree just by pruning it properly when planting it and regularly pruning it to keep it small.
• Pollination Requirements: self-fruitful (pollinates among its own flowers) or self-sterile (requires pollen from another variety)
• Water Source: an irrigation system is best but you can also water by hand
Fruit Tree Maintenance Requirements
• Yearly Pruning: both in winter and in summer
• Fruit Thinning: required to grow larger sized fruit
• Common Diseases of particular fruit trees:
Pear trees: fire blight
Plum trees: plum aphid
Peach & Nectarine trees: peach leaf curl
With this knowledge in your pocket, you are ready to do some after holidays shopping at your local nursery. Don’t let the maintenance requirements discourage you from starting your own small orchard. Do like our team does; research and learn as you grow. A good source for all of your questions is the UC Davis California Backyard Orchard at https://homeorchard.ucanr.edu/.
Also, check out our information on:
How to plant a bare root tree
How to grow fruit trees
December 2021: Composting & Testing Your Soil
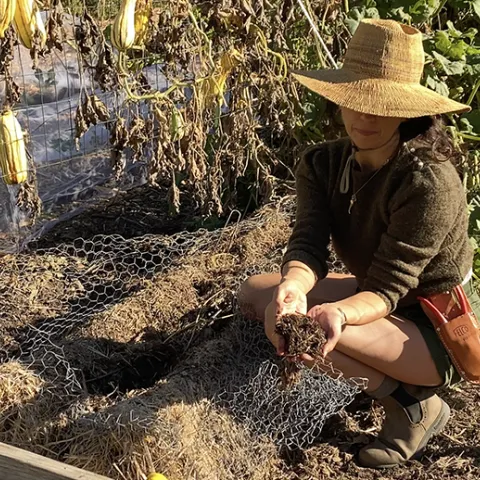
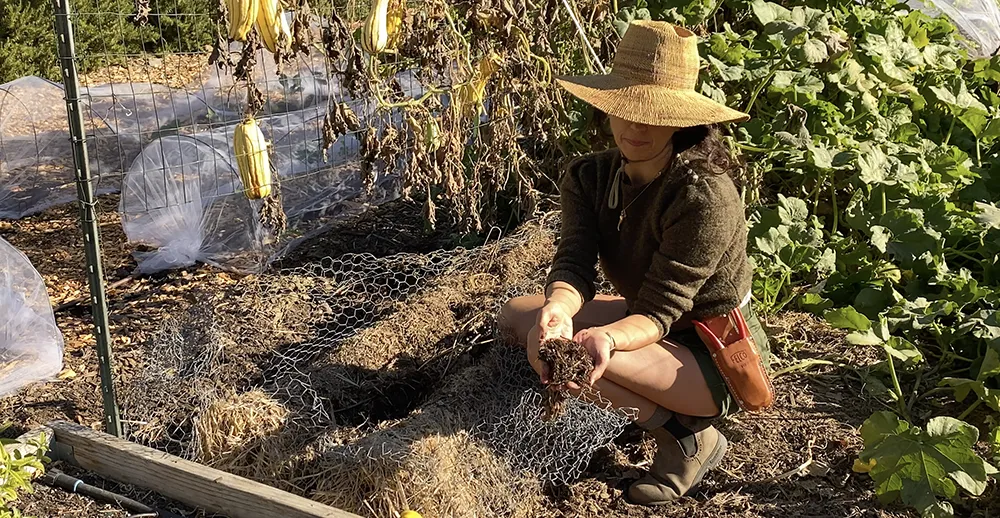
Soil Testing for the Home Gardener
Every Master Gardener in our training class learns how to use a do-it-yourself soil testing kit that will give you a pH reading and the level of Nitrogen (N), Phosphorous (P), and Potassium (K) in your soil. The kits we use are inexpensive (under $20). The process involves dissolving pills in distilled water with a soil sample and after the soil settles, comparing the color of the water against a key that tells you the level of a particular nutrient. Are these tests totally accurate? Probably not, but they can give you a rough estimate of your soil fertility for the primary nutrients that are required in larger amounts than other soil nutrients. One piece of advice, do this with a buddy because the directions are complicated and it helps to have one person read them while the other one actually does the testing. It is more fun that way too.
If you don’t feel like being a chemist, there are also nutrient testing kits you can purchase that just require you to send a soil sample to a lab for testing. You get a list of the results and also some recommendations for amending any deficiencies. These test kits are also under $20 but you have to pay the postage for shipping to the lab.
Choose which method suits you best. For Master Gardeners, getting your hands dirty and experiencing science up close and personal can feel quite rewarding.
Soil Testing Results
We tested the pH and the nitrogen level in our straw compost and found out that the pH was perfect for growing vegetables. The Nitrogen level, however, was between low and very low. So what was the difference between last year and this year? In October, we had substantial rain: 17 inches for the reservoirs in Southern Marin and 7.6 inches for Stafford Lake in North Marin. We left our bales in place during October because we were still harvesting winter squash and the rains came down hard on them.
At the end of the growing season, the leftover nitrogen is mostly dissolved in water held in the pore space between the soil particles. It is very mobile and probably was depleted by the onslaught of heavy rains as it was washed into the soil below. So what we hoped would fertilize our soil will now be used as mulch which will improve the soil structure but not fertilize our plants.
Compost to Increase Fertility for your Spring Garden
As a result of our testing, we will now go back to the tried and true use of compost to solve our garden fertility problems. Even though our straw compost was a faster way to start our horseradish growing again, by the spring, the farm’s compost had proven to be just as effective even with the slower start.
The nitrogen in compost is in a form that is not available to plant roots. But it is slowly converted over time to a form that can be used by the plant. Now is the time to apply compost to your winter garden plants and the also the parts of the garden that will be left fallow. Also, adding a mulch like straw, for example, on top of the compost will help to conserve soil moisture just like it does in the summer.
Let’s hope that we get more storms this winter but with the compost’s slow process of converting organic nitrogen to a usable nutrient, your garden will be all ready to go come spring. As we Master Gardeners love to say, "compost, compost, compost"!
November 2021: Integrating Native Plants in Your Edible Garden
Natives help you reduce water use
With drought conditions, many people are replacing their higher water use ornamentals or even lawns with native plants. With some native plants like our beautiful Ceanothus, you can stop irrigation totally once the plant is established. Many other plants, like Penstemon, and Salvias require no summer irrigation at all. As we experience more drought years, native plants will be essential for providing needed ornamentals in our landscaping. But why would we need these plants in an edibles garden?
They attract animal life that edible plants need
Native plants attract butterflies, insects, birds, and other animals by providing a consistent supply of nectar, pollen and seeds. They support a steady population of beneficial insects, both insects that pollinate and those that control pests. Native plants aid all kinds of pollinators including native bees, butterflies, moths, and other insects that pollinate our edibles. They also provide natural pest control by bringing to our gardens both predators and parasitic wasps, one of the most important biological controls that gardeners have. Predators like the aphid-eating lady beetle can find refuge under the plants, as well as native bees a nesting site for over-wintering. With native plants in your garden, you have built-in pollinators and pest control.
Natives support a healthy environment
Native plants have evolved to thrive in our native soil. Fertilizers are not needed and in fact, natives do not like rich soil or added compost. Also, because they are so great at attracting insects and animals that control garden pests, there is no need or less need for pesticides in your garden.
Easy to care for
At the end of the summer in the edibles garden, our team spends a lot of time cleaning up plant debris and adding compost to our soil. Native plants need none of this except for some deadheading of flowers and cutting back. For natives, it is best to do minimal ground clean up in the fall so that beneficial insects have the protection to successfully over-winter and emerge healthy in the spring. The native plant area decreases the impact of the more intense edibles clean up that is necessary to reduce diseases in the soil. Our beneficial insects will have their own refuge for the winter.
If you are considering adding some natives to your garden this fall, here is the list of plants that the Native Plant Guild chose for ours. This was an amazing gift to our garden.
| SHRUBS | |

|
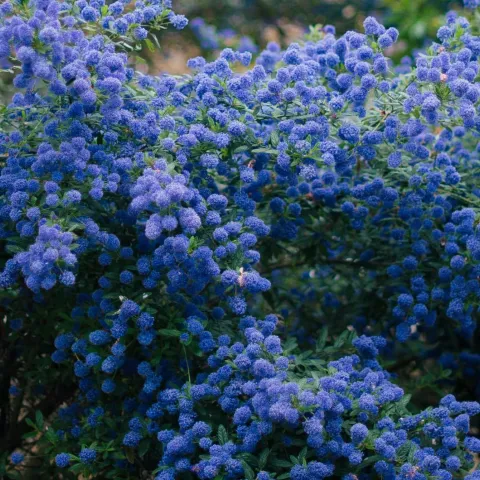
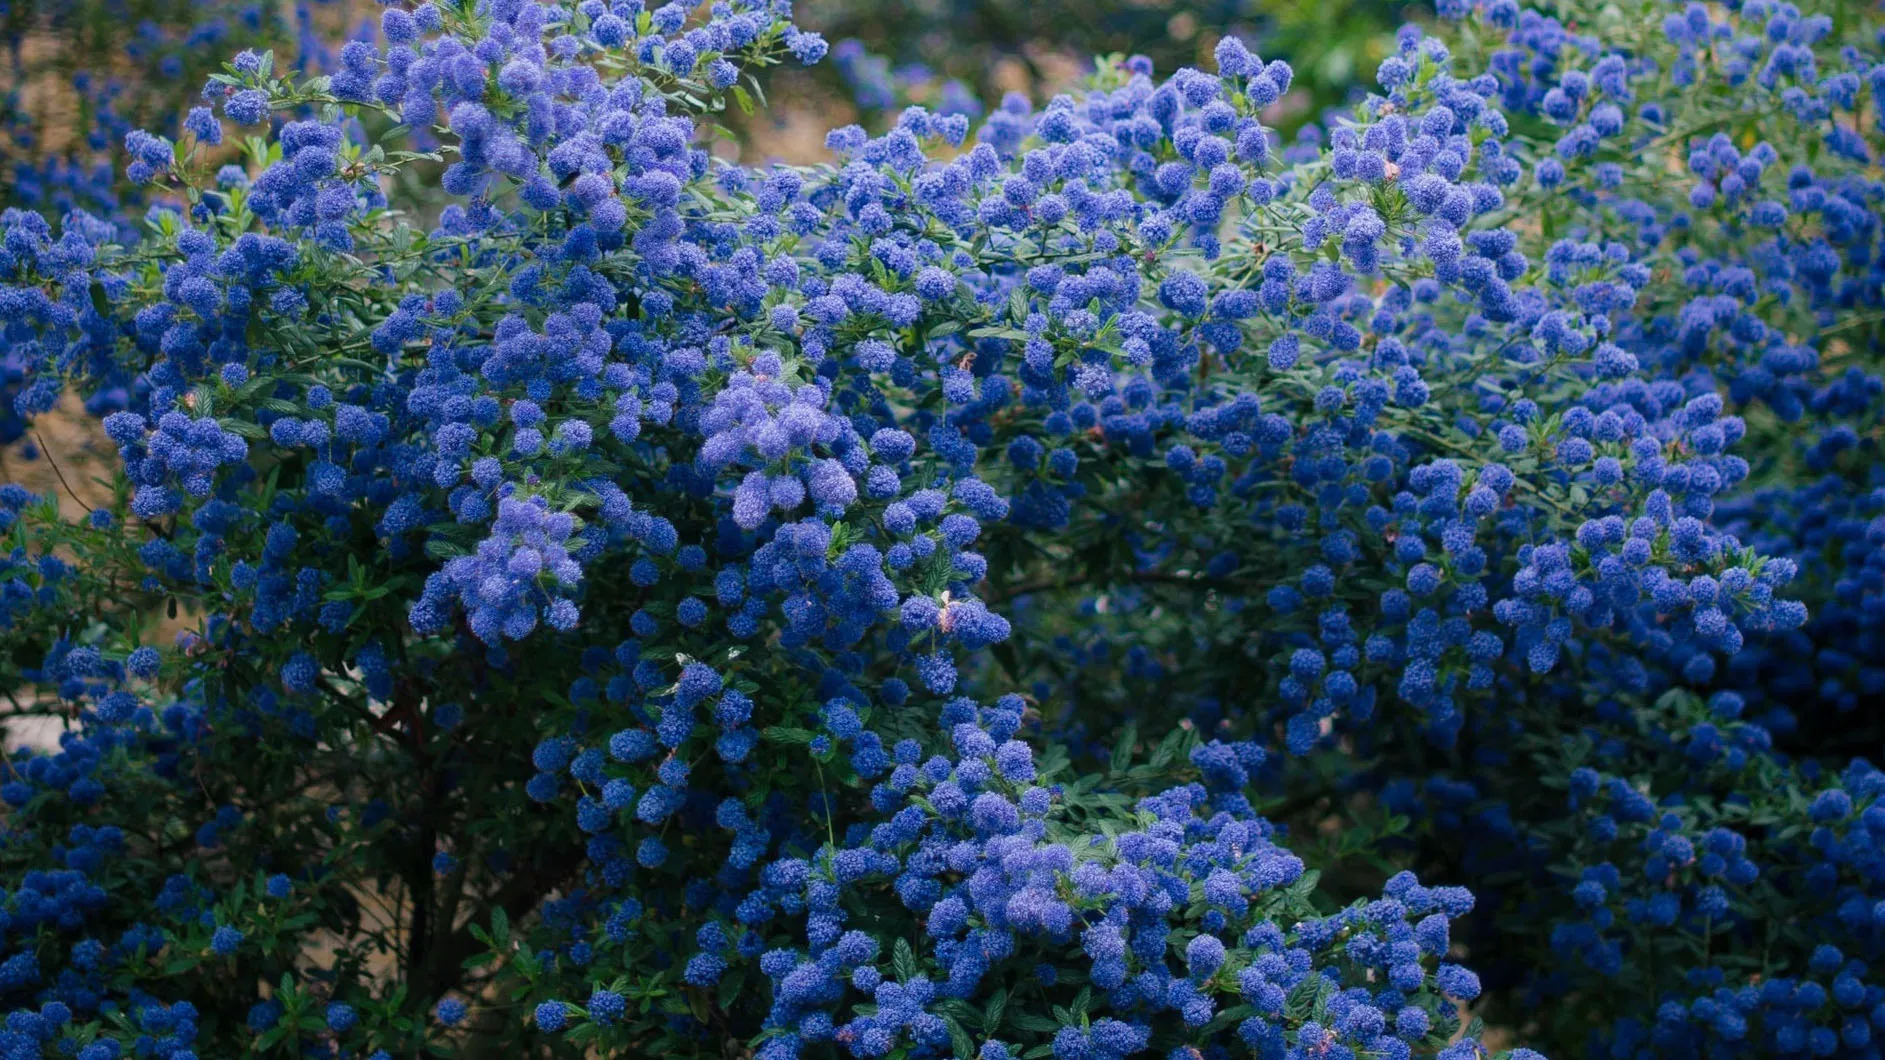
Ceanothus 'Concha'; Concha California lilac |
|
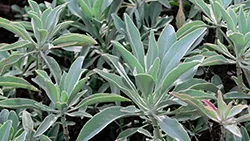
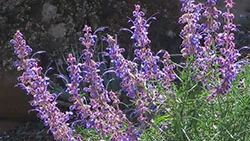
Salvia apiana; Sacred white sage |
|
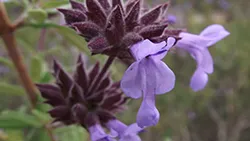
Salvia brandegeei; Brandegee's sage |
|
Trichostema lanatum; Woolly blue curls |
| PERENNIALS | |

|
Anaphalis margaritacea; Western pearly everlasting |
|
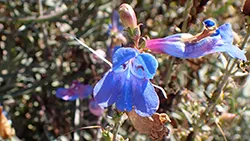
Penstemon ‘Blue Springs’; Electric blue penstamon |
|
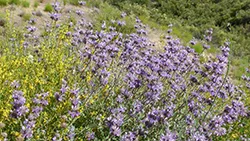
Salvia clevelandii ‘Pozo Blue’; Grey musk sage |
|
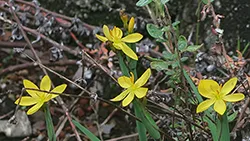
Sisyrinchium californicum; Yellow-eyed grass |
|
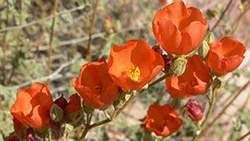
Sphaeralcea ambigua; Apricot mallow |
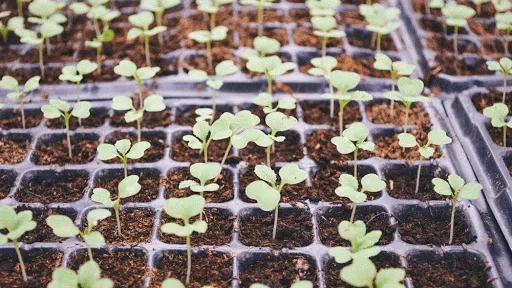
October 2021: Seedling Transplanting Tips

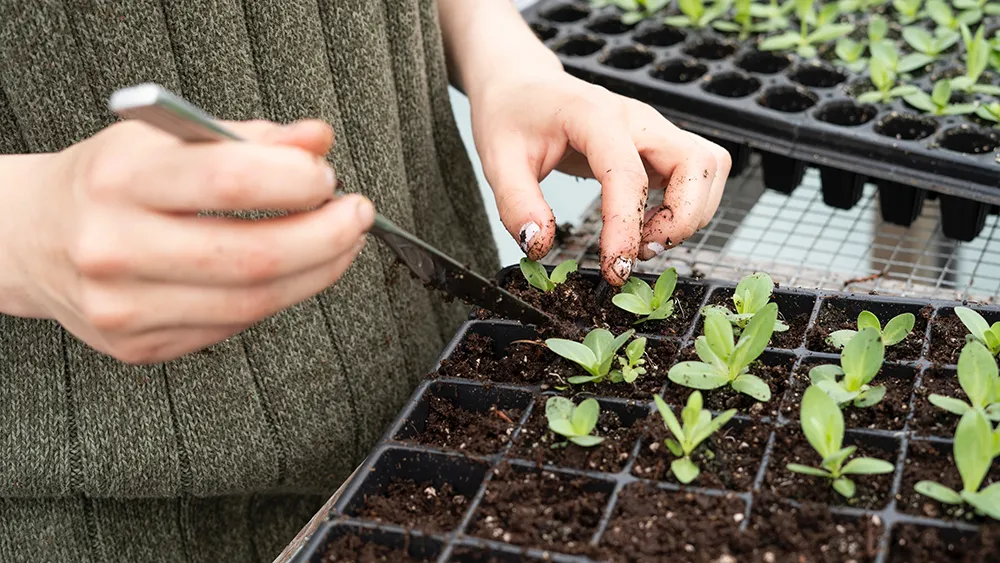
When is a seedling ready to move?
The most common problem with transplanting is timing. Many gardeners, including our team, make the mistake of waiting too long. A good rule of thumb is that the seedling should have at least three to four true leaves in addition to the seed leaves that appear first. The height of the seedling is not as important as the number of leaves it has. An ideal seedling would be as wide as it is tall. So how do we toughen up that soft, succulent type of growth into a firmer, harder type? This process is called ‘hardening off’.
Take the Time for Hardening Off
Your seedlings need a transition time to the harsher outside conditions. If you do not provide this, a severe, long-term check in growth can occur. The hardening process will take at the very least seven days or up to two weeks, so this requires patience. Remember that you’re looking for the plant to lose those soft stems and harden up. So observe your plants closely.
Hardening Off Process
As you transition your seedlings to the outside, keep in mind the two elements that will have the most impact on them: wind and sun. A hot, windy day would not be the day to start the move. For the first excursion, pick a temperate day with no wind and even then, put your plants in a protected area in the shade. You might leave them out for only a few hours. After that, increase the exposure time each day, moving eventually to dappled morning sunlight, and then gradually to full morning sunlight. Placing plants in full afternoon sun will be done toward the end of this process, as well as leaving them out overnight, but only when temperatures do not fall below 50°F. Reducing water frequency to slow growth during hardening is advised.
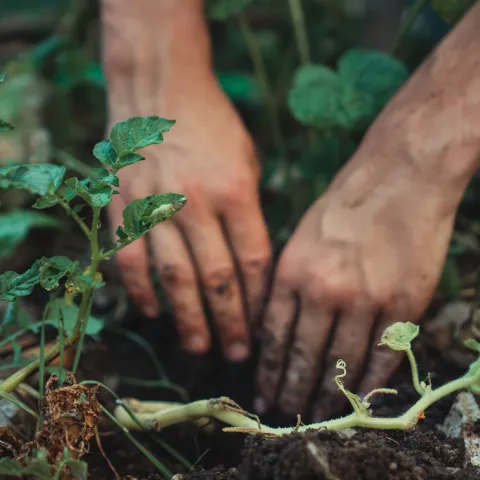
Transplanting Seedlings into the Garden
Like ‘hardening off’, choose your day and time carefully. An ideal time would be the late afternoon or evening of an overcast day with little or no wind. The worst day would be during a lengthy heat spell with lots of wind.
Water your seedlings well before transplanting. Then, dig a hole with the same depth at which the seedling is growing and a bit wider. (Tomatoes, broccoli, cabbage, and cauliflower should be set deeper than they are growing.) Mix in compost or a starter fertilizer at the bottom of the hole. When removing the seedling from its container, treat the roots gently, trying not to tear them. Also, if possible, handle the plant by its leaves rather than the stem. After firming the soil around the plants, water gently including the leaves. If there is concern about the effect of intense afternoon sun, you can choose to shade your seedlings by placing a board or piece of cardboard on the southwest side of the plants for a couple of days.
Finally, the plants will likely experience little or no growth for up to several weeks, but do not get discouraged. After that, the seedlings will have made themselves at home with roots that can support growth and your plants will begin to thrive.
Congratulate yourself on the careful fostering of your little seedlings, and celebrate when they give back to you the abundance of their fruiting.
September 2021: Growing Your Own Plant Starts
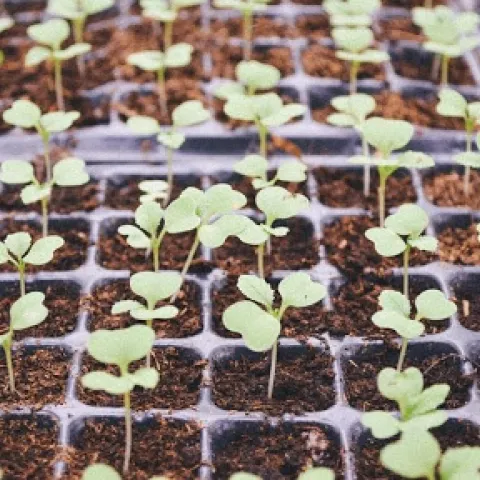
Growing Your Own Plant Starts
Even with access to a greenhouse, our team is not always successful at producing the number of plant starts that we want. So, we are paying extra attention to the most important factors that affect germination: sufficient light and warmth, seeding mix composition that provides enough oxygen, and careful watering without disturbing delicate seeds and seedlings.
Ideal Light and Temperature Conditions for Germination
After germination, your plant will need to be moved to a bright, airy location. A window facing south could provide adequate light although the more fail-safe solution is to use grow lights for about 12-16 hours per day.
Temperature: The ideal temperature for seeds to germinate is 65°F-75°F. If your house is cold, particularly at night, a warming mat may be needed. However, many gardeners find the top of the refrigerator is perfect for this purpose.
Seed Starter Mix
The ideal seed starter mix is fine and uniform in texture, well-aerated and loose, free of insects, disease organisms, and weeds, and able to hold moisture and drain well. The farm uses a mixture of about two parts aged compost, one part peat moss, and a one part mixture of perlite and vermiculite. The peat moss and compost are sifted to get a finer medium. Also, fertilizers like kelp meal and bone meal are added because once seeds germinate, they require feeding in order to grow well.
If making your own seed starting mix is too much work for you, then there are commercial seed mixes that you can purchase. Be sure to check the ingredients to determine if fertilizers have been added. If not, you will need to regularly apply a half-strength solution of a fertilizer like fish emulsion or a liquid fertilizer for houseplants once seedlings emerge.
Steps for Planting your Seeds
- Crush any lumps in your mix and then moisten until it feels like a wrung-out sponge.
- Fill washed and sterilized (one part bleach to nine parts water) containers to three-fourths of an inch from the top.
- Firm mix at the corners and edges so there is a uniform surface.
- Plant two-three seeds in each unit according to the depth indicated on the seed packet. If no seed packet is available, use the rule of thumb to plant to a depth that is two-four times the diameter of the seed.
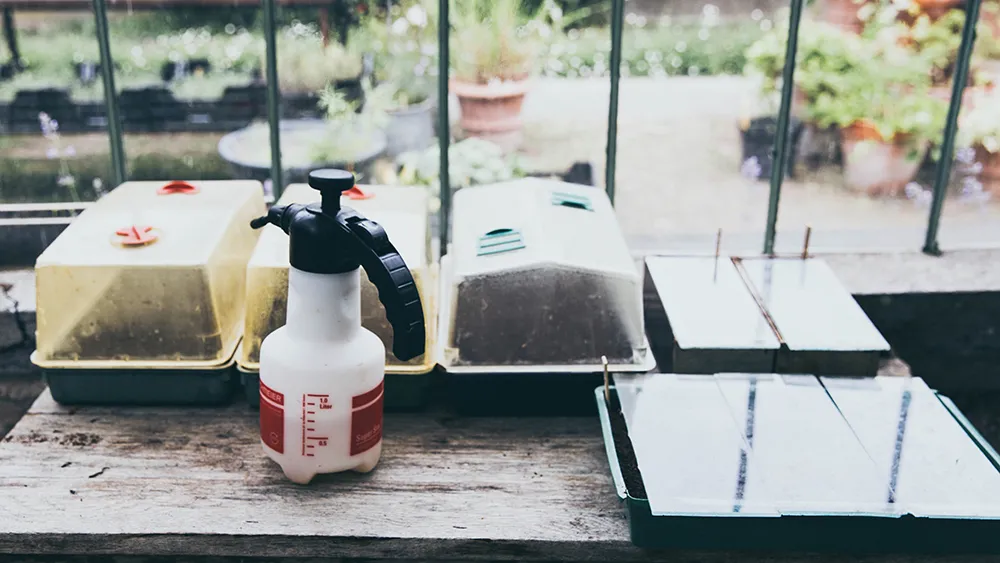
- After seeds are sown, water using a fine mist spray for small seeds and for larger seeds, use a gentle trickle of water on the surface of the container. Cover your container loosely (not airtight) with either plastic or a glass sheet. No further water is needed until seeds have sprouted.
- Remove cover when first seedlings appear. Lightly water and move your container to the brightest, airy spot you have.
- Begin watering regularly when the mix on top feels dry.
- Fertilize every other week if your seeding mix does not contain fertilizer.
- If more than one seed germinates, thin the weaker ones by using scissors to cut the stems.
Stay tuned for next month when we will answer this question: After you have your starts, what is the process for getting them into your garden?
August 2021: Growing Tomatoes and Physiological Problems
As the EDG team waits for the ripening of our tomatoes, we are sometimes discouraged because some of our plants or tomatoes do not look as perfect as we would want. What are those brown areas on the tomatoes and what’s causing the plant’s leaves to roll up? Often the cause is physiological, which is a fancy way of saying the symptoms are caused by environmental stresses and not by pests or disease.
Sun Scald
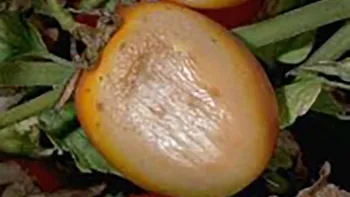
Description: often seen in mature green tomatoes and ones showing first hints of color. There are white or yellow shiny areas on the sides of the tomatoes that face the intense afternoon sun, and causes the fruit to rot if left on the vine.
Cause: intense, direct sun on fruit
Prevention: protect fruit by using wire cages or plant tomatoes closer together. Provide shade by using shade cloth or burlap for at-risk tomatoes during the most intense heat of the day and avoid pruning any leaf cover that will open fruit to exposure. Fertilize to promote leaf cover (The Farm uses a very diluted solution of fish emulsion every other week after fruit is set.)
Leaf Roll
Description: often occurs during the fruit set of first and second flower clusters, lowest or oldest leaves roll upward and then the sides roll toward the middle vein; the leaves stay green, but can become leathery and brittle. The plant may look wilted, normal growth most often continues leaving rolled leaves below.
Causes: heat, drought, root damage
Prevention: harden off seedlings before planting, be careful not to damage roots, limit early pruning and prune lightly as plant grows, maintain consistent moisture, avoid too much fertilizer
Blossom End Rot
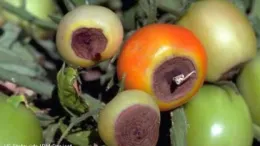
Description: most often seen on early maturing fruit, starts out as light brown spots on the blossom end of fruit turning to larger brown or black spot as fruit matures
Cause: inconsistent soil moisture resulting in decreased uptake of calcium by the roots
Prevention: keep soil moisture at a consistent level especially during setting and ripening of fruit. Do not let soil dry out or become saturated and the best irrigation practice is a good long soak every few days, always monitor soil moisture during lengthy heat spells, apply two to three inches of mulch to retain soil moisture. Avoid applying too much nitrogen during early fruiting.
Catfacing

Description: misshapen, large scars and holes at the blossom end of fruit, may have deep folds also, more common on large-fruited varieties like beefsteak.
Causes: happens during flower formation, but exact causes are unknown. Catfacing is more apt to happen after cold or cool temperatures a few weeks before bloom and heavy pruning may increase it.
Prevention: choose smaller-fruited varieties, prune only when necessary to protect fruit.
Splitting/Cracking
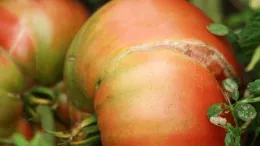
Description: cracks can either start on the stem end and move toward blossom end or occur in a ring or rings around the stem scar. This can happen at all stages of growth, but fruit is more susceptible as it matures or begins to color. It happens mostly in large-fruited varieties, exposed fruit is more susceptible.
Causes: the inside of the tomato grows faster than the skin around it. This can follow an abundance of water applied to soil following drier conditions or wide fluctuations in air temperature.
Prevention: water consistently to avoid large fluctuations in soil moisture, apply mulch to reduce drying out of soil, maintain good foliage cover by pruning only when necessary, or choose smaller- fruited varieties.
Poor Fruit Set
Description: plant growth can be robust, but blossoms do not develop into fruit.
Causes: happens after days of temperatures less than 55°F or greater than 90°F, or high concentrations of smog (ozone).
Prevention: provide at least six hours of direct sunlight, to keep plants as healthy as possible to avoid damage from pests or disease. Provide consistent moisture, do not apply excessive nitrogen fertilizer prior to fruit set, but instead use it after you observe fruits developing.
Last Thoughts on Physiological Problems in Tomatoes
* Provide consistent soil moisture
* Prune lightly and with a purpose of paying attention to timing
* Protect the roots
* Be thoughtful when applying fertilizer, less can often be more and timing is important
* Mulch, mulch, mulch
* Tomatoes can be ripened indoors, so pick damaged tomatoes early before they begin to rot
* Don’t be squeamish about imperfect tomatoes, just cut off the damage and enjoy that juicy beefsteak tomato!
Read more on tomato care and other tomato problems
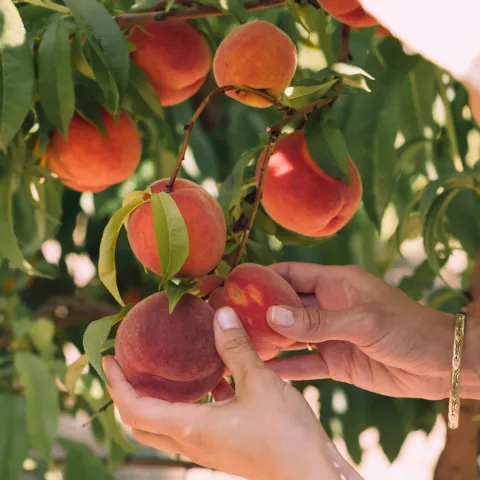
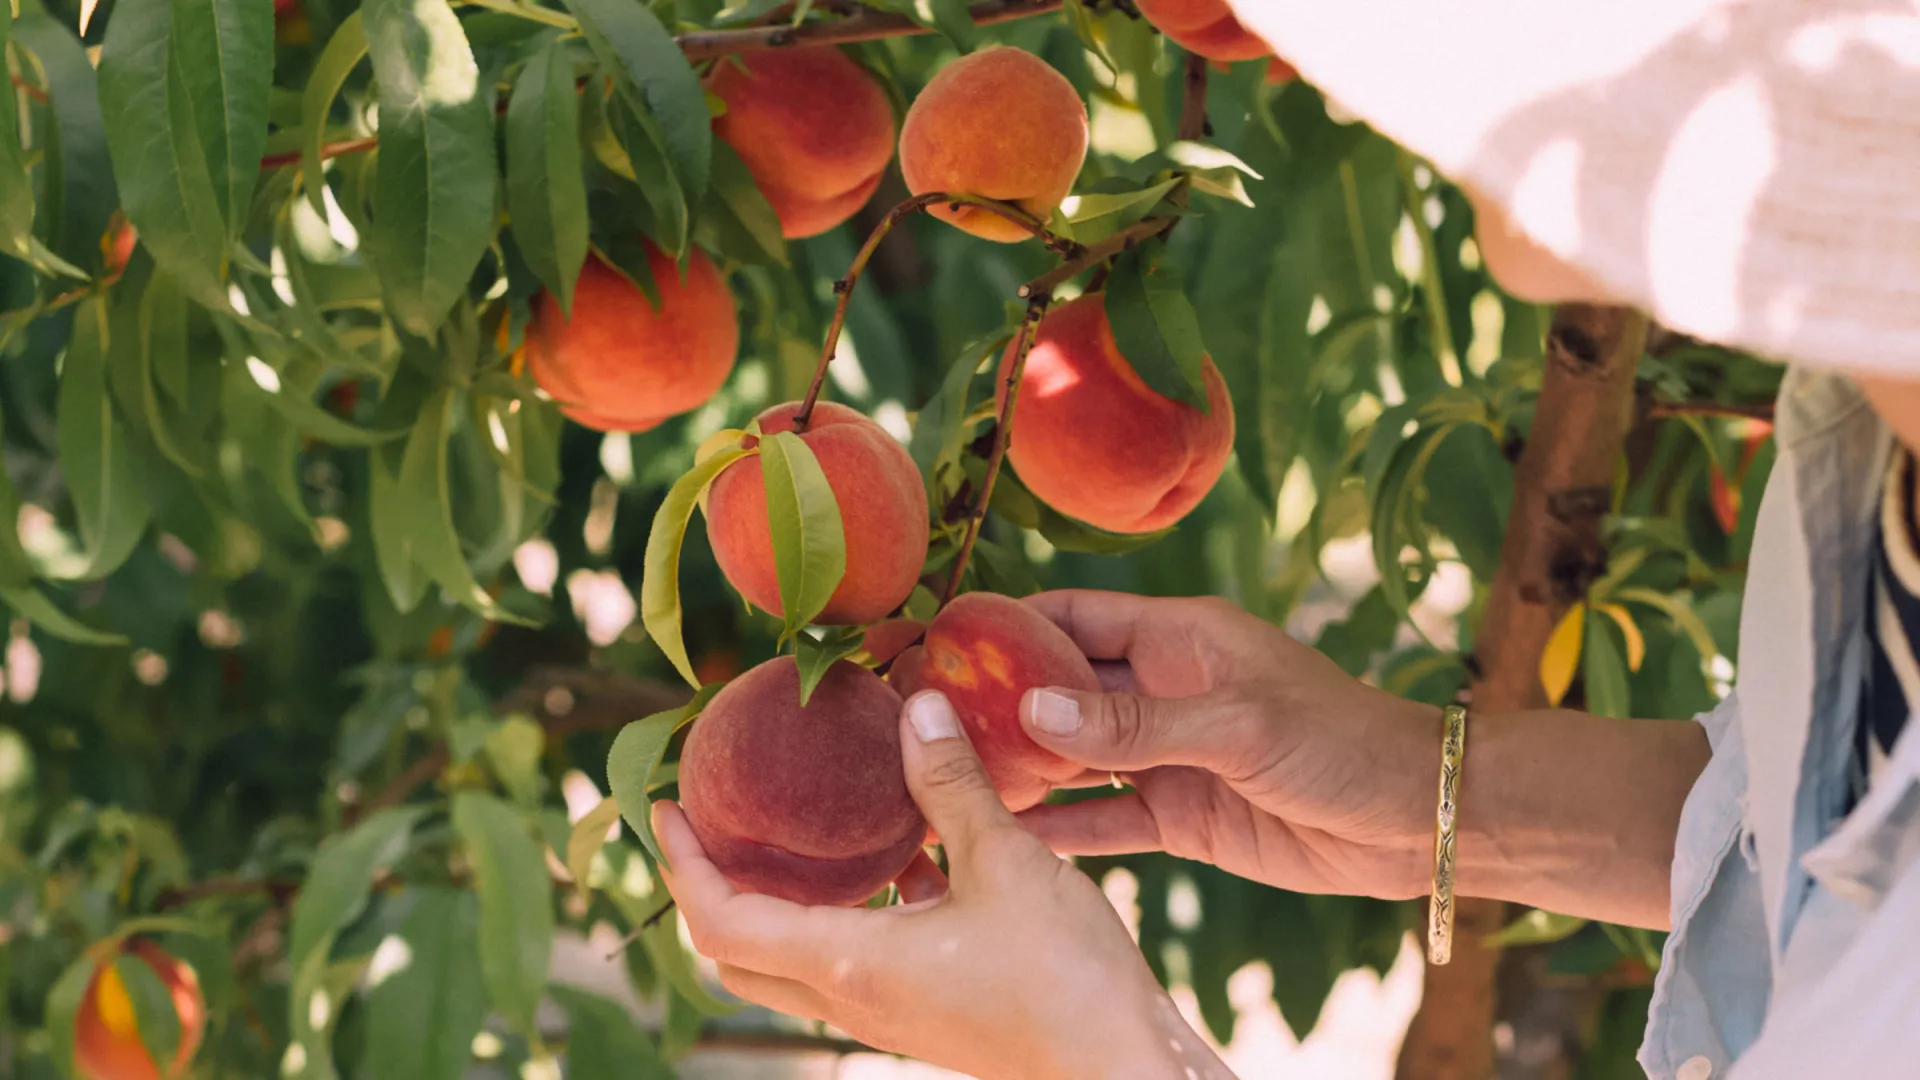
July 2021: Summer Harvesting Tips

General Harvesting Rules
Do not fall into the ‘bigger is better’ trap.
Peak quality often happens before a vegetable is fully mature.
Harvest in the early morning hours.
Plants regain moisture overnight. In addition, the starches formed during the day may be converted to sugars in the evening. You will get crisper, juicier, and sweeter vegetables in the morning.
Be gentle when harvesting.
If the vegetable is not easily picked, then use a knife, scissors, or pruner. Be careful not to damage the leaves and stems of the plant.
Pick frequently to prolong the harvest.
Keep in mind that a plant’s goal is to reproduce. If a plant’s fruit is allowed to fully mature, there is no need for the plant to continue flowering. Fruit production will slow or even cease.
Harvesting Tips for Specific Summer Vegetables
Cucumbers: Pick slicing types when six to nine inches long and pickling types between two to six inches. They should be bright green and firm.
Eggplant: Harvest when about four to six inches in diameter. Fruit should be shiny and uniform in color. When pressed slightly with a thumbnail, the indentation remains.
Peppers (Sweet): Pick when they are green and as soon as they stop enlarging. They can mature on the vine to red, yellow, or purple but the ripening process may keep the plant from setting new fruit. If you want abundance, pick them green.
Squash (Summer): The rule of thumb with summer squash is ‘the smaller the squash, the better it tastes.’ Pick every one -three day(s) and don’t let them mature on the vine. Pick when crookneck or straight varieties are a maximum of one and a half -two inches in diameter, zucchini is seven-eight inches long, and scallop types are three- four inches in diameter. But if you want your squash to be extra tender, harvest them before they reach the sizes listed above.
Squash (Winter): In contrast to summer squash, winter types (pumpkins, acorn, butternut, Delicata) must fully mature on the vine for that deep sweet flavor. It is better to leave them too long on the vine than not long enough. Wait for the squash to reach maximum size, the shell is so hard that it cannot be punctured with your thumbnail, and the color is dull and uniform. The final clue is that the green color of the stem changes and develops brown woody stripes. Nature tells you when the fruit is ready to separate from the vine.
Tomatoes: Tomatoes are complicated. You have two choices:
Fully Ripen on the Vine: A ripe tomato should feel heavy. It should also give slightly to the touch, neither too firm nor too soft, but just a little tender. For solid color tomatoes, the color should be even all over. Check the color on the bottom of a tomato, the deeper the color the riper it is. Some tomatoes tend to have green shoulders like Cherokee Purple. If the rest of the tomato appears fully ripe, then it is ripe for the picking.
Pick With First Traces of Color and Ripen Indoors: The central question with this method is whether, as a few studies have indicated, the vine shuts down the transfer of nutrients and flavor when the tomato begins ripening showing the first traces of color. After side-by-side comparisons, some people believe the flavor of a kitchen-ripened tomato is no different from a vine-ripened one. There are many reasons why you might want to use this method: to reduce the risk of cracking and blossom end rot, to deny the birds and squirrels a fully ripened tomato, and to avoid damage from a heat wave, which negatively effects ripening and causes sun scald. Also, too many tomatoes ripening at once can slow down further fruit production.
If you want to try this method, pick your tomatoes when they start to develop streaks of color down at the blossom end. Store them away from sunlight in a shallow dish or even on a baking rack so the air can circulate under them. They will ripen best at temperatures between 65°-70°.
So, when you take that morning trip to your garden and you have gently removed an armload of summer squash and ripe (or not quite ripe) tomatoes to bring to your kitchen, enjoy the sublime taste of your own hard work. There is nothing like it!
June 2021: Fertilizing Your Soil
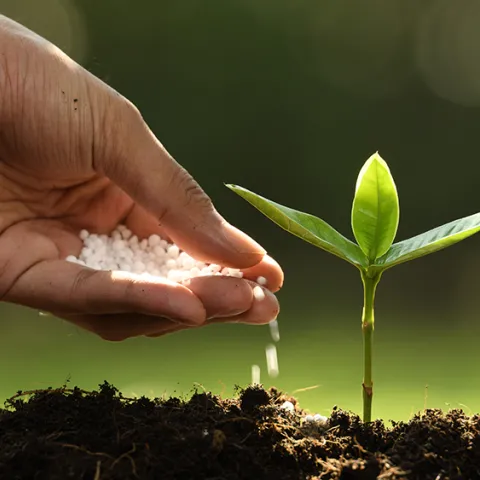
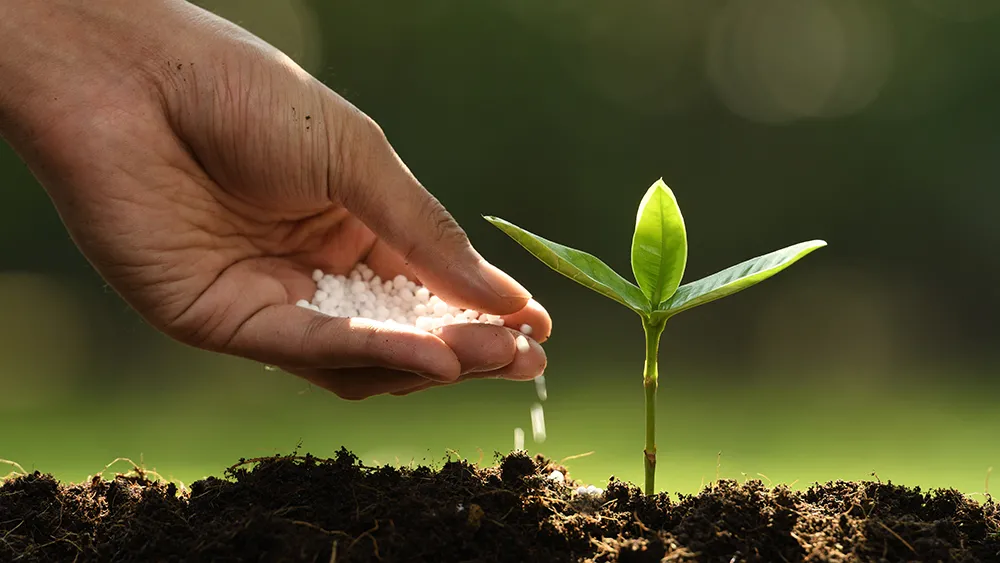
NPK?
Nitrogen - Of the three primary nutrients, California soil is most likely to be deficient in nitrogen. This deficiency is increased with the rainy season when nitrogen can be leached from the soil. Nitrogen is very important for photosynthesis; the most prominent symptom of nitrogen deficiency is chlorosis or yellowing of older leaves.
Phosphorus. California soils usually contain phosphorous naturally, although highly-weathered soils can be deficient. The symptoms of a phosphorous deficiency include stunted growth, purplish tint on leaves, and/or poor fruit or seed development.
Potassium. Additional potassium is usually not needed in California soils. However, if deficient, plants can experience slow growth, browning with dieback of leaf edges and tips, weak stalks, and small fruit.
NPK Testing
Prior to planting, a quick test of the NPK in your soil can alert you to the need for fertilizer. At most nurseries, you will find simple testing kits for NPK that also test pH. You will feel like a chemist as you shake water and tablets in test tubes and look at color charts to determine nutrient levels in your soil. This process can be intimidating for some. Many gardeners just watch their plants carefully and based on plant symptoms, they get a sense for what is needed. So what choices do you have when you determine a nutrient is needed?
Fertilizer Types
Inorganic: These fertilizers are composed of minerals and synthetic chemicals. They are fast acting and low in cost. But they contain salts and can leach and burn crops if applied incorrectly. They do not have the ability to improve the soil.
Organic: These are derived from plant or animal products. They are bulkier and more costly than inorganic fertilizers and can have odors. They are also slower to act. But besides adding nutrients, they work more naturally, improving the soil by decreasing density, which increases water filtration and the soil’s ability to hold nutrients.
Manures: These contain animal excrement, plant remains, or both. They are a good organic fertilizer and they improve soil structure. Many gardeners raise chickens and they get the benefit of chicken manure, the most concentrated NPK source of any type of manure.
Fertilizer Use on a Certified Organic Farm
Because we are located on a certified organic farm, the Edibles Demonstration Garden (EDG) can only use organic fertilizers that in most cases are labeled OMRI Certified. OMRI stands for the Organic Materials Review Institute and is a nonprofit organization that maintains lists of products that are FDA approved for use on certified organic farms.
The EDG most often uses compost to improve our soil. But compost alone does not provide the amount of NPK needed for heavy summer feeders like tomatoes. We also use worm castings from our worm bins. The approximate NPK percentages for worm castings are 5-5-3, which is much higher than compost.
In the past few months, we have used fish emulsion (4-1-1) as a nitrogen boost for our artichoke plants and worm compost ‘tea’ for our seedlings that had yellowing older leaves. We added blood meal (12-0-0) to our raspberries and a balanced fertilizer (7.5-5-7.5) to our fruit trees. Artichokes, raspberries, and fruit trees are perennials. Edible perennials often have specific fertilizer requirements especially in the spring so pay attention to their fertilizer needs also.
As you tend to your garden this summer, look for symptoms of nutrient deficiencies. Try to choose fertilizers that mimic the way nature provides nutrition for plants. The nutrient boost may take longer for you to see the benefits, but natural fertilizers pay off in the longer term.