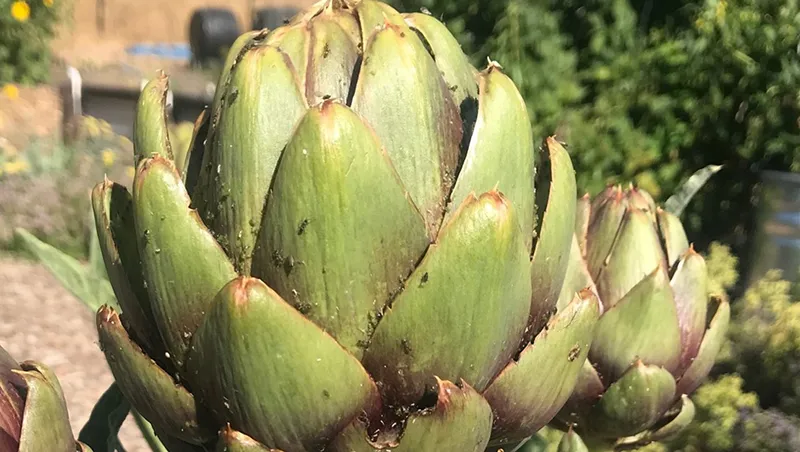
Fruit Trees
Growing Fruit Trees

Fruit trees need suitable climates, well-drained soil, proper planting, and maintenance throughout the season. It takes some planning and work to get them established, but once you do it's a joy to pick fruit fresh from the garden. Here's how to create your very own home orchard.
Site considerations
There are many things to consider when deciding which fruit trees are a good match for your garden, including:
• Careful evaluation of your microclimate
• Chill hours available (see below)
• Soil quality
• Access to water
• Space
• Protecting fruit from wildlife
Choosing a fruit tree

The best way to assure success is to choose fruit trees that work in your microclimate, and to grow them in the conditions they need. One important consideration is the number of chill hours required. Fruit trees (except citrus) need a specific number of cumulative hours of chilling (temperatures between 32°F and 45°F) to break winter dormancy. This varies by variety.
Preparation and planting
All edible plants require proper preparation and planting, and fruit trees are no exception. Fruit trees need proper spacing to avoid crowding and other problems. To get them off to a good start, make sure you follow guidelines for proper planting and handling.
Growing instructions
Cick on the individual trees below to learn how to grow healthy trees for sweet, delicious fruit for years to come.
> Apple
> Apricot
> Cherry
> Citrus
> Fig
> Olive
> Peach
> Pear
> Persimmon
> Plum
Pruning instructions
Pruning is different for every type of fruit tree. Most fruit trees benefit from summer and winter pruning. Refer to our full Pruning Library or click on the individual trees below for detailed tips, techniques, and timing.
Benefits of pruning fruit trees
• Controls size for easier harvesting and care
• Increases strength so weight of the fruit doesn't break branches.
• Distributes sunlight evenly throughout tree
• Regulates fruit bearing by removing excess fruitwood
• Renews fruitwood to continue strong buds and flowers
• Removes undesirable wood such as dead, broken, diseased, and crossing branches.
> HOW TO PRUNE COMMON FRUIT TREES
Maintenance
Use this maintenance schedule, which provides fruit tree care by type of tree and time of year.
Irrigation

Generally speaking, fruit trees need a large volume of water -- but not every day. The correct amount of water for a given fruit tree depends primarily on the size of the tree and the heat of the day. Here's detailed irrigation advice and guidelines, including examples of how long to water using different watering methods such as drip or sprinklers.
Pollination

Without pollination, flowers may bloom abundantly but will not bear fruit. To avoid this frustration, learn your fruit tree's pollination requirement. This will vary depending on your tree, climate, and regional conditions.
Fertilizing
Specialized fruit tree fertilizers can be purchased at nurseries. Be sure to follow all instructions. Do not add more fertilizer to help your tree “grow faster.” Excess fertilizer could damage your tree or get washed away in storm drains.
Fruit thinning

Fruit trees often produce more fruit than the branches can hold when young, and more fruit than the tree can support as it matures. Thinning fruit or removing extra fruit when the fruit is small is key to harvesting good-sized fruit. The amount of fruit to thin depends on the species and the overall fruit load on the tree.
Stone fruits produce one fruit per bud:
• Apricots and plums are fairly small, so they should be thinned to 2 to 4 inches apart on the branch.
• Peaches and nectarines should be thinned to about 3 to 5 inches.
• If excessive fruit have been set, more thinning may be required.
• If the fruit load is light, but one or two branches have a large amount of fruit, less thinning is required.
Pome fruits (apples and pears) produce a cluster of flowers and fruit from each bud:
• Thin to no more than one to two fruit per cluster, depending on the total fruit set and growing conditions.
• Retain the largest fruit whenever possible.
• When the crop is heavy, fruit should be spaced no less than 6 to 8 inches apart.
Propagation
If you eat a delicious peach and decide to plant the seed, you will be disappointed. Fruit trees require propagation by budding and grafting, which assures quality fruit plus disease resistance and other traits. Budded and grafted fruit trees are available bareroot in winter.
Pests and Diseases
Integrated Pest Management (IPM) encourages natural predators to control pests in your garden or orchard. Nature provides a balance between plant pests and the beneficial insects that control these pests. The less we do to tamper with that balance, the more likely it is to work successfully. How does it differ from organic gardening? Proponents of IPM are not opposed to the use of chemical controls, but use them only when necessary and only in amounts and with proper timing to minimize a negative effect on the beneficial bugs in the garden.
Learn more about common pests and diseases of individual fruit trees.
Harvest and storage
Ripening, harvesting, and storage requirements vary by the type of fruit. Taste and texture will be at their best if you use proper strategies. Here are guidelines for storage.
FRUIT TREE CARE CARDS TO PRINT & KEEP!
Use Master Gardener and master pruner Susan Pearson's pruning and growing cards for specific fruit trees common in Marin. Print them out and keep them for easy reference.

APPLE
FIG
LEMON
PEACH
PEAR
PERSIMMON
PLUM
POMEGRANATE
BACK TO EDIBLES
> What Edible Gardens Need
> Best Choices for Marin
> How to Prepare
> How to Plant
> Edibles in Containers
> Planting Calendar
> Grow & Care Sheets for Vegetables, Herbs & Fruits
> Tips & Techniques
> How to Maintain
> Fruit Trees
> Top 20 Edible Garden Problems
> Cover Crops & Soil Enhancements in the Off-season
> Conserving Water
•••••••••
Visit our EDIBLE DEMO GARDEN at IVC Organic Farm & Garden
News from the Edible Demo Garden
Seasonal Advice and Happenings at our Edible Demonstration Garden
Every month, the team at the Edible Demonstration Garden chronicles what's happening in the garden - planting, harvesting, problems and more. Check out our stories!
> BACK TO THE EDIBLE DEMO GARDEN
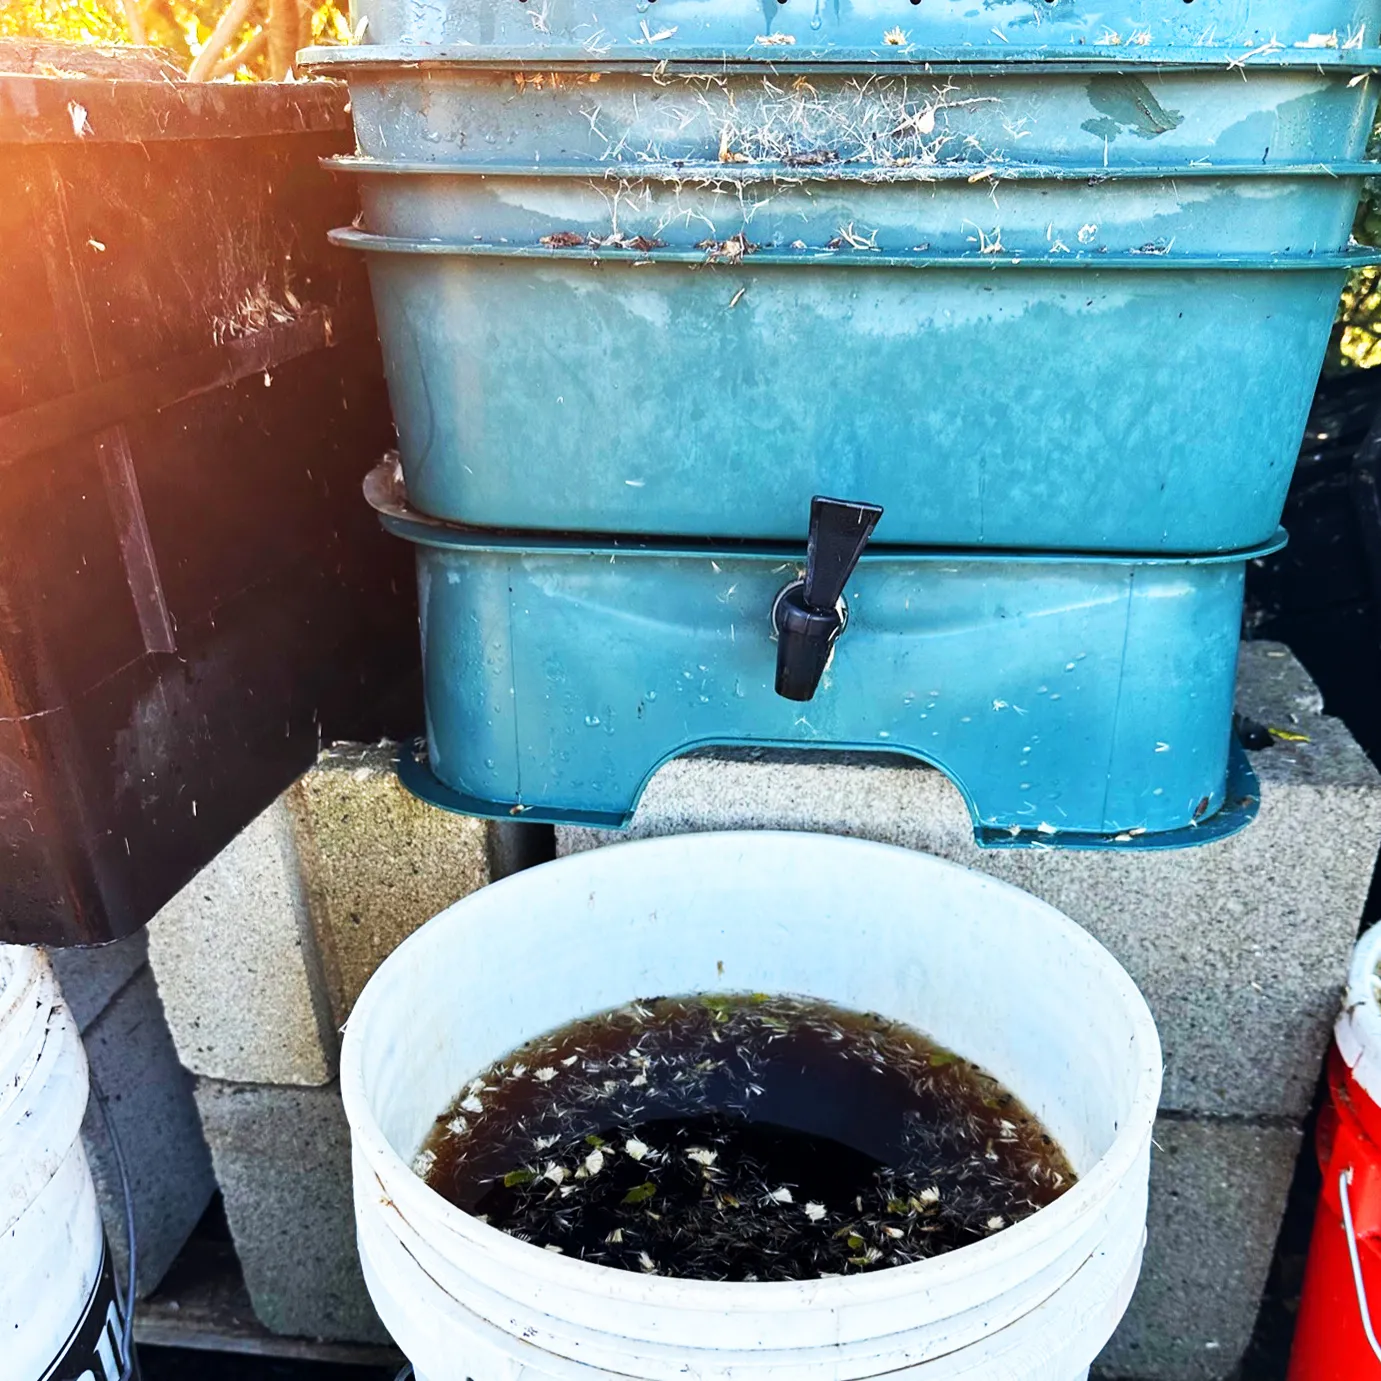
January 2023: Welcoming Worms
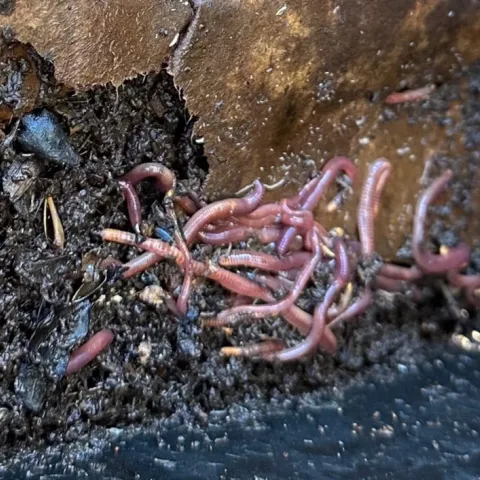
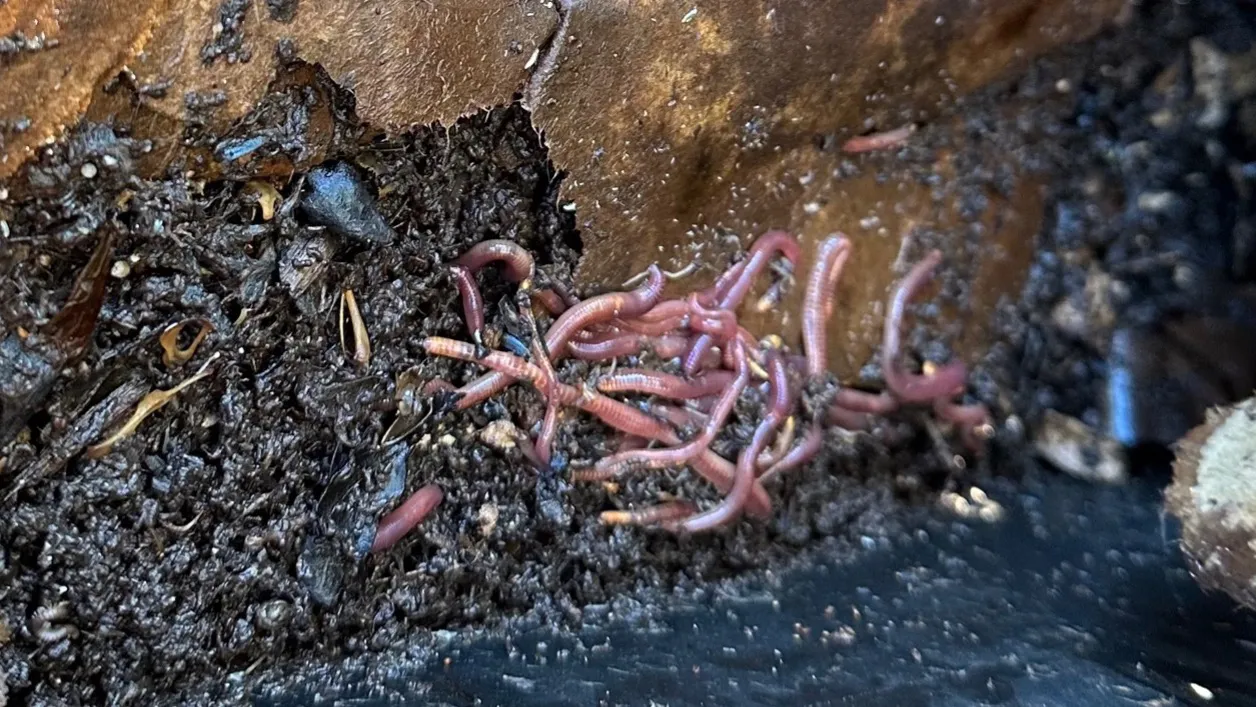
Not all the worms in the Edible Demo Garden hang out in the garden beds. There are captive worms living in a specially designed worm bin. These worms are turning cardboard, paper, and discarded produce into compost, or more specifically, vermicompost. The practice of raising worms to make compost is known as vermiculture. Because these worms are not free to roam the garden, they need a regular supply of food, sufficient moisture, and protection from temperature extremes. Worms can eat their own weight each day. When fed regularly, captive worms can survive year around in a cool, shady spot in Marin’s temperate coastal climate,
Are all earthworms the same?

Maintaining a worm friendly garden
Good garden practices are also good for earthworms. Regular additions of compost and mulch provide food and protection for plants and worms. Both thrive in soil that is moist but not soggy or too dry. Also, like plants, earthworms prefer fertile soil with a pH between 6.0 and 7.0 so the same organic amendments benefit both.
Why raise worms?
Historically, worms were not always appreciated. Charles Darwin is credited with bringing attention to their abilities and usefulness. Raising worms can be an interesting hobby with benefits. As pets, they are quiet and undemanding and when properly cared for, they don’t smell. They dispose of unwanted food scraps and produce compost that can improve the quality of edible crops. There is a seasonal sequence to their work and if they overpopulate the worm bin, they can be set free in the garden.
Watch below for instructions on how to make a worm bin, from the Marin Master Gardeners YouTube Channel!
December 2022: Horseradish Harvest
What kind of plant is horseradish?
Horseradish, Armoracia rusticana, is an herbaceous plant in the Brassicaceae or mustard family. It can be considered a root vegetable, although it is primarily used as a spice or condiment. It is native to southeastern Europe and has been cultivated for around 3,000 years for both its taste and its medicinal properties. It is rich in vitamin C, calcium, and other nutrients and has been shown to have anti-inflammatory, anti-bacterial, and even anti-cancer health benefits.
Horseradish is related to Wasabi japonica, the source of the wasabi paste usually eaten with sushi. Due to limitations in the cultivation and availability of the Japanese wasabi plant, western horseradish, with green coloring added, is often used as a substitute for true wasabi.
Horse radish plants are grown from root cuttings planted in late winter or early spring. Although classified as a perennial, horseradish plants are best treated as an annual because after two or three years the roots become too large and tough. The plants prefer a sunny location with well-amended soil and regular watering. Any fertilizer used should be high in potassium and phosphorus and low in nitrogen. Too much nitrogen encourages leafy growth and underdeveloped roots.
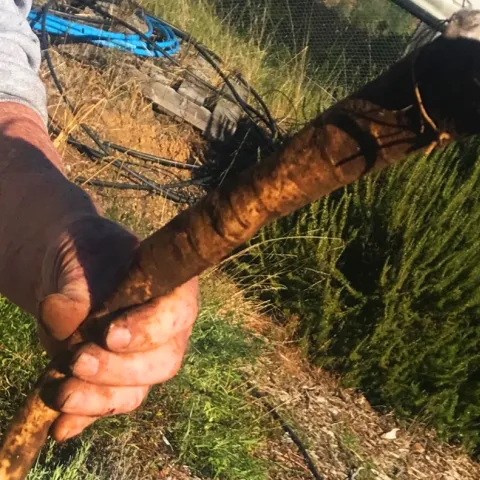
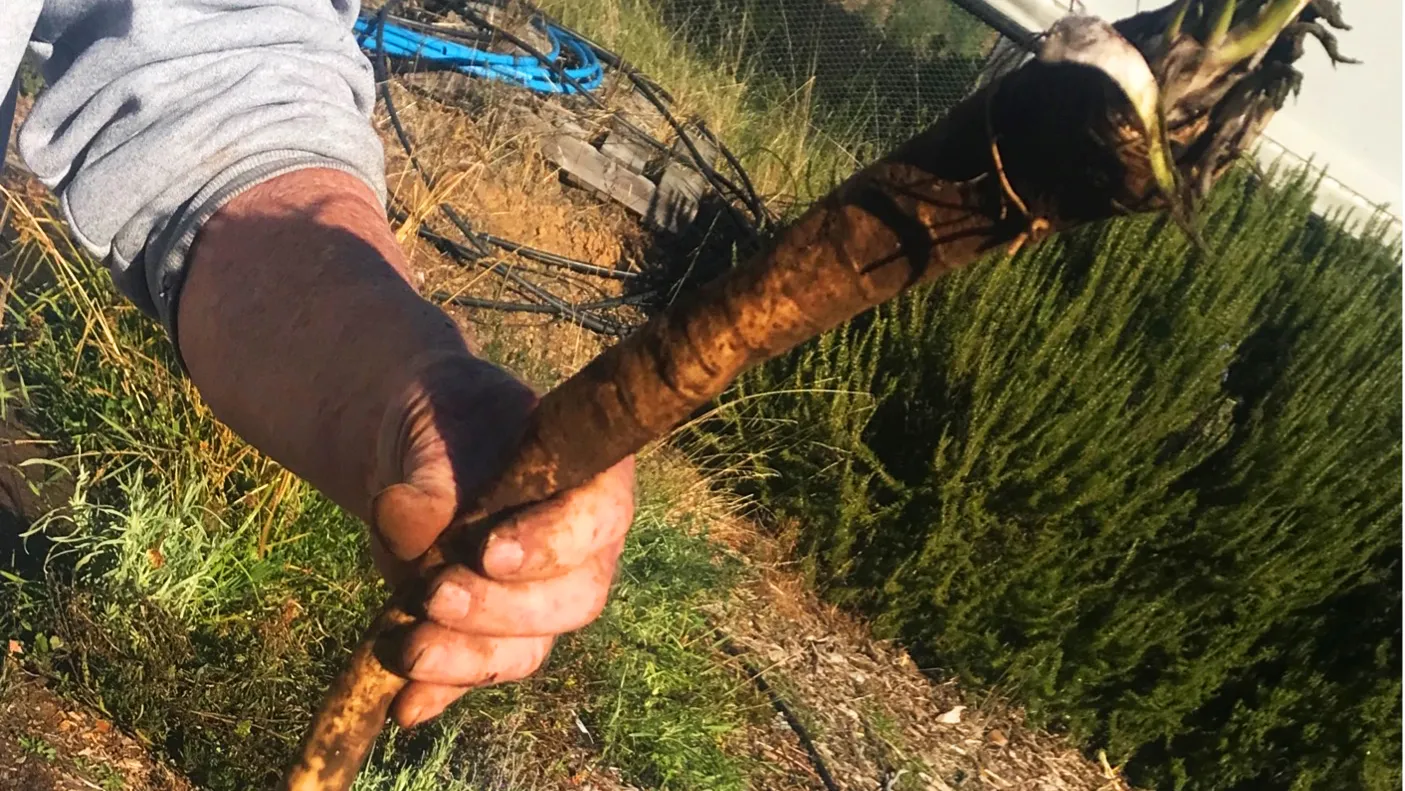
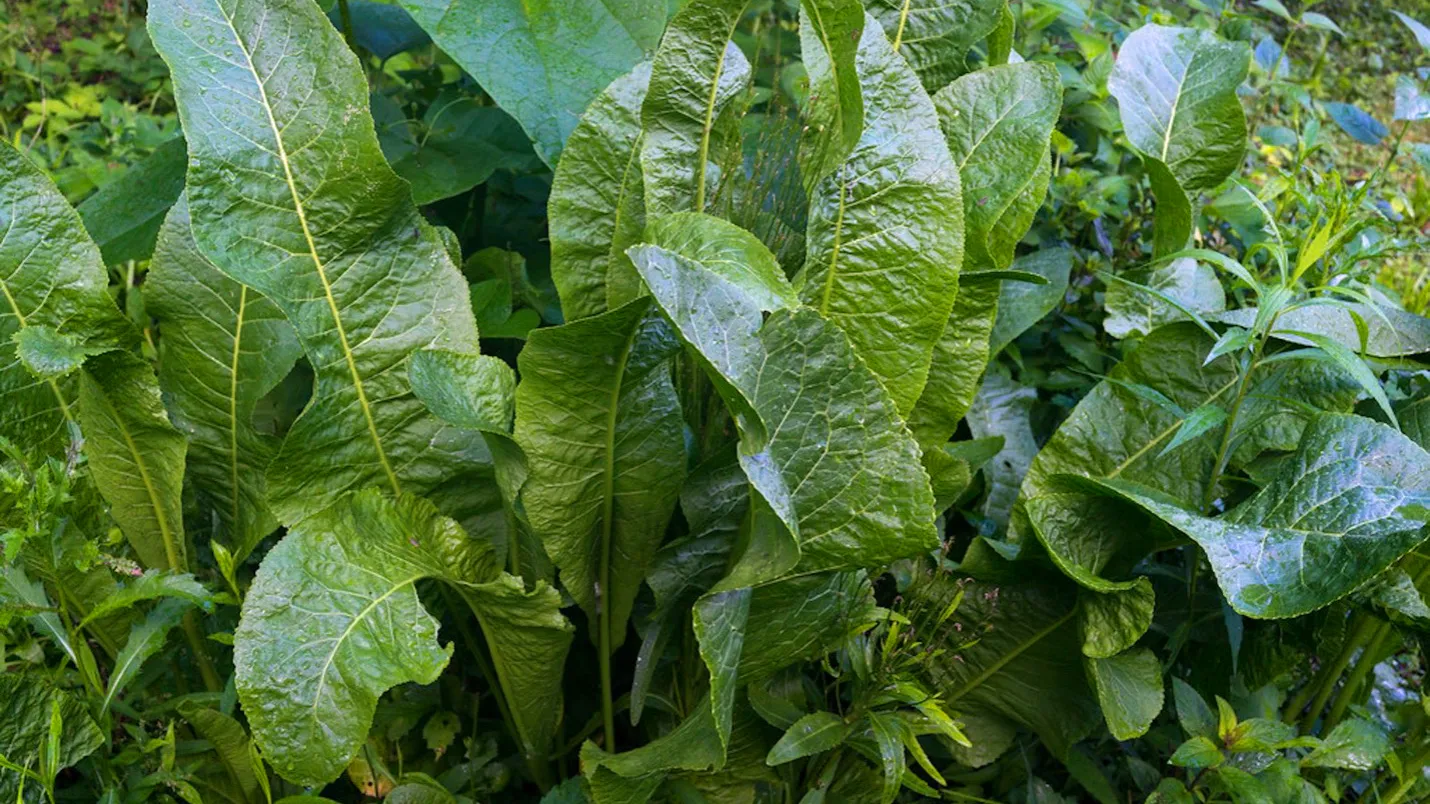
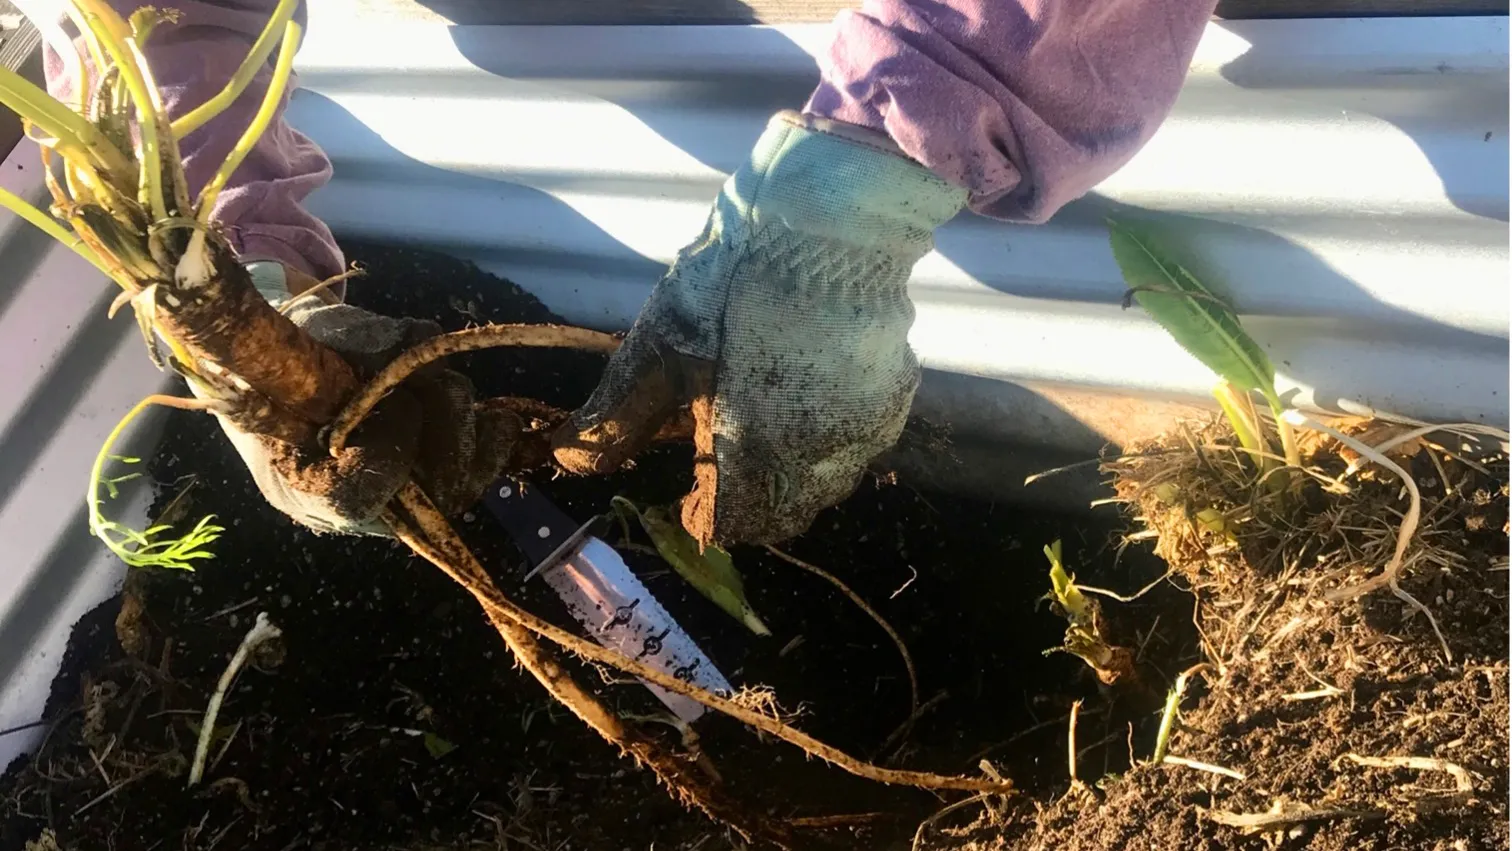
In the spring the horseradish plant produces large, weedy-looking green leaves. Underground, the white, fleshy roots develop. By late fall the roots should be around the size of a large carrot and ready to be harvested. The roots are fragile and need to be dug up carefully. Even in the fine textured soil in the Edible Garden raised beds, it took considerable care and effort to successfully extract the intact roots. While harvesting, some root cuttings were preserved and replanted for next year’s crop.
Horseradish is relatively easy to grow, and one plant can provide enough for the average family. However, it works best in a dedicated garden area because any root fragments left in the ground after harvest will produce a new plant.
The bite and sinus-clearing aroma of horseradish is produced by the volatile compounds that are released when the root cells are crushed. The roots are prepared by cleaning them, peeling them, and grating them finely. The grating is best done in a food processor with a little water added to aid in the grinding process. Ground up fresh horseradish is very potent, much more than chopped onions, so good ventilation and eye protection is strongly advised.
Once the root is finely ground, it’s time to add a tablespoon or two of vinegar to the mixture. Vinegar stops the reaction of the volatile compounds and controls the hotness of the ground horseradish. The grated horseradish can then be transferred to jars. It will keep in the refrigerator for at least a month and can be used in a variety of recipes. Most who have tried it agree that the taste of fresh horseradish is far superior to the supermarket options.
November 2022: Fall Garden Activity

As in the spring, conditioning the soil has high priority. When the warm season plants finished production, they were consigned to the compost bins where they will decompose and eventually be returned to the garden. To replace the nutrients used up by the summer crops, compost and amendments were added to the vacant beds in preparation for the new seeds and starts. The area known as the “back forty”, was cleared and prepared for planting field peas and vetch. These cover crops will help to improve the soil structure and increase fertility by adding organic matter. They will also prevent the overgrowth of weeds and reduce erosion.
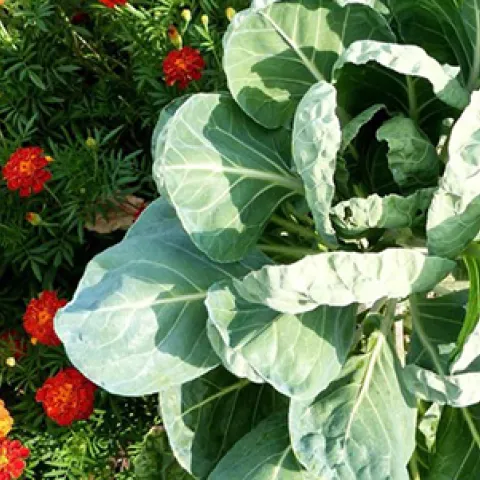
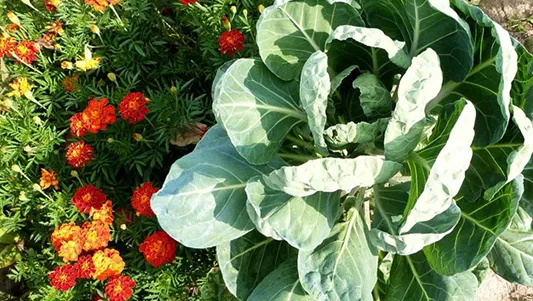
Growing a Winter Garden

- Cool season crops grow best when air temperature is 55-75 degrees and soil temperature is about 40 degrees. When soil is cooler, plant growth slows.
- Day length and sun exposure also determine the rate of plant growth. Shorter days and less sun result in decreased photosynthesis and slower growth.
- Timing is important. Plants need some time to grow before the weather turns cold. Microclimates can make a difference in determining the best planting time. The sunnier and warmer the location, the later in the fall a winter garden can be planted.
- Frost is more damaging than cold weather alone. If frost is likely, it is best to choose tolerant varieties or plan to provide protection.
- Containers and raised beds can extend wintertime planting and allow for more plant choice options.
Find more information about planting times on this website.

- Leafy greens - arugula, spinach, Swiss chard, lettuces, and kale
- Root crops - carrots, beets, and radishes
- Brassicas - broccoli, cauliflower, and cabbage
- Legumes – peas
- Alliums – onions, garlic, and leeks
Information about the varieties of these cool season crops that grow well in Marin can be found here.
Varieties of cool season crops recently planted in the Edible Demo Garden include ‘Touchstone’ beets, ‘Bilko’ cabbage, ‘Tatsoi’ greens, and ‘Easter egg’ radishes.
October 2022: The Many Benefits of Growing Herbs

- Most are not fussy. They can tolerate less than ideal garden environments and even survive some extreme weather conditions.
- Herbs can be easily integrated into a vegetable garden and make good neighbors for other crops.
- They are cost effective. Herbs are inexpensive to grow, and the small amounts needed for many recipes can be easily harvested as needed.
- Herbs can do double duty as ornamentals. Many perennial herbs stay green or gray green all year and make attractive landscape plants.
- The blossoms on herbs attract pollinators and other beneficial insects.
- Herbs are not usually bothered by pests and diseases.
- Deer usually leave herbs alone, especially those with strong tastes and scents.
- Herbs grow well in containers and are a good choice when garden space is limited.
What is an herb?
Herbs are considered different from spices based on the part of the plant that is used. Spices are derived from the roots, bark, fruit, berries, and seeds of plants. A plant such as Coriandrum sativum, also known as Chinese parsley, can be both an herb and a spice. It is the herb called cilantro when its green leaves are used, and the spice called coriander when its seeds are used. Because spices are more commonly grown in tropical climates, herbs are generally better suited to Bay Area gardening.
Annual versus perennial herbs

Perennial herbs die to the ground at the end of each growing season and return the next year from the roots. Perennial herbs in the Edible Demo Garden include oregano, thyme, lemon verbena, lavender, chocolate mint, chives, Mexican tarragon, anise hyssop, and pineapple sage. These plants too are summer producers and once the leaves or flowers begin to fade in the fall, they are cut back to prepare for growth the next year. The leaves of perennial herbs can be used fresh in cooking or making teas or dried for later use.
How to grow herbs
Because many common herbs originate from the Mediterranean region, they grow well in the Bay Area climate. They thrive in full sun, well-drained soil, and dry summers. While most require some regular watering, some, such as thyme, oregano, and sage, are drought tolerant. Herbs do not demand much additional fertilization but benefit from annual applications of compost to improve soil structure.
Detailed information on growing herbs can be found on this website at: https://marinmg.ucanr.edu/EDIBLES/EDIBLES_GROW_SHEETS
Join Marin Master Gardeners on October 8th for a public presentation: Herbs for All Seasons: Beyond Parsley-Sage-Rosemary and Thyme.
September 2022: Introducing the Honeyberry
![]() A small bush grew unnoticed at the edge of the Edible Garden for several years until a new garden pathway was needed and the bush was in the way. Only then did a garden volunteer find a tag identifying the bush as a honeyberry. This prompted some research because few of the seasoned Master Gardeners involved knew much about honeyberries. The bush had produced a few berries the previous summer but just when it was planted and who had planted it was a mystery.
A small bush grew unnoticed at the edge of the Edible Garden for several years until a new garden pathway was needed and the bush was in the way. Only then did a garden volunteer find a tag identifying the bush as a honeyberry. This prompted some research because few of the seasoned Master Gardeners involved knew much about honeyberries. The bush had produced a few berries the previous summer but just when it was planted and who had planted it was a mystery.
What is a honeyberry?
The Honeyberry, Lonicera caerulea, is new to most American growers, but has a long history in the colder areas of the northern hemisphere. Most varieties originated in either Russia or Japan where it is called haskap. Its other name, edible blue honeysuckle, is a clue to its family membership. It is a non-invasive relative of honeysuckle, and its blooms look a lot like honeysuckle blossoms. it produces a nutritious edible fruit with a unique sweet-tart flavor. The fruit resembles elongated blueberries and is higher in antioxidants than blueberries. Honeyberries are delicate and don’t transport well, so don’t look for them in the grocery store.
What are the growing requirements for honeyberries?
![]() In the right conditions, honeyberry plants are easy to grow and can live up to 50 years. Honeyberries-
In the right conditions, honeyberry plants are easy to grow and can live up to 50 years. Honeyberries-
- are cold-hardy and can tolerate clay and alkaline soils,
- require little yearly maintenance,
- grow best in full sun but may need protection in hotter climates,
- have shallow roots and need frequent watering until established,
- appreciate being mulched to protect the roots,
- usually need a honeyberry bush of a different variety nearby for cross-pollination,
- like many perennial fruiting plants, require a certain number of chill hours to produce fruit.
Can a honeyberry bush be successfully transplanted?
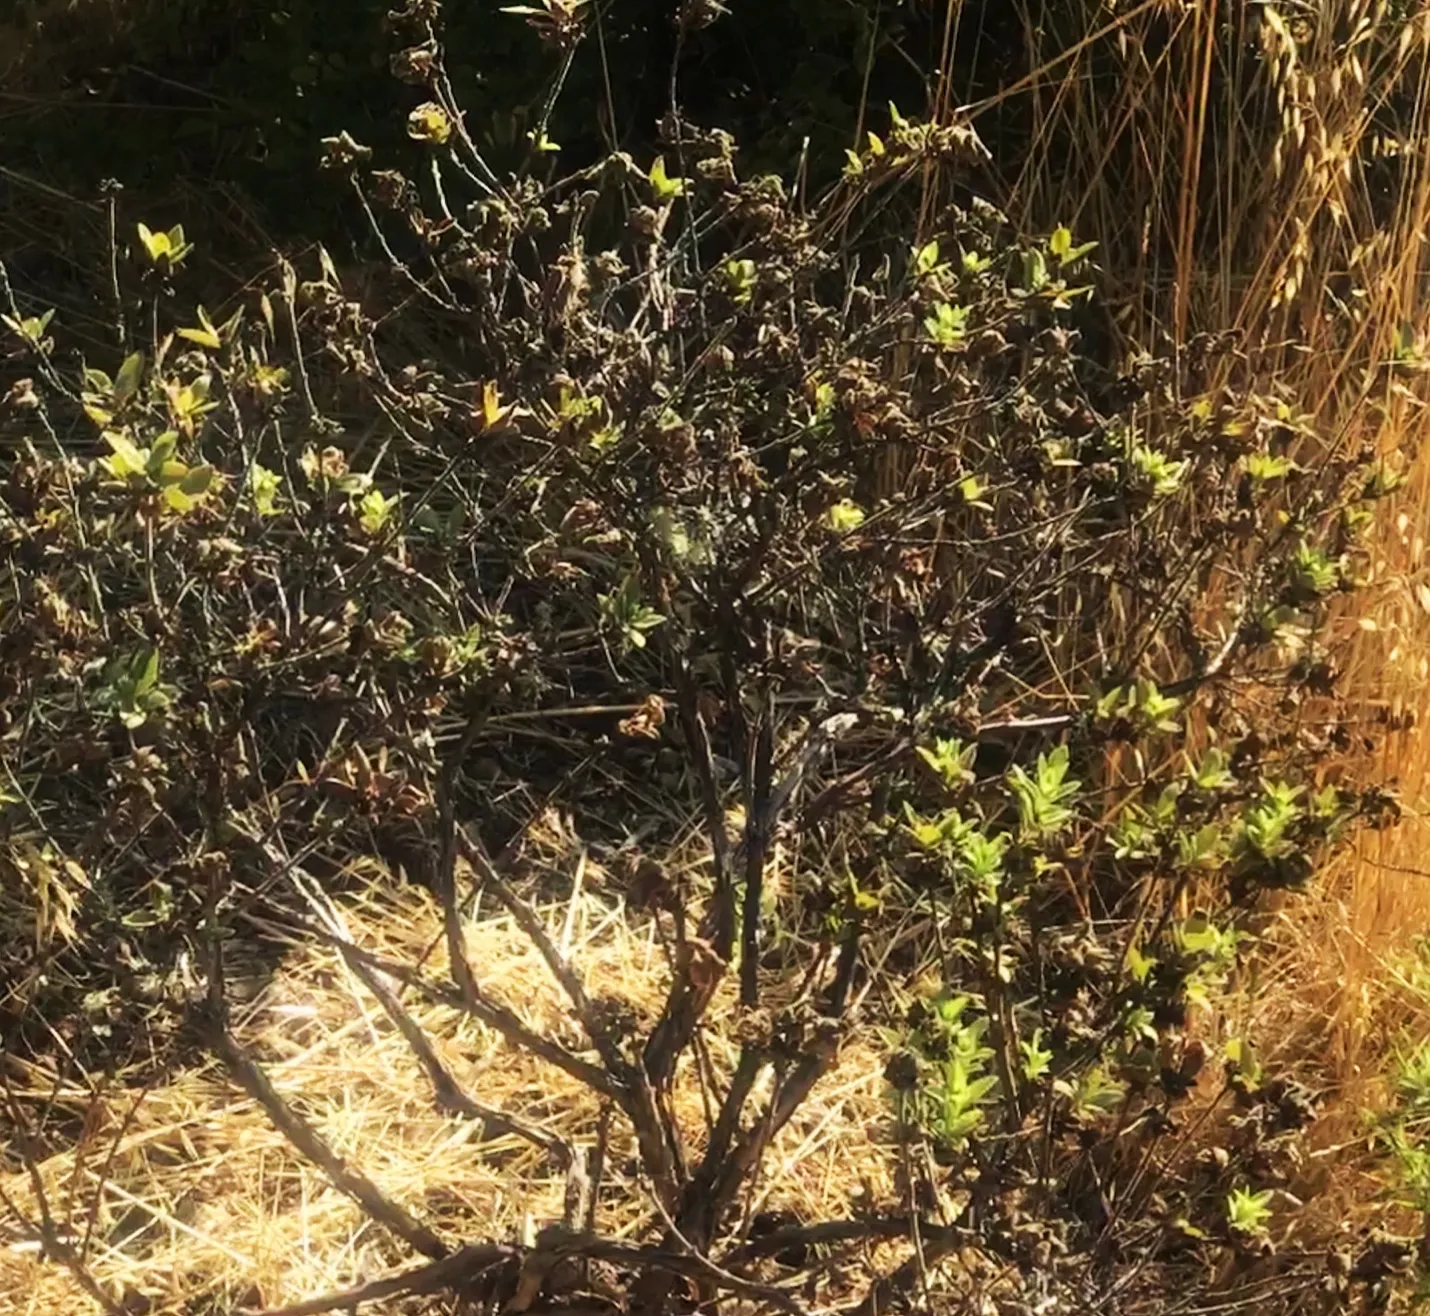
Transplanting an established bush around four feet in height and width took some planning and effort. Care was taken to protect the roots by digging deeply around the bush perimeter and cautiously removing as much of the root ball as possible. The new site was excavated and watered well, and the honeyberry bush was nestled into its new home. Drip irrigation was added in order to provide adequate water for the roots to reestablish. Five months have passed, and the honeyberry bush is still alive but showing some stress. It’s too soon to know if the transplant was successful.
Tempted to try growing honeyberries?
You probably won’t find honeyberry plants in local nurseries, but there are many varieties available from growers online. Since honeyberries originated in cooler climates, it’s important to select varieties with the lowest number of chill hours. You will also need at least two plants of different varieties that bloom at the same time. Growing your own unique tasty fruit could be worth the challenge.
August 2022: Managing Pests in the Organic Garden
Cooperation with nature is a guiding principle of organic gardening and this includes the management of unwanted bugs and critters. Organic gardeners steer clear of toxic pesticides and instead implement integrated pest management strategies starting with those least harmful to the environment. This is earth-friendly gardening in practice.
Integrated Pest Management (IPM)
IPM is based on the understanding that the most effective long-term way to manage pests is to use a combination of methods that minimize risks to people and the environment. These approaches fall into the following categories.
- Biological controls – Most of the creatures found in gardens are not pests and are benign or beneficial. Biological controls engage natural enemies in pest management. Good bugs reduce pest damage by eating the bad bugs. Using ladybugs to reduce aphids is only one of many examples of the action of natural enemies. Birds, lizards, and insects, such as praying mantis, are also beneficials but are not as specialized.

- Cultural controls – Good garden practices such as nurturing the soil, clearing out debris, properly managing irrigation, and removing infected plants can also deter pests. Rotating crops reduces the chance that pests will become established in a certain location. Companion plantings can provide protection by luring pests away from their favorite food sources.
- Mechanical and Physical Controls – Blocking pests from access to garden plants is the most effective way to prevent damage. In the Edible Garden, where gophers are abundant, plants are protected with underground wire mesh. The lost sunflowers were in an area of the garden without gopher protection. Row covers effectively keep out both birds and insects but are not useful for plants with flowers requiring pollination.
Frequent monitoring for signs of pests is key to reducing crop damage. Many times, a hard spray of water will wash off sucking insects such as aphids and their ant companions. Hand removal is always an option for larger nuisances such as cucumber beetles, slugs, and hornworms.
- Chemical controls – The use of selective, less toxic pesticides can be included among IPM strategies but only when other methods have been ineffective. Chemicals are rarely used to control pests in the Edible Garden. As part of the Indian Valley Organic Farm and Garden, the Edible Demo Garden must adhere to Marin Organic Certified Agriculture standards in terms of chemical use. Only approved non-synthetic pesticides can be used.
More information on controlling pests is available on this website at: http://marinmg.ucanr.edu/PROBLEMS/
Detailed information on IPM and links to specific pest problems can be found at: http://ipm.ucanr.edu/index.html
July 2022: Plant Partners

 Companion Planting
Companion planting as a gardening technique has been practiced for generations, based on discoveries about how combining two or more plant species together can provide mutual advantages and enhance growth and production. The classic example is the Native American “three sisters” plantings combining corn, beans, and squash. Ideally, the corn provides structure to support the pole beans and the squash spreads out underneath the other plants. The best plant companions do more than just grow well side-by-side, they interact and form partnerships which benefit one or more of them.
How Plant Partnerships Work
Many old beliefs about which plants make good companions are based on folklore or trial and error rather than sound science. Fortunately, there are now numerous credible studies and controlled experiments that are helping to explain the ecosystems that enable edible garden plants to thrive. There are many ways in which one plant can influence another by either enhancing conditions for growth or increasing protection against threats.
- Enhancing conditions for growth
Certain plant partners can improve soil composition by breaking up heavy soil or assisting in nitrogen transfer. Companion plants can increase the number and diversity of pollinators leading to higher yields. A sturdy upright plant can serve as a living trellis to support a vine crop. Plant partners can also promote the health of beneficial soil-dwelling organisms and assist in the movement of nutrients within the soil.
- Increasing protection against threats
Probably the most common goal of companion planting is to manage pest insects. Studies have demonstrated that some plant partners are able to confuse pests and make it harder for them to find their preferred host plant on which to feed or lay eggs. The chemical and visual cues on which the insect pests rely are masked by the companion plant. Weed management without herbicides can be another plant partnership benefit. Some plants produce chemical compounds that inhibit weed growth and others act as living mulch. Finally, there is evidence that certain plant diseases can be suppressed through plant partnerships.
A Few Examples of Tested Plant Partners
- Peas and Lettuce – Both are cool-season crops with different growth structures. The peas climb while the lettuce stays low. The peas benefit the lettuce by shading them in warmer weather and providing nitrogen via the mycorrhizal network.
- Pak Choi or Radish and Eggplant, Peppers, and Tomatoes – Pak choi and radish are favorites of flea beetles. Planting radish or pak choi a few weeks ahead of the other vegetable crop can serve to trap the flea beetles and reduce damage to other vegetables.
- Tomatoes and Basil – This combination can work in the garden as well as in the kitchen. The basil serves to mask the tomato plants from thrips, small sucking insects that can damage tomato plants and fruit.
- Cosmos and Cabbage - Combining members of the aster family (which includes coreopsis, yarrow, zinnias, and marigolds) with cabbage, broccoli, cauliflower, kale, and other members of the cabbage family has been shown to reduce aphid numbers by attracting beneficial, aphid-eating insects.
Diversification is Key
Plant partnerships work because they support diversity in the garden and contribute to a healthy ecosystem. Not all plant partnerships work as planned in home gardens. There can be unwanted competition, the timing might be off, or the location might not be right. But even when there seems to be no measurable success, the hidden benefits of an environmentally friendly garden can be appreciated.
More information on growing edibles is available on this website at http://marinmg.ucanr.edu/EDIBLES/.
June 2022: Welcome Pollinators!

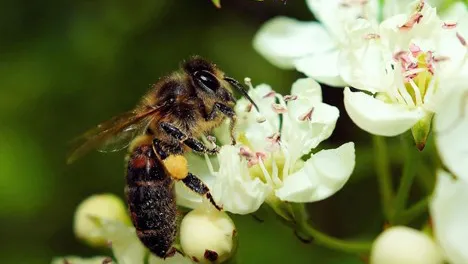
What’s so complicated about pollination?
Pollination occurs when pollen from a stamen or male part of a flower is transferred to the pistil or female flower part. Germination begins when the pollen reaches the ovary of the flower and fruit development follows. Most flowers, however, need help getting the pollen onto the pistil and that’s where the pollinators come in. While we commonly think of bees and other insects as pollinators, pollen is also transferred by wind, water, birds, bats, and small mammals. Pollination is the unintended consequence when a bee or butterfly moves from flower to flower to gather pollen or sip nectar and drops off extra grains of pollen in the process.
Types of pollination
While there are many types of pollinators, there are only two types of pollination – self-pollination and cross-pollination.
- Self-Pollination A flower is considered self-pollinating if the whole process can occur within the same flower. Transfer of pollen from stamen to pistil only requires some air movement. Lettuce, peas, beans, tomatoes, eggplant, and peppers are self-pollinating.
- Cross-Pollination Cross-pollination requires the transfer of pollen from the stamen of one flower to the pistil in another flower. In some edibles, the flowers need to be on different plants. Spinach, beets, carrots, corn, onions, cabbage, and squash are cross-pollinating.
Pollination in fruit trees
Most fruit trees are cross-pollinating, and many require pollination between two or more trees, sometimes of a different variety. A lone apple tree, for example, may produce little or no fruit if there is no other apple variety close enough to provide bee or wind carried pollen.
Pollination in cucurbits
Plants in the Cucurbitaceae family, which includes cucumbers, squash, and melons, produce separate male and female flowers. Typically, the male flowers appear first followed in a week or so by the female flowers. The female flowers can be recognized by the swelling at the base of the flower that looks like a miniature fruit. Bees do the major work of transferring the pollen from the male to the female flower.
Pollination Problems
Pollination depends on the right environmental conditions for both plants and pollinators. Too much rain and cold, lack of sun, extreme heat, drought, and the presence of pesticides can all reduce the formation of healthy flowers and discourage pollinators. Pollination may not occur, or it may be incomplete, affecting the quality, amount, and appearance of the fruit. In cucurbits, the timing for the female flowers may be off and there may not be enough male flowers remaining to pollinate them.
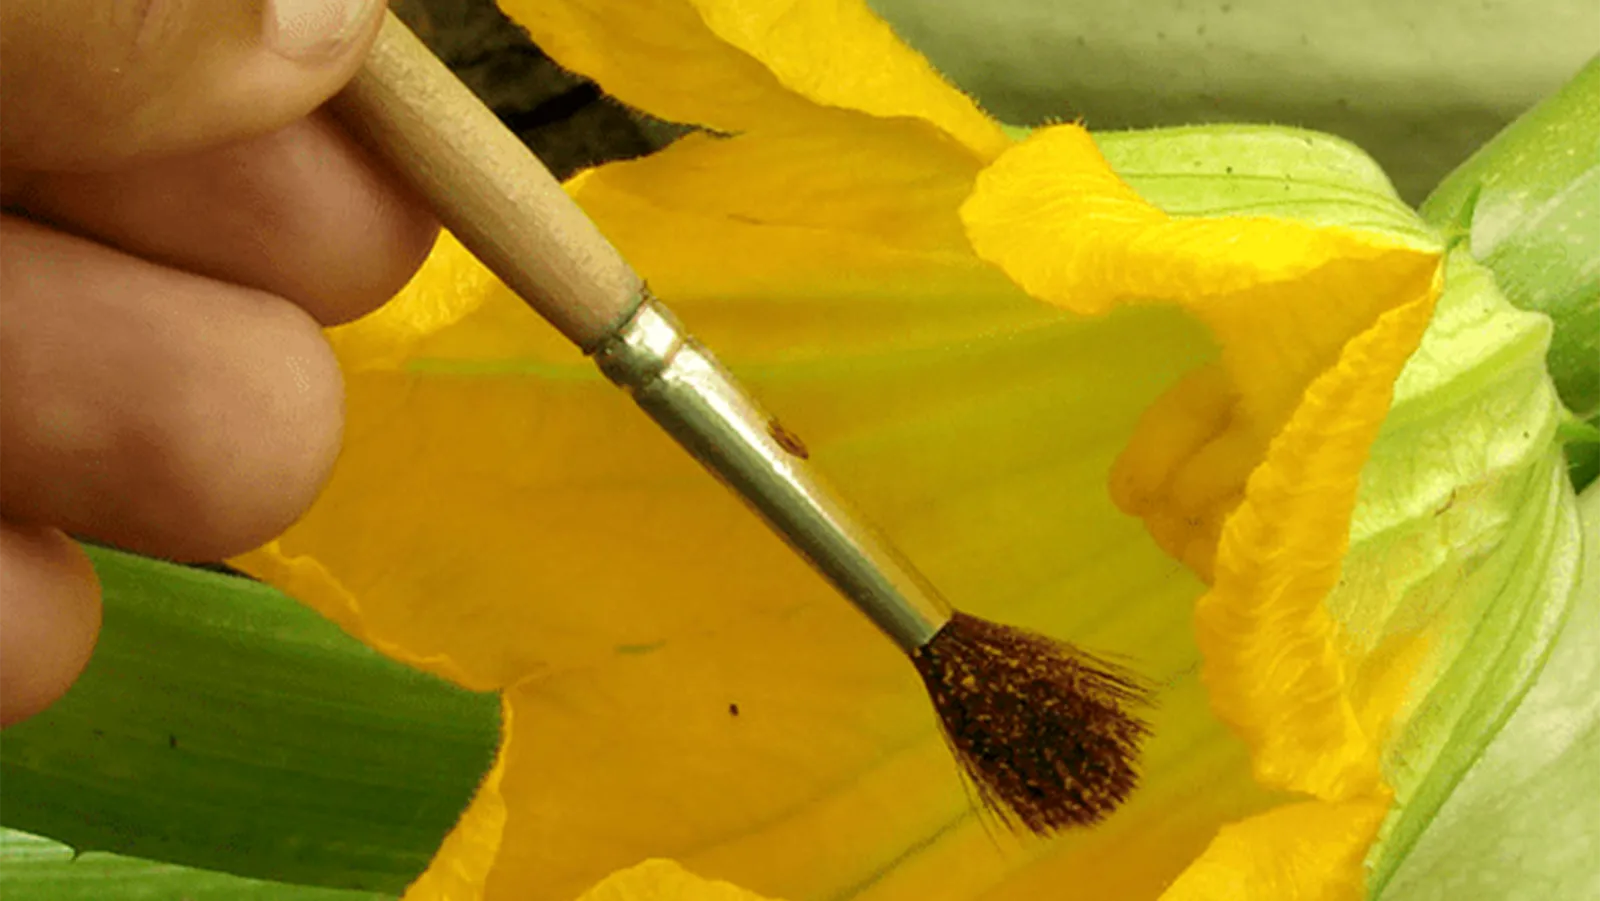 Hand-pollination
When natural pollination is deficient, dedicated gardeners can become pollinators. Even in the Edible Demo Garden where there are plenty of flowers to attract bees and the plants are well cared for, the pollinators can sometimes use some human help. When flowers appear and no fruit begins to develop, it could be time to employ one of the following hand-pollinating methods.
- Shaking – In self-pollinating plants, simply shaking the plant may be enough to move the pollen grains within the flowers
- Brushing – A soft artist paintbrush can be used to transfer pollen within or among flowers, mimicking the action of bees.
- Swabbing – Similar to a paintbrush, a cotton swab can also be used to cross-pollinate.
- Using a battery-powered toothbrush – Crazy as it sounds, an electric toothbrush can provide both vibration and direct pollen transfer.
More information on growing edibles is available on this website at http://marinmg.ucanr.edu/EDIBLES/.
May 2022: No Digging Needed to Grow Potatoes
Choosing which potatoes to plant
Whether planting in soil or straw, it’s important to start with seed potatoes that are certified free of pests and diseases. Among the number of factors to consider when choosing which potato varieties to plant are time to maturity, garden size, and determinate versus indeterminate growth type. Determinate varieties mature earlier, require less space, and generally produce smaller tubers. Indeterminate varieties are slower growing, but the yield is higher and the potatoes larger. The four varieties selected for this year’s potato patch are all in the early maturing determinate category:
- Russet Norkotah – brown skinned and oblong, a good potato for baking
- Yukon Gold – gold skin and flesh, very popular for multiple uses
- Dark Red Norland – red skin and white flesh, tasty boiled and in salads
- Huckleberry Gold – purple skin and white flesh, a new low glycemic variety
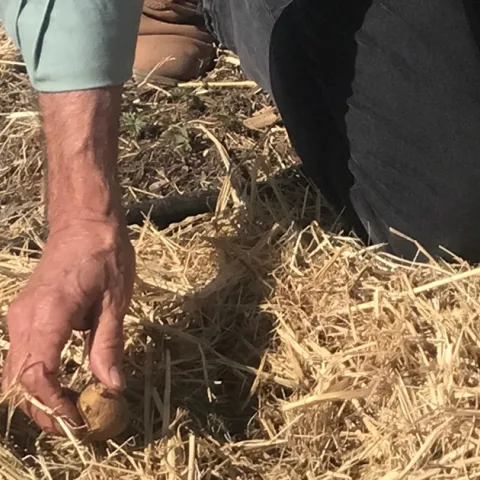
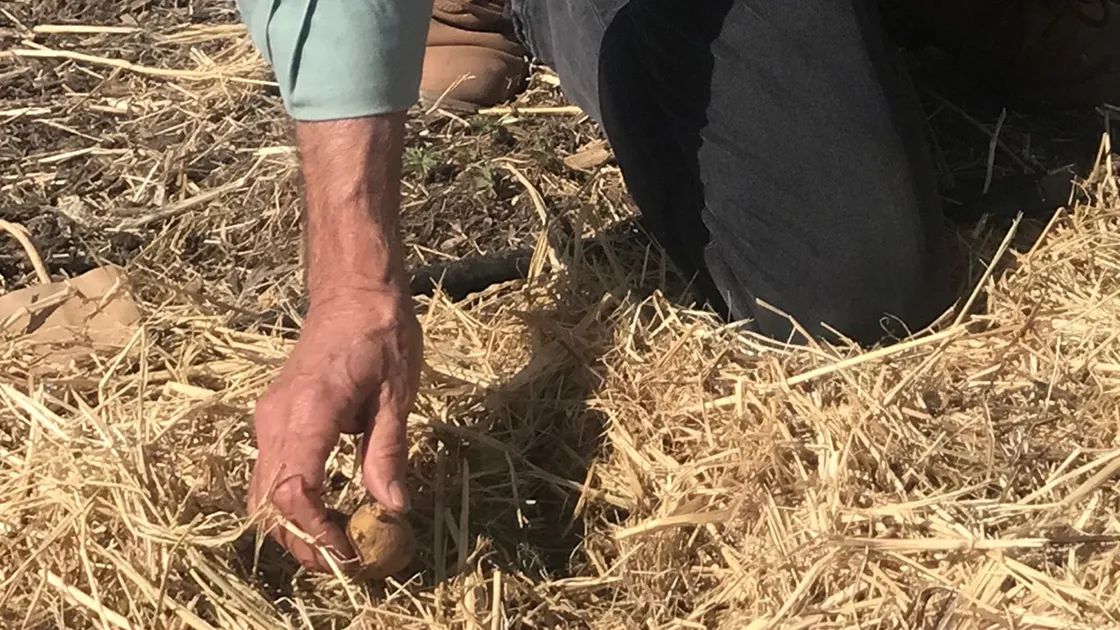
The straw planting method
- Prepare the planting bed – Although the potatoes will be growing in straw, the soil underneath needs to be weed free and drain well. Adding compost can help with this. In the Edible Garden, the prepared soil was covered with a layer of straw and drip lines were laid on top.
- Plant the seed potatoes – Seed potatoes are planted whole, if small, or cut in pieces if larger. Each piece should have at least one eye, which is where the sprout will develop. If pieces are cut, it’s good to allow them to age a few days before planting to reduce the chance of decay. Space the seed potatoes 6-12 inches apart. In the Edible Garden the potatoes were nestled into the straw along the drip lines and then covered with more straw
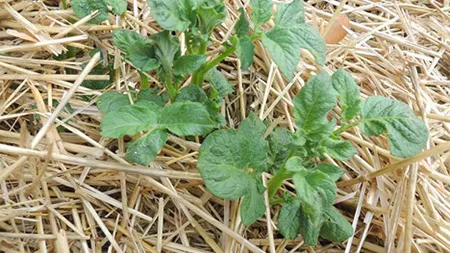
- Keep the straw moist but not wet – The roots growing in the straw can dry out quickly if the moisture content in not maintained but too much moisture can cause rotting. When green leaves appear, add more layers of straw around them to keep the roots covered. Potato tubers exposed to sunlight will turn green and be inedible.
- Harvest after the vines have yellowed and begun to die – It’s hard not to peek, but potatoes need undisturbed time to mature. The appearance of blossoms indicates that growth is also occurring underneath the straw layers. Some gardeners pinch off the flowers to favor tuber growth. It’s at harvest time that the straw bed method can be fully appreciated. There’s no need to go digging into the soil to find potatoes, accidently damaging them in the process. The potatoes come out cleanly from the straw with little effort. Then, it’s “bon appetit”!
Find more tips for growing potatoes on our Edible Grow Sheet on potatoes.
