Planting & Spacing
How to Plant Your Edible Garden

Take care to plan out your edible garden before diving in. Consider any theme or general approach to your garden, how your plants will be organized, how to invite pollinators, and whether you'll be planting your crops from seeds or starts. Most importantly, be sure you plant at the correct time. Here's how to manage it all.
APPROACH: Getting started
There are many ways to grow edibles, whether incorporated in the ornamental landscape or in a separate area of the garden.
Edible landscape
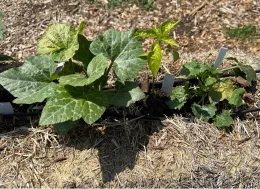
Use edibles in place of ornamentals in your landscape or integrate them within existing ornamentals. Blueberries and artichokes are beautiful ornamental shrubs. Blackberries, asparagus and raspberries make a nice hedgerow. Herbs make a lovely border.
Theme gardens
Edible flowers, ratatouille or salad niçoise garden, tea or salsa garden, etc.
Planting space & relative square foot value
• If space is tight: High-yield per square foot plants
Herbs, parsley, carrots, and beets provide the greatest yield per square foot. In other words, you get the most produce from the smallest amount of space. If space is tight, these edibles are good choices.
• If space is not an issue: Low-yield per square foot plants
Winter squash, sweet corn, watermelon. and pumpkin have the least yield per square foot. Grow these if space is not an issue or if you don't mind edible vines creeping through your ornamental beds.
Others crops are somewhere in between.
GROUPING PLANTS: How to organize your edible garden
Use the guidelines below to create a planting plan for your edible garden.
MOST IMPORTANT: Hydrozones and plant spacing

Hydrozones
Place edibles with similar water needs together. Plants with similar root depth have similar water requirements.
• Most edible plants are shallow rooting (approximately 12 inches or less). Examples include lettuce, arugula, basil, chives, garlic, kale, mustard greens, and some carrots.
• Deeply rooting plants include artichokes, asparagus, parsnips, rhubarb and tomatoes.
• Most annuals need one inch of water per week and up to two inches in hot weather. Learn how to calculate an inch of water.
• Tomatoes need less water after fruit has set.
• Perennial herbs need less water after they're established.
Plant spacing
Place crops according to size at maturity or according to spacing suggestions. Vegetables harvested before full maturity, such as beets or greens, may be placed more closely.
Plant placement
Consider:
• Shade: Place taller plants on the north side of your bed/garden so they will not shade shorter plants. Plant crops that enjoy light shade, such as lettuce, in the shadow of taller plants.
• Ease of access: Group shorter plants near the front of beds so they're easy to reach.
Rotation
Group plant families together for easier seasonal crop rotation.

Frost-sensitive plants
Place frost-sensitive plants such as peas and citrus in protected areas near a structure, fence, or in an otherwise protected spot. Use cold frames to get seedlings started outdoors.
Perennials
If space allows, grow perennials such as asparagus, artichokes, berries, herbs, fruit trees, sunchokes, and walking collards in separate beds or containers.
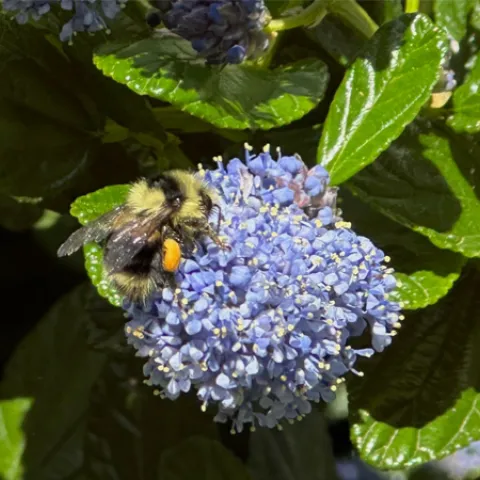
POLLINATORS: how to attract them

If not for pollination, our food gardens would be lovely, under-productive patches of green. In fact, pollination accounts for one out of every three bites of food we eat. That said, the need for pollination varies by crop:
| Require no pollination | Carrots, kale, and other edibles, which we eat before pollination occurs |
| Self-pollinating | Beans, peas and tomatoes |
| Wind-pollinated | Beets, chard, and corn |
| Require pollination | Brassicas, cucumbers, melons, okra, pumpkins, squash and many fruit trees Pollinated by hummingbirds, bees and other insects, and in their absence, humans! |
Use our lists of Plants for Bees, Hummingbirds, and Butterflies. These plants are easy to grow, bloom heavily, and are good company for edible crops. They create spots of color, texture, and scent. The result is so much more than an edible garden. It is a resilient, sustainable, fascinating ecosystem. Learn more about habitat gardening, pollination, and pollinators.
KNOW YOUR SOIL TEMPERATURE: Guidelines for warm & cool season crops
Edible crops are not only sensitive to air temperatures; they are also sensitive to soil temperatures. Whether planting seeds or starts make sure soil temperature is adequate:
Warm season crops need soil temperature at 60 to 65 degrees.
Cool season crops need soil temperature at about 40 degrees.
How to take your soil's temperature
• Use an instant read thermometer, the kind used in the kitchen. Insert it into the soil about 3 inches deep.
• The best time to check soil temperature prior to planting seeds and seedlings is in the morning because this will be the coolest soil temperature of the day. If you want to know the warmest soil temperature, check the soil in late afternoon.
To raise soil temperature
• Cover the bed for a few days with a dark material, such as heavy weed cloth.
PLANTING: SEEDS OR STARTS?
When planting your garden, you have a choice between planting seeds or starts. Most gardens include plants propagated from both seeds and starts.
WHAT ARE STARTS?

Starts are plants you buy at the nursery or grow yourself from seed.
HOW TO PLANT STARTS • Harden off: If you have grown your own starts, be sure to harden them off for about a week before planting in the garden by leaving the plants outside each day for longer and longer periods of time but bringing them in at night. Starts purchased from a nursery are already hardened off. |
SEEDS: Growing your own starts

Follow directions on seed packets and decide if you are going to start the seed indoors in a container or direct sow into the garden.
Benefits of growing edibles from seed:
• Variety: Starting with seed reveals a world of vegetables that you will never find in the market or nursery.
• Cost: Growing from seed is less expensive than buying starts.
• Sharing: You can exchange different varieties with friends.
• Disease resistance: Growing from seed reduces the risk of introducing diseases into your garden.
• More control over timing: This can help when rotating crops or doing succession planting.
| HOW TO SOW SEEDS INDOORS or in a cold frame outdoors • Begin 3-6 weeks before planting into the garden. • Use a fine textured seeding mix • Use any kind of container that is at least 2 inches deep and drains. • Fill the container or flat with seeding mix. • Level out. • Place seeds more densely than recommended on the seed packet, as some will not germinate. • Once the seedlings are about 1-inch high, thin with scissors, giving each seedling 2 inches of space all around. • When the seedling has at least 2-3 true leaves, feed with fish emulsion diluted to half the standard strength. (Seeding mix does not usually contain nutrients since the seed uses nutrients stored in the seed.) • Transplant in the spring after danger of frost or according to the recommended planting time. |
Seed types to sow indoors or in a cold frame:
• Smaller seeds are usually started in a flat in a protected environment (indoors or out) and transplanted after a full-set of leaves has formed and the plants have been hardened off (gradually exposed to outdoor elements). An exception are small seeds that mature quickly, such as lettuce and arugula, which may be directly sown into the garden.
• Large seeds such as beans, peas or squash may be started indoors and transplanted to provide a head start on the growing season.
• Medium size seeds such as those for eggplants, tomatoes and peppers are started indoors and transplanted outdoors.
| HOW TO SOW SEEDS DIRECTLY into the garden • Plant large seeds the depth recommended on the seed packet (usually about the length of the seed). • Scatter small seeds on the surface of the bed, then top lightly with soil. • Thin with scissors to recommended planting spacing when seedlings are 1 to 2 inches tall. • Cover with tulle to protect from birds. |
Edible crops to sow directly by seed into the garden:
• Large seeds: beans, pumpkins, squash, peas
• Root crops: beets, carrots, parsnips, radishes, turnips
• Quickly maturing seeds: braising mix, lettuce, microgreens
TIMING: when should you start growing?
In the edible garden, this is a critical question that could mean the difference between success and failure. Check online for information on specific plants, or use our planting calendar and our grow sheets as a guide.
BACK TO EDIBLES
> What Edible Gardens Need
> Best Choices for Marin
> How to Prepare
> How to Plant
> Edibles in Containers
> Planting Calendar
> Grow & Care Sheets for Vegetables, Herbs & Fruits
> Tips & Techniques
> How to Maintain
> Fruit Trees
> Top 20 Edible Garden Problems
> Cover Crops & Soil Enhancements in the Off-season
> Conserving Water
•••••••••
Visit our EDIBLE DEMO GARDEN at IVC Organic Farm & Garden
News from the Edible Demo Garden
Seasonal Advice and Happenings at our Edible Demonstration Garden
Every month, the team at the Edible Demonstration Garden chronicles what's happening in the garden - planting, harvesting, problems and more. Check out our stories!
> BACK TO THE EDIBLE DEMO GARDEN

July 2025: Vole Invasion

July 2025: Vole Invasion

Protecting the growing plants from hungry critters is an ongoing challenge in the Edible Demo Garden. Wire mesh is used extensively under planting beds and around the straw bales to discourage gophers. Yards of protective netting keep the birds and rabbits from eating young seedlings and ripening fruit. Through vigilance and determination, EDG volunteers have usually managed to reduce damage to crops from the vertebrate garden dwellers. However, this spring volunteers noticed that something was eating the summer squash plants in the straw bales in the area known as the “back 40”. Whatever it was had to be small enough to slip around and under the gopher-repelling wire mesh. Some little holes in the bales and on the ground nearby pointed to voles as the most likely culprits.
What are Voles?
Voles are small, chunky, ground dwelling rodents with short tails. They are also called meadow mice, but they are not mice or rats. They belong to a separate genus and are more closely related to lemmings. The most common of the five species of voles in California is the California vole, Microtus californicus. It is four to six inches long with grayish brown fur, a blunt nose, and small eyes and ears. Voles are herbivores. Although their favorite foods are grasses and herbaceous plants, they can cause extensive damage to edible crops.
How do you know if voles are in your garden?
Voles are active both day and night, but primarily around dawn and dusk. They hide in dense underbrush and in their shallow burrows, so they are not easy to spot. Voles are extremely prolific and mature rapidly with females bearing multiple litters per year.
Once you notice plant damage and suspect voles, look for burrows with numerous openings, about one to two inches in diameter, connected by narrow pathways. The pathways may be littered with droppings and plant fragments. Unlike gophers and moles, voles do not pile up soil around their burrows.
What can you do to control voles?

The first step to controlling voles is to make your garden less welcoming. Because they only like to travel a short distance to a food source, removing the vegetation they depend on for cover will discourage voles and prompt them to go elsewhere. Weeds and grasses provide hiding spaces, so creating a vegetation-free zone around a garden area will deter them. Unfortunately, they found both the food and cover they needed in the straw bales in the EDG garden.
In ideal circumstances, vole populations stay in balance, providing food for predators. Their lives are short, most living less than a year. They are snacks for owls, hawks, coyotes, foxes, and snakes. Populations also fluctuate with peaks every two to five years.
When vole populations are high and removal of vegetative cover and physical barriers are not sufficient to control them, snap-type mouse traps can be used with varying success. Traps should be placed at right angles to burrow pathways with the trigger end in the pathway so that voles will trip it as they pass over. Flooding or fumigating burrows does not usually work because of the shallow and open structure of the burrows. Poison bait, while effective, increases risk to pets, wildlife and humans and should never be used in edible gardens during the growing season.
What are the options for an organic edible garden?
While numerous home remedies and repellents have been suggested, none have been shown to be reliably effective against voles. Possible repellents include coffee grounds, cayenne pepper, castor oil, and garlic. Voles don’t like plants with strong odors and unpleasant tastes. They avoid plants in the allium family like onions and garlic and find daffodils, marigolds and castor beans distasteful. Several of these options were considered for the Edible Demo Garden. Coffee grounds were ruled out as not certifiably organic. Claims that sprinkling cayenne pepper around garden plants discourages voles prompted the EDG volunteers to plant hot peppers among the squash vines. Subsequently, damage to the plants appeared to decrease so maybe it worked, or possibly one of the snakes recently spotted in the garden is reducing the vole population.
Click here to learn more about voles.


January 2025: Natives in the Edible Garden
Native Plants Attract Pollinators and Invite Beneficial Insects
Native plants also invite beneficial insects that are natural enemies of vegetable garden pests. Beneficials such as hoverflies, lady beetles, and lacewings go where they find the herbivorous insects they like to eat. It doesn’t matter to them whether their prey is on an edible plant or a native. The natives keep the beneficial insects nearby, so they are there to control pests when the vegetable crops are planted.

Native Plants Improve Soil Health
Native plants support soil biodiversity by providing habitat for beneficial microorganisms like fungi and bacteria. Some can act as nitrogen-fixers to improve soil fertility. Natives with deep root systems can improve soil structure by creating channels through which water and nutrients can penetrate. When the roots and leaves of the native plants die back, they add organic matter to the soil reducing the need for soil amendments.
Native Plants are Low Maintenance
Natives don’t need fertilizing and require little watering once they are established. While some need deadheading and cutting back, it’s best to minimize the kind of tidying up that’s done in the edible garden. The native plants can offer a refuge for beneficial populations, providing them with undisturbed nesting and overwintering sites. Ideally the native plants attract enough beneficial insects and other natural enemies to maintain a healthy balance so that pests are kept in check.
Native Plants Add Beauty and Interest
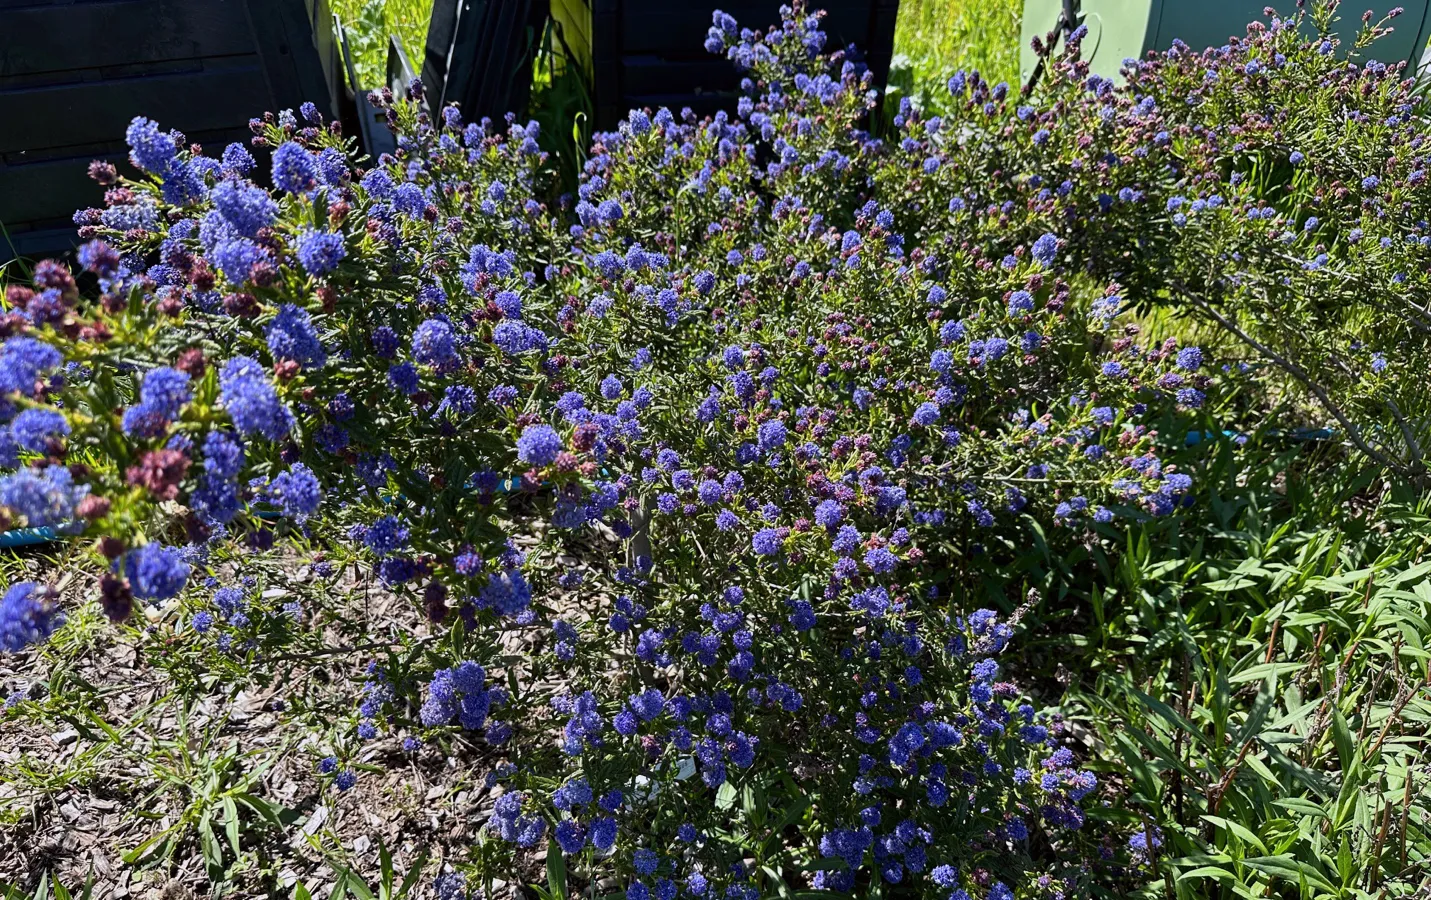
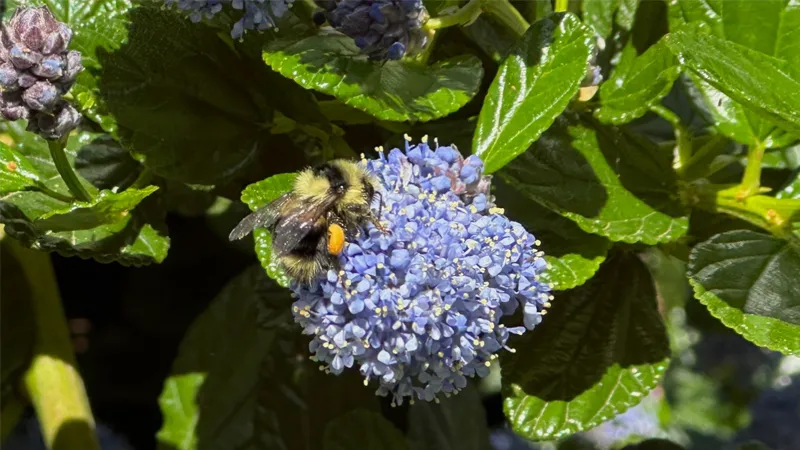
Native plants bring unique beauty to the garden. The natives planted in the Edible Demo Garden were initially chosen to provide blooms throughout the year. Some flower early and bring color into the winter garden and others extend their blooming period into late fall. They add contrast to the flowering of the vegetables and fruit trees. Ceanothus ‘Concha’ now masks the compost bins with its copious cobalt blue flowers in early spring. Coast Aster, Aster chilensis, provides bright, daisy-like blossoms throughout summer and fall. Bees and hummingbirds enjoy the showy red tubular blooms of California fuchsia, Epilobium, into late fall. The goal to bring native plants into the Edible Demo Garden to provide year-round beauty has been achieved.
For more information on growing native plants, click here.

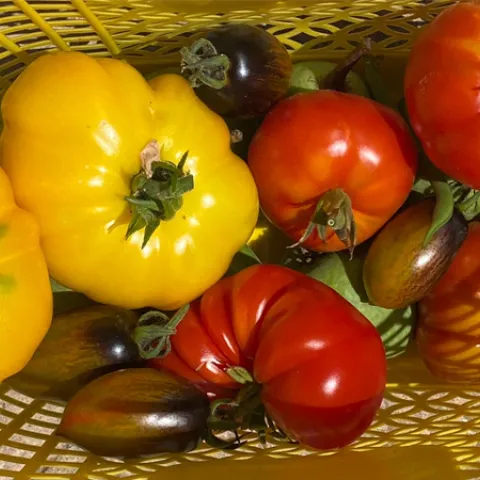
November 2024: Experimenting with Different Tomato Varieties
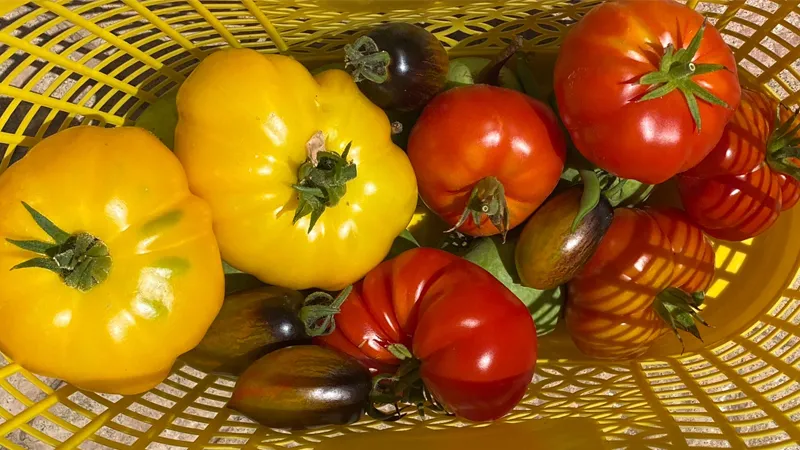
Tomatoes are among the top summer crops in the Edible Demo Garden and each year there are decisions to be made about which varieties to grow. Since there are reported to be over 10,000 varieties of tomatoes, it’s important to narrow down the selection considerably and plant only those varieties that grow well in Marin and are appealing to consumers. However, even within those broad parameters, many choices can be made. The Marin Master Gardeners typically offer sixteen varieties in their annual tomato plant sales. These are the varieties that have proven over the years to be the most popular with customers. Each year one or two new varieties may be offered to replace some that have not fared so well in terms of sales or customer reviews. Choices about new varieties are usually based on members’ recommendations.
The Tomato Experiment
This spring the Edible Demo Garden and the Edibles Guild launched a collaborative experiment to determine which of seven tomato varieties not previously sold in the tomato market, would be most successful in Marin’s different growing conditions. The experiment involved adopting out 132 plants grown in the Indian Valley Organic Farm & Garden greenhouse to 37 Marin Master Gardeners willing to try growing them in their own gardens. The seven varieties were:
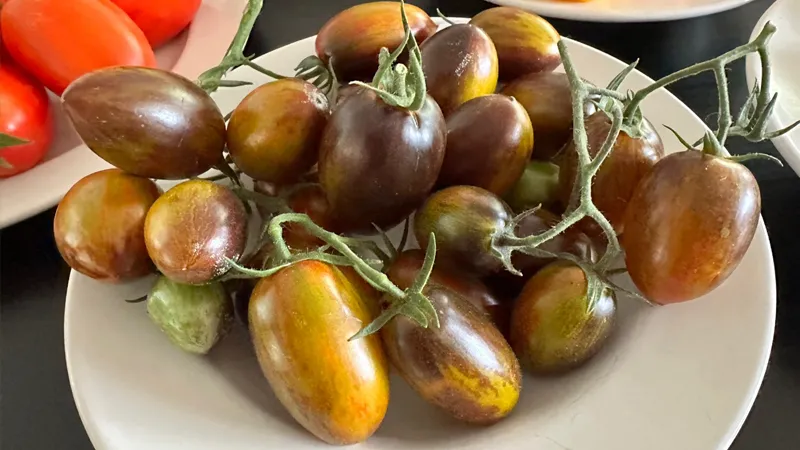
- Costoluto Genovese – a classic red Italian heirloom
- Bicolor Marvel Stripe – a marbled red and gold heirloom
- Moonglow – a bright orange heirloom
- Mortgage Lifter – a large meaty red heirloom
- Magic Bullet – an elongated cherry-sized open pollinated variety
- Pink Berkeley Tie Dye – a wine-colored open pollinated variety with green stripes and pink flesh
- Amish paste – a small bright red heirloom best used for sauces
The tomato adopters agreed to submit data describing their experiences growing the trial tomatoes. They recorded the garden type, location, and microclimate, when the tomatoes were planted, how they were cared for, and when the first tomato was harvested. Then they subjectively rated the tomatoes on yield and taste. Finally, and most importantly, they answered the question – “would you grow this variety again?”.
Which varieties had the best results?
What matters most when choosing tomatoes to plant
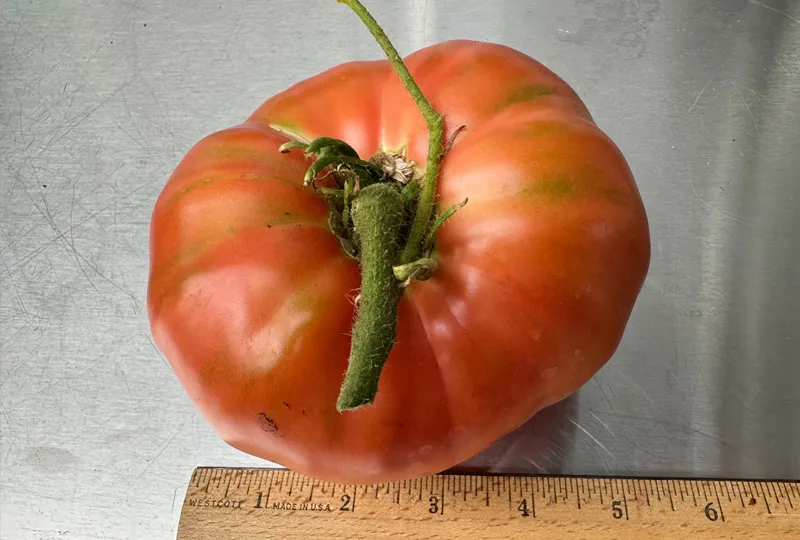
One of the most important factors to consider when choosing a tomato variety is the microclimate in the growing location. Tomatoes need sunshine and warm soil. All the experimental tomatoes required temperatures above 65 degrees and some preferred 75 degrees. During a typical spring, in most areas of Marin, around May 1st is when the temperatures are best for planting tomatoes. Tomatoes planted before the air and soil are sufficiently warmed, will sit idly by until the conditions are right. Conversely, tomatoes don’t like extreme heat and will stop production during heat waves like those experienced in parts of Marin this summer.
Linked to microclimate are days to maturity. This is the average time it takes for the first ripe fruit to develop in ideal heat conditions. Magic Bullet, Pink Berkely Tie Dye, and Costoluto Genovese are considered mid-range, requiring 70 to 80 days to mature. The others are late maturers, needing more than 80 days to produce ripe fruit. Bicolor Marvel Stripe takes 95 days to mature. In cool areas of Marin, there may not be enough warm days for some late maturing tomato varieties to reach full production.
Click here for more advice on selecting and growing tomatoes.
October 2024: Herbs Among the Edibles

The supporting cast of herbs in the Edible Demo Garden includes basil, oregano, thyme, lemon verbena, chives, Mexican tarragon, anise hyssop, chocolate mint, lavender, pineapple sage, and rosemary. Some are harvested and sold fresh at the Indian Valley Organic Farm and Garden farm stand and others are dried and offered as seasonings and teas. They are among the most reliable plants in the garden.
What is an Herb?
The word “herb” can be applied to any non-woody plant with leaves, seeds, or flowers used for seasoning, medicine, or fragrance. It’s the culinary uses that most commonly interest home gardeners. Herbs are considered different from spices based on the part of the plant that is used. Spices are derived from the roots, bark, fruit, berries, and seeds of plants. Some plants can be both an herb and a spice. Coriandrum sativum, also known as Chinese parsley, is called cilantro when the green leaves are used as an herb and coriander when the seeds are used as a spice.
Why Grow Herbs?

- Herbs make good neighbors with other plants and can be easily integrated into both edible and landscape gardens. They are attractive enough to do double duty as ornamentals.
- Herbs are cost-effective. They are inexpensive to grow and can be harvested in the amounts required for a recipe. No need to spend money at the supermarket on packages of herbs.
- The blossoms on herbs attract pollinators and other beneficial insects.
- Herbs are usually not bothered by pests and diseases. Some herbs have been shown to repel pests affecting companion plants. An example is the ability of basil to deter thrips from invading tomato plants.
- Deer usually leave herbs alone, especially those with strong tastes and scents.
- Herbs grow well in containers and are a good choice when garden space is limited.
Tips on Growing Herbs

Some herbs are started from seed while others are easy to grow from cuttings. Information on the growing needs of common edible herbs can be found at http://marinmg.ucanr.edu/EDIBLES/EDIBLES_GROW_SHEETS/
Check the upcoming events listings on this website to register for a hands-on public workshop on growing and using popular edible herbs. There will be a workshop held on the College of Marin Indian Valley Campus on November 2, 2024, from 10:00 am to 12:00 pm.