Cover Crops & Soil Enhancement
What to Do Off-Season in the Edible Garden

Putting the garden to rest
Thanks to Marin's mild winter weather, home gardeners can grow vegetables year-round. But you may choose to give the garden (and yourself) some rest and rejuvenation once you've harvested your last summer-fall crop. Here are two options for putting the edible garden to bed before you kick back in your easy chair and flip through seed catalogs.
Two basic options for your edible beds:
> Grow cover crops
> Straw-covered manure layer
Option one: GROW COVER CROPS

Cover crops are plants grown primarily to improve soil. Planted when traditional garden crops are not present, they enrich soil and provide numerous other benefits. Cover crops are often referred to as a “green manure.”
Advantages
• Build soil fertility
• Increase soil organic matter
• Suppress weeds
• Protect soil from wind and water erosion
• Provide habitat for beneficial insects and earthworms
• Loosen soil without digging, as roots reach down deeper than any shovel
• Fix nitrogen in the soil. Research shows that legume crops, especially vetch, are the best for nitrogen fixing.
• Suppress some harmful soil-dwelling nematodes: Mustard plants do this naturally.
• Provide aesthetic addition to winter gardens.
Disadvantages
• May require watering, at least until fall rains keep soil evenly moist.
• Cutting down the crop and digging it into the garden bed is work.
• Patience is required while the chopped material breaks down in the planting bed. Alternatively, put greens in the compost pile.
TIMING: when to plant and cut down a cover crop
Planting cover crop seed at the right time is important for success.
September or October: Sow cover crop. To enhance the soil for spring edibles, avoid planting cover crops after November.
February or early March: When cover crops are 25-50% in flower, cut them down, chop them up, and dig the greens into the soil 3 to 6 weeks prior to planting. The buried material will decompose and provide nutrients and organic material to the soil while increasing biological activity, water infiltration, and soil tilth. Shredded cover crop may also be added to your compost pile instead of digging it into the bed.
Example: Plant cover crop on October 1, cut down on March 1, plant tomatoes and other spring crops on April1-15.
Any time of year: Plant a cover crop at any time to enhance a tired bed, as long as the crop planting is consistent with the growing season.
HOW TO PLANT a cover crop:
• Inoculant: Some UCCE (University of California Cooperative Extension) Farm Advisors recommend inoculating legume seeds prior to planting to effectively fix nitrogen. Legumes work with bacteria called Rhizobium that live on their roots, and allow the plant to fix nitrogen into the soil. Buy inoculant where you buy cover crop seeds.
• Planting depth is based on seed size. In general, the larger the seed, the more soil cover it requires. Follow instructions on seed package and the suggestions below.
• Rake the soil smooth, removing any significant debris from a previous crop.
• Broadcast the seed at the recommended rate for the plant type.
• Cover the seed with soil to the recommended depth for the plant type.
• Water if necessary and keep moist until rains begin.
WHAT TO PLANT
Choose a cover crop based on your goals:
Improve soil structure
Plant deeply rooted plants and/or plants with large biomass such as barley, rye, and daikon radish.
Build soil microbial biomass
(fungi, bacteria and other microbes): Plant Phacelia.
Protect the soil from erosion
Plant grasses, mustard, and radish.
Suppress weeds
Plant grasses, mustard, and radish.
Attract beneficial insects
Plant mustard and radish.
(These plants may also attract undesirable insects such as cucumber beetles and stink bugs).
Increase nitrogen
Plant vetch and other legumes.
Seeding for the season
Common Cover Crops for California are included in the chart below. Once you’ve identified the desirable crop, check with local nurseries or online seed suppliers for availability.

Option two: LAYER OF MANURE COVERED WITH STRAW

A rice straw-covered layer of manure is another way of boosting soil.
Advantages
• Works slowly over the winter to enrich soil
• Attracts earthworms
• Feeds legion of beneficial microbes needed for healthy spring crops
• One-and-done deal; there is nothing to cut down in spring like there is with a cover crop.
Disadvantages
• Sourcing, transporting, and shoveling manure
• A smelly wait for a couple of days for the barnyard aroma to dissipate
HOW TO LAYER IT UP
• Pile on 2 or more inches of herbivore-generated manure (horse, chicken, cow, goat, llama and rabbit are all equally good (preferably from animals that have not been treated with antibiotics or other pharmaceuticals).
• Top it with a fluffy layer of rice straw (often available inexpensively at horse or farm supply stores) or dry leaves three times as deep as the manure layer. The straw stays neat-looking for months, and thick layers of organic material smother most weeds.
• Winter rains keep the pile moist, attracting earthworms and helpful decomposers.
• Straw and leaves hold in moisture and prevent rain from compacting the soil.
• In spring, turn the composted manure and straw into the top layer of soil before planting.
BACK TO EDIBLES
> What Edible Gardens Need
> Best Choices for Marin
> How to Prepare
> How to Plant
> Edibles in Containers
> Planting Calendar
> Grow & Care Sheets for Vegetables, Herbs & Fruits
> Tips & Techniques
> How to Maintain
> Fruit Trees
> Top 20 Edible Garden Problems
> Cover Crops & Soil Enhancements in the Off-season
> Conserving Water
•••••••••
Visit our EDIBLE DEMO GARDEN at IVC Organic Farm & Garden
News from the Edible Demo Garden
Seasonal Advice and Happenings at our Edible Demonstration Garden
Every month, the team at the Edible Demonstration Garden chronicles what's happening in the garden - planting, harvesting, problems and more. Check out our stories!
> BACK TO THE EDIBLE DEMO GARDEN


May 2025: Drip Irrigation Troubleshooting
When the winter rains end, it’s time for gardeners to focus on providing spring and summer edibles with the water they need to grow and produce. While hand watering may be the simplest way to adjust watering to the needs of individual plants, it’s not the most efficient means for getting the right amount of water to an entire garden.
Drip irrigation has proven to be the best option for home gardeners. It is particularly suitable for edible gardens because it delivers the water at the soil level and avoids water on the plant leaves which can lead to problems with mold and mildew.
Drip irrigation is also waterwise, reducing loss by evaporation and runoff and maintaining a desirable balance of air and water in the soil through slow application of water to plant roots.
What can go wrong with drip irrigation?
Whether installed by professionals or as a do-it-yourself project, drip irrigation requires routine maintenance. It’s recommended that the lines be checked monthly when the system is operating. It is especially critical when the drip irrigation is first turned on in the spring. Here are some common problems to look for:
- Leaks. The dreaded geyser is a sure sign that there is a break in the line somewhere. It could be a dislodged emitter or a damaged line. Thirsty rodents like to chew on the tubing and lines can be unintentionally broken by shovels and spades.

Finding a wet spot where there is no emitter can signal a problem in the supply line. If the line is buried, it will take some digging to find the leak. This was a recent problem in the Edible Demo Garden. The drip irrigation was installed some time ago and it was unclear which lines led to which bed. The search for this particular leak is still continuing.
- Blocked lines and emitters. Lines may get clogged, and emitters can be plugged by debris, mineral buildup, and algae. Pinched lines, especially the smaller feeder lines, can also be a problem. Periodically walking the circuit and checking flow from the emitters while the system is running is a good way to spot irrigation problems before plants start showing signs of distress.
- Low water pressure. Drip irrigation operates at 15-25 pounds per square inch (psi) which is much lower than sprinkler systems which can require up to 50 psi, and household systems running at 50-80 psi. A pressure regulator is needed to reduce the incoming household pressure to that for which the drip systems are designed. However, pressure in the lines can be lowered further by elevation gain, friction in the tubing, and long line lengths. It is recommended that 1/2” supply lines be limited to 200 feet in a single zone and the number of one gallon per hour emitters per line not exceed 200. If a drip emitter at the end of a line is not delivering sufficient water, it could be a low-pressure problem.
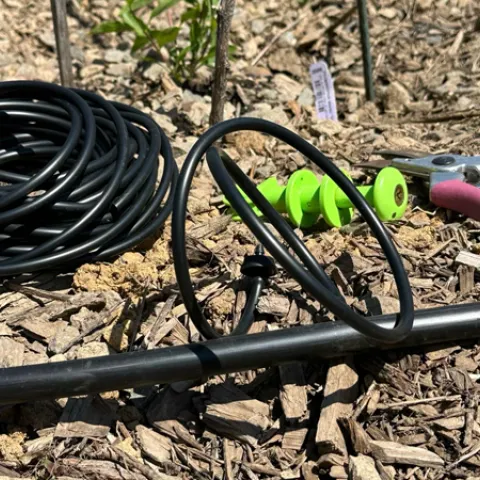
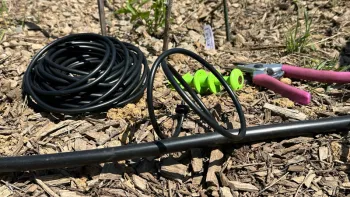
Fixing drip problems
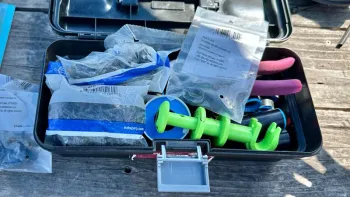
With the right supplies, many common irrigation problems can be easily fixed. An emergency drip repair kit should include spare flow emitters of different sizes, connectors (both straight and elbow), line plugs, end caps, and tubing. It’s also handy to have a tool for cutting tubing, a punch to make holes in 1/2” line, and metal staples for securing the lines. The same supplies are useful when drip lines need to be added for new plants.
Lines can be flushed to remove debris, and clogged emitters can be cleaned or replaced. Small holes in lines can be plugged. Larger damaged sections in lines can be removed and connectors used to join the undamaged sections.
A water pressure test gauge, available at hardware stores, is helpful in determining if the pressure in the drip system is in the right range. Low pressure problems due to overly long lengths of supply line or too many drip emitters might involve changing the drip line layout or adding another zone to the system.
Controlling drip irrigation
Drip systems require control valves to direct water into the system. These are generally automated with an AC or battery powered controller/timer that makes it easy to set irrigation frequency and duration. These devices range from simple timers to more complicated “smart” controllers. All these devices include the option to run the system manually, allowing gardeners to conduct their periodic system maintenance checks.
Click here for more information on irrigation systems.


October 2024: Herbs Among the Edibles

The supporting cast of herbs in the Edible Demo Garden includes basil, oregano, thyme, lemon verbena, chives, Mexican tarragon, anise hyssop, chocolate mint, lavender, pineapple sage, and rosemary. Some are harvested and sold fresh at the Indian Valley Organic Farm and Garden farm stand and others are dried and offered as seasonings and teas. They are among the most reliable plants in the garden.
What is an Herb?
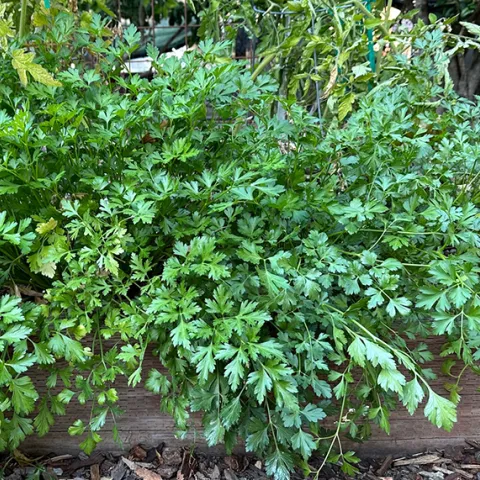
The word “herb” can be applied to any non-woody plant with leaves, seeds, or flowers used for seasoning, medicine, or fragrance. It’s the culinary uses that most commonly interest home gardeners. Herbs are considered different from spices based on the part of the plant that is used. Spices are derived from the roots, bark, fruit, berries, and seeds of plants. Some plants can be both an herb and a spice. Coriandrum sativum, also known as Chinese parsley, is called cilantro when the green leaves are used as an herb and coriander when the seeds are used as a spice.
Why Grow Herbs?

- Herbs make good neighbors with other plants and can be easily integrated into both edible and landscape gardens. They are attractive enough to do double duty as ornamentals.
- Herbs are cost-effective. They are inexpensive to grow and can be harvested in the amounts required for a recipe. No need to spend money at the supermarket on packages of herbs.
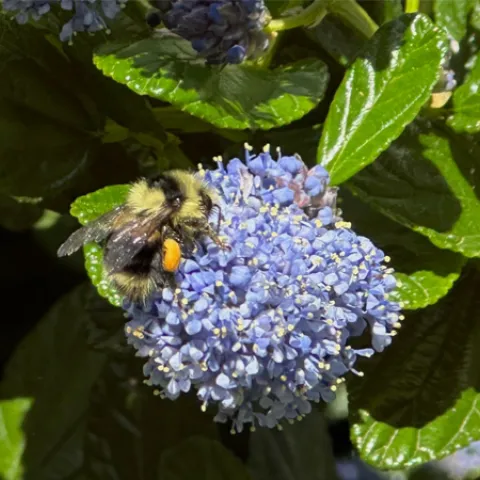
- The blossoms on herbs attract pollinators and other beneficial insects.
- Herbs are usually not bothered by pests and diseases. Some herbs have been shown to repel pests affecting companion plants. An example is the ability of basil to deter thrips from invading tomato plants.
- Deer usually leave herbs alone, especially those with strong tastes and scents.
- Herbs grow well in containers and are a good choice when garden space is limited.
Tips on Growing Herbs

Some herbs are started from seed while others are easy to grow from cuttings. Information on the growing needs of common edible herbs can be found at http://marinmg.ucanr.edu/EDIBLES/EDIBLES_GROW_SHEETS/
Check the upcoming events listings on this website to register for a hands-on public workshop on growing and using popular edible herbs. There will be a workshop held on the College of Marin Indian Valley Campus on November 2, 2024, from 10:00 am to 12:00 pm.