Compost Alchemy: Turning Scraps into Garden Gold
Composting 101 for Beginners
First installment in an upcoming series exploring home composting for small-space gardens—stay tuned for more in future issues of News to Grow By.
Every trash day, I happily wheel my green waste barrel to the curb. The municipality will turn my garden and kitchen waste into compost that, in a few months, I’ll buy as a bag from my nursery.
Wait…what? I’m throwing away organic scraps today, just to buy them back as compost in a few months. I’m giving away a valuable resource that I could have myself for free!
What is Compost “Alchemy”?
Thanks to school garden programs, students learn early about composting, a controlled process of recycling leaves, food scraps, and other organic matter into a nutrient-rich soil amendment. Compost improves soil structure, increases water retention, and promotes healthy microbial activity. With these nutrients, plants can grow stronger and can better resist disease and insects. To grown-ups, composting might seem messy, but composting is more fun and accessible than you might think.
The University of California promotes home composting as a go-to strategy, encouraging us to divert household organic waste from landfills and return nutrients back into our own backyards. The circular nature of composting teaches us to move materials from the kitchen to the compost bin to worms to the garden, and then back into the kitchen as abundant fruits and vegetables. Instead of throwing away organic matter, we can make compost and build up soil in our own backyards. Not only is this good for our gardens, but home composting eases the environmental strain of centralized composting and reduces truck emissions.
What types of scraps?
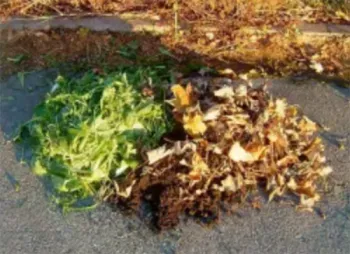
Compost requires four components:
- Greens (nitrogen-rich materials)
- Browns (carbon-rich materials)
- Water
- Air
With some heat and a little help from microbes and insects to help decomposition, you could have free, homemade compost in as little as 2-3 months.
“Garden Gold” Home Compost
The Set Up
- Location - Create a structure that measures 3 x 3 ft, accessible for turning. Partial shade is best.
- Water – Ensure nearby water sources to maintain moisture.
- Structures - Use prefabricated materials or build your own using concrete blocks or wood (not treated wood). Avoid materials such as straw bales or chicken wire that may permit access by pests.
- Air – Ensure air can circulate under or through the cover.
Starting the Process (Fast Composting Method)
- Composition – Mix an equal volume of brown material and green material, a 1:1 ratio.
- Brown materials include dry leaves, dried grass, straw, woody prunings, coffee filters, eggshells, shredded paper bags, and cardboard boxes.
- Green materials include vegetable and fruit scraps, fresh grass clippings, wilted flowers, coffee grounds, loose tea leaves and young green weeds without seed heads.
- Chopping - Chopping material ½ to 1½ inches will speed up the composting process but is not mandatory.
Feeding the Process
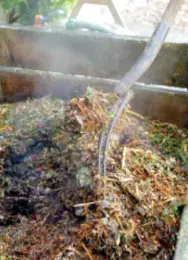
- Turning the pile - Turn the pile with a pitchfork every few days to once per week to aerate it. Move the outer, less composed material to the center, and move the more decomposed material from the center to the outer edge.
- Water - Keep the pile as moist as a wrung-out sponge. Dry piles decompose slowly.
- Temperature - Bacteria feeding on nitrogen-rich green material produce heat. The ideal temperature range is 100°F to 150˚ F.
- Adding food scraps - Bury scraps 6-12 inches into the center of the pile to deter flies and rodents.
- DO NOT add soil, wood ashes, manure, seed-bearing weeds or invasive plants, diseased plants, animal products (no meat or fat), dairy products, oil, grease or fat, glossy paper, or sawdust from treated lumber or plywood.
Three Compost Methods
Methods vary based on the speed at which you want finished compost:
- Slow compost method (12-18 months)- Continuously add to the pile, little or no chopping of materials, and water. No need to turn, generally.
- Intermediate compost method (3-8 months) - Build a pile with no further additions, chop materials to 2-inch pieces, turn and water the pile weekly.
- Fast compost method (6-8 weeks) - Build a pile with no further additions, and chop materials to ½ - 1½ inch pieces. Closely monitor the temperature of the pile. Turn the pile immediately if the temperature is 150˚ F. Turn and water when the pile reaches 140-150˚ F. As the pile cools, start turning when it reaches 120˚ F. Once the pile cools below 120˚ ˚F turn and water every week.
Troubleshooting
- Make sure the pile is moist but not wet. If too dry, decomposition will slow down.
- A bad odor often indicates the ratio of browns to greens is off (usually too much green).
- If the process is slow and moisture level is correct, add green material.
- Fruit flies might mean that the kitchen scraps need to be buried deeper in the pile
- Compost needs a minimum 3 ft x 3 ft x 3 ft volume to work well.
Finished Compost
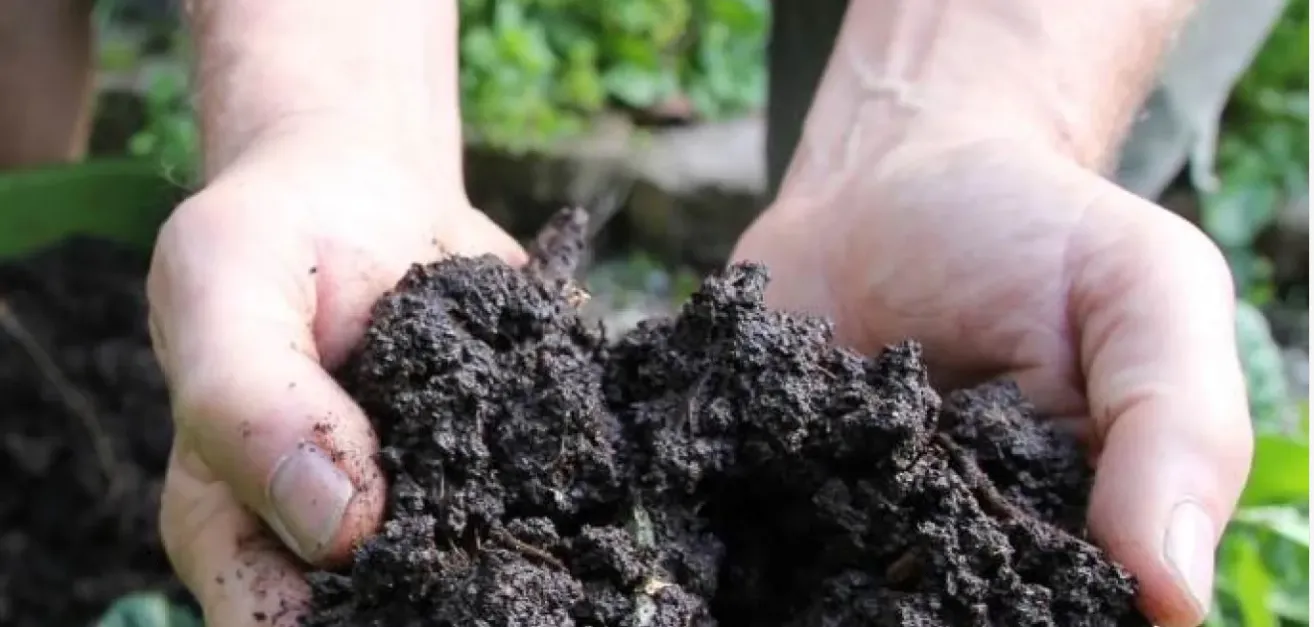
Indicators that your compost pile is finished are (1) temperature drops below 90˚ F and (2) you don’t recognize the materials you put into it. Your compost must age for two weeks before using it. To age it, let it sit undisturbed (you can bag it and leave it undisturbed so that a new pile can be built in the meantime). Signs of a healthy compost pile - earthy odor, heat, powdery white fungi on decomposing mat. Be safe and wear gloves and long sleeves when handling compost.
Ready?
Now you know the alchemy of turning scraps into garden gold. Are you ready to try it?
In future issues we will talk in more detail about the different composting methods and composting bins but if you'd like a headstart, here is some additional advice:
Compost bins can be homemade or can be purchased commercially. Keep in mind the following features when buying or building your bin:
- Volume – the ideal bin size is three-to-five cubic feet
- Ventilation – more ventilation in wet climates and less in dry climates
- Construction – recycled materials can be used. Wood, cinderblocks and used chicken wire are ideal materials. Many commercial recycled plastic bins are now available. Look for one with adjustable ventilation.
- Access for pile turning – bin should be no higher than four feet for easy access
- Rodent resistance – vents should be too small to allow for rodent entry
Learn more home composting, or how to use compost in your garden by following this link.