How to Sheet Mulch
A Quick Start
Sheet mulching is a technique of laying cardboard or newspaper over an existing lawn and then topping it off with layers of compost and wood mulch. The layers suppress weed growth, giving you healthier soil and plants.
Step 1
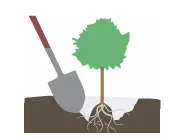
Mow or cut vegetation to the ground. Install any 5-gallon or larger plants which require a large planting hole.
Step 2
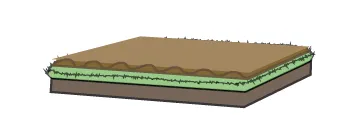
Lay down weed barrier: 2-3 layers of B-flute card board (rolls or salvaged boxes). Make sure to have 8 inches of overlap where sheets meet. Work around existing plants by ripping and folding the cardboard.
Step 3

Wet the cardboard as you go to keep it in place and to shape it around obstacles.
Step 4
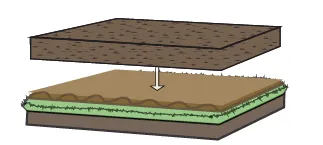
Spread compost directly over the cardboard. Adding 1 to 2 inches of compost will help build soil and provide planting medium for 4- inch or smaller pots.
Step 5
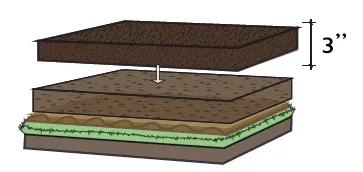
Now add the final top mulch layer, at least 3 inches thick. Water the whole bed thoroughly once again.
Step 6
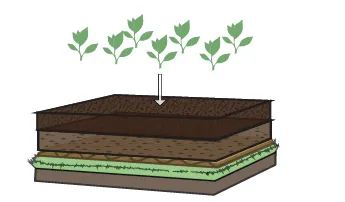
You are ready to plant your plants. Smaller plants can be planted right into the mulch & compost layers on top of the cardboard. For larger plants, punch a hole in the cardboard. Keep mulch away from the base of the plants.
Sheet mulch diagrams excerpted from Gardens for San Lorenzo by Elizabeth Christine Bailey et al, ([Berkeley, California]: University of California, Berkeley, Landscape Architecture Department, 2014). Used with permission.
UC Master Gardener Program of Contra Costa County
2380 Bisso Lane, Concord, CA 94520
Website: https://ucanr.edu/site/uc-master-gardener-program-contra-costa-county