Lighting Tips
Lighting is a complex topic, but a few key principles will make a significant difference in the quality of your videos.
Soft vs. Hard Light
Light from a single small source — such as direct sun or a bright LED — creates harsh shadows and unflattering contrasts. Bright areas may be overexposed while shadowed areas go dark. This is called hard light.
Soft light comes from a large source, ideally one larger than the subject itself. It wraps around a subject and eliminates harsh shadows. In most cases, you want to film in soft light.

Indoors, position your subject next to a window using natural light. If the side away from the window is too dark, place a silver reflector on a stand opposite the window to fill in the shadows. This technique also works well for close-up shots of small objects, including shiny surfaces like leaves.
Outdoors, direct sunlight on a clear day produces hard light. Overcast conditions soften the light because the entire sky acts as a light source. If it is sunny, film in shade or under a white pop-up tent.
Mid-Day Light
Morning and evening offer the best light for filming. Extension events, however, often happen at mid-day, which creates challenges.
Filming a subject in bright mid-day light will typically result in one of three problems:
- The face is bathed in so much light the subject cannot keep their eyes open (front-lit, facing the sun)
- One side of the face is brightly lit while the other is in deep shadow (sun to the side)
- The face is entirely in shadow (sun behind the subject, backlit)
If you must record at mid-day without shade, try these techniques:
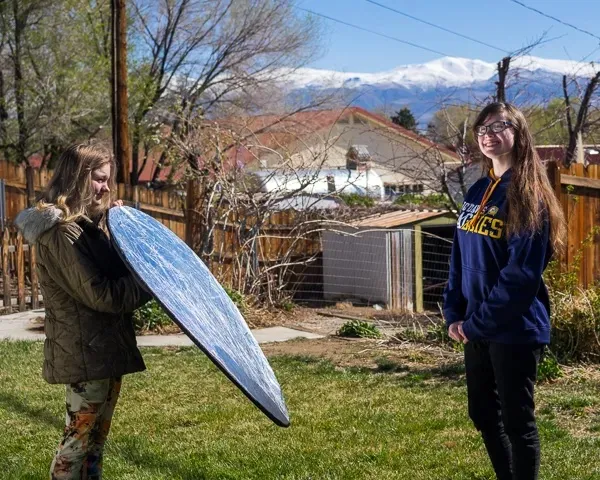
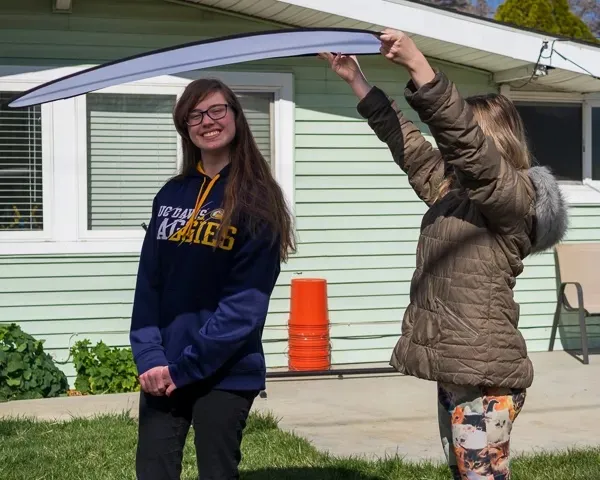
- If the sun is overhead, use a diffuser above the subject to create soft light. (This is the stiff internal panel of a 5-in-1 reflector.)
- Position the sun over the subject's shoulder and use a silver or white reflector to fill in the shadowed side. This usually requires an assistant since the subject will move while talking.
- With the sun behind the subject, use a white reflector to light the face. This can work without an assistant if you are close to the subject — gaffer's tape can secure the reflector to a tripod, or the subject can hold it at waist level out of frame.
Examples of Challenging Lighting Situations
| Situation | Uncorrected | Corrected |
|---|---|---|
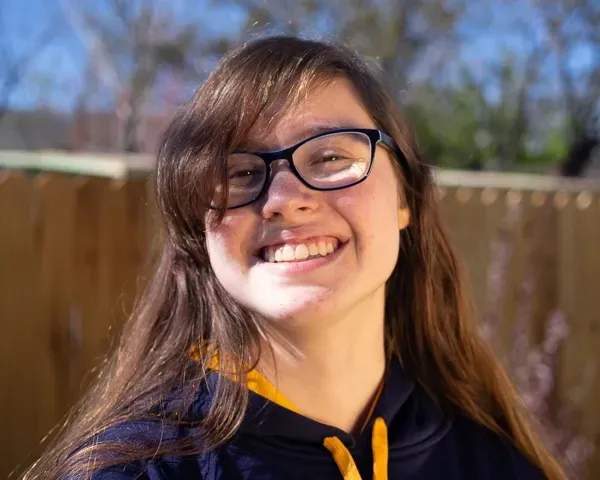
| Backlight Silver reflector used; white also works. Watch for reflections in glasses. |
Image

|
Image

|
| Side light (over shoulder) White reflector held close to face by assistant. |
Image

|
Image

|
| Overhead light Diffuser held above subject by assistant (see image above). Note the dark shadows under the nose and chin when uncorrected. |
Image

|
Image

|
White Balance
All light sources have a color. Incandescent bulbs produce warm yellow-orange light; many LEDs produce cool blue light. Your brain adjusts for this automatically, but cameras do not always get it right.
When all light in a scene comes from a single similar source — such as a window — your smartphone will usually correct white balance accurately. Problems arise with mixed lighting: a combination of natural and artificial light, or multiple types of artificial light such as fluorescent and LED together. A common example is a kitchen with a window on one side and overhead fixtures above.
Slightly off white balance can be corrected in editing, but getting it right during recording produces better results. Avoid fluorescent lighting when possible — office fluorescent tubes vary in brand, age, and color spectrum, and can introduce strong green or pink casts.
If recording with a dedicated camera, use a gray card or a piece of gray cardstock to set white balance manually.
Low Light
Smartphone sensors are small and do not perform well in low light. Nearly all cameras record best when light is bright, soft, and even. If light is insufficient, you will need supplemental lighting.
During the day, positioning your subject between a window and a silver reflector is often the easiest solution. When more light is needed, LED lights are a cost-effective option — basic models suitable for video can be found for under $30 and can be mounted on tripods, light stands, or camera flash shoes.
Most inexpensive LED lights are daylight-balanced (cool white). If your primary light source is incandescent, the color temperatures will not match. Look for an LED with an orange CTO gel filter to correct this, and set your camera's white balance to the lightbulb icon.
If your LED makes faces look pale or slightly purple, adding a quarter CTO gel to the light will warm the skin tones. To soften the light, turn it to full power and shine it through a diffuser or a piece of sheer white fabric.
Special thanks to 4-H members Natalie and Amelia Blakey for serving as models in this course.