Note: Part 1 published February 12, 2016.
Vermicomposting, Bin Set Up

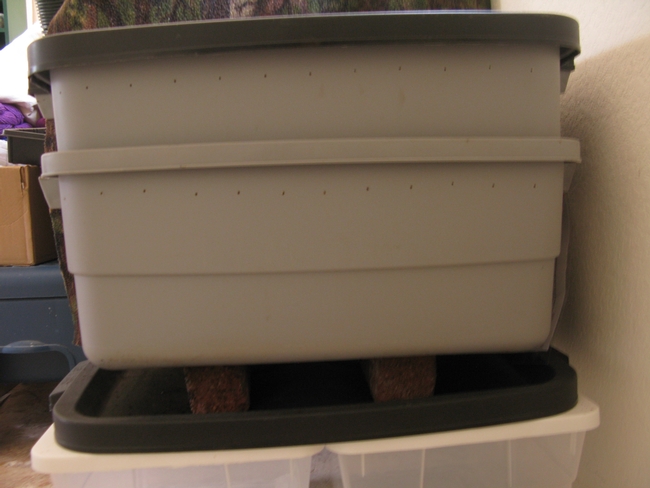
Washington State University Whatcom County Extension ”Cheap and Easy Worm Bin.” See references for the website. I spent sixteen dollars on these two bins. They are super easy to create by drilling holes for air in the two bins and one of the lids. Many other containers will work, just keep in mind that the worms need air, and darkness; don't pick clear containers.
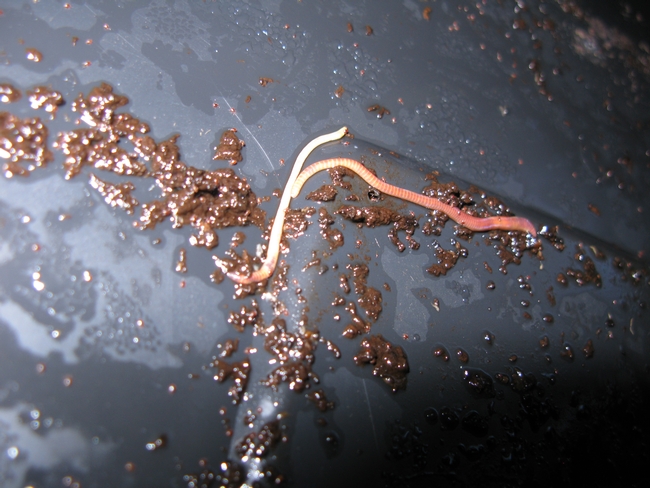
Compost worms live in leaf litter, as opposed to earthworms that burrow in the soil. There are many suppliers of compost worms (see references) and to start, about 1000 worms, roughly a pound will work fine in this size bin. The worms will reproduce to the capacity of the bin. If you've tried the bait shops, likely you found only night crawlers for sale. Night crawlers cannot survive on vegetable waste and will not thrive in your bin.
To create good conditions for the worms, shredded newspaper, or other paper will work as the bedding for compost worms. Follow these steps to set up your bin:
? Rinse bin, to ensure the bin is clean.
? Tear newspaper into strips about 1” wide. Avoid colored print, which may have ink that is toxic to the worms.
? Dampen newspaper strips by placing in a large plastic bag and adding water until the bedding feels like a wrung out damp sponge. If the strips get too wet, add more paper.
? Add the paper strips to the bin and fluff up. Do not pack down; you want to provide air for the worms to live in the bedding. Add enough fluffed up paper to fill the bin up to 3/4 full.
? Sprinkle about 2 cups of soil into the bin. Worms use the soil grit to grind up their food, and the soil adds useful micro organisms.
? Add compost worms: put in under the paper shreds.
? Bury food scraps under the bedding. See food list. Smaller pieces are more readily eaten by the worms.
? Start slow, generally worms can consume about 3 times their weight, per week. If you start with a pound of worms, then you can feed about 3 pounds of food scraps per week.
? Cover the bin with the lid that has air holes.
? The other lid can be used under the bin to catch any drips.
? Place bin away from windows and heaters. Temperatures around 55 to 70 degrees work well. If the temperature is ok for you, it's ok for the compost worms. If outside, secure from animals digging in the bin.
Feeding: feed compost worms scraps from your food preparation; vegetable scraps, rinds, non-greasy leftovers.
Do feed:
? Vegetable scraps
? Fruit scraps, and peels. Apple cores, skins etc.
? Tea & teabags, if paper.
? Coffee grounds and filters.
? Crushed egg shells.
? Paper napkins and towels
? Bread and grains, careful not to bury grains they may heat up if covered.
Do not feed:
? Be careful of too much citrus, no more than 1/5 th of feed.
? Onions, garlic, both considered too pungent for compost worms.
? Meats, fish.
? Dairy foods.
Bin maintenance:
Compost worms also consume the paper bedding. After the initial set up, keep a 1” layer of bedding on top, adding more as needed.
If the contents seem too wet, add more dry paper.
If the contents seem too dry, mist with water.
Fluff up the bedding once a week to keep the bedding from becoming dense.
If the bin begins to have a bad odor, you may be adding too much food. Fluff up again, and stop feeding for a while to let the worms catch up on their eating.
Check each week to see how well the worms are going through the amount of food you are giving and adjust accordingly.
Worm composting is a wonderful environmentally friendly way to dispose of garbage; it is especially suited to processing kitchen scraps. Worm compost is rich in nutrients and is an excellent soil conditioner. Offices and schools may also use worm bins to reduce paper waste and turn garbage into garden gold.
For further information, check the next article on Harvesting Worm Compost.
References:
Cheap & Easy Worm bin. http://whatcom.wsu.edu/ag/compost/Easywormbin.htm.
Cornell Composting http://compost.css.cornell.edu/worms/steps.html
To get an idea of worm suppliers check:
http://www.calrecycle.ca.gov/organics/worms/WormSupply.htm
Attached Images:

