Dec 20, 2011
We've had a few questions about how to add the anrstats@gmail.com e-mail account to your own Google Analytics account so here is a step-by-step tutorial on how to add the account to your Google Analytics.
Step 1) Login
First you will need to login to your Google Analytics account.
Step 2) Selecting an Account
Once logged in this will take you to your Google Analytics Account Home.
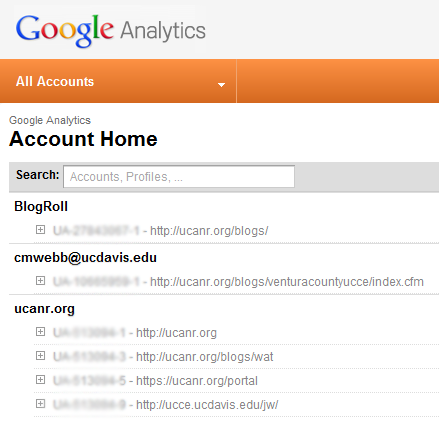
Account Home
Step 3) Select a specific account
In Google Analytics user access to Analytics data is per account. So if you have more than one account you will need to add the user anrstats@gmail.com to each account individually.
To select an account click on the name of the account or the "+" (plus) sign. Then click on the URL of the account in blue.
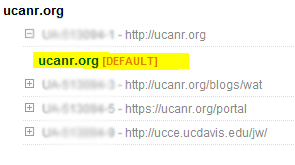
Selecting an Account
Once you select an account you should see the account overview with some summary graphs of the traffic to the site. From here you will need to edit the account settings. This can be done by clicking on the gear on the top right corner of the screen.
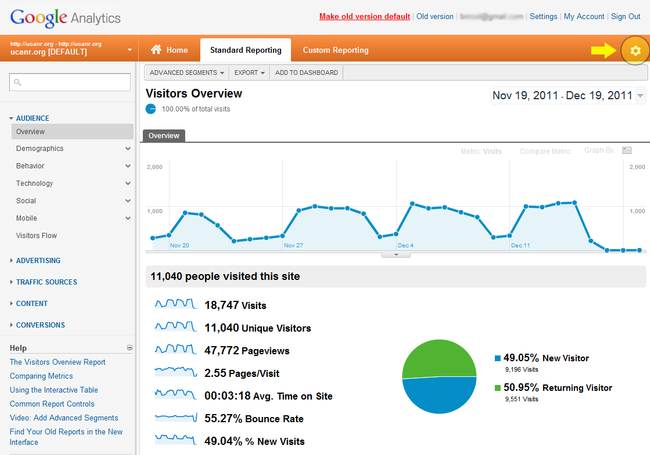
Account Settings
Step 5) Editing User Accounts
This will take you to a page where you may edit many different settings for this Google Analytics account / website. One of the tabs is the "users" tab. select the "users" tab to edit who has permission to see this Analytics data.
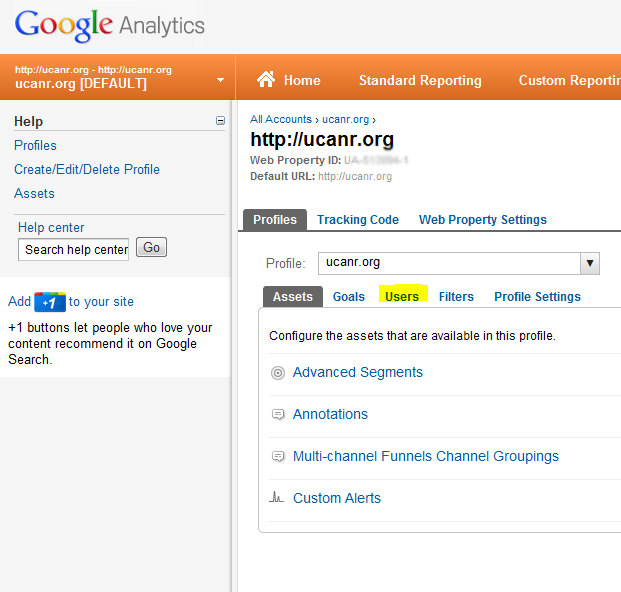
Editing User Accounts
Step 6) Adding a New User
To add a new user click on the "+ New User" button. This will take you to a page where you can give other people permission to view statistics from your website based on their e-mail address.
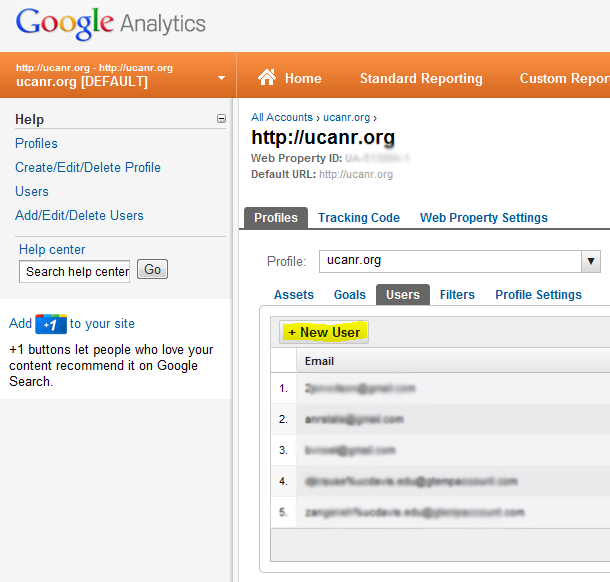
Add a new User Account
Step 7) Adding the new User account and Selecting Permissions
Enter the new users e-mail address in the "Email Address" field. In this case the e-mail address is anrstats@gmail.com
Then select the role you would like the user to have. For anrstats@gmail.com, I recommend you select "Administrator". This allows anrstats@gmail.com to modify the account settings if you are not able to so do. This is an important step as it allows us to add other users to the site statistics in the event someone leaves and is unable to add new users themselves.
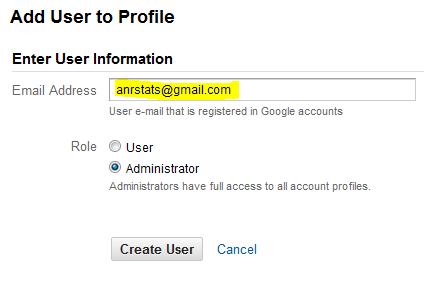
Enter User e-mail and select permissions
Step 8) Create User
Select "Create User". This completes the process of adding the anrstats@gmail.com user to your Google Analytics account.
Once you've been through the steps a couple times it becomes second nature. The settings button (gear) is context sensitive so it will display different setting depending on the page on which it was clicked. We've seen this already create some confusion. So if you get confused head back to the "Account Home" page and start the steps from the beginning.
To get back to the "Account Home page". Select the Accounts drop down and select the "ACCOUNTS LIST" button from the drop down. I've found getting back to this list to be a bit confusing at first.
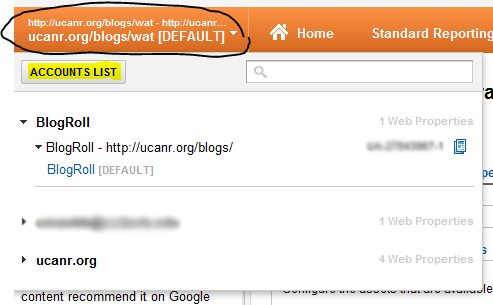
Accounts List
NOTE - Your Google Analytics pages may look different from the screen shots shown here. Google Analytics is currently going through a transition from an old look to a new look. The style I am showing here is the new look and the look that will eventually be applied to everyone. If you don't see the new look then click on "New Version" at the top of the screen in red.
Note 2... Google Analytics offers great depth to what can be done with the statistics data. So much so that we cannot even begin to tell you how to use it to it's full potential. There are many classes available for Google Analytics and there are many tutorials available on the Web. Even some on Linda.com (which ANR staff can view for free through the ANR Portal). Here's Google Analytics Help Page.