To set up a new ranch, click on the "new ranch" button at the bottom of the ranch list screen after logging on. You can also edit existing ranches that you previously set up by clicking on the ranch and selecting "edit ranch" from the menu. Note that you must be the "ranch owner" to edit the ranch.
Adding a new ranch or editing an existing ranch in CropManage has been made easier with the new online form under “add ranch,” which appears as an option on the left hand side of the screen (Fig 1). You can also still use the original method of filling out the downloadable spreadsheet template that can be selected on the right side of the menu.
CropManage uses information about your farm/ranch to develop recommendations on irrigation and N fertilizer management. Ranch data includes the main soil type and acreage of each field, well information, nearest CIMIS stations, commonly used fertilizers, and setting preferences for managing weather data and user access. By entering the information when the ranch is set up, the data is available for all plantings on the ranch, and does not need to be reentered when using CropManage for future irrigation and fertilizer decisions.
Fig. 1. Two options for adding a new ranch include using the online form or importing ranch information using the downloadable excel spreadsheet.
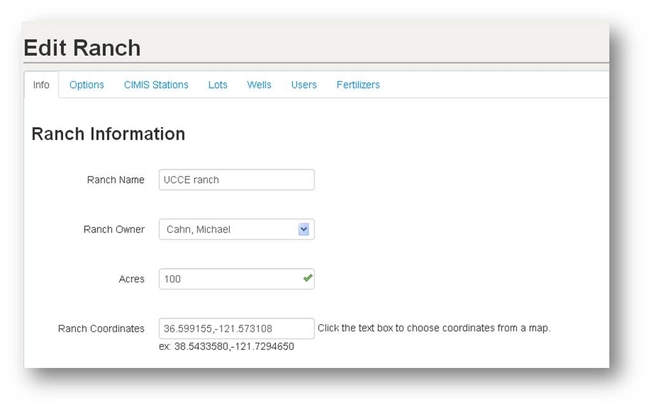
Step 1: Ranch Info Tab Add ranch name, ranch owner, and total acreage of ranch under the “info” tab (Fig. 2.) The ranch owner does not need to be the actual ranch owner. This should be the person that has the responsibility of managing the ranch information on CropManage and who will be responsible for granting access and permission to users. If you would like the ranch information to remain anonymous, then use a pseudonym for the ranch name and do not enter the ranch latitude and longitude coordinates. Keep in mind that ranch location information is need for importing spatial CIMIS reference evapotranspiration (ET) data.
Fig. 2. Information tab on the online ranch form.
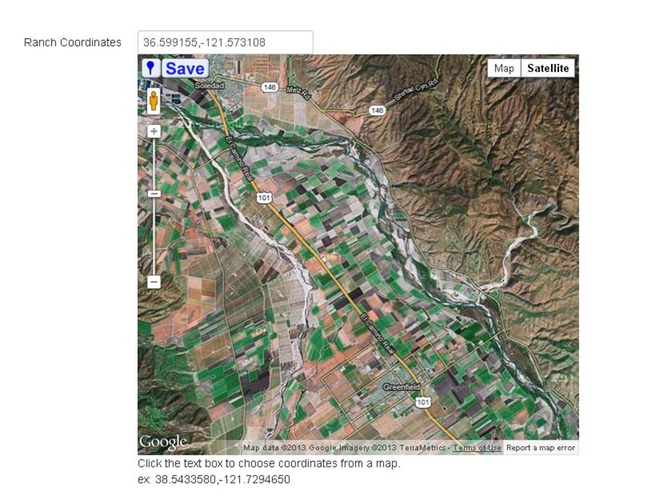
Getting lat and long coordinates of a ranch If you will be using Spatial CIMIS, you must enter the ranch latitude and longitude coordinates. If you do not know the coordinates, then you can use a tool for locating the ranch by clicking in the ranch coordinates box (Fig. 3.) Using the Google map tool, you can zoom to the location of the ranch. Switch the display to satellite to see field boundaries. Click on the thumbtack in the upper left hand corner to activate coordinate selection, and then click on the map where the ranch is located. Choose save to import the lat. and long. coordinates into CropManage.
Fig. 3. Google map tool for selecting latitude and longitude coordinates of a ranch.
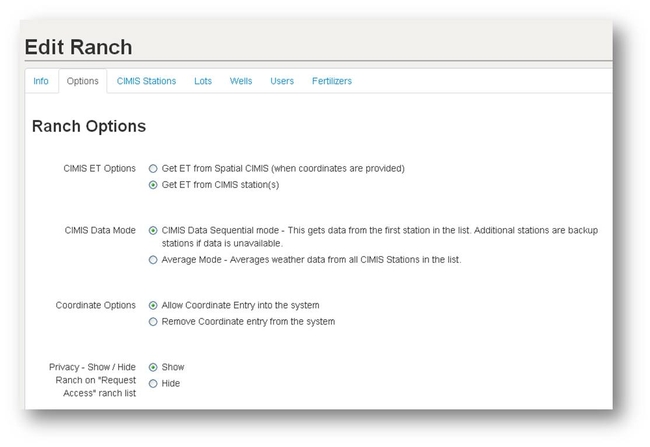
Step 2: Ranch Options Select the CIMIS weather and privacy options under the “options” tab (Fig. 4.) Choose if you want to get reference ET data directly from CIMIS weather stations or from Spatial CIMIS. Note that spatial CIMIS needs latitude and longitude coordinates of your ranch to function. Choose if you want to use CIMIS ET data from a particular weather station and set an order of preference for back up stations if data is not available from the first station (sequential mode) or average ET data from several stations.
The ranch owner can decide if latitude and longitude coordinates can be entered for the ranch by selecting in the coordinates option. By selecting” no coordinates entry” option no user with access to the ranch can enter latitude and longitude coordinates. This option will keep the location of the ranch anonymous. Again, Spatial CIMIS needs the location coordinates to function. If you choose the “no coordinate entry” option then you will need to choose a specific CIMIS station for the ET data.
Fig. 4. Options tab for selecting preferences for CIMIS weather data and privacy.
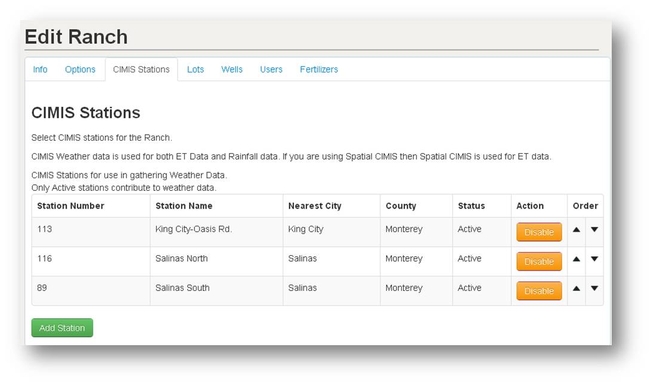
Step 3. Choose CIMIS stations The CIMIS stations tab (Fig. 5) is used to enter active CIMIS weather stations that will provide reference ET data for all plantings associated with the ranch. Even if you choose to use Spatial CIMIS, it is a good idea to enter the closest stations to the ranch in case spatial CIMIS data is not available or you want to change ET options at a future time. Use the “add station” button at the bottom left to see a list of all active CIMIS stations that are not currently associated with the ranch. You can sort the list by county or station number by selecting the list heading. After locating the station of interest, select the station number to add it to the ranch. Repeat this process for all stations . If you selected the sequential mode, the station at the top of the list will be the first station that CropManage uses for ET data to calculate the irrigation schedule. You can change the station preference order by selecting the arrows on the far right of the table (Fig. 5)
Fig. 5. CIMIS station tab for associating CIMIS weather stations with the ranch.
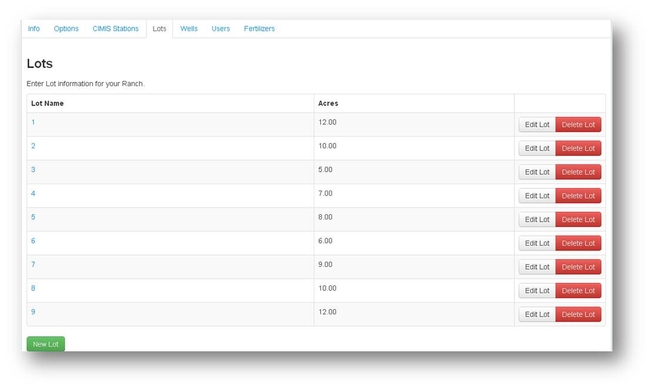
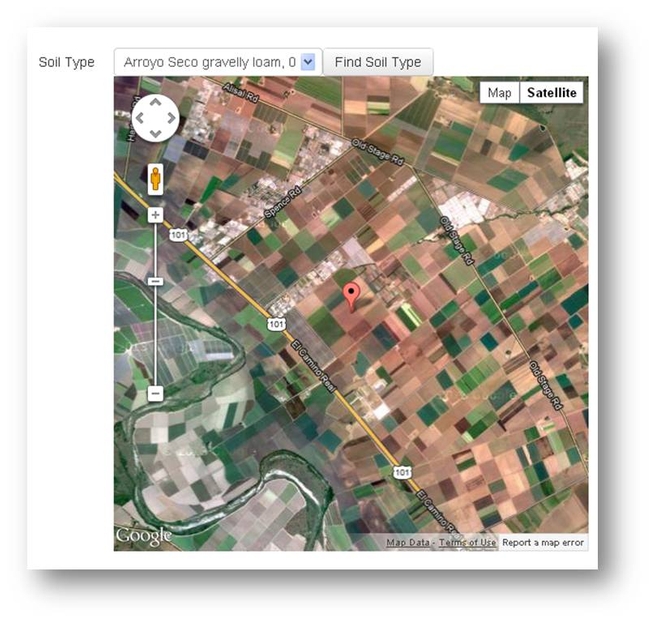
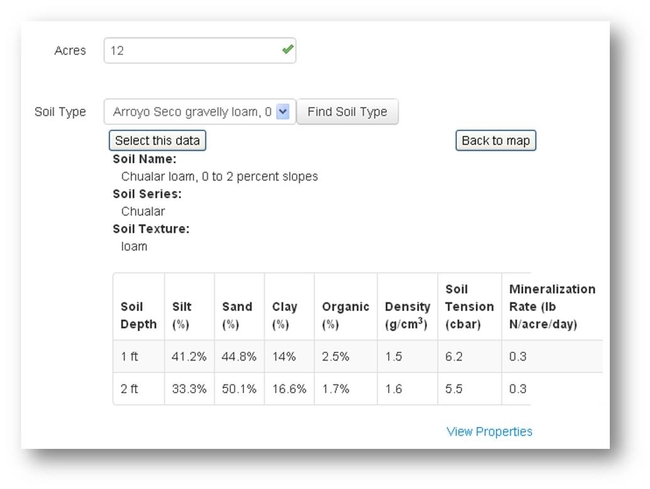
Step 4. Add field/lots to ranch Field or lot names are designated on the “Lot” tab (Fig. 6). Select “new lot” from the bottom left of the screen to enter a new field. Add a name and area (acres) of the field and then enter the soil type. If you do not know the soil type, then use the “find soil type” tool to the right of the form to determine the soil type of the lot. The tool links to the UC Davis SoilWeb using a google map application. Switch to satellite view to see field boundaries and click on the location of the field to obtain the soil properties needed for CropManage (Fig. 7.) A table will appear with the soil properties for the 1 and 2 foot depths (Fig 8.) By clicking on “Select this data,” you can associate the soil properties with the field. To save the soil properties, select OK in the window that appears asking to update soil properties. Be sure to click the “save lot” button on the bottom left of the screen before continuing.
Fig. 6. Lots/fields are added or edited in the “Lot” tab.
Fig. 7. Use the “Find Soil Type” tool to determine soil properties of the field.
Fig. 8. Soil property table is displayed after selecting the soil type using the Google map tool.
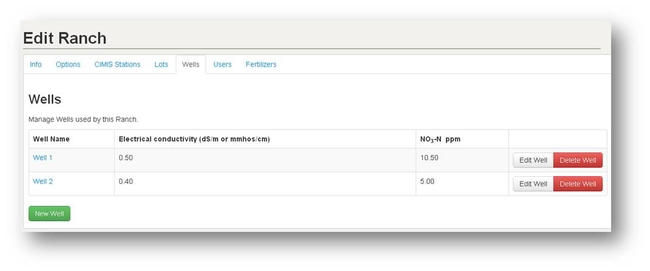
Step 5. Enter wells Using the “well” tab, well names and average salinity and nitrate concentration of the water can be added to the ranch (Fig. 9.) Although currently not available, we plan to add algorithms that determine the nitrogen contribution of the irrigation water to the crop and also determine an appropriate leaching fraction to apply to minimize salinity effects on the crop.
Fig. 9. The “Well” tab allows entry of ranch well information.
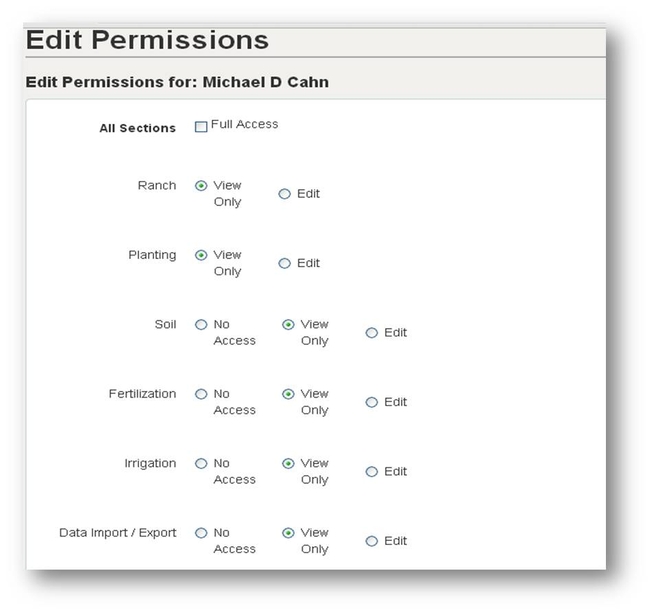
Step 6. Add/Edit users Using the “user” tab the ranch owner can determine which CropManage users can have access to their ranch and planting information and also set the level of access to the data (Fig. 10.) The ranch owner may decide that some users cannot have access to specific information, or can only view the data.
Fig. 10. The user tab allows the ranch owner to customize the level of permission for users.
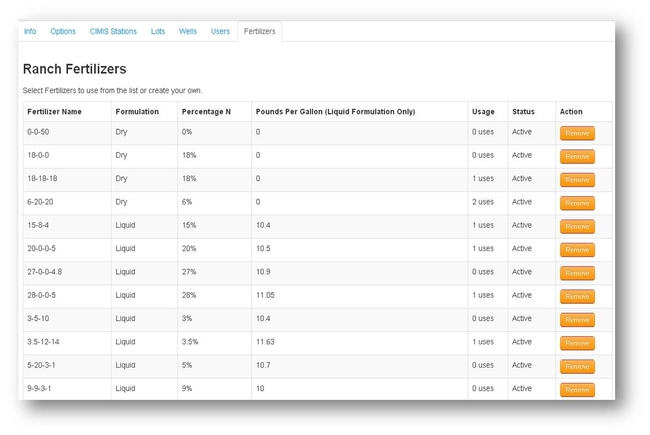
Step 7. Add Fertilizers Customize a list of the commonly used fertilizers for the ranch in the “Fertilizer” tab by selecting “add” in the far right column (Fig. 11.) The selected fertilizers will display in a drop down menu when entering fertilizer events for the plantings. The database automatically converts between gallons or lbs of fertilizer to lbs of nitrogen using the conversions shown in the table. You can also enter fertilizers not shown on the tab using the “create fertilizer” button at the bottom left of the screen.
Fig. 11. A fertilizer list can be customized for a ranch under the “Fertilizers” tab.
Summary
Although setting up the ranch information requires some upfront investment of time, this base information eliminates the need to reenter data required later for calculating fertilizer N and irrigation recommendations. At anytime, ranch information can be edited or updated. If you are in a hurry, then just enter the minimal data needed. For example, you do not need to enter information for all fields on the ranch or add all the fertilizers to the fertilizer list. These can be added at a later time.
Now that the ranch information is updated, you are ready to start adding new plantings and using the soil test, fertilizer and irrigation functions of CropManage.

