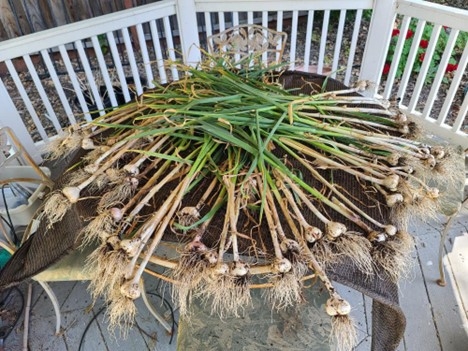
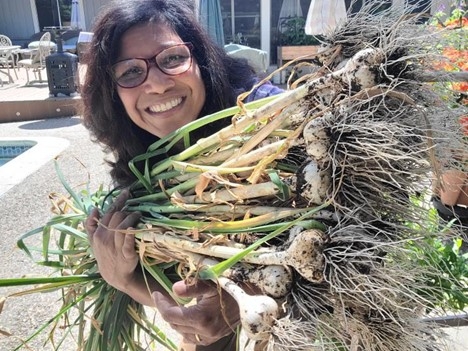
Garlic (Allium sativum) is loved and respected around the world as a symbol of protection and luck. It is thought to impart strength and endurance and is prized as a natural medicinal remedy with antibacterial, antiviral and antifungal properties. Impressive for such a humble vegetable.
Garlic is best planted in the fall for the largest bulb size at harvest. In USDA growing Zones 9 and 10, aim to get your garlic in the ground 6 weeks before the first frost. For much of Contra Costa County, this will be mid to late October. Bulb formation will begin in the spring as the daylight hours increase.
Refer to our previous blog post for an explanation of hardneck and softneck garlic and selecting seed garlic for the home garden. https://ccmg.ucanr.edu/our-blog/?blogpost=60828&blogasset=12496
Site selection
Find a convenient location with access to water and select a planting site which is level for consistent irrigation. Garlic takes 6 to 9 months to mature so the bed you select will not be available for another crop from October to June. Garlic does best in full sun (a minimum of 6 hours of sun a day). Clear all weeds from the bed and surrounding area. Weeds deprive the garlic of nutrients and water and can harbor many of the pests which are attracted to garlic.
Prepare the soil
Garlic does well in a wide range of soils, but the soil needs good drainage. Damp soil surfaces encourage snails, slugs, and root diseases. Much of our soil in Contra Costa County is heavy clay, so amendments are often added to give the clay soil a better structure. Adding organic matter such as compost, manure and leaf mold works well for this purpose. Dampen the soil before you work in the amendments to help the material to combine evenly. It is best not to overwork your soil. Gently mix the soil amendments into the top 2–4 inches of the soil and rake the surface smooth. Then water the plot wel to get the microorganisms working.
How to plant
Have a fertilizer on hand such as cottonseed meal that is in the range of 5-2-2. Gently break the cloves of garlic from the bulb. The largest cloves will grow the biggest bulbs. If you are planting different varieties, keep them separate and well-marked. Dig a trench about 3” deep, add the recommended amount of fertilizer and work it into the soil. Plant the garlic cloves 8” apart, giving them plenty of space for the bulb to form. Stand each clove up in the soil with the flat side down and the point up. Cover the garlic to about 1” above the tip of the garlic. Put in your plant stakes with the variety name at the end of each row. Water the bed to settle the soil and put a 3” layer of mulch over the bed. Less frequent, deep watering is the best practice for garlic to lessen the chance of bulb rot.
Fertilizing
Garlic is a heavy feeder. In the spring when there is 2–3” of new growth, pull back the mulch to warm the soil and apply the fertilizer you used at planting, repeating every 3–4 weeks until April. In May and June switch to a phosphorus fertilizer such as rock phosphate, bone meal, or bird guano to increase the bulb size.
In addition to the big 3 (N-P-K), garlic also needs these macronutrients: calcium, magnesium, and sulfur. There are also some micronutrients essential for garlic growth and development including iron, manganese, copper and zinc. Several applications of liquid kelp or kelp meal during the growing season can supply the additional nutritional needs.
Harvest time
In late spring, hardneck garlic will form scaping, a flower stalk which forms a whorl. Remove this stalk in the early growth stage. These are delicious when made into pesto or used in a quiche.
The first of June watch for the lower leaves of the garlic to begin to turn yellow. This is an indication that harvesting is close. For hardneck garlic look for 40-50% of the leaves to turn yellow. For softneck garlic look for 1/3 of the leaves to turn yellow. Dig up a few sample garlic bulbs and check to see if the bulbs have a uniform shape with good sized shoulders. If they are not ready, give them another week or two. When the bulbs have reached full size stop watering for a week to give the bulbs a chance to harden off a bit before harvest.
Using a garden fork (or a potato digging fork) gently lift the garlic bulbs out of the ground. Work the soil off the bulb and the roots, move the garlic to a well shaded area with good air circulation.
Curing
Lay the garlic out in a single layer. Make a second pass over the garlic, cutting the roots back by half and the stem to 9 inches in length. If air circulation is lacking, use an oscillating fan to keep the air moving for the first two weeks. Let the garlic cure for 3–4 weeks. At this time cut the roots to 1/4” and the stem to 1/2” and continue to cure for an additional 2–3 weeks. When there is NO green visible in the stem the garlic is ready for storage.
Storage
Garlic needs breathing room so wire-mesh baskets or mesh bags are the best containers. Low light, cool temperatures (35-55°) and moderate humidity (40-60%) is ideal for garlic storage. Garlic can be stored in the refrigerator but once it's removed from the cold it is very quick to sprout.
With some garden prep, meeting the nutritional needs of garlic, having patience for the long growing season, and careful curing, you can be richly rewarded with a bumper crop of garlic. You may well be the envy of your fellow gardeners, family, and friends.
IPM Garlic Pest and Disease Management
https://ipm.ucanr.edu/home-and-landscape/onions-and-garlic/index.html?src=307-pageViewHLS
Garlic Cultural Practices
https://ipm.ucanr.edu/home-and-landscape/onions-and-garlic/cultural-tips/index.html?src=307-pageViewHLS
Help Desk of the UC Master Gardeners of Contra Costa County (BHD)

