UPDATE: There will be a Box training webinar taking place on Thursday June 13 at noon. Email blidl@ucanr.edu for more details.
UPDATE 2: Video of the training webinar is available here.
UPDATE 3: Video from a second training webinar is available here.
In an earlier blog post, we told you that we are preparing to replace the aging ANR File Vault with services provided by Box.com. In this post, we'd like to show you Box equivalents to common File Vault functions.
Box.com equivalents to Filevault functions
Send a File (from a non-ANR person)
This feature (https://ucanr.edu/filevault/) allowed anyone, both in and outside of ANR, to send a file to ANR staff. The process works best when the UCANR user requests the file from the up-loader first.
- Go to or create a new folder to serve as the upload site. Note that people uploading files cannot see other documents in that folder, or recall/edit the document once uploaded.
- Go to the More Options menu, and select File Request
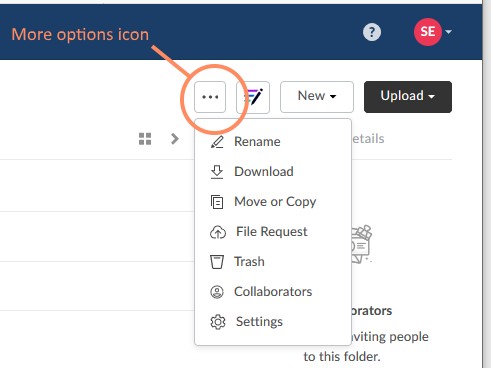
- An options window will open -
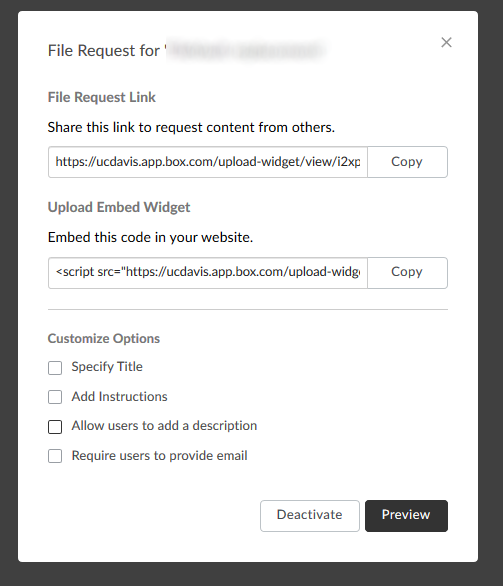
- If you want to publish or email an upload link, you can use the File Request Link. If you want to embed an 'Upload document' link in a website, use the code provided in the Upload Embed Widget box. If you want the upload window to have a different title than Submit Files to , select Specify Title. If you want to add some instructions to the upload window, select Add Instructions. If you want to match the behavior of the Filevault (required email address and optional notes), select Allow users to add a description and Require users to provide email.
- The Preview button allow you to see what the upload window will look like. The Deactivate button disables the upload feature (if a File Request link is disabled, the link will show a This Form is Currently Disabled message).
 Note that if you change any of the options (title, instructions, notes, email address) you must re-copy the link or code after you change the options; they do not persist once you close the File Request options box.
Add A File
This feature allows UCANR Portal users to share a file with internal or external users. It also allows you to keep a private repository of files that can be accessed from anywhere.
In Box.com, there is no explicit file expiration. However, links to files can expire, and this is covered below
- Go to the list of files and/or folders, select More Options for the file or folder you want to share, then select Share -
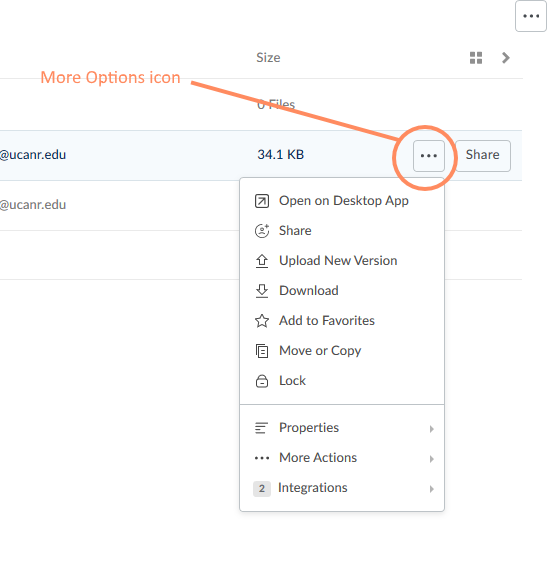
- An options window will open -
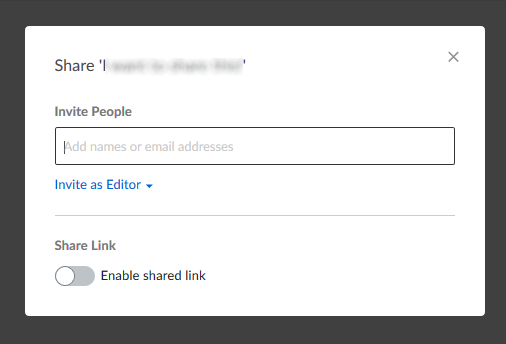
- If all you want to do is send a link giving read only access to the file (the way the File Vault Public Link operates), use the Share Link option and select People with the link/Can view and download -
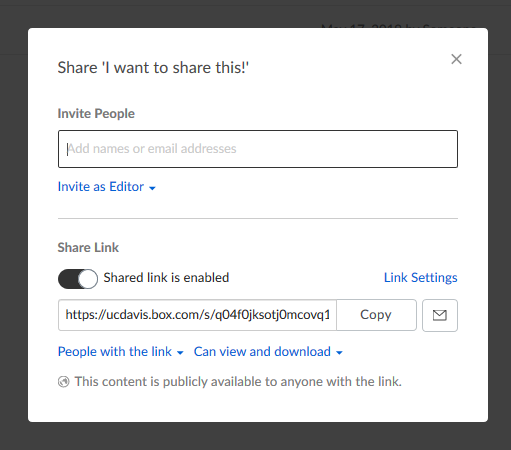
- To customize the link further, such as creating an expiration date for the link, select Link Settings -
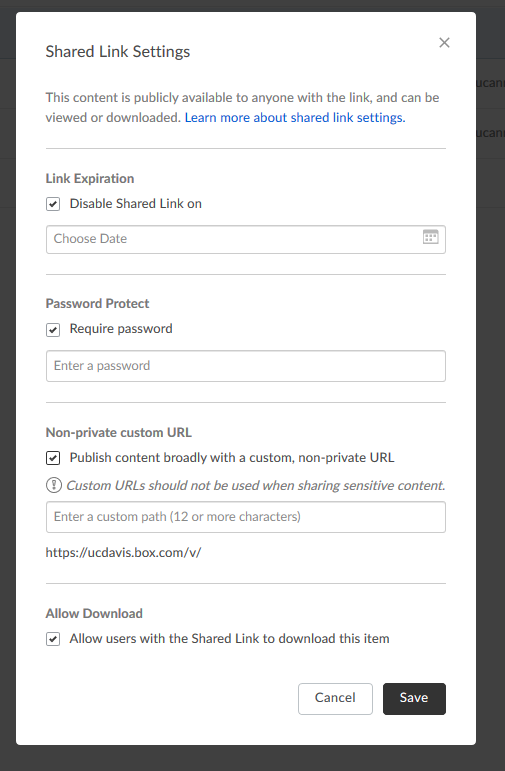
- If you want to add an additional layer of security, you can require a password for access; just create the desired password and send it to the user(s) by some other method. If you want to create an easily-memorable name for a link, you can create a link suffix, for example
https://ucdavis.box.com/v/importantdocument. Note that this suffix must be unique across all UCDavis box folders. Also note that deselecting the Allow Download link simply removes the download link; one can still download documents via, for example, right clicking and saving. - If you want to give people a level of control from being a co-owner of the file or folder down to just being able to upload documents, use the Invite People link. You can type in as many email addresses, or paste in a space or tab-delimited list. If you start typing a name or email address, it will attempt to auto-complete using names from the UCDavis directory. You can select the degree of control you want to give to the invitees (Invite as…) and add an optional message.
File Groups
The File Vault allows you to organize files into groups and download the group as a Zip file. You can do a similar thing in Box.
- Select at least one folder (or multiple documents, or documents *and* folders) via shift-click
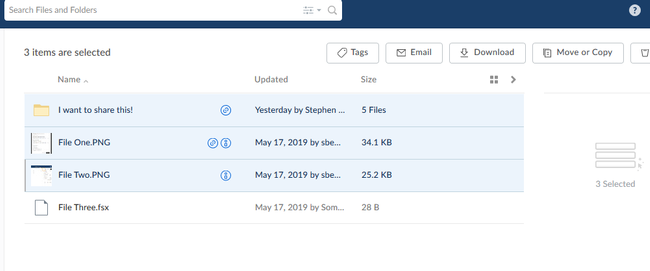
- Now, when you use the Download button, it will download the selections as a Zip file.
Download Tracking
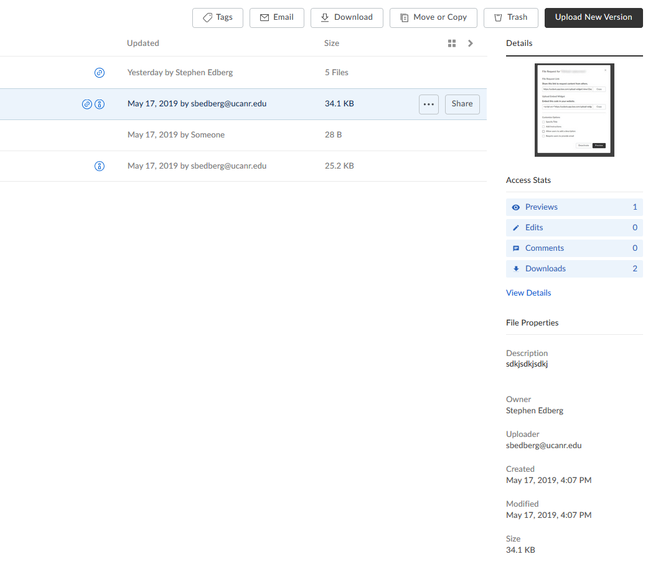
Box.com has much more extensive tracking than the File Vault. To see a history of actions on a file (editing, uploads, downloads, views), simply select the file; you will see a list of details on the right side of the window:
Clicking View Details shows you who, what and when; it also gives you the ability to Export the information to a CSV file. This file will appear in a folder entitled Box Reports in the top level folder ("All Files") This report may take up to a day to be created.
Tips for usage
-
Create separate folders to make sharing easier; eg, UCANR, Personal, Family, etc.
-
Box has flexible permissions and sharing capabilities; however, you cannot reduce permissions on items or folders within a higher-level folder; you can only add permissions. Having multiple levels of folders makes it easier to restrict sharing to only the people you want.
- Box.com can maintain multiple versions of a file. To do that, select the file in Box then use the Upload New Version button:
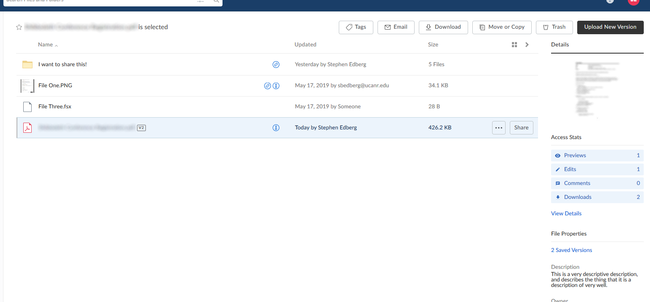
- The x Saved Versions link allows you to access old versions, and make one of them the current version.
- File versions do not have to be named identically, or even be the same type of file. It is up to the user to determine the details of the file. However, if you upload a file with the same name as an existing file in the folder, Box will make the uploaded file a new version of the existing file.
- Remember: Once you separate from the University, your Box account becomes a free Personal account with limited space. At this point, you will be asked to change the email address associated with your account and the University will no longer have any control over it. Make sure that any files needed by others at the University have been shared with them or deleted.


