I Need More Help!
Request assistance using the IT Help System*.
*Non-ANR personnel should contact their local coordinator or site administrator for assistance.
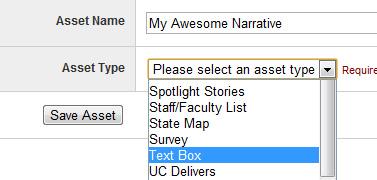
Text Box

By far, the most important asset that you will use on your site is the "Text Asset." Not only will you put all of your custom content into the text box, it's also the place where you would display file links, images, video, etc.
You can put as many text assets on a page as you need, and it's likely that you may end up with more than one, especially if you are using a two-column approach. This display style is popular for sites that will feature text in the center column and images in the right. Both the text and images will use a Text Asset to get on the page.

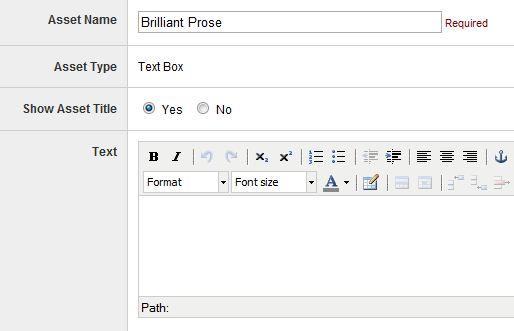
The top section of the text asset includes the asset title, the toggle to show the asset title on the page and the actual "Text Box" or "WYSIWYG Editor." The many functions of the text editor are covered in detail below. Site Builder 3 uses TinyMCE, an open source JavaScript-based text editor. Please note: you must have JavaScript enabled in your browser to take advantage of the text editors features.

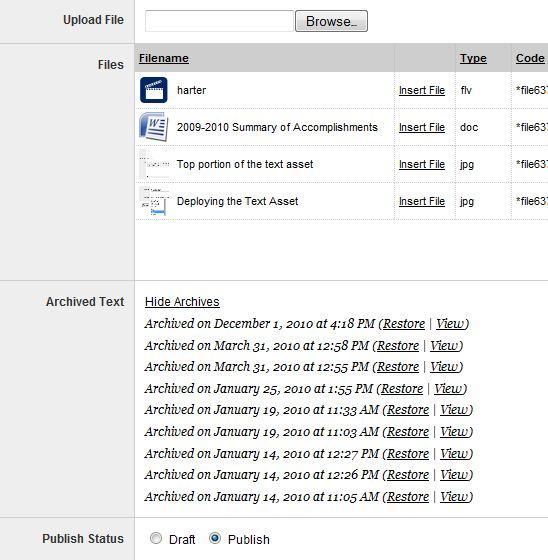
The lower section of the text asset includes the mini file library, archived text and publish status. The mini file library allows you to quickly upload files that will end up on your page. It also creates a relationship between the file and the page, making it easier to find and update files later. The mini file library is covered in more detail below.
The "Archived Test" section will store the last nine versions of your text for you! You can view or restore any archived text at anytime. This comes in handy after making a catastrophic text change. Please note: the text asset does not "auto-save," so you should save often while working on your text.
The "Publish Status" allows you to save text without publishing it to your page. This will come in handy for those who do actually save frequently while working!
The Text Editor Up Close

Top buttons (from left to right)
- Bold - Makes text darker, thicker. Use sparingly on your site. Bold only works when used occasionally for emphasis of a word or phrase.
- Italics - Italics should be avoided except when necessary for correctly citing something. Many monitors will display italics in a jagged manner, making it more difficult for users to read.
- Subscript - Makes the text small and lowers it below the text line.
- Superscript - Makes the text small and raises it above the text line.
- Numbered List - Select your individual lines and click this button to put the items in a numbered list.
- Bullet List - Same as numbered list, except in this case, they are bullets.
- Remove Indent - Removes the indent.
- Indent - Adds the indent.
- Left Justification - The normal justification for your text. Should be used primarily if not in ALL cases.
- Centered Text - Good for captions on images and figures. Avoid using centered test for your narrative, especially if your page also contains left justified text. Centered text is more difficult to read.
- Right Justification - Slams the text up against the right side of the page. Very few reasonable uses for right justification on websites.
- Anchor - Anchors are placeholders for your content. Place an anchor at a spot on your page, and then you can link to that spot! If you are linking from the same text asset, the text editor will see the anchors and list them for you in the link popup.
- Horizontal Rule - This drops a horizontal line onto your page.
- Special Characters - Need an accented letter? Or the copyright symbol? The special characters will help!
- Link - Highlight a word or phrase, and the link button will be available. It will open a popup allowing you to insert a URL and set properties for how the link will behave. You can also choose anchors and you can put Site Builder codes into the URL box!
Bottom buttons (from left to right)
- Font Sizes - We suggest not changing the font size unless you are creating captions. For larger font sizes to show a new section of a page, consider using the headings as described in the bullet point above this one.
- Formats - This dropdown includes a selection of predefined formatting options for you to use on your site. For general text, it will be in a "paragraph." The Headers are very useful for making your site accessible to users with visual disabilities. Heading 1 is the page name, so you will not likely need to use it. However, Heading 2 might be useful. Site Builder uses it as the default for asset titles, but you could use it for any subcategory of your page. Heading 3 would then be used as a subcategory for your subcategories.
- Table Creation (followed by table control buttons) - Best practices suggest that tables should only be used for displaying data. The table creation button and the other 10 table related buttons will help you create flexible, functional tables for your data.
- Font Color - There is a limited set of colors to choose from in Site Builder. In order to make your site usable by people with visual disabilities or low vision, you should be using dark colors to create as much contrast as possible. Light green on white is nearly invisible to many people.
- Undo - Undo the last change you just made.
- Redo - Redo the change you just undid with undo.
- Find and Replace - Find and replace certain words and phrases in your text.
- Remove Formatting - This magic button should remove ALL formatting from your text. Very useful if you imported your content from Microsoft Word, and it isn't behaving well.
- Full Screen Toggle - Very useful button that will make the text box go full screen. For larger sections of text, this is almost a necessity.
- Print - Print a copy of your text.
- HTML View - For the brave and bold, only. HTML view will show you the code behind the text.
The Mini File Library Up Close

What exactly is the mini file library? It's an extension of the main file library that is built into every Site Builder site. If you put files into any mini file library, the are by default part of the full site library, too. Therefore, you only need to put a file into the library once to use it in multiple locations.
The main advantage to using the mini file library is that the file will have a relationship with the page, and every time you return to edit the page, the file will be connected to the asset. This makes it very easy to locate and update files!
For detailed instructions on how to use the mini file library, please go to the file library help section.
