I Need More Help!
Request assistance using the IT Help System*.
*Non-ANR personnel should contact their local coordinator or site administrator for assistance.
Site Info & Appearance
The "Site Info & Appearance" page in Site Builder allows you to set basic properties for your site, including its name, design, and primary contact. There's much more to see, though, so let's go field by field!

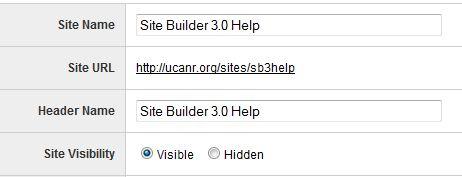
- Site Name: This is the name that will appear for this site when we show it internally or on lists. For example, your portal will show this name, and so will our all site list. You can call your site anything you like.
- Site URL: Your default URL is a combination of http://ucanr.org/sites and the folder you specified when creating the site. If you have a custom URL, such as ceyolo.ucdavis.edu, we can use it for your site. Custom URLs are subject to approval prior to use. Please contact Bruce Lidl if you have any questions about custom URL acquisition.
- Header Name: The header name appears at the top of every page on your site. It is limited to 59 characters. "University of California" or "University of California Cooperative Extension" will appear automatically, depending on the logo and county affiliation of your site.
- Site Visibility: New sites are invisible by default to give you time to get everything just right. Once you're ready to go live, switch your site to visible! That's it!

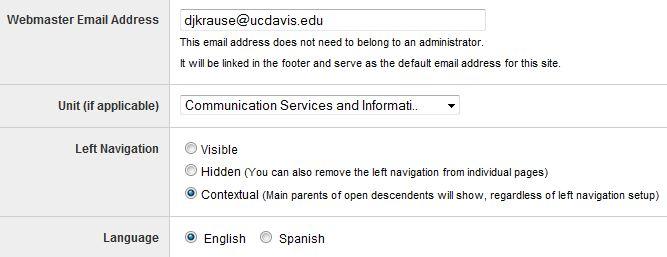
- Webmaster Email Address: This email address will be at the bottom of every page on your site. It does not have to be an administrator for the site, just an email address that is checked often!
- Unit: Connecting to a unit will set a few defaults within your site, such as directions. It is not required, but all county CE offices should be connected.
- Left Navigation: There are three options for how your navigation will be displayed. These are site-wide settings, but you can also turn navigation off on individual pages.
- Visible - Left navigation will show up normally. Child pages will display under their parents when active.
- Hidden - Left navigation is completely removed.
- Contextual - Contextual navigation is helpful for large sites with many sections. When a page is clicked, the navigation will collapse to only the active "family" of pages. This means that only the pages within the active "main parent" will display. This reduces the number of items a user sees in the navigation.
- Language: Toggling the language setting from English to Spanish will change site default text to Spanish. It will NOT translate your content. Items above the header, in the footer and elsewhere are changed by this setting.

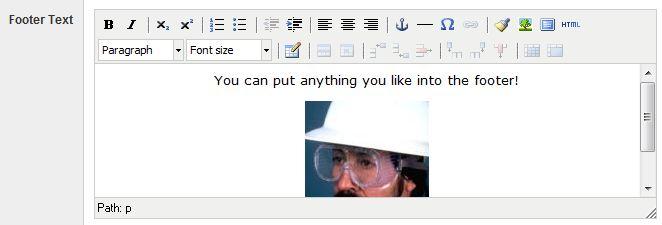
- Footer Text: There are two places where you can put information that will show up on EVERY page of your site. The left navigation has a space under the list, and the footer. Put information in this area that you want to show up on every page, like partner logos, contact information, etc. You can use Site Builder codes, such as *file1234*, if you like.

When you launch the designer, you will find options for how your site will look. The following pages will guide you through the designer options:
Each page on your site also has some design options that will override the site defaults. If you would like to "reset" all of your pages to the site defaults, you can check the "Reset Page Designs" box.

- Ratings Found: This will show up if you have ratings enabled on any of your pages and a ratings have been made. If you would like to "reset" your ratings on every page, check the box. You can also reset individual page ratings on the page properties.
- Social Network Sharing Option: Each page on your site will have "Email" and "Print" on the top right of you page content. You can add "Share" by switching the Social Network Sharing Option to "On." Share will allow visitors to share your content on the top social networks, such as Facebook and Twitter.
- Google Analytics Code: We have an in-house web statistics application called SmarterStats. It is robust and can be accessed by clicking the "View Statistics" navigation item in Site Builder. However, you may want to view your web statistics using Google Analytics interactive interface. You must go to Google Analytics and create an account to receive a code. Once you get the code, put it in the field and save. Site Builder will add the necessary JavaScript to each one of your pages, so your site visitors and usage is tracked by Google.
