- Author: William Loyko Jr.
- Contributor: Jim and Sue Farr
Our January 2022 Workshop is all about Citrus. We have a few new recipes to share. Our workshop date is January 15 at 10:00 am.
Please visit our Facebook page for registration information!
AVOID FOOD WASTE: USE THE ENTIRE LEMON!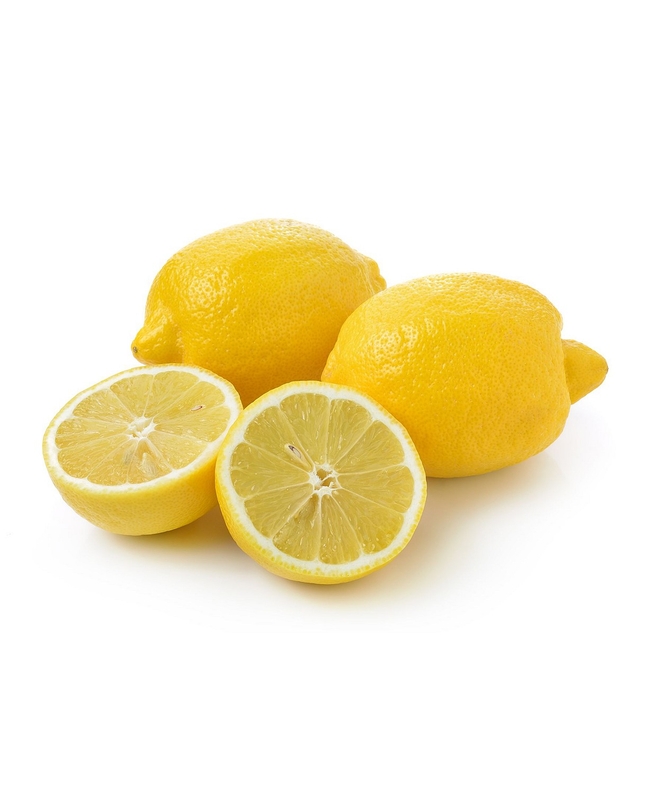
Awhile back we wrote about how to stop food waste. Remember the mission of food preservation is includes the reduction of wasted food, fruits and vegetables. This week we will offer up four recipes that use up all parts of the lemons that are so abundant in February and March.
Many more recipes are available at the National Center for Home Food Preservation: https://nchfp.uga.edu; Ball Canning Books or So Easy to Preserve from the University of Georgia.
Candied Citrus Peel Yield: about 2 pints
A tasty treat that is both sweet & tart. It is super easy to make & so much better than store- bought. You can use lemon peel, or any other citrus peel such as orange, lime, grapefruit or mandarins.
Ways to use candied citrus:
As garnish for pies, cakes and cupcakes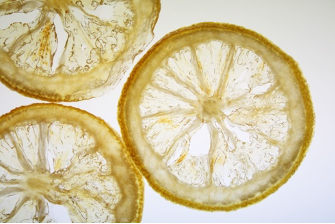
Chopped up and added to cookies, cakes, muffins, cupcakes, scones, etc.
Sprinkled over ice cream or yogurt
As garnish for citrus-flavored drinks
Finely chopped and added to streusel topping for muffins and cakes
Dipped in chocolate for an elegant sweet treat
INGREDIENTS:
- Peels, including pith, from 6 oranges or other thick-skinned citrus fruit
- 1 cup water, plus more for boiling peels
- 5 cups sugar
- 1 vanilla bean
DIRECTIONS:
1. Cut the peels into 1/4-inch strips. Cover the peels with cold water in a large nonreactive saucepan and bring to a boil, stirring to ensure that all of the peels are heated through. Strain and repeat two more times to remove the bitter flavor from the pith and to soften the peels. After the third round, set aside the peels to drain while you make the syrup.
2. Bring 1 cup water to a boil and gradually add 4 cups of the sugar, stirring to dissolve. Add the peels and the vanilla bean. Return to a boil, and then reduce to a simmer, cooking gently until the peels are translucent and tender, about 1 hour.
3. Using tongs, remove the peels to a drying rack placed over a baking sheet and separate them so they don't touch. Let drain, and then dry for 4 to 5 hours. Save that citrus syrup to add when you want a sweet citrus flavor.
4. When quite dry but still tacky, roll the peels in the remaining 1 cup sugar to coat. 5. Peels keep, stored in an airtight container, for up to 1 month.
Citrus Salt Yield: about 1-1/4 cups
Make your custom-blend citrus salt by using the zest from any citrus. If trying to cut back on salt you can alter the ratio of zest to salt.
How to use your citrus salt:
Great in dressings, on steamed veggies, sprinkle on fish, poultry or other meats as a custom-blend rub.
Sprinkle on popcorn or chips for a tangy lemon or lime flavor.
Spice up cocktails with flavorful rims. When serving up margaritas, try a lime-salt rimmed glass.
INGREDIENTS:
- 1 cup flake salt or coarse salt
- 3 tablespoons citrus zest (any kind)
DIRECTIONS:
1. Mix salt and zest in a bowl; work zest into salt with your fingers to release oils and flavor.
2. Spread on a baking tray. Air-dry until dried completely, 8 hours to overnight. 3. Keep airtight at room temperature for up to 2 months.
Notes: • Zest's color will fade over time, but this won't affect taste. • Another drying option is to heat the oven to 200°F, insert the baking tray and turn off the oven. Let the tray sit in the oven overnight. Use a fork to separate any clumps.
Citrus Pulp Powder
After you have juiced your citrus, pour through a fine mesh strainer to get clear juice but save the pulp to make citrus pulp powder. This can be used to sprinkle over foods or drinks when you don't want to add any extra liquid.
1. Spread pulp from juiced citrus in a thin, even layer on parchment paper placed on a dehydrator tray. Remove seeds.
2. Dry at 140°F in dehydrator for 8-12 hours.
3. Place dried pulp in blender, herb, or coffee grinder and blend until a fine powder.
Dried Citrus Wheels 20 Minutes; Bake Time: 6 Hours
Sliced thinly, these will dry into beautiful “citrus wheels”. Add them to a cheese board, float one on a mug of hot apple cider or tea, or use them as garnish. You can add them to a custom potpourri mix or string them together for a pretty garland that will see you through the holidays—they'll keep for weeks.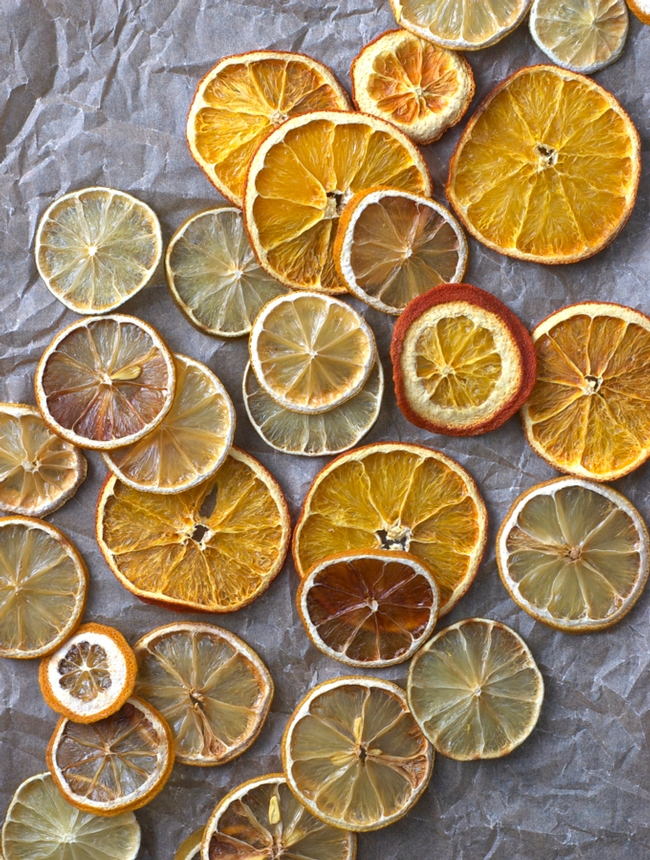
1. Preheat oven to 150°F.
2. Wash the citrus fruit and cut into uniform slices, about 1/8”- 1/4” thick.
3. Arrange on a baking tray over two paper towels to absorb the juices and continue layering the paper towels and fruit in a stack.
4. To bake, arrange the slices in a single layer on a baking sheet lined with parchment paper.
5. After 3 hours, place a sheet of parchment paper over the citrus slices and cover with another baking sheet. Hold both baking sheets together and flip so that the citrus slices bake evenly on both sides.
6. Return to the oven for another 3 hours or until dried; they should be bendable and no juice should come out.
Alternate technique: dry the slices in a dehydrator at 130°F for 16-18 hours, flipping several times for an even dry.
These and many more recipes can be found in Master Food Preserver groups from throught the state of California and across the country. These lemon recipes can be found in Central Sierra Master Food Preservers Handout from their online class Preserving Citrus (January 9): https://ucanr.edu/sites/mfp_of_cs/files/342435.pdf Thanks Jim and Sue Farr for your contribution this week!
Enjoy your lemons!
- Author: William Loyko Jr.
Covid-19 has changed the way we communicate, the way we meet with friends and family and the way we teach and learn. Across our county and the state, teachers have learned to be creative, even more than before, and conduct all their classes using virtual media. I am still amazed at how my daughter-in-law can keep her kindergarten children's attention. I'm sure its difficult enough face to face, but now virtually? Wow!
The Master Food Preserver volunteers of San Joaquin County have not given up on teaching food preservation strategies, techniques and skills. All of our virtual workshops are held on the third Saturday of the month from9:50 am to Noon. All workshops come with recipes and informational handouts. Additionally all workshops are recorded and will be posted to our Facebook page, our website: https://ucanr.edu/sites/NSJMFP/, and then to our blog. PLUS all the workshops are free!
Here is what we have planned for 2021. Mark your calendar and watch for sign up opportunities on Facebook.
February 20 Citrus - including preserved lemons
March 19 Dehydrating
April 16 Pressure Canning and Freezing
May 15 Its all about berries
June 19 Pickles - more than just cucumber
July 17 Stone fruits
August 21 What to do with all your home grown TOMATOES
September 18 Cheese and peppers
October 16 Gifts from the Kitchen - in time for holiday gifting
November 20 Seasonal favorites
Its a packed year covering all the major food preservation strategies. Mark your calendars and join us for some fun, educational virtual workshops.
- Author: Bill Loyko
- Contributor: Jim and Sue Farr
STOP FOOD WASTE
There is nothing that makes me feel more guilty than cleaning out the refrigerator and tossing food that has been kept too long or has visible signs of spoilage. Thanks to Jim and Sue Farr for this article on preventing food waste.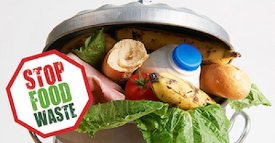
One of the goals of home preservation is to prevent waste of excess fruits and vegetables. However preventing food waste should be something we apply to all of our produce and groceries. Did you know that 40% of all food in the United States is wasted? Reducing food waste is one of the easiest things you can do to help fight hunger, fight climate change, and save money. Wasted food has profound financial, social, and environmental impacts.
Three changes in your behaviors will help you reduce your food waste:
- Plan It: go shopping with a plan, you will save money and waste less food.
- Store It: proper storage of produce keeps them fresher, longer.
- Eat it: Keep track of your fresh produce and leftovers. Eat them before they go bad.
For more information go to: http://stopfoodwaste.org
The above StopFoodWaste website also provide tools to help you plan your shopping, track your food purchases and tips on proper storage of produce and other goods. Take the 10 minute Fridge Reality Check to gauge your food habits and where you can improve to help stop food waste. 
Another very useful tool that will help you keep your produce as fresh and nutritious as possible is from UC Davis. Proper storage of fruits and vegetables will maximize their wholesomeness over time but it is not obvious which fruits and vegetables should be stored at room temperature on the counter, which should always be refrigerated and which should initially be stored at room temperature and then transferred to the refrigerator after a period of ripening. It is also important to keep humidity levels appropriate to the produce and occasionally measure the refrigerator temperature to make sure it is in the proper range, 34-40F.
Go to: http://postharvest.ucdavis.edu/files/230110.pdf for the UC Davis Table of Produce storage recommendations based on scientific testing. It is a good idea to print out the chart and keep it handy in your kitchen. Besides keeping your produce fresher longer, it pays dividends preserving taste and nutrition of the produce.
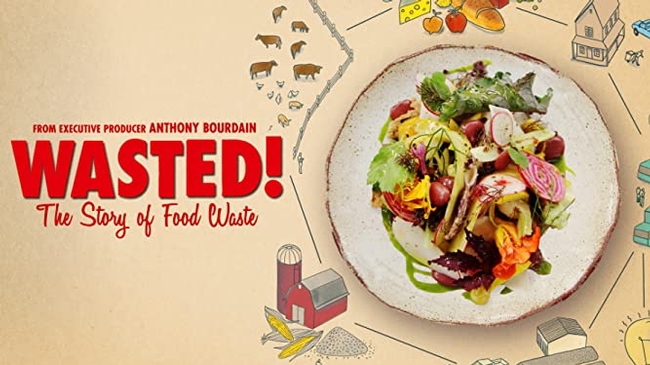
One last comment, there is a great movie entitled 'Wasted! The Story of Food Waste". I would recommend this movie for everyone. Please be aware there are a few scenes where language is an issue (that's Anthony Bourdain). Its a great lesson on how poorly we treat food in America. You can find the movie thought an Internet search. Prepare some popcorn and your favorite beverage and enjoy the show
Have a happy and healthy 2021!
- Author: William Loyko Jr.
FOOD SAFETY TIPS FOR COOKING POULTRY
In an attempt to eat healthier, many have switched to eating more poultry and seafood and less red meat. Nothing against red meat, I love a good thick charbroiled steak, especially on special occasions when one might go out for dinner. But at home, many tend to cook more poultry. We just finished the holidays and turkeys were on many tables. In the summer there is plenty of chicken legs, thighs and quarters for everyone. Covid-19 brings special attention to food safety issues. So it is important to prepare, serve and store your food in accordance with the recommendations of the CDC.
Anytime is a great time to enjoy family meals together, whether just in your household or when the pandemic is less, amongst friends, and by keeping food safety top of mind you will have meals that are safe for your family. Here are some food safety tips that you should keep in mind:
- DO NOT RINSE POULTRY IN SINK: Washing or rinsing poultry such as turkey or chicken is no longer recommended by the CDC. Washing poultry in the sink will spread the germs from the poultry to other surfaces in the kitchen.
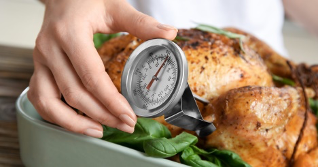
- COOK TO THE CORRECT TEMPERATURE: Cooking poultry to the correct temperature will guarantee that the poultry is safe to eat. Poultry should be cooked to an internal temperature of 165F. Make sure to use a thermometer to measure the internal temperature and do not rely on pop-up temperature indicators that sometimes are attached to turkeys.
- WASH HANDS: Wash hands with warm soapy water for 20 seconds before and after handling turkey and other poultry and is a good practice to get into when you handle any food in the kitchen.
- AVOID CROSS CONTAMINATION: Use a separate cutting board for poultry, remember to avoid cross contamination. Wash cutting boards, utensils, dishes and counter tops with hot soapy water after preparing and before you prepare the next item.
- REFRIGERATE LEFTOVERS at 40F or colder as soon as possible and within 2 hours of preparation to prevent food poisoning. It is always a good idea to check the internal temperature of your refrigerator with a thermometer to make sure that it is at or below 40F.
- REHEAT ALL LEFTOVERS TO 165F before serving. Again make sure that you use a thermometer to measure this temperature, guessing the doneness by time is no guarantee it will be at the proper temperature.

These and additional tips and food safety information is available at the following CDC websites:
Food Safety Tips for the Holidays:
https://www.cdc.gov/foodsafety/communication/holidays.html
Food Safety Tips For Your Holiday Turkey:
https://www.cdc.gov/foodsafety/communication/holiday-turkey.html
Four Steps to Food Safety: Clean, Separate, Cook, Chill:
https://www.cdc.gov/foodsafety/keep-food-safe.html
By keeping food safety top of mind, you will have food safe and enjoyable family meals.
Thanks to Jim and Sue Farr for the meat of this article
- Author: Jim and Sue Farr
What is your favorite spread to go along with peanut butter. Typically we choose a jelly or a jam or marmalade or some fruit topping made with fruit, sugar and pectin. We have many recipes for many different fruits and fruit combinations for our jellies and jams. But have you ever tried a fruit butter? Since we are all hunkered down and have time on our hands here is a new challenge for you, try making a fruit butter with your favorite fruit. Apples are readily available, but Jim and Sue Farr have given us a recipe and a resource to make butters other than peanut or apple. Try this after you go to your favorite Farmers Market and get a supply of your favorite fruit. Enjoy!
Fruit Butters: More Than Just Apple
When I was growing up when we ran out of Welch's grape jelly for our breakfast toast, next in line was a jar of my mother's homemade apple butter. Besides apple butter which was a staple in many homes in the 50s and 60s, there are now recipes for making a variety of fruit butters beyond apple.
Fruit butters, as their name implies, are smooth, creamy spreads. They are made by slowly cooking fruit pulp and sugar to a thick but spreadable consistency. Spices or a second fruit are often added to enhance the flavor. Fruit butters are often made with less sugar than jams and have less of a candied fruit flavor. They are also simpler in that they do not contain any added pectin.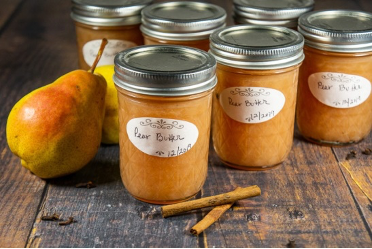
Among their many uses, those soft spreads make an excellent filling for layer cakes and the basis for a delicious trifle. Just spread the fruit butter of your choice on sliced pound cake, then layer with fresh fruit, vanilla pudding and, if desired, whipped cream. They also make an excellent filling for sandwich cookies. Simply spread butter on a plain cookie and top with a second cookie. Fruit butters can also be substituted for some of the fat in many baking recipes to produce delicious baked goods that are lower in fat. Fruit butters make excellent gifts.
Tips on Cooking Butters
Butters are cooked over medium to medium-high heat. To prevent scorching, stir butters frequently, especially as they thicken and reach the doneness point. Cooking times will vary depending on the diameter of the saucepan, the type of fruit and the intensity of the heat. Most butters will need 30 to 60 minutes of cooking time. Butters cook best in a wide diameter, heavy bottomed stainless steel saucepan. The extended cooking time evaporates moisture, thickening the fruit mixture and creating a spreadable, buttery texture.
Tips on Testing Fruit Butters for Doneness
Butters are cooked until they thicken and begin to hold their shape on a spoon. To assess doneness, spoon a small quantity of cooked mixture onto a chilled plate. When liquid does not separate, creating a rim around the edge, and the mixture holds a buttery, spreadable shape, the butter is ready to ladle into jars and process.
Below is a typical example of a fruit butter recipe (Reference: Ball Complete Book of Home Preserving – publication date 2015, page 57). For any given recipe there are also variations often included in the recipes depending on uses for the butter and personal tastes.
The recipe for Peach Butter
Peach butter: makes eight 8 ounce jars or four 16 ounce (pint) jars
4 ½ lbs Peaches, peeled, pitted and coarsely chopped
½ cup Water
4 cups Granulated sugar
Grated zest and juice of one (1) lemon
- In a large stainless steel saucepan, combine peaches, water and lemon zest and juice. Bring to a boil over medium-high heat. Reduce heat and boil gently, stirring occasionally, until peaches are soft, about 20 minutes.
- Working in batches, transfer peach mixture to a food mill or a food processor fitted with a metal blade and puree just until uniform texture is achieved. Do not liquefy. Measure 8 cups of peach puree.
- In a clean large stainless steel saucepan, combine peach puree and sugar. Stir until sugar dissolves. Bring to a boil over medium-high heat, stirring frequently. Reduce heat and boil gently, stirring frequently, until mixture thickens and holds its shape on a spoon.
- Meanwhile, prepare canner, jars and lids
- Ladle hot butter into hot jars, leaving ¼ inch headspace. Remove air bubbles and adjust headspace, if necessary, by adding hot butter. Wipe rim. Center lid on jar. Screw band down until resistance is met, then increase to fingertip-tight.
- Place jars in canner ensuring they are completely covered with water. Bring to a boil and process for 10 minutes. Remove canner lid. Wait 5 minutes, then remove jars, cool and store.
Variations:
For a more sophisticated fruit butter, reduce the sugar to 3 cups. When butter has begun to thicken but does not quite mound on a spoon, add 1 cup of your favorite spirit, such as amaretto liqueur or a sweet wine, and continue cooking, stirring frequently, until mixture mounds on a spoon.
Another variation is to replace peaches in the above recipe with pears. The 41/2 lbs of peaches is replaced with 7 lbs pears, peeled, cored and coarsely chopped. The rest of the recipe is same as the peach recipe above with the exception that grated orange zest and juice as well as nutmeg (1 tsp) may be added.
There are other fruit butter recipes using for example: crabapples, apricots, yellow tomatoes, prunes and blueberries.
These and other recipes can be found in Ball Canning Books.


