- Author: Deborah Schnur

Lamb Canyon is a Class III Sanitary Landfill covering 1189 acres, with 144.6 acres permitted for landfilling. Opened in 1970, its service area includes Beaumont, Banning, San Jacinto, Hemet, Coachella Valley, Pine Cove, Idyllwild, Cherry Valley, Cabazon, Homeland, Romoland, and Winchester. In 2022, it processed an impressive 606,481 tons of waste.
Waste Management and Sustainability
Our tour began at the scale house, where incoming vehicles are weighed to calculate the amount of waste delivered. With approximately 300 vehicles weighed daily, this step is essential for effective landfill management. Because of increasing customer traffic, the facility is currently upgrading its scales, roadways, and traffic signs.

Our next stop was the organics collection and composting area. Composting at this site is a 15-day process that turns green waste (excluding food waste) into compost used for erosion control within the landfill. There are plans to make compost available to the public at the Reuse Store.
Exploring Landfill Operations

Heavy machinery, including dozers and compactors, is used to break down and compress the waste. Pipes collect methane gas and carry it to a flare station where it is burned and safely released to the atmosphere as carbon dioxide and water vapor. A drainage system collects leachate, the liquid filtering through the landfill, to protect groundwater. Leachate is then stored in tanks and recycled for dust control within the landfill. Parts of the landfill also have a liner to contain leachate.
At night, waste in the active part of the landfill is covered with tarps to shed surface water, prevent fires, and reduce scavenging by animals which spread disease. Drones and falcons are used to keep birds at bay.
Surprisingly, the landfill also contains a 200-acre conservation area, providing habitat for a variety of sensitive plant and animal species including western sycamores, mountain lions, burrowing owls, and red-tailed hawks.
An Eye-Opening Experience Open to All
At the end of our tour, we received gift bags containing recycled and reusable goodies. More importantly, we left with a better understanding of where our trash goes and the engineering required to protect the environment. The volume of waste managed here emphasizes the importance of recycling, reusing, and reducing waste in our daily lives.
If you're interested in exploring Lamb Canyon Landfill, free guided tours are available from March through October, Monday through Thursday, for groups of 10 to 42 people. For more information, visit the Riverside County Department of Waste Resources website at https://rcwaste.org/education-center.
Have you enjoyed reading this blog? Do you have questions? Need help with environmental education? Feel free to contact me at dschnur@ucanr.edu. I look forward to hearing from you and supporting you.
- Author: Margaret J O'neill

- A garden is a work in progress, and that means reevaluating your goals, design, and needs every so often! When I talk to people about gardening, I like to remind them (and myself!) that gardening is a journey, not a destination. That means a garden is never really “done,” and that's a good thing. The relationship we have with our garden, and the time spent outside, is vital for not only the health of our planet but for ourselves as well. With that in mind I like to do seasonal check-ins with my garden to see what plants are working and what aren't. I consider what hardscape features I could add to make my garden more functional in the rain or extreme heat. These check ins can not only help keep your garden looking it's best they can also help keep you engaged, or reengaged, in your garden even if you sort of “fell of” for a season or two because of life, etc!
2. This rain has greened up things that might not be practical to keep green under another more drought and water restrictions (we're still there!). Nature blessed us with some serious water this spring, and I'm seeing so many things that are green that haven't really looked their best in years. I must remind myself that in my area I got about 30 inches of rain, about 18 inches above average, and that is not sustainable if I needed to water those plants to keep them going. With that in mind, I am noting which plants might not be best suited for my yard since they do best with more water than I am usually able to provide, and that can help me decide what to keep and what not to keep. For plants that I am really attached to, I am thinking of ways to help reduce moisture loss, like adding mulch, and also thinking about ways that I can extend the water I have through rain catchment, berms and swales, and greywater (for non-edibles), or setting up more efficient irrigation systems.
3. If you're pressed for time in the garden or have a big space that you want to rejuvenate, consider breaking your space into sections to make tackling the job easier. There are lots of ways to mentally divide up your garden space. You can think about the plants function, like pollinator habitat, food gardening, fruit trees, ornamental plants, native habitat, etc. You can also think about your space in terms of how things are planted, like in containers, in the ground, in raised beds, etc. In my garden I also have added a layer of what I like to do in each space. So, for example I have a meditative or relaxing space, my herb garden, my native habitats, and a small orchard. These spaces aren't that large but giving them a “theme” helps me decide where I am going to work on any given day, and I just sort of rotate around to give even attention to all. This can also help me decide that “today I am going to work on cleaning up my (neglected) meditation area” so I don't feel so overwhelmed by all the garden chores I need to do (really sounds like I need that meditation space to be up and running!!).
4. Another way to break up garden chores that might seem overwhelming is to focus on specific tasks. This is a technique I use regularly in my garden. I will decide that “today I am going to just move mulch, or work on my compost pile, or prune fruit trees off the ground to help keep ants out…..” This single task might be something I do in multiple areas of the garden, but I can bring out one set of tools, or stay focused on one task and can really get a lot done.
- Don't forget that the “little by little” approach can move mountains (of mulch for example)! I am amazed at how much I can get done that way. Just spending 15 min a day in my garden can show results in a week's time. The same goes for a big pruning or weeding job, or any other big task that you are doing yourself. Sometimes I get overwhelmed at the tasks that lie ahead of me, but I can tell you from experience that working in the yard for 15 min a day is a lot more productive than the weeks I spent just thinking about how big of a job something is! That short time in the garden is also a great way to clear your head each day and it can become a great part of your healthy lifestyle routine. Getting into a routine can help you get back into gardening more easily if you've had things that have kept you from garden for a few days or even weeks.
- Lastly, be patient with yourself and your garden. When you see amazing gardens at your neighbor's house, or online, don't compare your garden to theirs in a judgmental way. They may have lots of garden helpers or be retired with plenty of time on their hands. They may have also just found their gardening groove….a routine that works for them that keeps them getting into the garden on a regular basis, even if it's just for a short interval each time. I try to look at those “ideal” gardens and see what's possible, what I like and don't like, and think about how I may be able to incorporate it into my garden over time. Last year I wanted to add more herbs to my garden, and took the little by little approach. After a year I am amazed at the little herb forest I have going and am so impressed by how my little efforts paid off. Some things I planted last year also didn't work, but I took a few min here and there to think about why certain things didn't work in that microclimate. I recommitted to some things this year that I really wanted to see come together and let some other things go that just didn't work for me (and my schedule or desired water usage), and that's ok too. Be kind to yourself in your garden and remember that it's a journey and not a destination! It's amazing what can be accomplished over time with just a little consistent investment each day or week.
Hopefully these tips help you feel empowered to tackle even the most neglected space! We would also love to hear about your gardening strategies to keep your garden at its best, so join our classes on revitalizing your garden to share your stories or if you need some more ideas end encouragement to get it done!
- Author: Deborah Schnur
In my previous blog, I gave an overview of the first two days of COMPOST2023. The event, hosted by the The US Composting Council in January, was an outstanding learning and networking experience. In Part 2, I'm excited to discuss the rest of the event, including the conference sessions at the Ontario Convention Center and Demo Day at One Stop Landscape Supply.

After the keynote, I wandered over to the Exhibit Hall, eager to check out the vendors and information tables. Major equipment vendors such as Komptech and Ecoverse showcased their massive composting machines, while product manufacturers offered samples of compostable bags and utensils. One of the biggest trends was biochar—a carbon-rich, charcoal-like substance created by burning organic material without oxygen. It was interesting to see that even pistachio shells can be used to produce this substance! When blended with compost, biochar enriches the soil by increasing its moisture retention, nutrient content, and microbial activity.

The final presentation I attended on opening day was “Healthy Soils for Healthy Parks: Los Angeles Urban Carbon Farm at Griffith Park” by Lynn Fang, a well-known educator and researcher in composting systems and soil science. LA Compost recently established its first park-based compost site at Griffith Park, using food waste collected from local farmers market drop-offs. Lynn's presentation highlighted a demonstration project of the Healthy Soils for Healthy Communities Initiative, led by TreePeople in partnership with LA Parks and Recreation, Kiss the Ground, and LA Compost, to promote regenerative park management. The study site was a flat, grassy area south of Crystal Springs, where individual plots were treated with mulch from Griffith Park, compost from LA Compost, or no amendment as a control. After 9 months, the researchers found that mulch and compost increased the activity of soil organisms and the percentage of soil organic carbon.

Other panelists showed how technology can facilitate community composting. Tess Feigenbaum, the Cofounder and Operations Director at Epic Renewal in Rhode Island, announced plans to release a mobile application to help with compost site management, process tracking, data collection, and environmental impact reporting. Sashti Balasundaram, the Founder and CEO of WeRadiate, is leading the development of smart sensors for compost piles, which measure temperature and moisture with remote, real-time monitoring.
The final panelist to speak was Elinor Crescenzi, who shared data on the 31 Community Composting for Green Spaces (CCGS) sites in the Inland Empire. Despite a modest $224K budget for labor and infrastructure, these sites managed to divert about 510K lbs of food scraps and 3.7M lbs of organic material from landfills, resulting in emissions reductions equivalent to 908 metric tons of carbon dioxide. That's similar to taking 200 vehicles off the road for one year! In addition to the environmental impacts, the CCGS program also had significant community and social impacts, such as increasing healthy food access, community engagement and education, social support networks, and psychological well-being. Ninety percent of the sites are growing food in addition to making compost.
Another interesting session was “Compost Market Dynamics in California”. One of the speakers was Jeff Ziegenbein, the site manager of the largest indoor compost facility in North America, the Inland Empire Regional Composting Facility (IERCF). Located in Rancho Cucamonga, the facility produces over 200K cubic yards of compost annually from recycled wood and green waste, biosolids, and horse stable bedding using the Aerated Static Pile process. The composting area is completely enclosed to meet air quality regulations. The filtering system does such a good job at odor control I didn't even know this facility is literally in my backyard. The compost, marketed under the SoilPro brand, is used in a variety of applications, including landscaping, horticulture, turf management, agriculture, and roadways.
After attending the morning sessions, I returned to the Exhibit Hall for some Q&A with the finalists of the Emerging Composter Competition. The first place winner was Greg Mankowski of Evolve Pet Composting Services and Consultation in Michigan. His business is very timely, as more and more states, including California, are passing laws to allow human composting. Second place was Justin Brann of Crystal Coast Compost in North Carolina, who composts food waste from many sources, including residences, businesses, farmers markets, and events. Third place was Jameson Meyst of Juicycles, who collects unpicked fruit from San Diego orchards, juices it onsite, and distributes juice and fruit popsicles to the community while composting the remaining waste.

My favorite day of COMPOST2023 was Demo Day, which took place at One Stop Landscaping Supply in Redlands. The place is huge, making it the perfect setting for demonstrations of large-scale composting equipment. As a volunteer, my day started early to direct traffic to the parking area and hand out safety gear to the attendees.

Despite the loud noise of the equipment, the wild burros grazing around the parking lot seemed unfazed. Having only heard about herds of burros roaming San Timoteo Canyon, I was thrilled to see them up close. Although they were quite shy and wandered away when approached, many drivers stopped to snap some photos before heading out.
If this blog has piqued your interest in COMPOST2023, you can find the recordings at Compost University on the US Composting Council website. I'm already looking forward to next year's conference at the Ocean Center Convention Center in Dayton Beach, Florida from February 6th to 9th. The theme of COMPOST2024 is “Making Waves”, which is fitting given the impact composting is sure to have for years to come.
If you want to learn more about composting, check out the videos on our UCCE San Bernardino YouTube channel or contact the Master Gardener Helpline at mgsanbern@ucanr.edu or (909) 387-2182.
Have you enjoyed reading this blog? Do you have questions? Need help with school gardens or environmental education? Feel free to contact me at dschnur@ucanr.edu. I look forward to hearing from you.

- Author: Margaret J O'Neill
This month's spotlight is on UCCE San Bernardino County Master Gardener Donna Palmer. She has been a Master Gardener (MG) for a few years, joining during our first virtual class in 2021. She is a natural teacher and has taken on the role of being a MG like she had been doing it her whole life. She has done many talks for the community, and was a great support when we were in our initial stages of doing online talks, taking on the cohost role, and teaching us the fundamentals of what a good cohost was! She has taken this skill she has as a presenter and cohost on to help train her fellow MGs in that role and it is so appreciated! Be on the lookout for Donna giving talks in 2023 (they are great!) and also check out her articles in the Chino Champion on gardening as well. You will learn more from Donna below about her gardening passions, and I hope you too will feel excited about gardening all over again when you read Donna's thoughts from the garden.
-Maggie O'Neill, UCCE San Bernardino County Master Gardener Coordinator
Why did you decide to be a MG?
I've long wanted to become a member of this community of gardeners and garden educators but was too shy to actually do it. When classes went online during lockdown, my husband suggested I use the opportunity to achieve my goal. Now I can't believe I waited so long!
What are your gardening passions?
Absolutely everything! I love a garden, learning about plants and plant families, trying something new in my garden beds, tracking growth and experimenting with techniques, harvesting and cooking from the garden, photographing the garden, teaching about gardens, reading about gardens, visiting gardens or nurseries or farms…. You get the idea. If I had to choose two of my very favorite things they would be teaching basic gardening and practicing plant propagation. There's nothing like watching a student discover the sights, textures, and smells of a garden. Witnessing a new gardener relish a sun kissed tomato or devour a fresh crunchy green almost brings me to tears. And I love populating a new area of the garden with the progeny of my own plants.
What do you think gardening gives back to our community and why do you think it's important for overall community health?
What doesn't a garden give back? The solitary gardener gains a nutritious harvest while building soil, promoting neighborhood habitat, supporting pollinators, beautifying a site, and enriching individual well being. Not to mention achieving a sense of accomplishment with every bloom or harvest. And I've never met a gardener who didn't want to share a harvest or favorite seed. Something about plant stewardship nurtures people and creates community. Gardening within a group does all of this on a larger scale. Gardens beckon us in. They invite us to become aware and participate. They prompt us to share and to nourish one another.
Do you have any tips for the community about conserving water in the drought?
I'm learning to garden in a drought just like every other gardener. Drip irrigation, mulch, and Waterwise plants are becoming my best gardening friends.
What is a tidbit or two you've learned as a MG that the public reading our newsletter could gain from?
Nurturing a plant to harvest is a skill. It's ok to experiment and fail and try again. Gardens are hard work for all of us. The most experienced gardeners earned their gardens one plant at a time.
What advice would you give someone considering becoming a UCCE MG?
Do it! The community of Master Gardeners is welcoming, supportive, exciting, and fun. You and your new friends will find opportunities to learn, grow, and make a difference.
- Author: Deborah Schnur
I couldn't believe it when I heard that COMPOST2023, billed as “the world's largest composting event”, was going to be held in Ontario, California in January. What were the odds that a composting enthusiast such as myself would be so close to the action? I'm so glad I was able to attend as a volunteer! This year's theme was “Capturing Carbon Renewing Soil”, emphasizing the importance of composting in reducing carbon emissions and enhancing soil health.

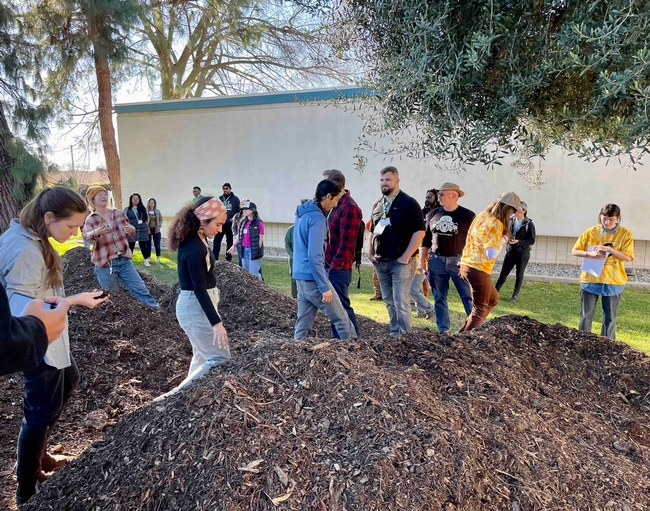
COMPOST2023 ran from Monday, January 23rd to Friday, January 27th, starting with two days of pre-conference activities. On the first day, I attended the Cultivating Community Composting Forum at the Ontario Convention Center. The second day was a Field Day with bus tours of local composting sites. I attended conference sessions at the Convention Center on Wednesday and Thursday and volunteered for Demo Day at One Stop Landscape Supply on Friday. It was a lot to absorb in such a short time.
The Institute for Local Self-Reliance (ILSR) coordinated the Cultivating Community Composting Forum and related Field Day activities. ISLR's Composting for Community Initiative works to advance “local composting to create jobs, enhance soils, protect the climate, and reduce waste through advocacy, training, research, demonstration sites, and coalition building”. The goals of the forum were to share best practices and build support for small-scale, community-based composting.

After a short break, the forum attendees reconvened for two peer-to-peer chat sessions on topics including scaling up, business and mission planning, funding and financing, and communications. I attended the sessions on community building and composting methods and best practices. These chats gave me the opportunity to share experiences with composters from across the country–from Peels & Wheels Composting in New Haven, Connecticut to ReMark Composting Solutions in Detroit to Hart's Worm Farm in Irvine.
The afternoon agenda consisted of two concurrent presentation sessions followed by two panels. One of the most memorable presentations was “Generating Excitement About Community Composting in an Urban, Chronically Marginalized Community” by Marvin Hayes and Kenny Moss of the Baltimore Compost Collective. Marvin is the Executive Director of the Collective which collects food scraps from residences and composts them at the Filbert Street Community Garden. Kenny, a student leader in the youth entrepreneurship program, helps manage the composting operations. In a catchy poem, Marvin described the role of composting this way: “Learn so we don't have to burn. Starve the incinerator. Feed the soil. Feed the Community! Clean air for Baltimore.” In 2022, the Baltimore Compost Collective served over 300 customers and increased its waste diversion by 40%.
Kourtnii Brown told the story of how the California Alliance for Community Composting (CACC) launched 120 community composting hubs with a $1.54M Community Composting for Green Spaces grant from CalRecycle. The network of composting sites spanned the state in 6 regions: the Bay Area, Fresno & Central California, the Inland Empire, Greater Los Angeles, Sacramento & Northern California, and Greater San Diego. CACC provided on-site support with skilled staff, infrastructure, community building, and program development. In the summer of 2021, CACC held a Soil Stewardship Training retreat (also called “Soil Summer Camp”) at Amy's Farm to train the trainers at the composting sites. Training recordings are available for public view on YouTube. Since 2020, the sites have diverted millions of organic waste from landfills and produced thousands of cubic yards of compost. The first round of CalRecycle funding just ended in January, and organizations have submitted applications for a second round.

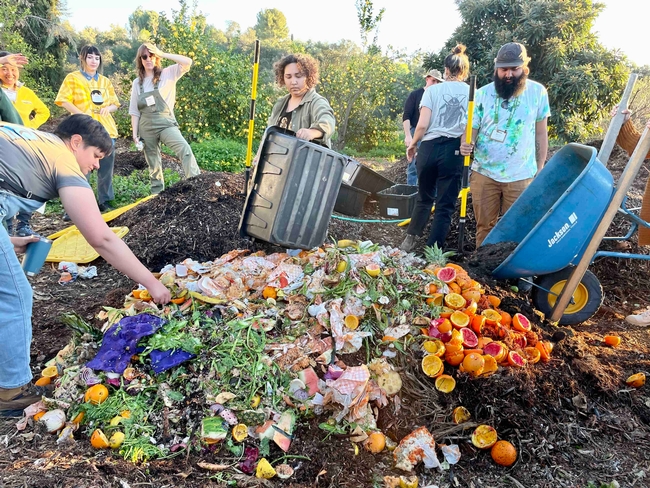
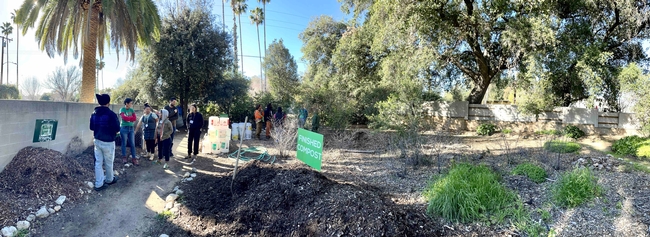
Of the two afternoon composting site tours, I opted for the one that included Temple Beth Israel in Pomona, Claremont Friends Meeting, and the Buddhist Tzu Chi Foundation in San Dimas. Temple Beth Israel was the newest composting site we visited. There are an impressive number of raised beds on the property (around 20 from what I remember), where onions, herbs, greens, and other vegetables are grown in partnership with Uncommon Good. Ten small businesses provide food waste for composting next to the planting beds.


If you want to learn more about composting, check out our UCCE San Bernardino YouTube channel or contact the Master Gardener Helpline at mgsanbern@ucanr.edu or (909) 387-2182.
Have you enjoyed reading this blog? Do you have questions? Need help with school gardens or environmental education? Feel free to contact me at dschnur@ucanr.edu. I look forward to hearing from you.


