- Author: Cynthia Nations
- Editor: Maggie Mah
Flowers: they're not just for centerpieces anymore-
If there's a silver lining to the Covid-19 pandemic, it's that many of us turned to cooking and gardening to cope with many more hours at home and enforced isolation. With plenty of inspiration from foodie TV shows and Internet sites, we gained expertise and became more adventurous with meal preparation over the long months of lock down. Now, with daily life returning to some new version of normal, we may be spending less time in the kitchen but making everyday food and beverages a bit more special is something we want to keep on doing. Edible flowers, which have been used for centuries and in many different cuisines, are a great way to add color and flavor to all kinds of dishes. It couldn't be simpler and you might even have the ingredients right outside your kitchen door. Getting started is easy, educational and fun.
Safety first: Do your homework
- Not all flowers or all the parts of an otherwise edible flower are safe to eat and some are poisonous and, if ingested, could cause serious illness. Doing a bit of research up front will help you determine which flowers are safe to consume. Edible flowers can also cause problems with your digestive tract if eaten in large amounts.
- A good practice is to grow your own or purchase from a reputable store. Either way, ensure they are grown without pesticides and other chemicals that could be harmful to ingest.
- Don't take a chance on flowers that are growing in the wild or on the side of the road. The plant that appears to be Queen Anne's Lace could actually be the extremely poisonous Wild Hemlock.
Next: A few easy steps
Treat flowers as you would delicate salad greens by submerging gently in a bowl of water. Swish lightly and allow the flowers to drain before spreading out on a dry kitchen towel. Some flowers, such as nasturtiums and pansies can be eaten whole. For others, you may need to remove the petals from the pistils and stamen because these parts are often very bitter. It's fun to do a bit of tasting ahead of time to get to know the flavors of each edible flower and which will work best in a particular dish.
Most edible flowers are best eaten as soon as possible after picking, preferably fresh from your own garden. If you won't be using them right away, wrap the flowers lightly in a damp paper towel and place in the produce section of your refrigerator where they will keep for 2-3 days.
How much to add and at what stage in the preparation process depends on the type of dish, the variety of flower and your own particular preference. In general, tender blossoms are added to cold foods or as a finishing touch to hot dishes while more fibrous varieties (such as lavender) can withstand longer cooking. Edible flowers also tend to be subtler in flavor so using them in combination with milder ingredients will allow their unique qualities to stand out
A bouquet of choices:
There are many varieties of edible flowers you can grow in your own garden and retail options are on the increase. Here are a few for starters:
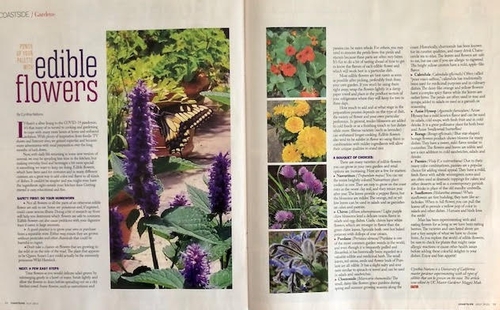
Nasturtium (Tropaeolum majus) - You can eat the entire brightly colored Nasturtium plant cooked or raw. They are easy to grow on the coast even in the worst clay soil, and they return year after year. The leaves provide a pepper flavor, but the blossoms are milder. The orange, red, or yellow leaves can be used in salads and as garnishes on cakes and pastries.
Chives (Allium schoenoprasum) – Light purple chive blossoms lend a delicate onion flavor in salads, and egg dishes. Garlic chives have white flowers, which are stronger in flavor than the green chive leaves. Sprinkle both over hot baked potatoes with dollops of sour cream.
Purslane (Portulaca oleracea) – Purslane is one of the most common garden weeds in the world, and even though it is frequently pulled and discarded, it has historically been regarded as a valuable edible and medicinal herb. The small leaves, red stems, seeds, and flower buds of Purslane are all edible. It has a slight salty and sour taste similar to spinach or sorrel and can be used in salads and sandwiches.
Chamomile (Matricaria chamomilla) - The small, daisy-like flowers grace gardens during spring and summer growing seasons along the coast. Historically, chamomile has been known for it's curative qualities, and many drink Chamomile tea to relax. The leaves and flowers are safe to eat, but use care if you are allergic to ragweed. The bright yellow centers have a mild, apple-like flavor.
Calendula (Calendula officinalis) – Often called “poor man's saffron,” calendula has traditionally been used for medicinal purposes and in culinary dishes. The daisy-like orange and yellow flowers have a complex spicy flavor while the leaves are rather bitter. The petals are often used in teas and syrups, added to salads or used as a garnish or seasoning.
Anise Hyssop (Agastache foeniculum) – Anise Hyssop has a mild licorice flavor and can be used in salads, cold soups, with fresh fruit and in cold drinks. It is a great pollinator plant for both bees and Anise Swallowtail butterflies!
Borage (Borago officinalis) - Blue star-shaped borage flowers produce showy blooms for many dishes. They have a sweet, mild flavor similar to cucumber. The flowers and leaves are edible and are a nice addition to cold sandwiches, salads and drinks.
Pansies (Viola V. x wittrockiana) - Due to their many color combinations, pansies are a popular choice for adding visual appeal. They have a mild, fresh flavor with subtle wintergreen notes and are often used as dramatic toppings for cakes and other desserts as well as a contemporary garnish for drinks in place of the old standby umbrella.
Sunflowers (Helianthus annuus) - When sunflowers are first budding, they taste like artichokes. When in full flower, you can pull the leaves off to provide a yellow pop of color in salads and other dishes. Humans and birds love the seeds!
Man has been experimenting with and eating flowers for as long as we have been eating berries. The varieties and uses listed above are just a tiny sample of what we have to choose from. As you explore the world of edible flowers, be sure to check for plants that might cause allergic reactions or cause other health issues before adding these colorful delights to your dishes. Enjoy and bon appétit!
Cynthia Nations is a UC Master Gardener experimenting with all types of edibles that can be grown on the coast. This article was edited by UC Master Gardener Maggie Mah.
- Author: Maggie Mah
- Editor: Cynthia Nations
If you long for a lovely landscape and bountiful baskets of homegrown vegetables, you might be surprised to learn that doing less can actually result in a healthier, more productive garden. If this sounds too good to be true, consider this: some of the most traditional practices are not only labor-intensive but also counterproductive. By making a few simple changes and letting nature do a lot of the work for you, you can achieve big results. Here's how:
Thou Shalt Not Till
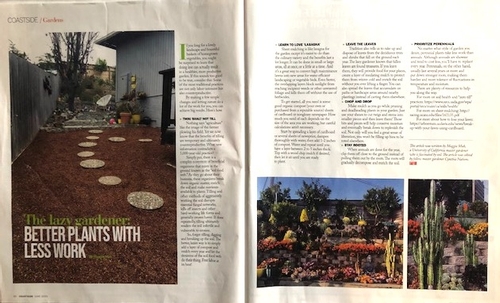
Nothing says “agriculture” like the image of the farmer plowing his field, yet we now know that the benefits of tilling are temporary and ultimately counterproductive. What new information contradicts a 5,000-year-old practice? Simply put, there is a complex ecosystem of beneficial organisms that exist in the ground known as the “Soil Food Web.” As they go about their business, these organisms break down organic matter, enrich the soil and make nutrients available to plants. Tilling and other methods of aggressively working the soil disrupts essential fungal networks, kills off insects and other hard-working life forms and generally creates havoc. If done repeatedly, tilling ultimately renders the soil infertile and vulnerable to erosion. So forget tilling, digging, and breaking up the soil. The better, lazier way is to simply add a layer of compost and mulch every year and let the denizens of the Soil Food Web do their thing. Free labor at its best!
Learn to Love “Lasagna”
Sheet mulching is like lasagna for the garden except it's easier to do than the culinary variety and the benefits last a lot longer. It can be done in small or large areas, all at once or a little at a time and it's a great way to convert high maintenance lawns into new areas for water-efficient landscaping or vegetable beds. Even better: the overlapping layers block sunlight from reaching incipient weeds or other unwanted foliage and kills them off without the use of herbicides.
To get started, all you need is some good organic compost (your own or purchased from a reputable source) sheets of cardboard or non-glossy newspaper. How much you need of each depends on the size of the area you are working but careful calculations aren't necessary. Start by spreading a layer of cardboard or several sheets of newsprint, dampen thoroughly with water then add 1-2 inches of compost. Water and repeat until you have a layer between 2 and 5 inches thick. Top with a wood chip mulch if desired, then let it sit until you are ready to plant.
Leave the Leaves:
Tradition also tells us to rake up and dispose of leaves from the deciduous trees and shrubs that fall on the ground each year. The lazy gardener knows that fallen leaves are found treasures. If you leave them, they will provide food for your plants, create a layer of insulating mulch to protect them from winter cold and enrich the soil without you ever lifting a finger. You can also spread the leaves that accumulate on paths or hardscape areas around nearby plantings instead of carting them elsewhere.
Chop and Drop:
Make mulch as you go while pruning and deadheading plants in your garden. Just use your shears to cut twigs and stems into smaller pieces and then leave them! Those bits and pieces will help conserve moisture and eventually break down to replenish the soil. Not only will you feel a great sense of liberation, you won't be filling up bins to be toted elsewhere.
Stay Rooted:
When annuals are done for the year, clip them off close to the ground instead of pulling them out by the roots. The roots will gradually decompose and enrich the soil.
Prioritize Perennials:
No matter what style of garden you desire, perennial plants take less work than annuals. Although annuals are showier and tend to cost less, you'll have to re-plant every year. Perennials, on the other hand, usually last several years or more and put down stronger roots, making them hardier and more tolerant of fluctuations in temperature and moisture.
Resources:
For more on soil health and “zero till” practices: https://www.nrcs.usda.gov/wps/portal/nrcs/main/ca/soils/health/
For more on sheet mulching: http://sacmg.ucanr.edu/files/163135.pdf
For more about how to lose your lawn: https://arboretum.ucdavis.edu/news/break-up-with-your-lawn-using-cardboard
This article was written by Maggie Mah, a University of California Master Gardener who is fascinated by soil. The article was edited by UC Master Gardeners Cynthia Nations and Maggie Mah.
- Author: Stephanie Erskine
- Editor: Maggie Mah
- Editor: Cynthia Nations
What is a Pollinator?
Bees are famous for spreading pollen from flower to flower but just about anything that helps distribute pollen from one plant to another can be called a “pollinator.” The list of pollinators includes wind, birds, beetles, butterflies, moths, flies, wasps and even humans!
Why do we need pollinators?
Imagine a world without chocolate, blueberries, or coffee—unthinkable, right? But that's what would happen if pollinators disappeared. Without pollinators, many flowering plants would not be able to reproduce. In fact, 75% of the world's flowering plants rely on pollinators. A vast majority of the fruit, vegetable, nut and seed crops grown around the world for human consumption depend on pollinators. Unfortunately, bees and other pollinators are having a hard time maintaining their populations due to disease, parasites, loss of habitat and other factors.
What is pollination? It really is about the birds and the bees
Pollination occurs when pollen grains from the male part of one flower (the “anther”) are transferred to the female part (the “stigma”) of another flower. Pollination sets off a chain of events that leads to fertilization and ultimately, to the production of seeds, which enable the plant to reproduce and/or to form fruits, vegetables and other edibles.
Hummingbirds, those colorful, ethereal garden visitors, also have a practical side: they are very good pollinators and are even referred to by some as “feathered bees.” As they flit here and there searching for nectar, the pollen inside the bloom attaches to the bird's feathers and long, slender bill. The hummingbird then transports the pollen to the next flower, repeating the process with each plant it visits. Pollen also gathers on the legs of beetles, bees and other insects. As they go about their business, pollen is distributed from plant to plant, helping to create genetic diversity and a healthier ecosystem.
Our unique and important pollinator habitat
We, along with our pollinators, live in an area known as “The California Floristic Province,” one of only five areas in the world with a Mediterranean climate, which is characterized by warm, dry summers and relatively mild winters. The area adjacent to the Pacific Ocean is called the California Coastal Chaparral Forest and Shrub Province. Our hospitable year round climate supports a wide range of diverse ecosystems and many endemic species of plants and animals. Thanks in large part to hard working pollinators, the California Floristic Province also generates half of all the agricultural products used by U.S. consumers. Despite this abundance, the entire California Floristic Province has been designated a biodiversity “hot spot” due to the number of species that are lost or threatened with extinction from loss of habitat, pollution, pesticides and other impacts caused by human activities. Pollinators help to preserve biodiversity but they could use some help.
How you can help your local pollinators:
- Select a wide variety of plants that will flower in overlapping waves from February/early spring to October/late fall to provide food sources for much of the year.
- Guide pollinators to your garden by planting in groups rather than single plants spaced farther apart.
- Bees and other pollinators like to visit flowers in the sun so use the shady areas of your garden for plants that are less attractive to pollinators.
- Provide a source of clean water, preferably shallow or with a place for pollinators to land and drink without drowning. A few rocks or a “bee raft” made by connecting 5 or 6 wine bottle corks with a bamboo skewer will turn any vessel into a pollinator-friendly drinking spot.
What plants attract pollinators?
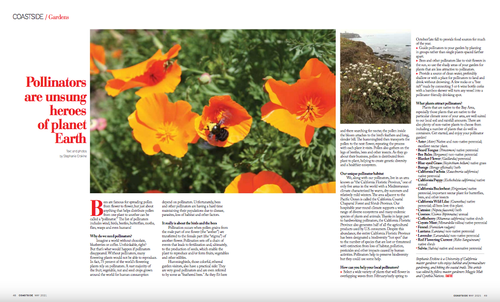
Plants that are native to the Bay Area, especially those plants that are native to the particular climate zone of your area, are well suited to our local soil and rainfall amounts. There are also plenty of non-native plants to choose from including a number of plants that do well in containers. Get started, and enjoy your pollinator garden!
-
Aster (Aster) Native and non-native perennial - Excellent nectar plant
-
Beard Tongue (Penstemon) native perennial
-
Bee Balm (Bergamot) non-native perennial
-
Blanket Flower (Gaillardia) perennial
-
Blue-Eyed Grass (Sisyirchium bellum) native grass
-
Borage (Borage officinalis) herb
-
California Fuchsia (Zauschneria californica) native perennial
-
California Poppy (Eschscholzia californica) native annual
-
California Buckwheat (Erigonium) native perennial, important nectar plant for butterflies, bees, and other insects
-
California Wild Lilac (Ceanothus) native perennial – all bees love this plant.
-
Catmint (Nepeta faassenii) herb
-
Cosmos (Cosmos Bipinnatus) annual
-
Coffeeberry (Rhamnus californica) native shrub
-
Coyote Mint (Monardella villosa) native perennial
-
Fennel (Foeniclum vulgare)
-
Lantana (Lantana) non-native perennial
-
Lavender (Lavandula) non-native perennial
-
Red Flowering Current (Ribes Sanguineum) native shrub
-
Salvia (Salvia) native and nonnative perennial
Stephanie Erskine is a UC Master Gardener who enjoys habitat and permaculture gardening, and hiking the coastal trails. This article was edited by UC Master Gardeners Maggie Mah and Cynthia Nations.
- Author: Carolyn Dorsch
- Editor: Cynthia Nations
- Editor: Maggie Mah
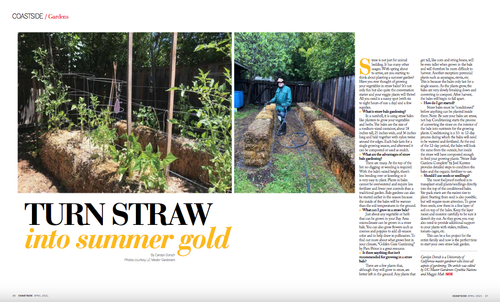
Straw is not just for animal bedding. It has many other usages. With spring about to arrive, are you starting to think about planting a summer garden? Have you ever thought of growing your vegetables in straw bales? It's not only fun but also quite the conversation starter and your veggie plants will thrive! All you need is a sunny spot (6-8 hours/day) and a few supplies.
What is straw bale gardening?
In a nutshell, it is using straw bales like planters to grow your vegetable and herbs. The bales are the size of a medium-sized container, about 18” tall, 21” wide, and 36” long and held together with nylon twine around the edges. Each bale lasts for a single growing season and afterward, it can be composted or used as mulch.
What are the advantages of straw bale gardening?
There are many. At the top of the list: no digging or weeding is required! With the bale's raised height, there's less bending over or kneeling so it is very easy to plant. Plants in bales cannot be overwatered and require less fertilizer and fewer pest controls than a traditional garden. Bale gardens can also be started earlier in the season because the inside of the bales will be warmer than the soil temperatures in the ground.
What can I grow in a straw bale?
Just about any vegetable or herb that can be grown in your bay area microclimate can be grown in a straw bale. You can also grow flowers such as cosmos and poppies to add all-season color and to help draw in pollinators. To find out more about what grows best in your climate, Golden Gate Gardening by Pam Peirce is a great resource.
Is there anything that isn't recommended for growing in a straw bale?
There are a few plants that, although they will grow in straw, are better left in the ground. Any plants that get tall, like corn and string beans, will be even taller when grown in the bale and will therefore be more difficult to harvest. Another exception: perennial plants such as asparagus, stevia, etc. This is because the bales only last for a single season. As the plants grow, the bales are very slowly breaking down and converting to compost. After harvest, the bales
will begin to fall apart.
How do I get started?
Straw bales must be “conditioned” before anything can be planted inside them. NOTE: be sure your bales are straw, not hay. Conditioning starts the process of converting the straw on the interior of the bale into nutrients for the growing plants. Conditioning is a 10-12 day process during which time the bales will need to be watered and fertilized. At the end of the 12-day period, the bales will look the same from the outside but inside, the straw will have composted enough to feed your growing plants. Straw Bale Gardens Complete by Joel Karsten provides detailed steps to condition the bales and the organic fertilizer to use.
Should I use seeds or seedlings?
The most foolproof method is to transplant small plants/seedlings directly into the top of the conditioned bales. Six-pack starts are the easiest size to plant. Starting from seed is also possible, but will require more attention. To grow from seeds, sow them in a fine layer of soil on top of the bales. Keep the layer moist and monitor carefully to be sure it doesn't dry out. As they grow, you may also need to provide additional support to your plants with stakes, trellises, tomato cages, etc. This can be a fun project for the entire family and now is the perfect time to start your own straw bale garden.
Carolyn Dorsch is a University of California Master Gardener who loves all aspects of gardening. The article was edited by UC Master Gardeners Cynthia Nations and Maggie Mah.
- Author: Marvin Goodman
- Author: Judith Dean
- Editor: Susan Kornfeld
- Editor: Cynthia Nations
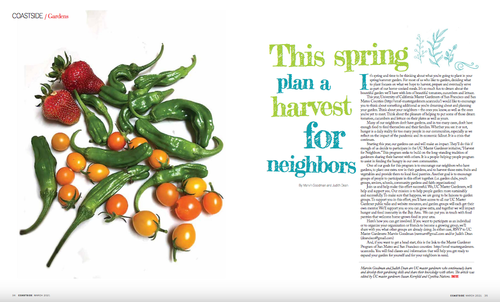
It's spring and time to be thinking about what you're going to plant in your spring/summer garden. For most of us who like to garden, deciding what to plant focuses on what we hope to harvest, prepare, and eventually serve as part of our home cooked meals. It's so much fun to dream about the bountiful garden we'll have with lots of beautiful tomatoes, cucumbers, and lettuce.
This year, University of California Master Gardeners of San Francisco and San Mateo Counties would like to encourage you to think about something additional as you're dreaming about and planning your garden. Think about your neighbors – the ones you know, as well as the ones you've yet to meet. Think about the pleasure of helping to put some of those dream tomatoes, cucumbers and lettuce on their plates as well as yours.
Many of our neighbors don't have gardens, and in too many cases, don't have enough food to feed themselves and their families. Whether you see it or not, hunger is a daily reality for too many people in our communities, especially as we reflect on the impact of the pandemic and its economic fallout. It is a crisis that continues.
Starting this year, our gardens can and will make an impact. They'll do this if enough of us decide to participate in the UC Master Gardener initiative, Harvest for Neighbors. This program seeks to build on the long-standing tradition of gardeners sharing their harvest with others. It is a people-helping-people program to assist in feeding the hungry in our own communities.
One of our goals for this program is to encourage our neighbors who have gardens, to plant one extra row in their gardens, and to harvest those extra fruits and vegetables and provide them to local food pantries. Another goal is to encourage groups of people to participate in this effort together. (i.e. garden clubs, youth groups, seniors, schools, community gardens and faith organizations)
Join us and help make this effort successful. We, UC Master Gardeners, will help and support you. Our mission is to help people garden more sustainably and successfully. To make sure that happens, we are going to be liaisons to garden groups. To support you in this effort, you'll have access to all our UC Master Gardener public talks and website resources, and garden groups will each get their own mentor. We'll support you so you can grow extra, and together we will impact hunger and food insecurity in the Bay Area. We can put you in touch with food pantries that welcome home-grown food in your area.
Here's how you can get involved:
• If you want to participate as an individual, please RSVP to UC Master Gardeners: Marvin Goodman and/or Judith Dean
• If you want to organize your organization or friends to become a growing group, we'll share with you what other groups are already doing. Please RSVP to UC Master Gardeners: Marvin Goodman and/or Judith Dean.
And, if you want to get a head start, this is the link to the Master Gardener Program of San Mateo and San Francisco counties: http://smsf-mastergardeners.ucanr.edu. You will find classes and information that will help you get ready to expand your garden for yourself and for your neighbors in need.
Marvin Goodman and Judith Dean are UC Master Gardeners who continuously learn and develop their gardening skills and share their knowledge with others. The article was edited by UC Master Gardeners Susan Kornfeld and Cynthia Nations.
