- Author: Judy Quan
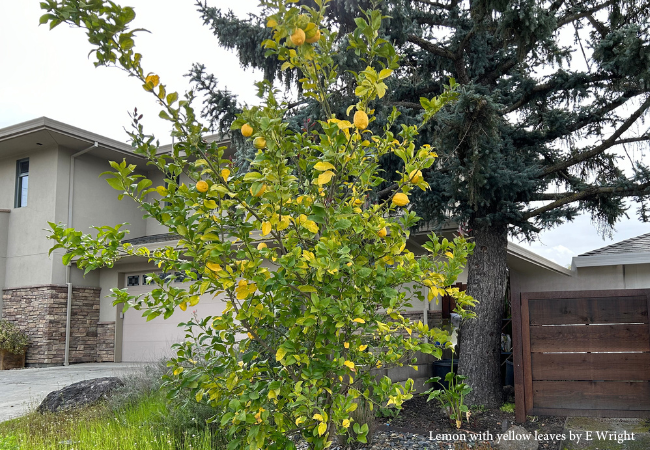
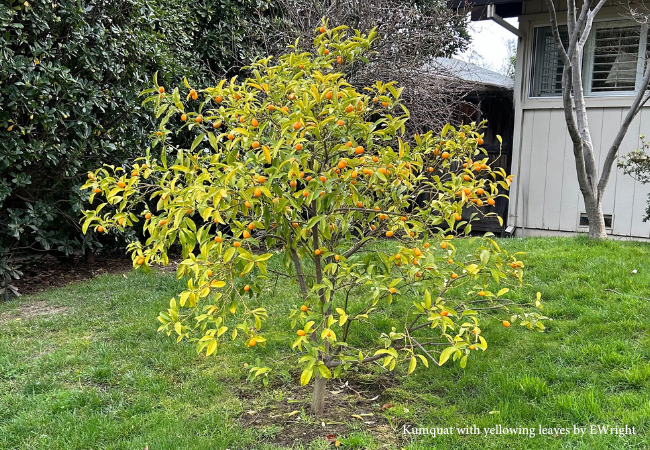
In winter it's a normal process to see yellowing leaves and leaf drop. When we see this in other seasons, it indicates a problem. When we see the yellowing leaves on our citrus, we often jump to the conclusion there is an iron or a nitrogen deficiency, but there can be a variety of causes.
Before adding nutrients such as iron or nitrogen, consider things such as the time of year, watering practices, soil pH, general care practices, as well as the pattern of yellowing on the leaves.
Things to check first before adding nutrients:
√ Is it winter with cold soil temperatures?
√ Are rains or irrigation practices causing soil to be waterlogged?
√ Is soil pH alkaline, greater than 7.5?
√ What fertilizers have been applied?
√ What is the pattern of yellowing on the leaves, symptoms in older or younger leaves?
Certain conditions often make nutrients unavailable to plants, even though the nutrient may be present in the soil.
Alkaline soil pH. Soil pH is a measure of soil acidity/alkalinity, with 7.0 as the neutral point. Citrus, like other plants that are adapted to slightly acidic soil, are especially prone to iron deficiency when soil pH is above about 7.5 (alkaline). Alkaline soils hold onto iron, making it inaccessible to plants, even though typically iron is plentiful in most California soils. A pH of around 6.5 is ideal for citrus, but it can tolerate a range from 6.0 to 7.5. Adjusting soil pH needs to be done carefully and slowly to avoid unwanted effects in the garden.
Cold soil and soggy soil limit microbial activity important in getting nutrients to the plants. Microbes need porous soil and a certain temperature range to thrive, which is why chlorosis (yellowing leaves) is more common in winter. Porous soils have spaces in the soil that allow water and air to move easily in the soil. Compacted or clay soils are especially prone to a lack of porosity in cold, wet weather which may persist into spring.
Nutrient imbalances, especially an overabundance of zinc, copper, and manganese, can make iron less available. Causes vary, but imbalances can be due to over-application of certain fertilizers.
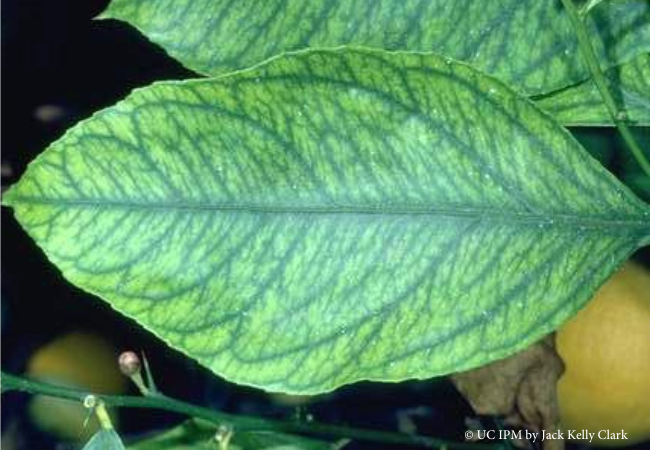
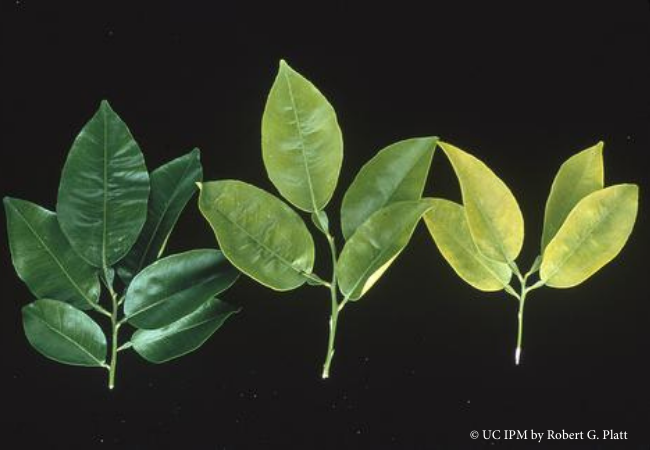
Identification: Iron deficiency symptoms: yellow leaves, green veins – primarily in young leaves. Nutritional deficiencies in citrus can be identified by the pattern of leaf yellowing and by noting whether it occurs on old or new foliage. The pattern of yellowing leaves between the small, darker green veins occurs primarily in young leaves. This happens as soils cool, reducing root activity. Other possible causes of that pattern of yellowing include zinc and manganese deficiencies. See the UC Integrated Pest Management website for pictures of various patterns of chlorosis.
What to do about iron deficiency?
Improve cultural practices and the soil environment.
- Make sure to irrigate with sufficient time between waterings to allow soil to dry but still provide enough water. Deep watering once a month is often sufficient, especially in summer.
- Make sure drainage allows roots to have air and water, avoiding waterlogged soil.
- Regularly add compost on top of roots, away from the crown of citrus. The addition of organic matter helps with iron deficiency as the organic matter decays and soil gradually becomes more acidic.
- If there has been a history of regular application of fertilizers, a soil test may be helpful to determine potential nutrient imbalances before applying more fertilizer.
- Iron, manganese and/or zinc deficiencies can be corrected with a foliar (leaf) application of a liquid micronutrient solution as the new growth emerges in the spring. You can also apply micronutrients, such as zinc sulfate or iron sulfate, to the soil. Microelements such as iron and zinc though, need an actively growing root system for uptake. Their soil application should be limited to the summertime.
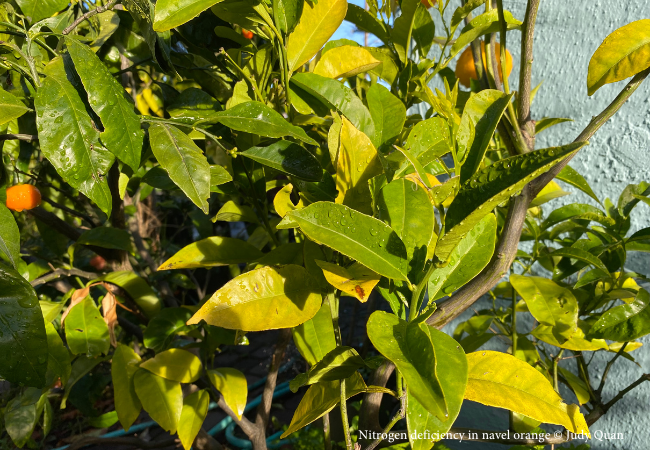
Identification: Nitrogen (N) deficiency symptoms- leaves pale all over (light green or yellow), especially in older leaves. Nitrogen deficiency starts with older leaves near the bottom of the tree and foliage turns a uniform yellow. Slow growth and uniform yellowing of older leaves are usually the first symptoms of nitrogen deficiency. The causes include a true deficiency of nitrogen, adverse soil conditions, or unhealthy roots.
What to do about nitrogen deficiency in citrus?
Most citrus require regular fertilization with nitrogen. However, there are still conditions that would mimic nitrogen deficiency that would not be fixed by adding nitrogen.
- Wait until the soil is warmer, moist but not soggy, to apply nitrogen. Cold and soggy soil inhibits nitrogen uptake.
- Make sure to water with sufficient time between waterings to allow soil to drain well but still provide enough water to citrus. Deep watering once a month is often sufficient, especially in summer.
- Make sure drainage allows roots to have air and water, avoiding waterlogged soil, which often leads to rot and crown damage.
- Regularly add compost on top of roots, away from the crown of citrus. The addition of organic matter helps with iron deficiency as the organic matter decays and soil gradually becomes more acidic.
- Consider doing a soil test, either from a commercial laboratory or a home soil test kit. If there has been a history of regular application of fertilizers, a soil test may be helpful to determine potential nutrient imbalances and to know the current levels of nutrients such as N,P, K and pH.
- Remember it is possible to over-fertilize, potentially causing problems such as a delay in maturity and a reduction in fruit quality; so when in doubt, fertilize less.
When should citrus be fertilized?
Most mature citrus require regular fertilization with nitrogen.
- Begin nitrogen fertilization in February or March depending on the temperature, when soils are warmer and drier, just before pre-bloom.
- Fertilize only in the spring and summer months.
- Choose more frequent/small applications of nitrogen that allow more efficient nitrogen uptake, so less fertilizer is required.
- Or choose the more convenient schedule of three nitrogen fertilizations to be in February, early May and June – Valentine's Day, Mother's Day, Father's Day, with a last application perhaps in early fall.
- Stop applying nitrogen fertilizer if citrus leaf miner severely damages new foliage growth in late summer.
- Aim to go into winter with adequate nitrogen stored in the plant, so when spring comes, the nutrients are already there ready for the blooming period.
- Avoid late-season fertilization
- It may affect fruit quality, delay fruit coloring and make the rind rough.
- It stimulates new growth and makes trees more susceptible to frost injury. Subtropical plants, including citrus, develop some resistance to cold damage by going through quiescence, a resting time of no or slow growth when cooler temperatures arrive. Quiescence is induced several weeks after 40-50°F temperatures arrive. But that quiescence can be changed to active growing by pruning or nitrogen fertilization in early winter, increasing the possibility of cold damage.
- Avoid adding too much nitrogen, which can damage plants and cause other problems associated with nitrogen excess. Follow the directions on the package. If in doubt, fertilize less.
What fertilizer should be used?
- Nitrogen is the chief nutrient required by citrus and should be applied each year. Fertilizers commonly contain nitrogen (N), phosphorus (P), and potassium (K), listed as NPK on the fertilizer label. Look for a fertilizer where the first number (nitrogen) is the highest of the three, e.g., 7-3-3; fertilizers formulated for citrus typically have higher nitrogen with lower levels of phosphorus and potassium. Avoid balanced fertilizers such those labeled 10-10-10. The relatively high concentrations of phosphorus and potassium are not needed since they are held in the soil much longer than nitrogen.
- Choose the type that best fits your needs. Nitrogen can be provided as organic matter, inorganic compounds, or commercial slow-release (e.g., suffer-or polymer-coated urea). Some fertilizers add nutrients only; other fertilizers are also amendments that indirectly affect plant growth by improving the physical properties of the soil. You can find more information about fertilizers and amendments from The San Luis Obispo Master Gardeners in their pdf handout.
When we see yellowing leaves in our citrus, we want a quick easy answer. But by taking a more comprehensive look at our citrus, the soil and the moisture levels in the soil, as well as the seasonal temperatures, we are more likely to correctly diagnose the problem and then effectively adjust factors that will result in healthier citrus trees. And fertilizing with the right amount of nutrients, mainly nitrogen, at the right time will promote the health and productivity of citrus while minimizing problems associated with overfertilization.
This blog post is brought to you by the Help Desk of the Master Gardeners of Alameda County. Subscribe to our blog!
Have a gardening question? We'll help. You can reach us by:
- Emailing acmg@ucanr.edu. Please include a photo of the problem, if you can, plus your name, phone number, city and a description of the problem.
-
Using our online form.
-
By phone, during our office hours, 10 am to noon Wednesday and 11 am to 1 pm Thursday: 510-670-5645. At other times, please leave a message and we'll return your call during our office hours.
- In person at our Hayward office, during our office hours, only by appointment.
Resources
- Adjusting Soil pH in California Gardens, a free downloadable PDF
- A Guide to Citrus Nutritional Deficiency and Toxicity Identification
- Citrus for the Home Gardener 2008 Vincent Lazaneo, Horticulture Advisor
- Diseases and Disorders of Leaves and Twigs
- Fertilizing Citrus in the Foothills by Cindy Fake
- Iron deficiency UC IPM
- Nitrogen deficiency UC IPM
- When to Fertilize Avocado and Citrus in California
- Author: Judy Quan
Help! My lemon tree has yellowing leaves and is dropping leaves… that is one of the most frequent requests we get at the Help Desk, especially in late winter and early spring.
When we see yellowing leaves on citrus, often we leap to the conclusion that it is nitrogen or iron deficiency. There are many causes of yellowing of leaves, not just nitrogen deficiency or iron deficiency. Some of the reasons for the yellowing of leaves will take care of themselves if we are patient and we wait for the soils to warm and dry as we emerge from winter temperatures and winter rains.
Yellowing leaves and leaf drop in citrus often occur in winter.
Winter leaf drop is part of the natural cycle of eliminating old leaves and their replacement with new leaves. Citrus sheds leaves year-round; the older leaves drop off, but in winter there are no new leaves to replace them.
Citrus often “rest” in winter, meaning no growth of new leaves, stems or roots. Citrus trees are evergreen tropical plants that are grown in subtropical regions; in winter, they go into a “quiescent” state, a kind of dormancy for subtropical trees. This is a kind of resting phase that is somewhat protective against frost. The winter temperatures are too low in many citrus-growing areas of California for vegetative growth, the growth of leaves, stems and roots.
The “winter yellows” are the yellowing of citrus leaves during the winter. The yellowing is most common on the later summer flush leaves, the leaves produced during the summer. Symptoms of winter yellows can include leaves that are pale all over with the older leaves often being affected first. The symptoms of winter yellows look like nitrogen deficiency, but the yellowing in winter likely is not due to the lack of nitrogen in the soil. Cool weather inhibits nutrient uptake, and then the leaves look as though there is a nutrient deficiency; however, if you tested the soil, the tests might show sufficient nutrients such as nitrogen or iron.
Root activity slows or stops when soil temperatures are low and soil is waterlogged. Leaf yellowing and drop in the winter is more likely due to excessive or too little water in the root zone or dry winds in combination with cool soils. Winds can cause more leaves to drop sooner, making it seem that there is more of a problem since the branches look more bare. Winter yellows can be more severe when we have winter rains that seem to come storm after storm, and the root zones become waterlogged. Soils that are too cold or wet do not allow the roots to absorb nutrients. Adding nutrients like nitrogen and iron during winter won't address the causes of winter yellowing of leaves.
Low temperatures hinder microbial activity that makes nitrogen more plant-accessible.
Cool soil temperatures inhibit microbial activity that is important to the processes of mineralization and nitrification, essential in the conversion of nitrogen to forms more accessible to plants.
- Mineralization is how microbes convert organic nitrogen to ammonium, an inorganic form of nitrogen which plants can absorb directly from the soil. Mineralization readily occurs in warm (68-95 degrees Fahrenheit), well-aerated and moist soils.
- Nitrification is how microbes convert ammonium to nitrate to get energy. Nitrate is the most plant-available form of nitrogen, but it is also the most susceptible to being lost to the plants due to leaching, which is when nutrients wash away in excess water. Nitrification is most rapid when soil temperature is between 67 to 86 degrees Fahrenheit but essentially stops when temperatures are below 41°F and above 122°F.
Want to measure your soil temperature? If you are curious whether the soil temperatures have reached the high sixties where the microbes are most efficient at making nitrogen accessible, you can use an instant-read probe, like the ones used for cooking or ones for soil. Insert the probe to the depth of the roots of the citrus. Test in the early morning for the lowest temperatures.
As temperatures warm up and as topsoil warms and drains, the trees generally gradually recover and the foliage re-greens. Look for the first flush of new growth in the spring. Healthy new leaves indicate a healthy tree, and your tree doesn't need additional nutrients right now.
This blog post is brought to you by the Help Desk of the Master Gardeners of Alameda County. Subscribe to our blog!
Have a gardening question? We'll help. You can reach us by:
- Emailing acmg@ucanr.edu. Please include a photo of the problem, if you can, plus your name, phone number, city and a description of the problem.
- Using our online form.
- By phone, during our office hours, 10 am to noon Wednesday and 11 am to 1 pm Thursday: 510-670-5645. At other times, please leave a message and we'll return your call during our office hours.
- In person at our Hayward office, during our office hours, only by appointment.
Resources
- Winter Yellows - Ben Faber
- Leaves on your Citrus Trees Turning Yellow this Winter? Don't Panic. by Ed Perry, emeritus Environmental
- Horticultural Advisor for University of California Cooperative Extension (UCCE) in Stanislaus County.
- Fertilizing Citrus in the Foothills
- Nitrogen Basics – The Nitrogen Cycle
- Nitrogen deficiency
- Nitrogen Management in Citrus and Avocado
- Author: Diane Allen
Spring is quickly approaching! To aspiring and experienced gardeners alike, that means it's time to begin the fun of choosing what to plant. This often includes which tomatoes to try, both old favorites and also some of the newer varieties.
There are so many tomatoes to choose from – how to even begin? Well, among other factors that can influence your choices, here are four key points to consider: Use, Growing Space, Climate and Disease Resistance. Even seasoned vegetable gardeners should find these four reminders helpful in choosing for tomato growing success!
Use
How will you be using your tomatoes? For fresh eating, as in salads or sandwiches? Making tomato sauce? Or perhaps you would like to sun-dry or can your tomatoes? There are types of tomatoes that are best suited for each of these different uses.
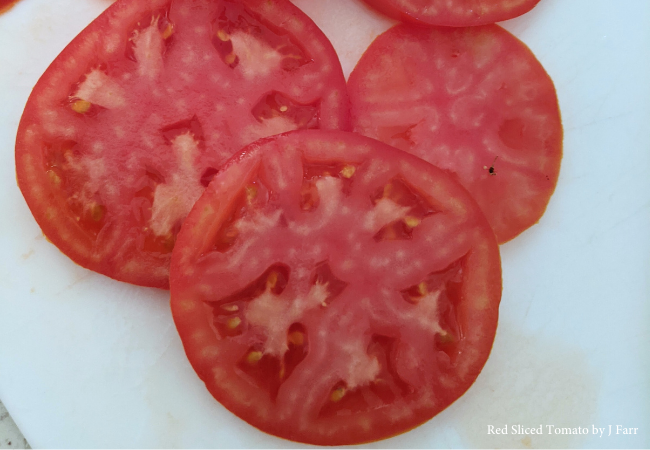
For fresh eating, vine-ripened large beefsteak and hybrid standard-size tomatoes are flavorful and good for slicing. Beefsteak tomatoes are especially large, and have smaller seed cavities than many other tomatoes, making them easier to slice. Somewhat smaller, round hybrid tomatoes like Early Girl are also delicious to eat fresh and generally ripen earlier than the larger beefsteaks. Standard-size tomato varieties also come in many different colors and color patterns!
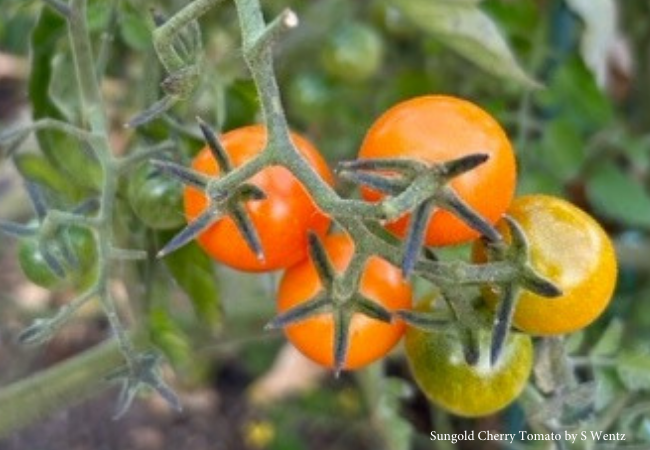
Cherry tomatoes are small and often very sweet. Common varieties of sweet cherry tomatoes include Sun Gold, Sweet 100s and Sweet Million. They are fun to eat whole, even right off the vine. There are cherry tomato varieties in different colors that make a fun addition to salads and other fresh dishes. As a bonus, cherry tomatoes are also typically easy to grow! They freeze well and roasting them before freezing enhances their flavor.
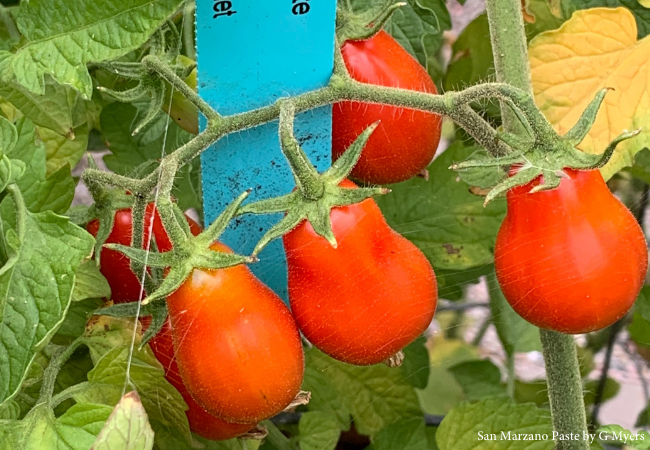
Making tomato sauce? Roma, or paste tomatoes have a smaller, oval shape, thicker skins and lower water content than other types. For this reason, they are well suited for making tomato sauce. The thicker skins make them easier to peel and the lower water content results in less cooking time to reduce the liquid to a thicker consistency. Other tomato varieties with an elongated “plum” shape that are good for sauce and salsa are Amish Paste and San Marzano. All of these plum-shaped tomatoes are also good for drying due to their lower water content.
No matter how you like to use your tomatoes, you'll find many different varieties to try for each of these sizes and types. Be sure to try a new variety when you can; you may discover a new favorite!
Growing Space
You can grow tomatoes in any part of your garden or patio that has sun, but the amount of space you have available will help you in choosing which varieties to grow.
Tomato plant varieties have a wide spectrum of sizes. A large garden space or raised bed can accommodate any size of tomato plant; the larger varieties grow up to 5-6 feet tall and spread just as wide if not trimmed or supported upright. Just remember to allow at least 3-4 feet between plants of larger varieties to ensure air circulation and to reduce the spread of any diseases. Their size may limit how many plants you can or may want to dedicate to your tomato patch.
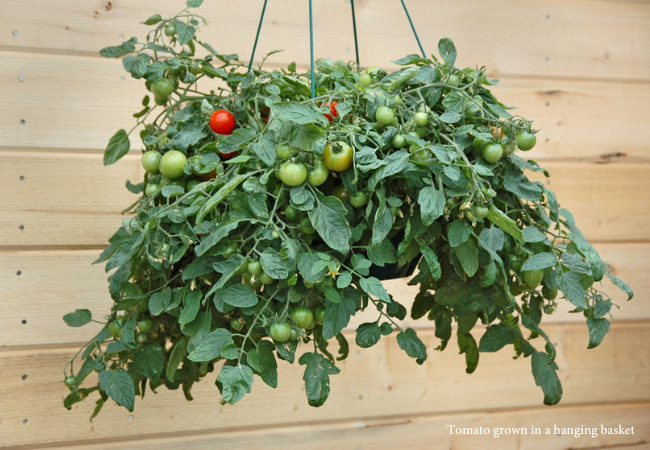
On the other end of the size spectrum, compact bush cherry tomatoes like Tiny Tim may only be 12 inches tall and 14 inches wide when grown in pots (a little larger when planted in the ground). These are perfect for patio and deck pots. You will still want to keep 18-24 inches between plants.
Determinate vs indeterminate
Tomatoes are described as determinate or indeterminate based on the plant's growth habit. This is another characteristic that affects the size of the mature plants and can help you choose the plant best suited for your growing space.
Determinate, or “bush,” tomato varieties have a somewhat bushy appearance, grow to a given size (between 3 to 5 feet), bear most of their fruit within 4 to 6 weeks, and then decline in vigor. Most early-ripening and canning tomato varieties are of the determinate type, as are some varieties that do well in containers. If you have limited space, determinate tomatoes have the advantage of being somewhat smaller than indeterminate plants.
Indeterminate varieties produce vines that continue to grow and set fruit all summer until they die from cold weather or disease. Many typical standard-sized and cherry tomatoes for the home garden are indeterminate varieties. Indeterminate plants can grow more than 5 feet tall and wide, and require much more space to grow. Left to grow without support, indeterminate plants also tend to sprawl on the ground, leaving the fruit susceptible to rot where it comes in contact with the soil. So support these plants with sturdy trellises, cages, or stakes. The branches of indeterminate plants can also be trimmed to help contain their spread, with acceptable sacrifice of fruit yield.
Bush varieties
Will you be growing your tomatoes in containers on your deck, balcony or patio? There are smaller, determinate bush varieties that do well in pots too! These include cherry tomato plants, such as the varieties Toy Boy and Small Fry. Better Bush VFN produces larger, good-sized fruit on compact plants growing 3-4 feet tall. It has more of an upright growing habit and does very well in pots.
Climate
Alameda County covers a large area, with vastly different local micro-climates. The cities in the western part of the county near the San Francisco Bay have cooler summer temperatures with some fog, while the eastern part of the county has dry, higher summer temperatures. Even within your yard you may find micro-climates. Your open unshaded areas may have a full day of direct sun and higher temperatures; more shaded areas of your garden will have fewer hours of sun and cooler temperatures. The average summer temperature of each of your growing areas is an important factor in the type of tomato that will be successful in that location.
Whatever your local climate, remember to also ask your neighbors what they are growing successfully. It's fun to exchange information and compare notes, and you may learn about a variety new to you!
Hot summer climates
Many of the larger beefsteak tomatoes, for example, require hot summer temperatures and have 75-100 days to maturity (i.e. the number of days it takes for the plant to become mature and to produce fruit). Even in the hot summers of the eastern part of the county, such as in Livermore, some beefsteak tomatoes will not ripen fully due to the time it takes to mature. To achieve more predictably good results in eastern Alameda County, you may want to plant beefsteak and hybrid tomatoes with 85 or fewer days to maturity.
Note that very hot weather can cause problems for tomatoes too. If temperatures are over 90 degrees for extended periods of time, tomatoes may drop their blossoms and the tomatoes can become sunburned while ripening. There are varieties that do well even during hot spells, such as Celebrity standard-sized and Sun Gold cherry tomatoes. You may want to try these if your garden experiences frequent hot temperatures.
Cool Summer Climates
Conversely, if you live near the bay or in the western part of the county, you may have average summer temperatures reaching only 67 to 75 degrees, and possibly some fog. But do not despair! Although tomatoes need sun to ripen, there are many varieties that do well in cooler temperatures. These are primarily those that reach maturity more quickly (50-70 days to maturity.) Using varieties with fewer days to maturity will give your harvest a longer time to ripen in your cooler climate.
Recommendations from the Master Gardeners Lake Merritt Trials Garden in Oakland over the past 10 years have included:
Cherry Tomatoes:
- Sungold: medium, orange cherry, great flavor, excellent yield, disease resistant; Sweet 100 or Sweet Million: small, red cherry, good flavor, good yield, disease resistant
Standard Tomatoes:
- Early Girl or Summer Girl: medium, red, great flavor, excellent yield, disease resistant;
Stupice: small, red, sweet flavor, excellent yield, disease resistant
Disease Resistance
Tomatoes are susceptible to several diseases that can reduce fruit yield or even kill your tomato plants. However, many hybrid varieties are resistant to these infections.
Some of the most common of these diseases are Fusarium wilt, Verticillium wilt and Tobacco Mosaic Virus. Hybrid varieties that are resistant to these diseases are fairly easily found. Look for the disease code letters on the tomato plant label next to the tomato variety name. Typically, the code is just the first letter of the disease, such as “F” for Fusarium, “V” for Verticillium wilt, “T” for Tobacco Mosaic Virus and “N” for nematodes. For example, “Super Sweet 100 Hybrid VF” indicates that the plant is resistant to both Verticillium and Fusarium wilt diseases. If you are growing your plants from seed, look on the seed packet for the code letters or a statement about resistance.
Note that disease resistance does not mean that the plant is completely immune to the disease noted. In parts of the garden where the disease has occurred in the past, even resistant varieties may experience some reduced growth and yield. For this reason, it's best to rotate the location of your tomato plants every year or two.
Try something fun and new
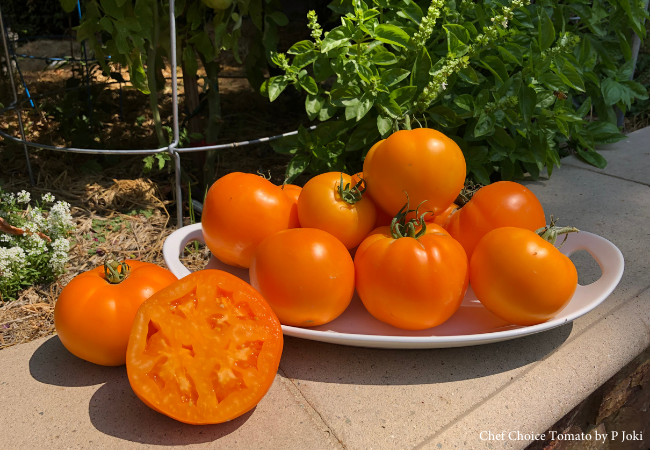
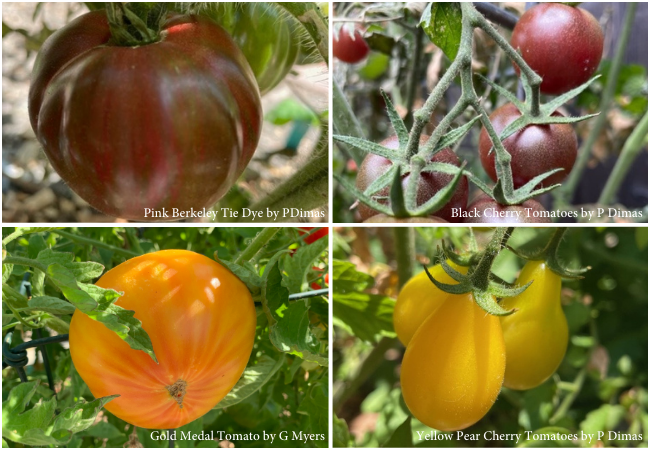
New varieties of tomatoes are being developed every year. They are fun to try, not only for flavor but also because they are in different colors, patterns and shapes. Below are a few examples.
Have fun in your garden and enjoy your tomatoes!
References and Further Reading
- Growing Tomatoes in the Home Garden, University of California ANR
- Best Types of Tomatoes for Canning from the University of Maine Cooperative Extension
- Tomato Transplants - pdf document
This blog post is brought to you by the Help Desk of the Master Gardeners of Alameda County. Subscribe to our blog!
Have a gardening question? We'll help.
You can reach us by:
- Emailing acmg@ucanr.edu. Please include a photo of the problem, if you can, plus your name, phone number, city and a description of the problem.
- Using our online form.
- By phone, during our office hours, 10 am to noon Wednesday and 11 am to 1 pm Thursday: 510-670-5645. At other times, please leave a message and we'll return your call during our office hours.
- In person at our Hayward office, during our office hours, only by appointment.
- Author: Jim Farr
Planting fruit trees is a rewarding and sustainable endeavor that brings the joy of fresh, homegrown fruit to your household. However, selecting the right fruit trees for your garden requires careful consideration of some key factors to ensure a bountiful harvest for decades. To help you embark on this fruitful journey, I have compiled a comprehensive checklist that covers essential factors to consider when picking out fruit trees from a nursery.
√ Choice of Type of Fruit
Choose fruit that you and your family enjoy eating. This may seem obvious but keep in mind that there will be times when you have an abundance of fruit. This will likely be far more fruit than your household can eat even if it's your favorite. My experience is that neighbors are very grateful to receive free fruit. Excess fruit can also be donated to food banks and churches. Look here to identify potential food donation localities near you.
√ Climate Compatibility
Your climate is a key consideration. Different fruit trees thrive in different climatic zones. Consult the USDA Hardiness Zone map to determine the climate zone of your region and choose fruit trees that are well suited to that zone. Review the USDA 2023 Hardiness Zone by zip code to check your neighborhood.
Checking the hardiness zone ensures that your tree can withstand the local temperature extremes. This is also important when considering chill hours which I will discuss below.
√ Soil
Most fruit trees thrive in deep, well-draining, granular soil with a slightly acidic to neutral pH (6.0-7.5). Amend the soil as necessary. Adding compost to the soil will help provide a slow-release fertilizer and help build the soil structure. However, do not replace all of the native soil, which may cause the tree to be root-bound. Use this blog as your guide to amending your soil to provide the optimal environment for your fruit tree.
It is important to recognize that some fruit trees have unique soil requirements. For example, blueberry bushes prefer more acidic soil in the pH range of 4.5-5.5. The normal neutral pH for soil is pH 7. Amendments can be added to the soil to make it acidic, such as sulfur. However, planting blueberries and other acid-loving fruit in containers allows for easier control of the soil pH.
√ Space Availability
Consider the available space in your garden. Fruit trees vary in size. Ensure you have enough room for the tree to grow to its mature size without overcrowding or competing with nearby plants. Fruit trees come in dwarf, semi-dwarf and standard (full) size. Look at the tag carefully for size information. Even a dwarf fruit tree can often still grow more than 8-10 feet, semi-dwarf trees up to 15+ feet tall and standard fruit trees up to 20-25+ feet. Dwarf or semi-dwarf varieties are suitable for smaller spaces, while standard varieties will be appropriate for larger areas.
√ Pollination Requirements
Some fruit trees require cross-pollination with another compatible tree to produce fruit. The tag will indicate whether the tree is “self-fruitful” or requires cross-pollination (sometimes referred to as “self-unfruitful”). For trees requiring cross-pollination check carefully which varieties are better for cross-pollinating than others. Sweet cherry fruit trees often require cross-pollination. The Bing cherry, for example, will require cross-pollination with another variety such as Stella or Sunburst varieties (which are self-fruitful).
Research the pollination requirements of the specific fruit tree you're interested in and ensure you have enough space for at least two trees if a pollinator is necessary. Alternatively, self-pollinating varieties are often available for those with limited space.
√ Chill Hours
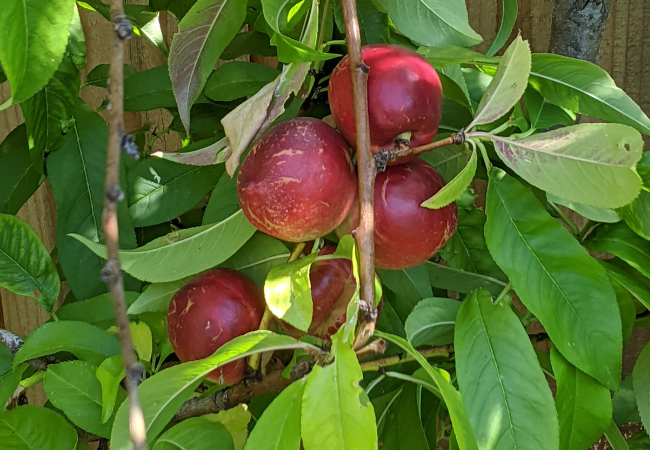
Chill hours refer to the cumulative hours a tree requires at temperatures between 32°F and 45°F during the winter to break dormancy and produce a normal crop of fruit. With insufficient chill hours, trees will leaf out late in the season, blossoming can be prolonged, buds may deteriorate and/or drop, and few if any flowers are produced. It's a critical factor for fruit development for many fruit species including apples, cherries, nectarines, peaches, plums, apricots, and pears. Choose fruit trees that match the average chill hours of your region to ensure successful fruiting.
To find the average chill hours in your region see the link below that provides current and past chill hours data for various regions in the Bay Area. Some fruit tree varieties may require more than 1000+ chill hours while other fruit tree varieties may require much less, for example, 200 hours. Avoid fruit tree varieties that have chill hours on the borderline for the averages in your area. Average chill hours will vary from year to year and this will avoid years of marginal harvests.
Find the chill hours for your county.
√ Pest and Disease Resistance
Investigate the susceptibility of your chosen fruit tree(s) to common pests and diseases in your area. Choose varieties known for their resistance to common diseases to minimize the need for chemical interventions and ensure a healthier, more sustainable home orchard. The tags on fruit trees will indicate any disease resistance of a particular fruit tree variety. Some types of fruit trees have fewer natural diseases than others. For example, pomegranates and persimmons have fewer disease issues than other species of fruit such as cherries, plums, and peaches. For information on the common fruit tree diseases for a particular type of fruit, the University of California Integrated Pest Management website is very useful.
√ Fruit Ripening Time
To enjoy a continuous harvest throughout the season, choose varieties of fruit trees with different harvest times for your home orchard. This ensures a steady supply of fresh fruit rather than a glut all at once. Tags on fruit trees will indicate whether the particular variety of fruit tree is “early”, “mid-season” or “late”.
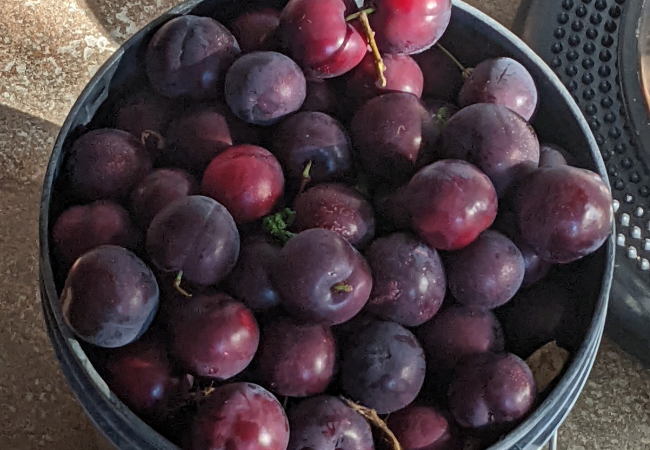
For example, if one wanted to extend the time when plums are ripe, planting the plum varieties Beauty, Santa Rosa, Burgundy, and Emerald Beauty will extend the harvest time from a typical 2 weeks for any one of these varieties to 3 months collectively. This can ensure a longer period of fruit harvest, as well as more flavor variety in the plums.
By timing the type and variety of fruit ripening dates, it is possible to have some fresh fruit available from May / June (apricots) all the way into October / November (apples).
√ Quality of Nursery Stock
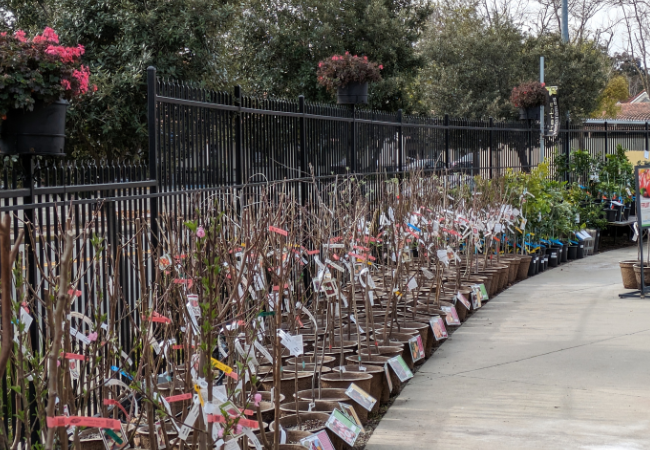
Purchase fruit trees from reputable nurseries. Inspect the quality of the nursery stock, looking for well-developed root systems, disease-free foliage, and a straight, healthy trunk. Avoid trees with signs of stress, damage, canker sores, and pest infestations. Often people look for fruit trees already bearing fruit. Keep in mind that once planted, it is usually recommended to remove any existing fruit from the tree to minimize shock during planting.
√ Planting, Pruning, and Training Needs
Owning fruit trees is a decades-long commitment to care for the trees. Use the information provided by the UC California Backyard Orchard site on planting your fruit trees.
The amount of care a fruit tree requires after planting will vary with the fruit type. In general, fruit trees will require some annual pruning. Research the specific needs of your chosen trees to ensure proper care to maximize fruit production. If your tree size is beyond your reach, you will require professional help pruning your fruit tree. Review information on pruning fruit trees from UCANR to give you some idea of pruning considerations.
Conclusion
Selecting fruit trees for your garden involves carefully planning and considering various factors. By following this comprehensive checklist, you'll set the foundation for a thriving home orchard that will reward you with delicious, home grown fruit for years to come. Lastly, remember that the Alameda County Master Gardener Help Desk is only an email or call away if you have any questions about fruit trees or any other gardening issue.
References
Alameda County Master Gardeners Help Desk
This blog post is brought to you by the Help Desk of the UC Master Gardeners of Alameda County.
Have a gardening question? We'll help.
You can reach us by:
- Emailing acmg@ucanr.edu. Please include a photo of the problem, if you can, plus your name, phone number, city and a description of the problem.
- Using our online form.
- By phone, during our office hours, 10 am to noon Wednesday and 11 am to 1 pm Thursday: 510-670-5645. At other times, please leave a message and we'll return your call during our office hours.
- In person at our Hayward office, during our office hours, only by appointment.
- Author: Diane Allen
Why It's Important
“…we now need to save nature where people are”
Doug Tallamy, T. A. Baker Professor of Agriculture, Department of Entomology and Wildlife Ecology, University of Delaware
Whether we grow our plants in pots on an apartment balcony or in large beds in a garden, we've all heard that it's important to conserve water and preserve our local environment by choosing native, drought resistant plants, reducing our lawns, and removing invasive plants that compete with our regional vegetation. We also know that plants, and especially trees, help cool our local environment and absorb pounds of carbon dioxide from the air, replacing it with oxygen. But did you know there is another equally important purpose that our personal outdoor spaces can fill?
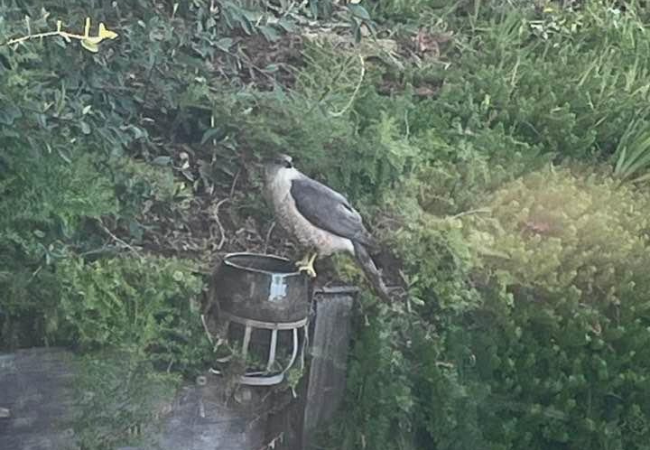
We can provide food, shelter and water for a wide variety of wildlife that can be critical for its survival. You may think “What difference can one person's balcony penstemon plant really make?” But consider a migrating hummingbird looking for flower nectar and finding that its usual open field is now a large parking lot. That penstemon on your balcony can help sustain the bird to the next food source on its way. There are many examples of how small actions in our own open spaces can increase food and habitat for wildlife. In turn, helping to conserve the diversity and numbers of our wildlife, even those only visiting shortly during migration, will have an important impact on our larger environment. All living things from microbes to mountain lions are interdependent. Even your annoying aphids can be food for birds!
The Habitat Garden: What is it?
The habitat garden is one that uses a variety of native plants, natural materials and sources of water to create places of food, shelter and nesting sites for pollinators (birds, bees, other insects) and other wildlife to thrive. Many articles, guides and entire books have been written on steps you can take to provide these elements for wildlife (see the Reference list below for a few of them). Here we will talk about some simple easy steps you can take to get started.
Your habitat garden will be less manicured, with reduced lawns, less pruning of trees and shrubs to provide limbs for bird perching and protected shelter areas, and clear areas for insect and bee nesting. A good home for wildlife!
Some First Steps You Can Take….
Provide Food and Water
- Plant California native plants, particularly the specific species that provide food for the insects, butterflies and birds in your area. We mention California native plants in particular as they have evolved and adapted over time to grow well in our climate, and native bees and other species also have evolved to feed on these plants. Examples include the California poppy, California fuchsia, penstemon, toyon, salvia, and common sunflowers. Some important pollinators feed only on particular plant species, so it's good to focus on those if you have enough space (e.g. milkweed for the caterpillars of Monarch butterflies, an oak tree for moths). Many non-native flowering plants are also beneficial for our local pollinators (for example lavender, catmint, and cosmos).
- Include multiple plants to the extent you have room, but even one or two plants on your balcony will attract and feed pollinators! Many pollinator plants will do well in pots, so you don't have to have a yard to support beneficial insects like butterflies and hummingbirds. As examples, salvia, catmint, cosmos, poppies, cone flowers and lavender are all easy to grow in pots and attract a variety of bees, butterflies and hummingbirds.
- Reduce or remove your lawn, and use that space to plant native plants. Even reducing a lawn a small amount can free up space for some food producing native plants. This also reduces the amount of water needed to irrigate, as native plants typically require much less water to thrive. There may even be rebates available in your area to help with replacing your lawn.
- Add a seasonal variety of native plants for year round food source and color to enjoy. You can find different species of native plants that flower and produce seeds or berries for wildlife food production year round. The California Native Plant Society and other sources have lists of plants for different seasons.
Spring: California lilac (Ceanothus), monkey flower, penstemon, California poppy, catmint
Summer: Sunflowers, California fuschia, salvia
Fall: Many plants will continue to bloom through fall, such as California fuschia and salvia. Fall is also a good time to plant perennial native plants, as the cooler weather will permit less watering while their roots grow.
Winter: Toyon (berries in winter; flowers in spring), Nicotiana
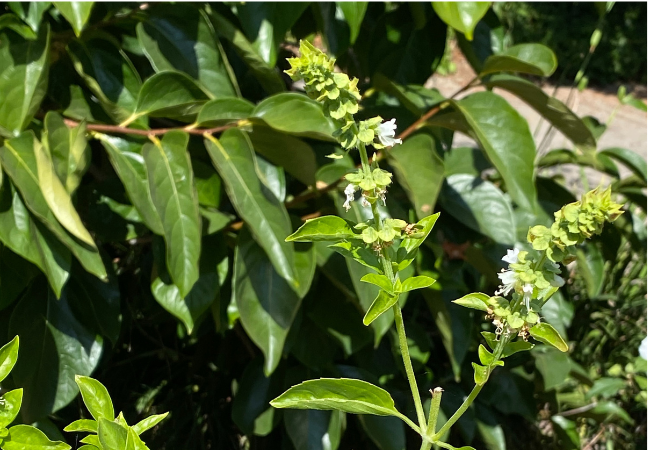
- Let a portion of flowering plants and vegetables go to seed rather than removing them at the end of the season. And don't remove your native plant flowers as they begin to fade; let them go to seed. Allow some of your vegetable plants to flower for the pollinators in your yard. Bees love basil and arugula flowers.
- Share your homegrown produce. Squirrels and birds can be a nuisance when our fruit trees and vegetable gardens begin producing. But consider sharing some of your fruit and vegetables with them rather than excluding them or picking everything – there are usually more than enough plums and tomatoes! When you are planning your vegetable garden, add an extra plant or two if possible to share with the wildlife.
-
Put out a shallow water source with rocks and stones for bees and birds, especially during the warm summer months. The stones provide a landing place for insects and birds. Butterflies cannot land on water but use muddy soil to drink (called “puddling”). You can make a puddling dish by placing a shallow dish, or even a pie tin, in the ground or on a pedestal. Fill it with muddy soil, and check it later to keep it moist.
Give Them Shelter
- Plant layers of foliage for shelter and nesting areas (groundcovers to mid-height and tall shrubs, as well as trees). Allow some leaf litter to remain on the ground as shelter. Some insect larvae spin cocoons in leaf litter to complete their life cycle. Plant native ground cover plants in larger areas; this will help reduce weed growth too! Leave some bare ground around plants and trees to provide nesting sites for ground nesting native bees.
- Leave some downed, brush piles for shelter for birds, insects, small mammals. While it's important for wildfire safety to not let deep amounts of downed brush to accumulate, small amounts of brush, some distance from your house, provides critical shelter for insects and birds.
Garden Practices
Use Beneficial Practices
- Use pesticides very rarely if ever, and only when absolutely necessary for a severe pest infestation, at the proper time of year and no more than instructions require.
- Hand pull or cut weeds and invasive plants rather than using herbicides.
Some Practices to Avoid
- Replace any white exterior lights around your home. White night lights kill great numbers of insects by blinding them, causing collisions, dehydration and other problems. Reducing light pollution is actually a fairly easy step and has a large beneficial impact. Just change outdoor white light bulbs to yellow LED bulbs and use motion activated security lights. This can increase your own enjoyment of the night sky too.
- Don't plant lawn below trees, as it not only can cause root rot from over watering the tree but also provides no benefit for habitat. Instead, leave soil bare under trees or plant a native ground cover.
- Do not leave out pet food or human food. Provide food for birds and mammal wildlife by planting seed and fruit producing plants and trees. Leaving food out can be harmful to mammal wildlife and also may make them accustomed to it and aggressive in looking for more (this is often seen with raccoons). Compost bins should be covered so as not to inadvertently feed unwanted wildlife.
The Result?
Since most of the land in our country is privately owned, supporting wildlife and our environment cannot be done solely through parks, protected corridors and nature preserves. Private lands, including our own yards and balconies, are key sources of habitat and food for the insects and mammals that pollinate our own food sources and are vital parts of our environment. So enjoy your beautiful, more natural garden and observe the wildlife that shares it with you. You are preserving nature at the same time as providing a place of respite and enjoyment for yourself and others!
References
- California Native Plant Society. https://www.cnps.org/gardening/native-design-basics/habitat-gardening
- National Wildlife Federation – tips on creating a wildlife habitat. https://www.nwf.org/Garden-for-Wildlife/About/Resources/tips
- National Wildlife Federation – Saving Pollinators One Garden at a Time. https://www.nwf.org/Garden-for-Wildlife/About/Resources/Saving-Pollinators
- UC Master Gardener Program of Monterey Bay
https://ucanr.edu/blogs/blogcore/postdetail.cfm?postnum=23513
https://ucanr.edu/blogs/blogcore/postdetail.cfm?postnum=20150
https://ucanr.edu/blogs/blogcore/postdetail.cfm?postnum=22539
- UC Master Gardener Program of Sonoma County
https://sonomamg.ucanr.edu/Sustainable_Home_Gardening/Protect_-_Encourage_Wildlife/
- UC Master Gardener Program of Contra Costa County
https://ccmg.ucanr.edu/News_to_Grow_By/?story=2461
- UC Master Gardeners of Tuolumne County – Habitat Gardening
https://ucanr.edu/sites/Tuolumne_County_Master_Gardeners/files/284974.pdf
- Pacific Horticulture/UC Berkeley Urban Bee Lab
https://pacifichorticulture.org/articles/gardening-for-native-bees/
- Pacific Horticulture - Pollinators
- Pacific Horticulture – Guide to Insect Hotels
https://pacifichorticulture.org/articles/web-extra-a-resource-guide-to-insect-hotels/
- Pacific Horticulture – Hedgerows as Habitat
https://pacifichorticulture.org/articles/hedgerows-as-habitat/
- Cornell Lab of Ornithology/Nest Watch – Bird Nest Boxes and Structures
https://nestwatch.org/learn/all-about-birdhouses/
- UC Berkeley Urban Bee Lab
Providing native bees with water, habitat, and food with plants. http://www.helpabee.org/seasonal-bee-gardening.html
Best bee plants for California. http://www.helpabee.org/best-bee-plants-for-california.html


