- Author: Diane Allen
It's wonderful to see spring bulbs and flowers beginning to emerge. But whether you have a garden in pots or in the ground, you may also be wondering how to get rid of the weeds coming up at the same time!
There are hundreds of varieties of weeds that grow in northern California, but really only three main categories (broadleaf, grasses and sedges). Below are descriptions of each category:
|
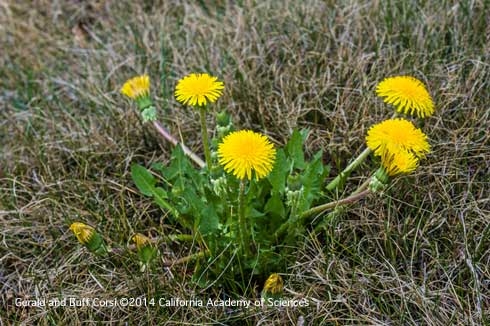
Broadleaf Leaves are wide, veins branch out in different directions. |
|
 Weed Grass - UC IPM |
Grasses Leaves are narrow, arranged in sets of two; stems are rounded or flattened. |
 Weed Sedge - UC IPM |
Sedges Leaves are narrow, and arranged in sets of three; stems are triangular in cross-section. |
While identifying which weed you have is important in finding how to control it, you may not have the time or inclination to research weeds you do not recognize. So in this article, we give you a few general key pointers to help you control and prevent most common garden spring weeds.
How to remove weeds?
There are two main ways to remove weeds: 1) manually, by hand pulling or using a weeding tool, or 2) chemical treatment.
Pulling or using a weeding tool
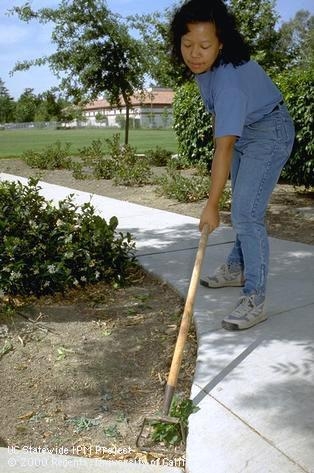
For home gardening, pulling weeds by hand or using a weeding tool can be simple and effective, especially to remove weeds with long roots. Hoes or other longer-handled tools are good for surface weeds with short roots.
The following video link shows some of the other tools available to help remove weeds and demonstrates different methods using dandelion weeds as an example:
Key tip: Remove all of the roots. Many perennial weeds like dandelions have a long taproot. Be sure you remove all of that root, or the weed may just grow back. It's easiest to do this when the ground is damp. If you're working in dry or compact soil, using a weed removal hand tool helps grab the root and lift it out.
Managing Oxalis
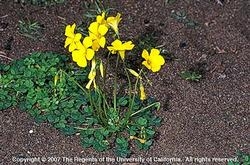
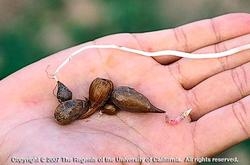
For those of you wanting to remove Buttercup oxalis (Bermuda buttercup; Oxalis pes-caprae) remember to remove not only the leaves and stems but also the bulbils (small bulbs) at the bottom of the stems. New plants can grow from these bulbs left in the soil. There may seem to be an unmanageable amount of the bulbils, but even removing a large number of the plants and bulbils will help reduce the number of plants and their spread to new areas.
Chemical treatment
While chemical treatment with commercial herbicides may be appropriate for serious infestations in large areas, herbicide chemicals also can cause potential harm to bees and other pollinators, as well as to beneficial insects that keep down the population of other pests. In home gardens, chemical treatments are usually not needed as manual removal is typically sufficient.
When to remove weeds?
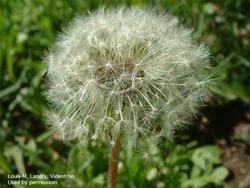
But don't despair if you can't get to those weeds only when they are small. Weeds can be removed when mature; just take extra care to remove all of the roots. You may have to dig further to remove large mature weed plants completely. Be sure to wear gloves; some weeds are prickly or have sap that can be an irritant to the skin.
How to prevent weeds?
While you undoubtedly see chemical treatments designed to prevent weeds (“pre-emergent” treatments), applying mulch is a very effective way to minimize future weed growth.
What is mulch? It is any material applied to the surface of your soil. These can be inorganic or organic. These materials prevent weed growth by blocking the sun from reaching the soil. This keeps the soil cooler and prevents light from reaching sprouting weed seedlings. To prevent weeds from emerging it's important to use a mulch of small enough size, or deep enough, to stop sunlight from penetrating the soil
Inorganic mulches include rocks, gravel, or landscape fabrics. Since sunlight can enter the spaces between rocks and gravel (especially if larger than 1.5 inches), these materials should be applied 3-5 inches deep to keep light from reaching the soil. They can be most effective if a landscape fabric is first laid onto the soil, with the rocks or gravel applied on top of the fabric.
Organic mulches are natural materials such as wood chips, straw, and seed hulls. Organic mulch not only prevents weeds but also conserves moisture in your soil and improves soil structure and nutrient levels. To prevent sunlight from reaching the soil and emerging weeds, apply at least 2-3 inches of small-sized organic mulch (e.g. wood chips smaller than one inch in diameter). For larger materials (e.g. larger wood chips 1.5 inches in diameter), apply 5-6 inches of material. Remember to keep mulch about a foot away from tree trunks, as the mulch may prevent the soil from drying near the trunk and contribute to tree root problems.
When organic mulch is promptly applied after removing weeds and their roots, the only weed management activities that may be necessary are occasional hand-pulling or shallow hoeing of weed seedlings and periodic reapplication of organic mulch. Each spring you will notice fewer weeds emerge, as each year there will be fewer weeds producing seeds or bulbs to germinate. It may take a few years of manual removal and replenishing the mulch, but eventually, there will be few weeds to remove.
Resources
The Master Gardeners of Alameda County website, and related University of California websites and videos, have more information for you on general weed control and details for individual types of weeds. Here are some to take a look at:
Types of Weeds
Information on specific weeds
- Broadleaf Weeds
- General Weed Control, before and after planting
- Weed management tips
- Woody Weeds and Difficult to Control Shrubs and Grasses
Video - Integrated Pest Management of Weeds
Types of mulch
Sheet Mulching
- Author: Michelle Chin
Tool care: why perform routine tool cleaning and maintenance
It may seem counter-intuitive to clean a tool that will get dirty again. But proper tool care starts with cleaning and maintenance. The routine ensures your garden tools maintain the correct working order and will last you for seasons. Winter time is an excellent opportunity to prepare your tools for spring. This guide covers everything you need to know to clean and maintain the typical gardening tools.
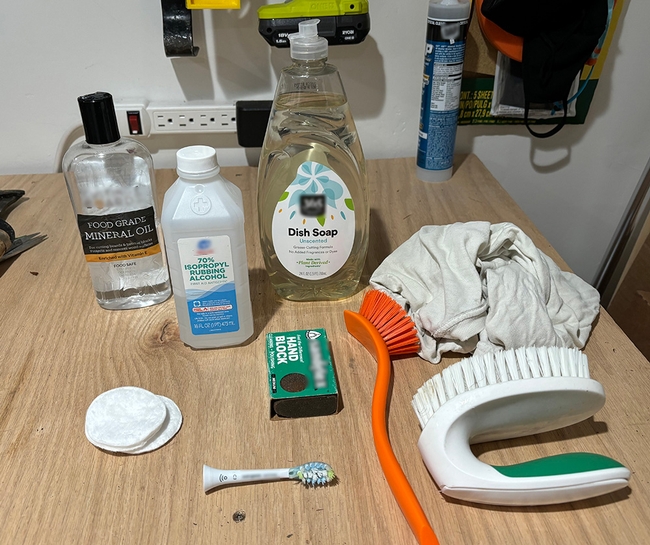
Cleaning materials needed
- Soft brushes, wire brushes, or scouring pads—old toothbrushes, retired dish sponges, etc. work well
- Mild detergent or dish soap
- Water bucket or utility sink
- Sandpaper
- Old rags/towels or paper towels
- Lubricating oil or spray—found in most hardware stores
- Boiled linseed oil—available in most hardware stores
- Rust remover
- Sharpening tools—files, sharpening stones
- Sanitizing tools—70% isopropyl alcohol, household spray disinfectants or wipes, or 10% bleach solution
- Cotton balls or pads
- Screwdrivers or other tools as needed—to fix any loose parts
Safety gear needed
Depending on the tool you're cleaning, we recommend you wear proper gear to protect yourself from injury.
- Work gloves
- Rubber or latex gloves—to protect your hands
- Long-sleeve shirt, long pants, closed-toed shoes
- Safety goggles
Cleaning hand tools
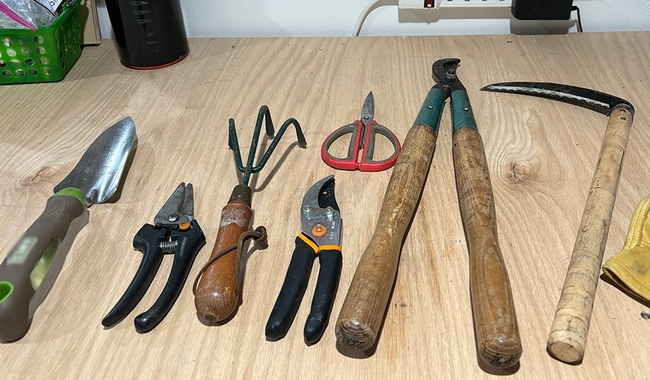
Hand tools include pruners, garden shears, trowels, shovels, and brooms.
- Remove dirt, grit, and sap with a brush or wire brush. Scrub off as much rust as possible with a wire brush or scouring pad. Wire brushes are helpful for cleaning in between saw blade teeth.
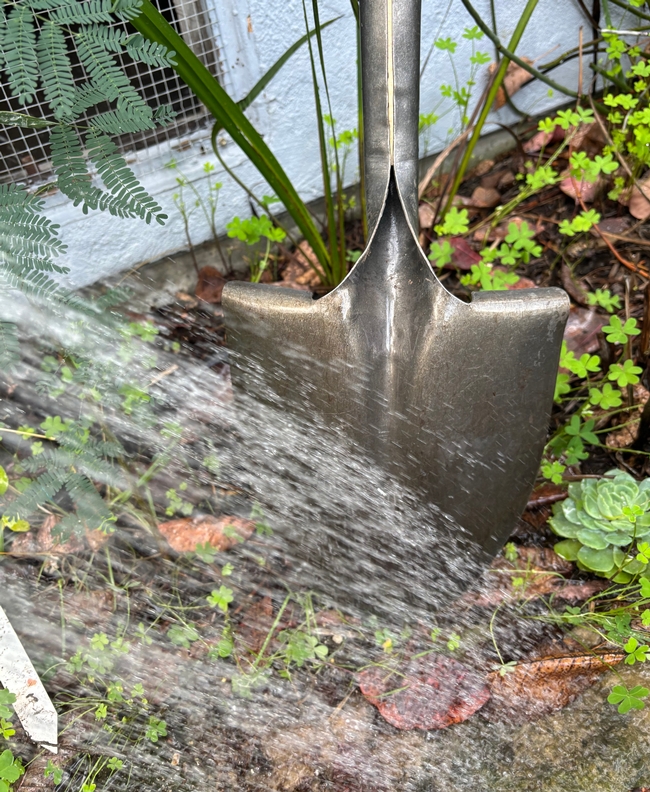
- Wash your tools with warm, soapy water. Soak tools for a few minutes if the grit and sap are tough to remove. Some tools can be taken apart for easier cleaning.
- Dry your tools thoroughly.
- If needed, sharpen dull blades with a sharpening tool.
- Check wooden handles for splinters. Gently remove fragments with sandpaper.
- Sanitize your tools with rubbing alcohol. With cotton pads, wipe the surfaces of your tools, especially any blades. Disinfecting your tools reduces the spread of diseases in subsequent uses.
- Lubricate any blades and moving parts. Lightly oil any metal part to prevent future rust.
- Oil any wooden handles with boiled linseed oil. Follow the container's instructions for use and proper storage. Handle and dispose of oily rags by following National Fire Protection Association guidelines. Important: Oily rags stored improperly can lead to spontaneous combustion!
- Inspect your tools to ensure they aren't cracked, broken, or dangerous. Depending on the damage, some grip handles might be replaceable or re-dipped in a grip coating. Hardware stores usually have options available. Tighten any loose parts. Replace any tools that have outlived their usefulness.
Cleaning power tools
Power tools include lawnmowers, string trimmers, leaf blowers, and more.
- Follow the manufacturer's guidelines for cleaning. If you can't find the original manual, manufacturers might have them online for downloading. If not, they might have some general cleaning instructions.
- Unplug or remove any elements that can power the tool on (e.g., spark plugs, batteries).
- Remove any debris like dirt, grit, and grass clippings. Use an old rag or soft brush on plastic parts. Metal parts might be able to handle a tougher scrub brush, but consult the manufacturer's guidelines.
- Dry any parts you washed thoroughly before reassembling.
- Inspect and replace any worn-out parts.
- Lubricate any blades or moving parts as needed.
Cleaning protective gear
Protective gear includes gloves, hats, aprons, boots, and more. While these might not be the first tools you think of, they still count!
- Shake out your protective gear to remove any loose bits of dirt, grit, and debris.
- Scrape dirt off of your boots and leather gloves.
- Wash fabric gloves, aprons, and hats as directed. If they are machine washable, wash them separately from other laundry.
- Dry out your gloves, aprons, and hats thoroughly before storing them.
- Inspect your protective gear for any holes or wear and tear.
- Repair or replace as needed.
Staying ahead tool cleaning and maintenance
Light cleaning and maintenance throughout the gardening season can keep your tools in good working order and make winter cleaning easier. Here are a few tips to keep in mind.
- Wash your hand tools after every use. Dirt and grit are much easier to remove when they're still fresh. Thoroughly dry your tools before storing them, and lubricate them as needed throughout the seasons.
- If you're using tools frequently, consider keeping a bucket full of sand and oil. In any bucket mix layers of oil (any oil like vegetable oil, mineral oil, etc.) sand together. After rinsing dirt off your tools, plunge the tools in the bucket as needed to sharpen and clean the tool simultaneously.
- Sanitize any cutting tools after use. This is vital if you use them to prune infected plants. Immediately sanitizing them prevents the spread of any disease. A sanitizing solution can be made with bleach and water. (See this PDF for details.) And you can confidently know they're clean the next time you cut something.
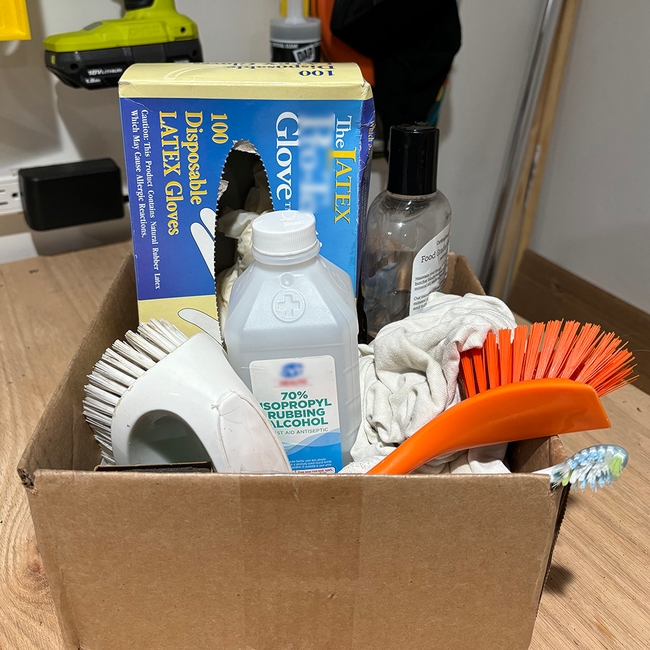
- Create a kit for your cleaning supplies. Having all your cleaning supplies in one place will make cleaning your tools easier at any time. Ensure you properly store cleaning supplies like oily rags or boiled linseed oil to prevent spontaneous combustion. Keep your kit out of reach of pets and young kids.
If you'd like to know more about tool care, consider these other resources:
- Tool care tips from the UC Master Gardeners of Santa Clara County
- Shovel sharpening tips from the University of Florida IFAS Extension
All photos are by Michelle Chin, UC Master Gardener.
- Author: Judy Quan
Container gardening is enticing. We love the option to grow plants where space and sunlight might otherwise limit our choices. Most perennials, shrubs and trees are better off planted in the ground, but, with care, we can maintain our larger woody plants in containers.
Container plants need more monitoring
We must carefully monitor and nurture our container plants since nutrients and water are confined to what is available in the container. Woody plants such as trees and shrubs need larger containers and more care over the years since they have larger root systems than most annuals and perennials.
The importance of repotting
The periodic repotting of container plants is an important aspect of care that is often neglected. Over time, as plants mature, plants naturally produce more leaves above ground and more roots below ground. Most container plants tend to become root-bound, meaning the roots outgrow the container, and the roots overlap each other, often circling the bottom of the container and growing back up its sides. Being root-bound results in stunted growth and poor plant health. The organic portion of the potting soil slowly decomposes over time and compacts, losing pore space, air space and drainage space.
When to repot
Generally, containers should be repotted every two to three years.
Signs that indicate the need for repotting:
- Surface/drainage hole roots
- Sunken soil level
- Plant seems too big for pot
- Discolored or yellowing leaves
- Frequent wilting
Container selection and preparation
It is important to have the right size container. You need enough space for roots, and enough room for soil for hydration, thermal insulation and fertility.
Managing large containers
Selection of container, usually you need half wine barrel size to accommodate a larger plant like a tree or a shrub. TIP: Having a plant caddy with quality wheels that turn easily can make the job of moving the barrel and the plant ball much easier. There are plant caddies that are built to deal with the weight of a fully loaded half barrel filled with potting soil and a tree or shrub. Plant caddies are also helpful to monitor drainage.
Adequate drainage
Make sure that there are adequate drainage holes in the bottom of the container. No need to add rocks or gravel as they can interfere with proper drainage and take valuable depth from soil. To stop soil from leaking out, a mesh screen works well. Avoid sealing the hole.
Plan to elevate the wine barrel to provide air space so that wood will have a chance to dry out underneath.
Potting soil (not garden soil) and potting soil mix recipes
Plants in containers do not do well using ordinary garden soil, especially clay soil; they need a more porous soil mixture to thrive.
If you are buying potting soil, remember you get what you pay for. Consider getting potting soil from your local nursery. Another way to get quality potting is to mix your own. Here are links to some recipes: Soil Mixes for Container Gardening by UC Master Gardeners of Napa County
It is good practice to refresh containers with additional new potting soil or to replace all the potting soil with new potting soil. Prepare the potting soil that you are planning to use. If you are using old and new potting soil, mix the two. If you add compost, mix well with the potting soil. Never exceed 1/3 of the mix when adding compost.
Fertilizer
Mix in some slow-release 16-16-16 fertilizer. The slow release is recommended since plants in containers need to be watered more frequently than those in the ground, and nutrients are lost as the water drains out of the container.
During the growing season, apply a water-soluble fertilizer every 2 to 3 weeks, supplementing the slow-release fertilizer.
Whatever fertilizer you use, be sure to follow the directions on the label.
Getting the plant out of the container easily and safely
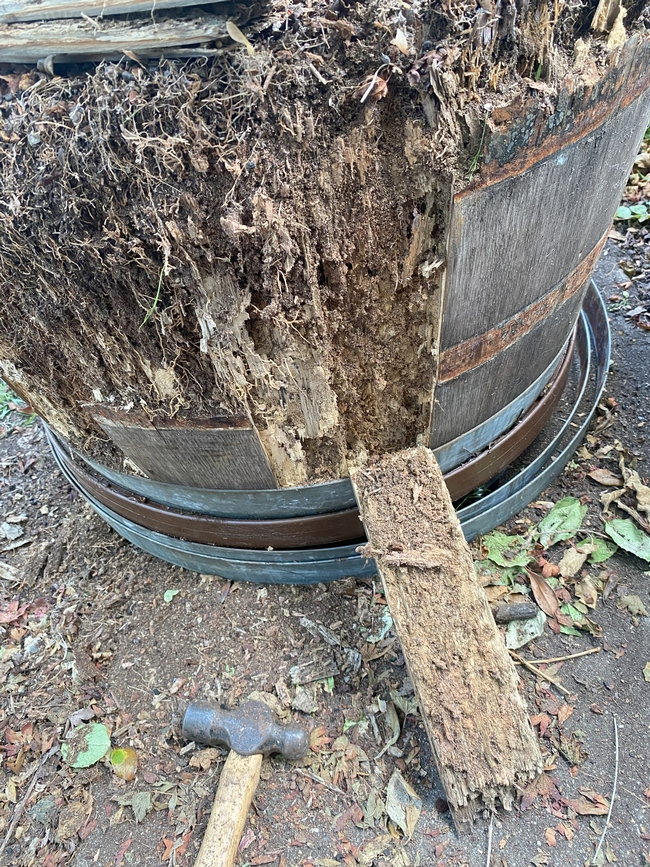
Break down sides of a worn-out wooden barrel by tapping on metal rings and they should just drop down allowing you to take out the wooden slats, exposing the root ball.
Readying plant for transplanting
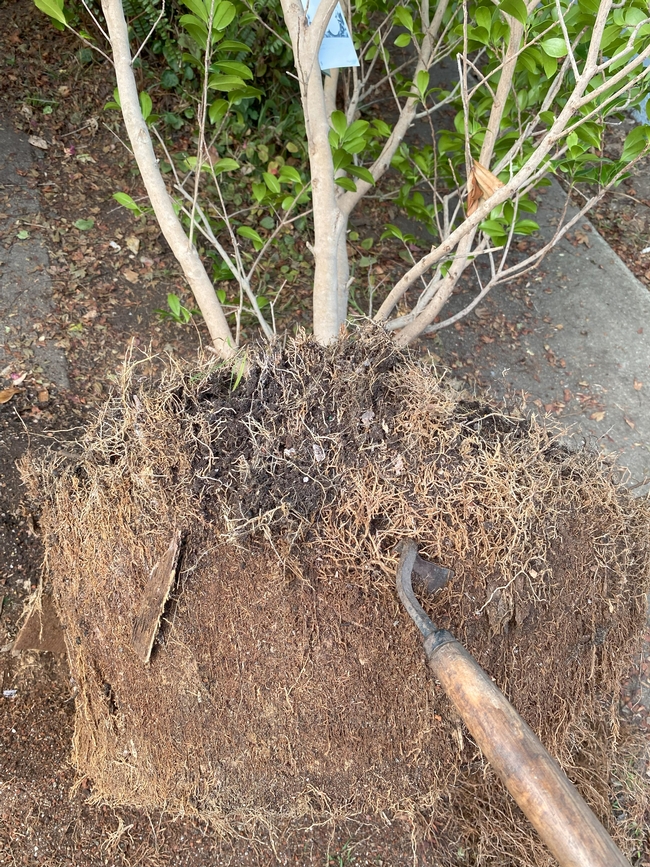 Camellia's extremely matted roots being loosened with garden tool - photo courtesy of Judy Quan 2024

Inspect and trim root mats, circling roots, tangled roots
Remove any diseased or damaged roots. When the plant is out of the container, gently separate the roots.
If the plant is root-bound, slice off outer 1/2 inch of roots including soil and root mats. Trim circling roots and any roots growing upward. Make sure not to remove more than 1/3 of the roots.
Transplant plant to new container
Fill by mounding potting soil for ease in root placement
Begin filling the container with potting soil. Build a mound in the center. Roots should be placed around the outer edge in a lateral, radial, slightly downward manner.
Place the plant on top of the soil mound, arranging roots away from the stem. Try to help roots avoid circling and being tangled with one another. Spread the roots apart as much as you can.
Position root crown in new container
Identify the plant's root crown. The crown is located where the first lateral roots start to appear. Estimate the location of the crown when it is planted in the container so it is at or slightly above the soil level. Positioning the root crown is especially important for trees since below soil level placement may lead to crown rot diseases. Crown Rot in the Garden - UCANR Pest Note
Be sure to keep track of the crown and keep it above the soil level as you are adding potting soil. Avoid packing the soil down. You can gently pat the soil just enough to remove big air pockets
Next, after transplanting into container
Gently water your plant.
Check by feeling the soil to make sure that the root ball is moist. When the root ball has dried out, it may be difficult to re-wet the root ball. A very thorough soaking may be necessary more than once. When you are finished, you can add some mulch.
Re-Check Soil Moisture and Soil Level Over the Next Few Days.
Check the top 2-3 inches of potting mix in the container for moisture over the next few days since it may be drier than you anticipate. You may need to add some additional potting soil once the soil has settled more.
Schedule frequent ongoing soil moisture checks
When it is dry, the plant needs water. Plants need more frequent watering when in smaller containers, higher temperatures, higher wind, and direct sun. Mature plants are more likely to need frequent, perhaps daily, watering in warm or hot weather., especially if located near heat-retaining hardscapes such as concrete, rocks, bricks, pavers, or stone.
When repotting is NOT enough, transplant to in-ground
Sometimes we realize that our plants are not thriving in their containers, no matter what we have done, and we need to plant them in the ground. Follow the same steps of separating the roots, and cutting and removing the roots mats that are at the bottom of the container. The holes should be wider than the root ball so that the roots can radiate out. Large rooted plants should be arranged so the roots are not tangled or only on one side. Remember, however the roots are placed, that is how they stay and grow. Repotting or transplanting plants in-ground often results in happier, healthier plants.
Resources:
Container Planting by Oregon State Master Gardeners Clackamas County (PDF)
Outdoor Container Flower Gardening by UC Master Gardeners of San Joaquin
Planting Landscape Trees - UCANR (PDF)
Repot Your Plants by UC Master Gardeners of Napa County (potting soil mix recipes included)
Repotting and Fertilizing Houseplants by University of Arkansas Cooperative Extension
Repotting Basics - Tips to Ensure Vitality in Woody Contain Plants, University of Georgia
Healthy Garden Tips -- Soil Mixes for Container Gardening by UC Master Gardeners of Napa County
Tips For Beginners: How to Transplant a Container-Grown Plant, Virginia Tech
Alameda County Master Gardeners Help Desk:
This blog post is brought to you by the Help Desk of the UC Master Gardeners of Alameda County.
Have a gardening question? We'll help. You can reach us by:
- Emailing acmg@ucanr.edu. Please include a photo of the problem, if you can, plus your name, phone number, city and a description of the problem.
- Using our online form.
- By phone, during our office hours, 10 am to noon Wednesday and 11 am to 1 pm Thursday: 510-670-5645. At other times, please leave a message and we'll return your call during our office hours.
- In person at our Hayward office, during our office hours, only by appointment.
- Author: Jim Farr
Editor's note: This blog post originally appeared on the Master Garden of Alameda County website. It's among our most visited topics.
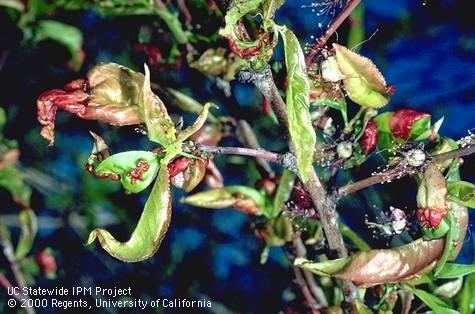
Last year the Help Desk received a record number of emails on Peach and Nectarine trees whose leaves were affected with highly distorted red blistered leaves caused by Peach Leaf Curl. Our key message was: 1. This will not kill your tree, as bad as it looks; and 2. It is easily preventable with some easy steps that can be taken during the dormant season. This article is a review of those steps so that you can have a healthy fruit tree during the Spring and Summer.
The disease that causes this problem with Peach and Nectarine trees is called Peach Leaf Curl, a fungal disease that affects the leaves and shoots of Peaches and Nectarines. The problem is very widespread and most people who have grown Peaches or Nectarines in their backyard in Alameda County probably have seen this problem at some point in time.
See UC Integrated Pest Management page for photos and further descriptions of the disease.
Signs of Peach Leaf Curl
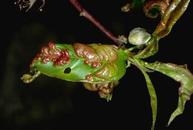
Symptoms normally appear about two weeks after leaves emerge in the spring. The first signs are red spots on the leaves, which soon become thick and puckered. The leaves eventually turn yellow and drop off. Healthy new leaves do emerge to replace the fallen ones unless subsequent spring showers cause the disease to spread to the new leaves.
Your Peach or Nectarine Will Survive
Gardeners are often discouraged to hear that once it appears on their trees in a given season, there is no method of effective treatment for that season. Peach Leaf Curl will cause the leaves to fall off and the fruit production of the tree can be affected. However, gardeners are usually relieved to hear that this disease rarely kills trees and can be easily managed if treated with a fungicide during the dormant season.
What is the Cause of Peach Leaf Curl
Taphina deformans is the fungus that causes Peach Leaf Curl. Periods of cool, wet weather when leaves are beginning to unfurl create a favorable environment for the fungus. Maximum infection develops when the trees are wet for two or more days during this vulnerable period.
How to Control Peach Leaf Curl ...fungicide in fall
To control Peach Leaf Curl, treat Peach and Nectarine trees with a fungicide in the fall after leaves have dropped. In the past, the disease could be successfully treated with either lime-sulfur fungicide or a fixed copper fungicide with a copper compound containing at least 50 percent copper. Unfortunately, the most effective products have been removed from the market by the manufacturer. The only fungicides left for treating Peach Leaf Curl contain lower levels of copper and copper soap (see references below).
Fungicide hints … add horticultural oil, spray twice
You can make the copper ammonium complex products more effective by adding horticultural oil to the treatment mixture. The oil, which should be one percent of the mixture, also helps control some insects that affect the trees. Spray your trees twice, the first time in late November and the second time in early February. A handy trick for remembering those dates is to spray right after Thanksgiving and just before Valentine's Day. Spray trees until they are dripping.
Peach Leaf Resistant Varieties are Available
Another way to reduce peach leaf curl is to plant trees that are resistant to the disease. Resistant peach varieties include Frost, Indian Free, Muir and Q-1-8. Although Frost is resistant, it does need fungicide treatments the first two to three years after planting.
In fact, all of the resistant varieties still benefit from spraying. While resistant, they are not immune, especially during years when the conditions are particularly favorable for the disease. Beware that not all of these resistant varieties are self-fruitful. For example, Indian Free Peach tree is an heirloom that is found to be vigorous and easy to grow but not self-fruitful so needs to be planted near another Peach or Nectarine tree for pollination.
What To Do … pruning in fall, avoid overhead watering, and remember to spray twice
If you experienced problems with peach leaf curl this year, consider pruning the tree this fall prior to applying fungicides. This practice can reduce the number of spores over-wintering on the tree. Remove all pruning debris and dispose of it in the municipal yard-waste container. Do not water the tree with overhead sprinklers, as this could spread the spores. And don't forget to spray around Thanksgiving and shortly before Valentine's Day.
References:
- Agriculture: Peach Pest Management GuidelinesPeach Leaf Curl
- Pests in Gardens and Landscapes: Quick TipsPeach Leaf Curl
- PEACH LEAF CURL - Dr. Mary Lou Flint, Associate Director Statewide IPM, University of California From The Curious Gardener, Winter 2011 - pdf document
Have a gardening question? We'll help. You can reach us by:
- Emailing acmg@ucanr.edu. Please include a photo of the problem, if you can, plus your name, phone number, and city and a description of the problem.
- Using our online form: https://surveys.ucanr.edu/survey.cfm?surveynumber=16371
By phone, during our office hours, 10am to noon Wednesday and noon to 2pm Thursday: 510-670-5645. At other times, please leave a message and we'll return your call during our office hours.
- In person at our Hayward office, during our office hours, only by appointment.
- Author: Michelle Chin
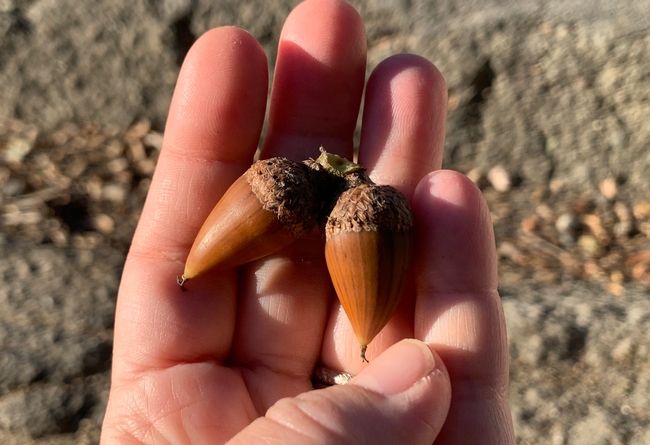
In the Fall, acorns start falling from oak trees. You may notice some acorns germinating and little seedlings forming, usually in inconvenient spots. But as stewards of the environment, you may wonder if it's possible to successfully transplant them to grow into strong oaks in more convenient locations. In this article, we'll cover acorn collecting for planting and transplanting seedlings. (Photo: Acorns in good condition, which can be planted or saved for later planting. (Photo by: Michelle Chin)
Saving acorns for planting
In terms of saving the acorns, you can definitely save them to plant at a later date. The best time to collect them is in the Fall. The San Luis Obispo Master Gardener program recommends the following tips.
- Save acorns that are brown with caps that can easily come off. Discard any acorns that are damaged, small, or feel hollow.
- You can test acorns by soaking them in water for 24 hours. Discard the ones that float.
- To store acorns, make sure they're dry, remove their caps, and place them in a plastic sandwich bag in the refrigerator. They should be kept cold at around 40°F to slow growth activity. You can store them for up to 6 months. Before planting, test to see if any acorns float. Discard any that float. The ones that sink are good for planting.
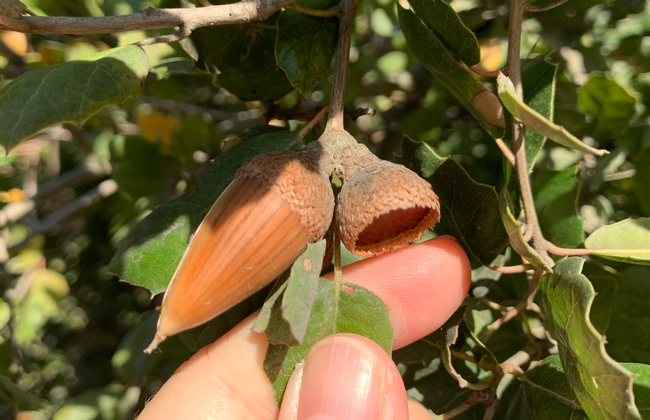
Acorns are ready when they're brown and they separate from their caps easily. (Photo by: Michelle Chin)
Alternatively, if you don't want to store them, you can plant acorns during the rainy season of November-March.
Before you collect acorns, ensure you have permission from the property where you're collecting them.
Planting acorns
Plant acorns anytime between November and March, during the rainy season. Planting acorns earlier in the season is better because it gives them more time to grow. This also reduces potential problems with premature germination during storage.
Where to plant acorns
- If you're planting directly in the ground, plant acorns in a sunny spot with loose, well-draining soil. Also, consider if there are any power lines above or below, underground sewer, water, or gas lines, or nearby buildings (home, garage, etc.). You'll want to avoid planting in these areas. Also, consider how big a mature oak tree can get. For example, a Coast Live Oak (Q. agrifolia) can become 20-70 feet tall!
- Dig a hole using a hand trowel or shovel. We recommend digging a hole several inches deeper than you'll actually plant the acorn, then partially fill the hole back up with loosened soil. This will make it easier for the seedling's roots to grow.
- If you're planting in a container, use well-draining soil and place the containers in a sunny spot.
How to plant acorns
- Plant the acorns ½-1” below the soil surface.
- If the acorns have germinated, be careful not to break the root tip. Position the acorn so the root tip is pointing down.
- Plant ungerminated acorns on their side and cover them with soil.
- Water the acorns after planting. If rain isn't consistent, water them once a week.
- Depending on the type of oak tree, germination can take a few weeks.
Transplanting oak seedlings
It's possible to transplant seedlings successfully. Here are a few tips.
When to plant oak seedlings
December through February is an excellent time to transplant seedlings because the soil will likely be wet.
Where to plant oak seedlings
- Plant seedlings in a sunny spot with loose, well-draining soil.
- Also, consider if there are any power lines above or below, underground sewer, water, or gas lines, or if they're near a building (e.g., home, garage, etc.). You'll want to avoid planting in these areas.
How to plant oak seedlings
- When digging up the seedling, try to keep intact as much as possible of the soil around it.
- Prepare the area you'll want to plant the seedling. Weeds, grasses, and other plants can remove resources from the seedling. Clearing an area of 2-3 feet around where the seedling will go will prevent that competition. You can clear the area by scraping the surface of unwanted plants. Adding mulch to that surface will suppress weeds and prevent other plants from taking over.
- The planting hole needs to be deep enough so that its roots don't bend upward when you plant the seedling.
- Digging a deeper hole (1-2 feet deep with an auger) can help root development and tree growth. This is helpful if the soil is compacted and hard. If you plan on digging a deep hole, call (811) or submit a ticket online (USANorth811.org) to have the area inspected for any underground utility lines.
- Plant the seedling so the soil it came with is level with the ground of its new home. Planting it too low or too high can impact its success. Tamp the soil around the seedling and water thoroughly.
- You can add some fertilizer to the hole before transplanting to promote growth.
- If there isn't much rain, watering periodically will help establish the seedling in its new home.
- Seedlings make great snacks for critters (and lawnmowers), so if that's a threat, creating some sort of cage or covering will help. You can make a cage from wire and place it around the seedling, but household materials like large yogurt containers or cardboard work just as well.
Here are additional resources if you'd like to learn more about growing oaks and oak trees in California.
- Master Gardeners of San Luis Obpiso's article on Oak Tree Care (PDF): https://ucanr.edu/blogs/slomggarden/blogfiles/13336.pdf
- UC Oaks article on How to Grow California Oaks: https://oaks.cnr.berkeley.edu/how-to-grow-california-oaks/ (If you go to the main home page of the site, there's a lot more information on oaks!)
- Oaks in the Urban Landscape by L. Costello, B. Hagen, K. Jones, a UCANR book
- How to Grow California Oaks by D. McCreary, a UCANR publication (PDF)
If you try planting acorns, let us know by reaching out to us on social media. We're on Instagram and Facebook at @alamedaMG.


