By Penny Pawl, UC Master Gardener of Napa County
Fall and winter are great times to do sheet composting in your garden. So just what is sheet composting and what are the benefits? Some people call it smothering, sheet mulching or lasagna composting.
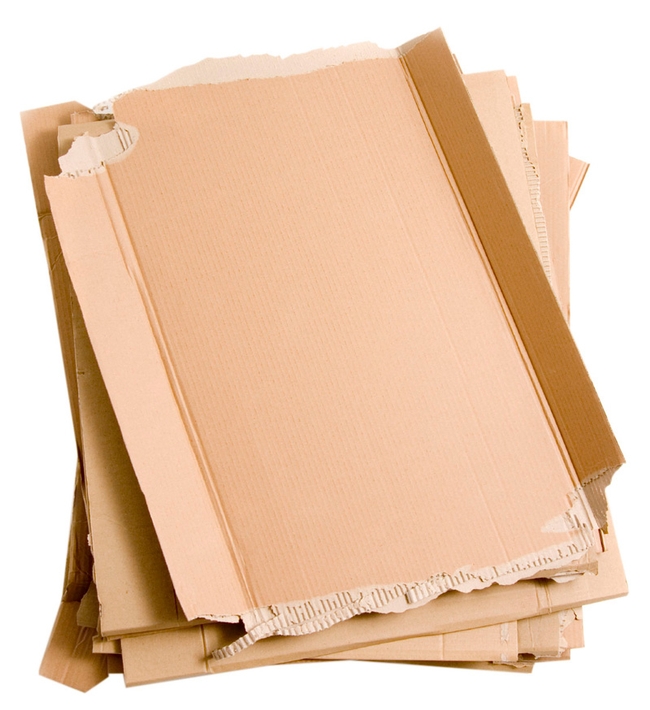
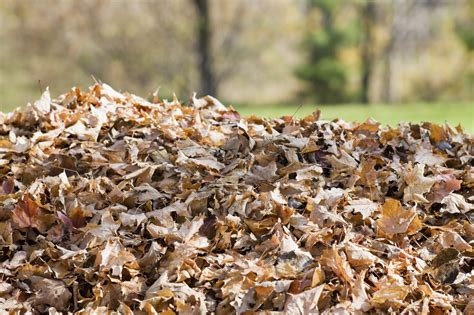
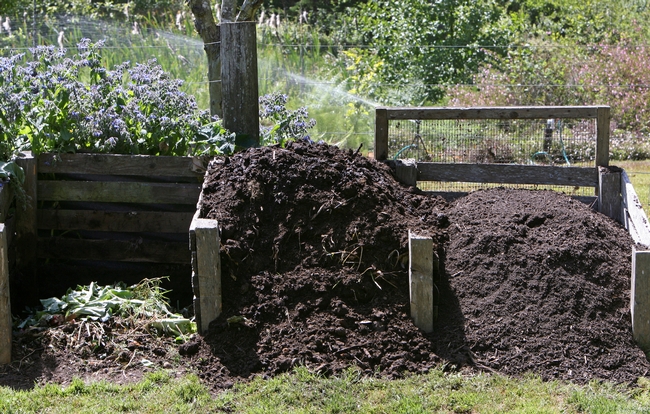
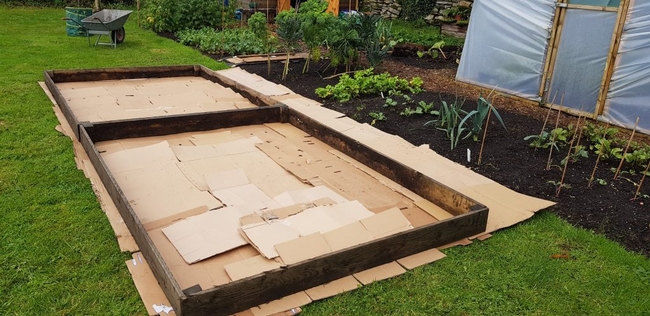
Sheet composting is a passive method of composting. It involves laying plain cardboard or newspaper on soil or lawn and covering it with compost or leaves or both. Autumn is the best time to do this because it gives a chance for the materials to break down and refresh the soil before spring planting.
In the spring when you are planting your garden, if the materials have not fully decomposed, you can cut through them to plant. As you water, the layered materials will continue to decompose and feed the soil.
One year, as an experiment, I planted a plant in my normal soil. Next to that I planted the same plant but used cardboard as a mulch. The soil under the cardboard stayed damper and that plant grew bigger.
Sheet composting is simple. It just takes some time to gather materials and put them to work. Before making the layers, make sure your soil is damp. Remove any large weeds but don't worry about small weeds. The composting process will smother them and they will add nutrients to the soil.
Gather a supply of clean cardboard. Some people prefer the sturdy cardboard used for large appliances, but you can use thinner cardboard, such as Amazon boxes, and double-layer it. You don't have to strip off any plastic tape. The plastic won't decompose so you can easily pick it up later. Worms and sow bugs love cardboard so it will decompose first. Be sure to overlap the cardboard so you smother what's underneath.
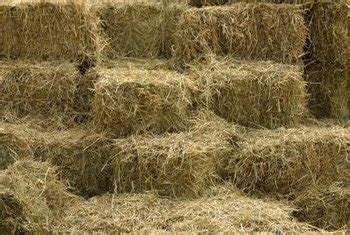
You can also use clean newsprint but avoid any pages with colored ink. Other good materials include dried leaves, compost from your own pile, straw and perhaps a dash of aged chicken manure. All these materials should be kept damp; if necessary, water by hand to keep the decomposition going. You may also want to cover the whole thing with plastic sheeting and add a weight so the materials don't blow away. You can layer the materials up to six inches deep.
Several years ago I demonstrated sheet composting in my garden for a garden club. I made the layers in early spring, covered the whole thing with plastic and, three months later, the decomposition was complete. Red wiggler worms and other insects and bacteria had eaten the materials and mixed them at the same time. The resulting soil was perfect.
Some people use sheet composting when they want to remove a lawn. The layered materials smother the lawn and amend the soil for future landscaping. If you are sheet composting in an area with trees or plants you want to keep, be sure to keep the layered materials away from the trunk or stem of the desired plants.
The compost committee of the Napa County Master Gardeners taped a video on backyard composting, including a demonstration of sheet composting. You can view it here:
Library talk: Napa County Master Gardeners will host a free talk on “Meditation and Wellness Gardens” on Thursday, November 4, from 7 pm to 8 pm, via Zoom. A meditation or wellness garden offers a quiet, calm place to unwind, plus other health benefits. Learn about the relationship of humans to gardens, the healing properties of gardens and some tips on creating your own wellness garden. Register here to receive the Zoom link.
Food Growing Forum: Napa CountyMaster Gardeners will present a discussion of “Cane Berries” on Sunday, November 14, from 3 p.m. to 4 p.m., via Zoom. Register here to receive the Zoom link.
Got Garden Questions? Contact our Help Desk. The team is working remotely so please submit your questions through our diagnosis form, sending any photos to mastergardeners@countyofnapa.org or leave a detailed message at 707- 253-4143. A Master Gardener will get back to you by phone or email. For more information visit http://napamg.ucanr.edu or find us on Facebook or Instagram, UC Master Gardeners of Napa County.


By Heather Dooley and Pat Hitchcock, UC Master Gardeners of Napa County
The recent rain and cool weather have given us plenty of time to pore over all those seed catalogs looking for a new vegetable variety to try or reordering seeds for our favorites. It's time to start planning your summer vegetable garden (although it's not planting time yet).
Fortunately, we live in an area with a Mediterranean climate, characterized by long, dry summers and mild, rainy winters. As a result, we have two cool seasons annually for gardening, one in late summer and early fall and the other in early spring. Our warm season typically starts in late April when the soil is warm enough to plant tomatoes. Now is the time to start planning for that warm season.
You can start your own warm-season vegetables now in pots. Tomatoes, peppers and eggplants are easily started from seed indoors. These vegetables require warmth to germinate so it's a good practice to put seed-starting trays on a heat mat.
All seeds need the correct temperature and moisture to germinate. But after they sprout, light becomes all important. Put baby seedlings in a sunny spot by a window or, if using a grow light, keep the light about 1 inch above the leaves to prevent spindly, weak plants.
If your seedlings do get leggy or aren't dark green, they need more light. Keep soil moist but not soggy and use a half-strength liquid fertilizer once a week. In about six weeks they will be ready to plant outside.
Be sure the area where you intend to plant your seedlings gets enough sun. Six to eight hours is the minimum for most vegetables.
Do you have a plan for irrigation? And have you examined your soil? Is it nice and crumbly, like a piece of chocolate cake? Or is it waterlogged clay? Clay soil holds micronutrients but typically needs to be amended with compost to lighten it, so it has air pockets for the nutrients to cycle.
Have you been adding organic matter to feed the soil microbes? Soil is alive. It has both macroscopic organisms (the ones we can see), such as earthworms, aerating the soil and decomposing organic matter and also microscopic organisms such as bacteria and fungi.
Mycorrhizae are fungi that live in association with the roots of plants. These fungi collect nutrients for the plants in exchange for carbohydrates. It's a wonderful example of life forms helping each other. There's a whole conversation going on underground in healthy soil.
Don't neglect weeds. Most soils have a large amount of weed seed just waiting for the right conditions. Weeds compete with your vegetables for water and nutrients. Controlling them is a constant part of gardening but can be managed by depriving the weeds of water and light. Mulch your beds to exclude light, water only where necessary for your vegetables and disturb the soil as little as possible to avoid bringing up a new crop.
Plant healthy transplants at the right time to encourage growth and to out-compete weeds. Chemical weed controls are not recommended in a vegetable garden and not needed in most situations.
Now that you have a sunny spot with great soil, access to water and no weeds, what do you want to grow? Ask yourself why you are gardening. Is it for flavor, to save money, to harvest organic produce or to have access to unusual produce varieties?
It's tempting to want to grow everything, but properly spaced plants will be healthier and more productive than plants spaced too closely. Make a planting plan on paper. Think about the size of the vegetable when full-grown and how long it will be in the ground. An indeterminate tomato plant will eventually need almost nine square feet of growing ground and will need to be supported with a strong five-foot-tall cage. Can you stagger plantings for a longer harvest season?
It is better to grow fewer plants well than to have a large vegetable garden that you can't take care of. Gardening is work and therapy, and you get tomatoes, too.
See complete list of upcoming events on our website calendar http://napamg.ucanr.edu
Free Talk, 1 hour: “Growing Summer Vegetables” at the Napa Public Library on Thursday, March 7, from 7 p.m. to 8 p.m. Learn what you can grow in the summer, what to plant and when, and how to have a harvest all summer long. No registration required.
Workshop, 2 hours: “Growing Spring and Summer Vegetables” on Saturday, March 9, from 9:30 a.m. to 11:30 a.m., at the University of California Cooperative Extension, 1710 Soscol Avenue, Napa. Do you want nutritious, easy-to grow and utterly fresh food from your garden this spring and summer? Learn what the garden needs to successfully produce spring and summer vegetables from seeds and plant starts. In addition to growing basics and hands-on activities, this program includes watering, fertilizing and harvesting tips, with a dash of Integrated Pest Management for pest and disease control. The delight of growing your own groceries is matched only by savoring them at harvest. Online registration (credit card only); Mail-in/Walk-in registration (check only or drop off cash payment).
Workshop, 2 hours: “Summer Vegetables” on Sunday, March 10, from 1 p.m. to 3 p.m., at Yountville Community Center, 6516 Washington Street, Yountville. Get tips for growing your own summer vegetables. Learn some basics, get keys to success, and do hands-on activities to learn about new varieties and review old favorites. Enjoy healthy vegetables taken straight from your garden to your table. The delight of growing your own vegetables is matched by savoring them at harvest. Online registration or telephone the Parks & Recreation Department at 707-944-8712.
Demonstration garden update: UC Master Gardeners of Napa County have begun the process of re-establishing a demonstration garden in Napa Valley. For further developments, please visit the Demonstration Garden link on our website ( http://napamg.ucanr.edu/).
Master Gardeners are volunteers who help the University of California reach the home gardening public with research based gardening information. U. C. Master Gardeners of Napa County (http:/napamg.ucanr.edu) are available to answer gardening questions in person or by phone, Monday, Wednesday and Friday, 9 a.m. to Noon, at the U. C. Cooperative Extension office, 1710 Soscol Avenue, Suite 4, Napa, 707-253-4143, or from outside City of Napa toll-free at 877-279-3065. Or e-mail your garden questions by following the guidelines on our web site, Click on Have Garden Questions? Find us on Facebook under UC Master Gardeners of Napa County.
Penny Pawl, U. C. Master Gardener of Napa County
Worms are not native to North America. About 20,000 years ago, our continent experienced an Ice Age, along with Europe and Asia. The phenomenon decimated the worm population, with the only survivors in parts of Turkey and the Mediterranean.
Over time, as Eurasians and Europeans began migrating to new lands, they brought plants for their new homes with them. Worms and other critters hitched a ride. On the East Coast of the U.S., these worms have changed the ecosystem because they eat the fallen leaves that trees also depend on for nutrition. This phenomenon is changing East Coast woodlands.
As the immigrant settlers moved across the country, so did their worms. In the Western U.S., worms have benefited the land and consequently the crops that people grow.
If you dig in damp soil, you will probably run across at least one worm. These earthworms (Lumbricus terrestris) live in the first 12 inches of soil. Their digestive systems turn soil into ever finer soil, and their castings improve the health of the soil. Worms also turn the soil, creating tunnels for water and roots. They won't thrive in compacted soil.
Night crawlers (Eisenia hortensis) also live in the soil. However, when the air is damp, they come to the surface and feed on plants there. They are much bigger than red wigglers. Once I put two night crawlers in a worm compost bin. When I cleaned the bin the following year, there were still just two night crawlers in the bottom of the bin. These worms had no interest in composting. However, some night crawlers from Europe and Africa will apparently do this work.
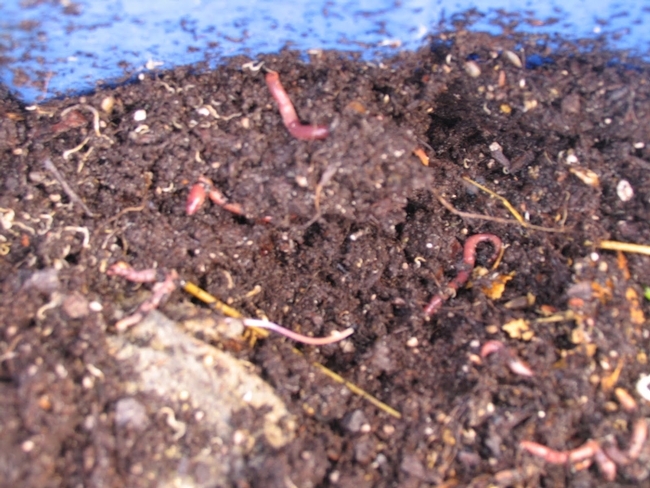
Red wigglers (Eisenia fetida, also known as fishing worms or manure worms), are the kings of composting. They are the worms you find under a stone, pot or pile of leaves. They only eat decaying matter.
Once I put a layer of maple leaves in one of my bins. I seem to have raked up some maple seeds, too, because a week later I had a crop of baby maples in my compost. The worms ate the leaves but not the seeds, which were still fresh enough to sprout.
Red wigglers eat or chew 90 percent of what you give them and that includes newsprint, plain cardboard, egg shells, daffodil leaves, spent flowers, vegetable leftovers, coffee grounds and animal fur. From these materials they produce compost, a mild fertilizer that you had a hand in.
Spread your worm compost over a garden bed, water it in, and the nutrients return to the soil. A lot of gardeners also put a little worm compost in the planting holes for their vegetables for an extra boost. I feed my potted plants with a handful of worm compost.
African red wigglers (Eudrilus eugeniae) grow much longer than our red wigglers and eat more. The two types can survive side by side because they are not necessarily interested in the same decaying material. The African worms need higher temperatures, but I have corresponded with someone in Michigan who is successful raising them in his garage.
Other critters will move into your bins, too. Sow bugs or pill bugs will be the first to arrive, and their manure is just as good as worm castings. My compost-bin residents have included small toads, earwigs, slugs, snails, an occasional small snake (they like worms), a few lizards, ants and various flies. Most of these creatures coexist but I do get rid of the fruit flies.
This year I am experimenting with putting compost bins in my raised beds, a technique common to African keyhole gardens. I put a compost bin in the middle of each bed so the worms can travel back and forth and hopefully fertilize the bed they are in. Only time will tell whether this experiment is successful, but I will report back.
Workshop: U. C. Master Gardeners of Napa County will host a workshop on “Rose Care” on Saturday, June 2, from 10 a.m. to noon, at University of California Cooperative Extension, 1710 Soscol Avenue, Napa. Roses will grow without any care. But they will thrive with a little TLC! Master Gardener rose experts will answer your questions regarding rose care at this popular forum. By June, the first spring blooms have faded, and many plants are beginning to show stress. Look for black spot, rust, mildew and aphids. Bring samples of what's plaguing your roses. Online registration (credit card only); Mail-in/Walk-in registration (check only or drop off cash payment)
Master Gardeners are volunteers who help the University of California reach the gardening public with home gardening information. U. C. Master Gardeners of Napa County ( http://ucanr.edu/ucmgnapa/) are available to answer gardening questions in person or by phone, Monday, Wednesday and Friday, 9 a.m. to Noon, at the U. C. Cooperative Extension office, 1710 Soscol Avenue, Suite 4, Napa, 707-253-4143, or from outside City of Napa toll-free at 877-279-3065. Or e-mail your garden questions by following the guidelines on our web site. Click on Napa, then on Have Garden Questions? Find us on Facebook under UC Master Gardeners of Napa County.
I have a manure farm in my backyard. Before you decide to move on to another article, you should know that my farm is small, only about two square feet in size. It consists of a plastic bin in which live hundreds of small, red worms. Known as "red wigglers", they are different from the earthworms you find in your garden. These little wonders will eat your food waste and create nutrient-rich manure that you can use in your garden.
My worms live very comfortably in their little storage bin, nestled in a bedding of shredded newspaper. Every now and then I take some leftover vegetables and place them under the bedding. Before long, the little red wigglers are all over it, chewing it up and turning it into the garden version of "black gold."
Their manure, or castings, looks much like soil at first glance. It is, however, around five times more nutrient rich then regular soil. The worms are good at their job of consuming and excreting up to half of their body weight in organic matter each day. This leaves me in awe. What if I could attempt such a feat?
Getting started on worm composting, also known as vermiculture, is easy. Obtain a wood or plastic container roughly one foot deep. Drill ¼-inch holes on the sides and bottom to allow air and moisture to pass in and out of the container.
Fill the bin with 1-inch thick strips of damp, but not wet, newspaper. This bedding will help your worms stay cool and damp, as well as give them an additional food source. Glossy newspaper inserts or magazines won't work as bedding. Choose a location that is not too cold or hot. I keep my bin in a shady corner of my patio, but many people keep theirs inside in the basement or laundry room.
Now that you have built your worm home, you can add worms and begin feeding them table scraps. Don't overwhelm them with too much food at first. Watch to see how quickly they eat what you give them, and raise the amount as the population grows. They reproduce rapidly, so you won't have long to wait.
Your new friends will be happy to have any leftover vegetables, fruit, dead flowers, tea bags, coffee grounds and even egg shells. They are vegetarian, however, so don't feed them any meat or dairy products. It is also best to minimize acidic foods such as citrus.
If all goes well, in a few months you will start to see worm castings accumulating at the bottom of the bin. There are many ways to harvest them, but I find the following method to be the easiest. First, remove the finished compost and set it aside. After adding fresh bedding, place hardware cloth across the top of the bin. Put the finished compost on the hardware cloth and let the sun or another bright light shine onto it. The worms will move away from the light, through the compost, and out the bottom into the new bedding. Afterward, pick through the compost to find any stragglers that you can transfer by hand.
Now you have a highly nutritious, homemade fertilizer. You can use it wet, but to store it for later use, let it dry. Just sprinkle it in your garden before watering to enrich your soil. I also like to put a handful in the bottom of a planting hole to give the new plant a healthy start in my garden.
Red wigglers can be found at many fishing supply stores and online. You can also get some worms and a free bin if you attend a Master Gardener worm-composting workshop (https://compost.naparecycles.org/). The workshop is also your chance to get more detailed information on vermiculture. I started my bin after attending such a workshop, and now can't imagine how I ever gardened without it.
Workshop: U. C. Master Gardeners of Napa County will host a workshop on “Landscape Trees, Shrubs and Maples” on Saturday, June 10, from 9:30 a.m. to 11:30 a.m., at the University of California Cooperative Extension, 1710 Soscol Avenue, Napa. The workshop continues from noon to 2 p.m. with a field trip to a local garden. Trees and shrubs add pleasure and value to your garden. Discover an array of options for the home garden and how to add structure and interest with landscape trees and shrubs. Tips for selecting, planting, and caring for trees and shrubs will be discussed. Please bring a sack lunch, dress for outdoor conditions and wear good walking shoes. Online registration (credit card only)
Mail-in registration (check only or drop off cash payment).
Master Gardeners are volunteers who help the University of California reach the gardening public with home gardening information. U. C. Master Gardeners of Napa County ( http://ucanr.edu/ucmgnapa/) are available to answer gardening questions in person or by phone, Monday, Wednesday and Friday, 9 a.m. to Noon, at the U. C. Cooperative Extension office, 1710 Soscol Avenue, Suite 4, Napa, 707-253-4143, or from outside City of Napa toll-free at 877-279-3065. Or e-mail your garden questions by following the guidelines on our web site. Click on Napa, then on Have Garden Questions? Find us on Facebook under UC Master Gardeners of Napa County.
- Author: By Penny Pawl, U. C. Master Gardener of Napa County
Spring is here and it's time to clean and refresh your worm bed. You can harvest that precious gold—the worm castings—and use it to feed your plants.
Years ago, I graduated to large compost bins for my worms. These bins need cleaning about every two years. If you are using a small container, you may need to clean it more often. I do add new bedding to the bins whenever the bedding gets about halfway down.
If you have a small worm bin, you need to harvest the vermicompost, get the worms out and then return the worms to the bedding. There are several ways to do this.
In the past, when I had a small bin, I would remove the whole pile to a temporary container. I would put the worms and their castings on a screen with a mesh large enough that the worms could move through. I would place the screen over moist new bedding. Then I would expose the whole thing to a light bulb or to sunshine. Since worms are light sensitive, they would wriggle away from the light and into the fresh bedding.
Another option is to use the plastic net sacks that onions and potatoes come in. Fill a sack with fresh, moistened bedding and put some of the worms' favorite foods inside. Then put the sack on top of the vermicompost and the worms will move into it, leaving the vermicompost behind for your use.
This method takes a little longer, but it's how I harvest my big bins. When the sack is full of worms, I dump it back onto the new bedding and the critters go back to work.
If you have big bins, you will have a bigger harvest and you need to prepare for it. Gather all the materials for the bedding: torn newsprint (no shiny coated paper), dried leaves, plain cardboard, straw, rice hulls, shredded paper. It feels good to put my old tax records in there.
When I have the bedding ready, I take the bin apart and set aside any uncomposted material. I put the composted material in a wheelbarrow so I can begin the process of separating worms and compost. I put the uncomposted matter back in the bin and then add the new materials. I don't try to mix them. Instead, I make a big “lasagna” of Iayered materials. As the worms eat their way through it, they do the mixing. Be sure to moisten all of the dry materials first, especially cardboard. When the bin is full, water it well. If the materials sink a bit, just add more.
I place a tarp over the castings in the wheelbarrow and put one or two of my sacks full of worms into the bedding. Every few days, I check the sacks and move the worms and contents to the new bin. Sometimes I add new worms at this point, purchased from a bait shop.
Once the worms have departed, I sift the compost to remove big items like sticks or peach pits. Then I put this sifted vermicompost into large pans in the sun to dry. When it's dry, I transfer it to a lidded storage container. (I use a garbage can.)
Scatter the castings around potted plants and in your beds, and your garden will thrive.
Workshop: U. C. Master Gardeners of Napa County will conduct a free workshop on “Worm Composting” on Saturday, March 19, from 9 a.m. to 11 a.m., at the University of California Cooperative Extension office, 1710 Soscol Avenue, Napa. Learn how to turn yard and kitchen scraps into rich compost to use as a soil amendment or garden mulch. Register here. No phone registration.
Master Gardeners are volunteers who help the University of California reach the gardening public with home gardening information. U. C. Master Gardeners of Napa County ( http://ucanr.edu/ucmgnapa/) are available to answer gardening questions in person or by phone, Monday, Wednesday and Friday, 9 a.m. to Noon, at the U. C. Cooperative Extension office, 1710 Soscol Avenue, Suite 4, Napa, 707-253-4143, or from outside City of Napa toll-free at 877-279-3065. Or e-mail your garden questions by following the guidelines on our web site. Click on Napa, then on Have Garden Questions? Find us on Facebook under UC Master Gardeners of Napa County.
Blog, Worms 031216

