By growing different varieties in your garden, you can pick berries year round!
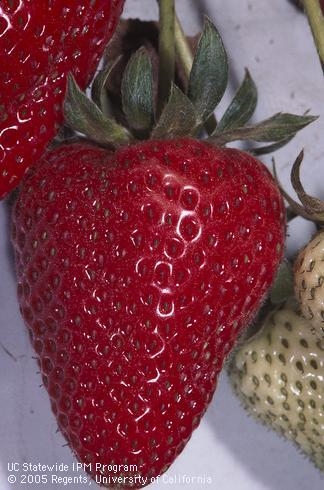
The home gardener loves them, too, and because of our climate and the variety of berries available, we can enjoy pretty much a year-round harvest.
Here are some tips on fulfilling your strawberry dreams:
Berries like full sun and soil that drains well. They also need potassium, so add pot ash when planting in clay soil.
Don't plant where you have grown tomatoes, eggplants or peppers as strawberries are susceptible to verticillium wilt, a fungus that can infect the soil and damage or kill the plant.
Strawberries have shallow roots and need to be watered frequently. Keep plants moist but not soggy.
Strawberries do best when refreshed every year. Dig up and discard of the mother plant. Snip off and replant the healthiest runners that are putting out strong roots and, to ensure large harvests and superior taste, plant new plants every 3 to 4 years.
Varieties
Strawberries fall into three primary categories: Everbearing, day neutral and June bearing.
Everbearing requires long days of sunlight to set fruit and, although they don't bear all year-round, they produce multiple crops in spring, summer and fall.
• Mara Des Bois, developed by a French breeding program, produces small, extremely fragrant, very flavorful fruit.
• Quinault produces up to 2 inch berries that are exceptionally sweet, great fresh or in preserves. It grows well in containers.
• White Carolina, or pineberry, is a unique white to pale pink berry that tastes like a cross between a strawberry and a pineapple. It produces medium size fruit from spring through fall and is heat tolerant and disease resistant.
Day Neutral berries do not depend on a set number of daylight hours in order to flower. They are a great choice if you want a small amount of fruit throughout the year.
• Alpine, sometimes thought of as wild strawberry, is a compact, clumping variety that can be grown in part sun. It has small, aromatic, rich tasting berries. Plants do not sent out runners so it makes a great edging option.
• Albion produces large, firm very sweet berries. It is disease resistant but needs more water and nutrients than other varieties. It spreads out rapidly, so space accordingly.
• Seascape, produced by the University of California in 1992, is productive. Many think it has the best flavor that any of the day neutral varieties.
June bearing strawberries require short day lengths, as in the fall, in order to flower. They are the most widely grown berry and make up the bulk of what you find at the supermarket. They tend to be vigorous plants, putting out lots of long runners, so require room to grow.
They are prolific producers of large fruit, but since the fruit comes on all at once you have to use it all pretty quickly. They are great for jams, jellies and pies.
Unlike the name implies, they don't all produce in June.
• Chandler offers good color and flavor, and the fruit holds well on the vine. It is susceptible to anthracnose disease.
• Earliglow is known for its wonderful strawberry flavor. The fruit is sweet, firm and medium sized. It produces vigorous runners, so give it plenty of space.
by UC Master Gardener Rebecca Jepsen
This article first appeared in the February 1 issue of the San Jose Mercury News.
Winter frost can damage and even kill your plants
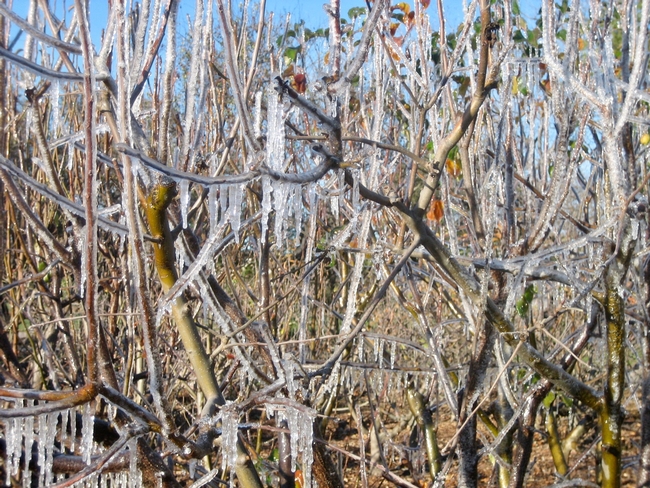
Citrus, succulents, newly planted or tender perennials, and many tropical and subtropical plants all are vulnerable.
Frost damage occurs when the water inside the cells of a plant freeze, causing damage to the cellular walls, which degrades the overall health of the plant. Affected plants will wilt and in severe or prolong periods of frost, die.
Shoots, buds and flowers will wither and turn brown or black as if they have been scorched. Even bark can crack or split and die off.
Young, newly planted, specimens are especially vulnerable.
We already have had several days of frost and freeze here in the Bay Area, and it looks like more is on the way. So, how do you protect your prized citrus, succulents, rhododendrons and azaleas?
- If a severe freeze, or multiple days of below freezing weather is expected, water 2 to 3 days ahead of time. This will increase the soil's ability to retain and give off heat.
- Wrapping trunks of young trees with blankets, towels or piping insulation will provide added protection.
- If you are doing container gardening and are able to pull pots into the garage, shed or other enclosed area, that would be ideal. Otherwise, move them up against the side of the house or garage, preferably beneath an overhang.
- Stringing your plants with old-fashioned, incandescent Christmas lights –not LEDs — can be very helpful. Covering the lighted plants with frost cloth, sheets or blankets will add 4 to 8 degrees of protection, enough to keep most plants alive.
- Frost cloth is lightweight enough to leave on for several days, however heavier covers should be removed each day once the temperature has warmed up, and then reapplied each night before sunset.
Make sure the cover goes all the way to ground in order to capture the radiant heat from the soil. Also, stake heavier covers so that the weight won't break branches, damage the leaves or suffocate the plant. You can also use inverted boxes, buckets and plant pots. - Adding a 2- to 3-inch layer of mulch around your plants can also help, but be sure to stay several inches away from the trunk or stem; mulching too close will cause the plant to rot.
- There are many varieties of foliar sprays available today that claim to protect against frost. Although recent field trials have shown no real harm in using them, they also show have found little to no actual protection from these products. You are better off using other methods to keep your plants safe.
- Wait until all chance of frost has passed before trimming off any damaged or diseased branches. Pruning too soon can cause significantly more trauma, even death, to a young, vulnerable plant that might otherwise have recovered in the spring.
by UC Master Gardener Rebecca Jepsen
This article first appeared in the January 8 issue of the San Jose Mercury News.
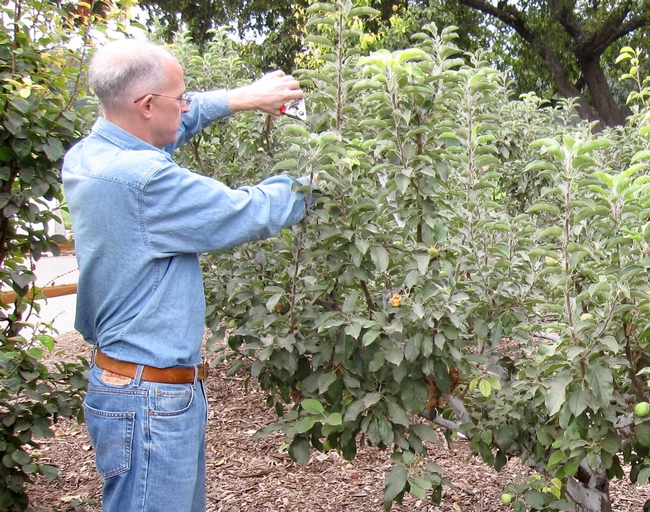 What to learn before picking up your pruners.

Pruning fruit and nut trees in winter is one of the best ways to share with your South Valley friends and neighbors more delicious crops next summer. With fall over, it's also a lot easier to prune without all those leaves blocking your view.
Winter pruning lets you improve the structure, size, and overall health of your fruit and nut trees. The only exceptions are cherry and apricot. Those trees are susceptible to a fungal disease called Eutypa dieback and should be pruned in August.
Before you start pruning, it's a good idea to learn as much as you can about your trees. Different trees have different needs in Gilroy than in, say, Minneapolis. Also, each species has its own needs. Some trees produce fruit on new growth, while others produce fruit on second year growth.
Most fruit trees should be pruned by 15 to 20 percent, while peach trees should be pruned 50 percent. Learning the details about your particular trees can make a big difference in how and where you make pruning cuts. Before you make those cuts, you'll need the proper tools and safety gear.
Putting on long sleeves, boots, gloves, and eye protection before pruning for safety is always an excellent idea. One little piece of flying bark can feel like a jagged boulder in your eye. It's not worth it. Also, make sure your tools are clean and sharp. It is easy to sharpen your tools with a file. You can see how at the Santa Clara County Master Gardeners YouTube website.
There are two basic types of pruning tools: bypass and anvil. Anvil cutters have one sharp blade and one flat blade, which can crush plants rather than make clean cuts, so they should be avoided. You will need hand pruners, loppers, and a curved pruning saw. Also, have a 10 percent bleach solution (1 part bleach, 9 parts water) or disinfectant bathroom cleaner handy. You will use this to sterilize your tools between each plant and after cutting off any diseased plant material.
Regardless of the species, diseased, damaged, and crossed limbs should be removed first. Next, prune for size and structure in ways that allow for good sun exposure and air circulation. Keep in mind that vertical branches tend to be more vegetative (leaf producing), while horizontal branches produce more fruit, and your tree needs both. You will use two types of cuts when pruning: thinning and heading. Heading cuts shorten branches, stimulating new growth where you want it. Thinning cuts are the removal of unwanted branches. When making thinning cuts, avoid damaging the branch collar without leaving nubs. Branch collars are areas of raised bark where a limb emerges. These living cells help a tree to heal itself.
These pruning tips can help you get the most out of your efforts (and your trees):
• Make cuts ¼-inch above nodes that are facing the way out want new growth to go.
• Prune for a size that will be easy to maintain and pick fruit.
• Aim to distribute sunlight evenly throughout tree.
• Most of the pruning should be done at the top of the tree, to allow more sunlight to reach the lower branches.
• Remember that one big cut can prevent several smaller cuts.
• Keep in mind how the tree will grow over the next few years.
• For heavy producers, remove excess fruitwood to prevent broken limbs.
• Sealants are not needed. Trees know how to seal themselves.
• Be sure to pick up and dispose of any rotting fruit or mummies.
As you prune, take the time to step back and look at the tree from several angles to make sure you are getting the shape you want. While you're at it, January is the best time to prune roses in the Morgan Hill area. Keep three to six strong, healthy canes per plant, leaving three to five buds on each cane. Make diagonal cuts ¼-inch above an outward-facing bud. To learn more, the San Jose Heritage Rose Garden offers free hands-on rose pruning classes in January and February.
by UC Master Gardener Kate Russell
This article first appeared in the Dec. 21, 2016 to Jan. 3, 3017 issue of Morgan Hill Life and Gilroy Life.
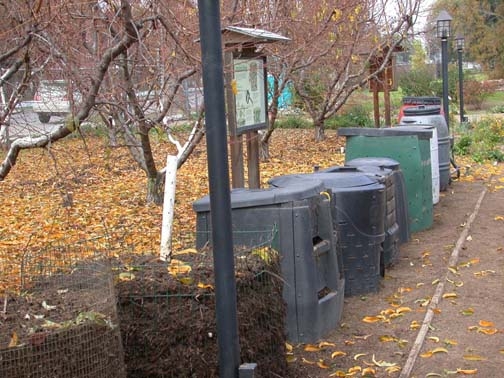
You could think of all this falling foliage as just another mess to clean up, but that would be a shame. Dry leaves are a powerhouse of nutrients for your soil, containing twice as much mineral content as manure. Decomposed leaf matter, often referred to as leaf mold, can also improve soil aeration and drainage while providing a feast for all the good microbes doing their work underground. And all it takes is just a bit of effort to turn that pile of dry brown into garden gold.
To keep all of your beautiful leaf pieces in one place, I suggest a simple structure. Step 1: Unroll about 6-8 feet of chicken wire and bend the wires from the two cut ends together to form a ring. Step 2: Fill the ring with leaves. I told you it was easy.
When you're ready to build your leaf pile, keep a few things in mind:
-
Use freshly fallen leaves as this is the stage when the nitrogen and mineral contents are highest
-
Shred or chop up dry leaves before adding them to your compost pile to speed up decomposition. A basic chipper/shredder is a good tool for this. Or, if you still own a lawn mower (what?), you can run it over the leaf pile.
-
Avoid adding black walnut and eucalyptus leaves which contain a natural herbicide that can affect seed germination of other plants.
If you already have a composting system in place (you garden rock star!), you can also add a moderate amount of shredded leaves as a brown ingredient for your brown and green recipe.
On the other hand, if you're not ready to commit to building a leaf mold pile, we won't judge. Gather up those leaves and spread them at the base of your trees and shrubs as a layer of mulch to protect the soil from winter rain and cold. As with any mulch, you want to keep the leaves away from direct contact with the plant itself to avoid crown rot. In spring, rake the leaves back to allow the soil to warm up more quickly.
If what you're looking for is an excuse to party, leaf it to me. See what I did there? But seriously, in Japan, where I lived for a few years, the farmer I worked with would celebrate the falling of the leaves, known as ochiba, with friends and family. Everyone spent the day collecting leaves for compost and then shared a meal, and maybe a lot of beer and sake, around a roaring fire. Just one more reason to not kick those leaves to the curb.
by UC Master Gardener Cayce Hill
This article first appeared in the November 25 issue of the Morgan Hill Times.
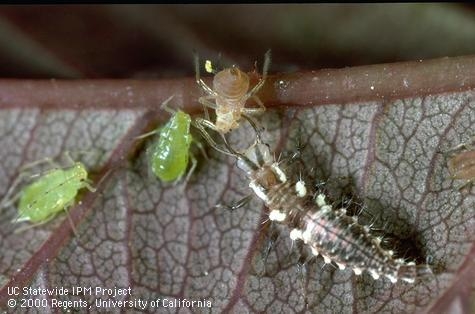
Beneficial insects are those that improve pollination, gobble up or lay their eggs inside insect pests, or speed up decomposition. Common beneficial insects include honeybees, minute pirate bugs, syrphid flies, assassin bugs, tachnid flies, big-eyed bugs, lacewings, native bees, parasitic wasps, butterflies and damsel bugs. Lady beetles are one of the most popular beneficial insects. A single lady beetle may eat 50 aphids a day, but it will fly away if its needs are not being met.
You can make your Morgan Hill yard and garden more welcoming to beneficial insects by meeting those needs with year round food, water, and shelter, using native plants. Local insects have evolved using native plants for food and shelter for thousands of years. Hedgerows and clusters of native shrubs and perennials can provide low-maintenance habitat for many beneficial insects.
To attract pollinators, try adding these plants to your landscape:
- Brandegee Sage (Salvia brandegeei)
- Borage (Borago officinalis – not native, but highly effective)
- California poppies (Eschscholzia californica)
- Coast buckwheat (Eriogonum latifolium)
- Great Valley gumweed (Grindelia camporum)
- Tansy (Phacelia tanacetifolia)
- Wild Liliac (Ceanothus sp.)
The following native plants make excellent habitats for pest-eating insects (with buckwheat being the favorite of most beneficial insects):
- Blue wildrye (Elymus glaucus)
- California buckwheat (Eriogonum fasciculatum foliolosum)
- California coffeeberry (Rhamnus californica tomentella)
- California lilac (Ceanothus griseus)
- California onion grass (Melica californica)
- Coyote brush (Baccharis pilularis)
- Creeping wildrye (Leymus triticoides)
- Elderberry (Sambucus mexicana)
- Manzanita (Arctostaphylos sp.)
- Nodding needlegrass (N. cernua)
- One-sided bluegrass (Poa secunda)
- Purple needlegrass (Nassella pulchra)
- Toyon (Heteromeles arbutifolia)
Providing shelter for beneficial insects often means nothing more than providing a source of water and avoiding the use of broad-spectrum pesticides and bug zappers. Pesticides and bug zappers often kill beneficial insects. According to research published in science research journal PLOS One, insect hotels may or may not be effective, but they might help and they do make nice garden art. Since each insect species has its own habitat needs, creating different levels within a landscape, using trees, shrubs, perennial beds, and low-growing ground cover can provide the widest variety of shelter possibilities. Shelter can also take the form of bare patches of soil or sand for ground dwelling solitary bees.
Plant a variety of colors and shapes, making sure that food and habitat are available year-round whenever possible. Some beneficial insects love round chive blooms, while others prefer the flat landing area provided by cilantro. Salvia's spikey blooms and daisy-like sunflowers fill out the range of flower shapes. Many delicious herbs, such as rosemary, oregano, dill, and thyme are irresistible to beneficial insects.
The rainy days of November are an excellent time to draw or list existing plants, noting when they bloom, their color and blossom shape, and which beneficial insects they attract. The next step is to see what is still needed for the biggest impact. If your Morgan Hill garden has specific pests that attack regularly, you can install plants to attract beneficial insects known to feed on those pests.
For more information, visit Master Gardeners or call 408-282-3105, Monday through Friday, 9:30 a.m. to 12:30 p.m.
by UC Master Gardener Kate Russell
This article first appeared in the November 9 issue of the Morgan Hill Life.

