Posts Tagged: pot
The Buzz About Honey Bees and Marijuana
Extension apiculturist emeritus Eric Mussen of the UC Davis Department of Entomology and...
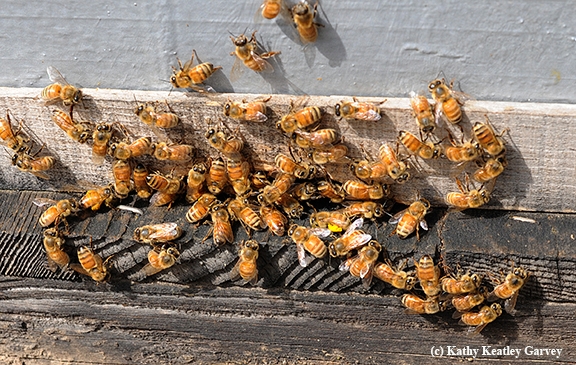
Honey bees laden with pollen returning to their colony. (Photo by Kathy Keatley Garvey)
Repotting the Potted Indoor Aloe
Advice for the Home Gardener From the Contra Costa Master Gardeners' Help Desk
Client's Questions & Concerns:
Client called in and also sent email with picture asking whether her aloe needed repotting. Plant appeared to be in original 4" pot. She also wanted to know why the plant was drooping.
Response from the CCMG Help Desk
You want to choose a pot that is wider and deeper than the current plant, with space for the plant to grow. The new pot can be plastic or clay/ceramic. Given the top-heavy nature of an aloe you may want to use a clay or ceramic pot. Any pot you select should have one or more drainage holes in the bottom. You can use commercial cactus mix as your planting medium.
Before planting, lightly cover the drainage holes with a piece of clay or a screen. Note: Do not place pebbles or multiple layers of clay pieces in the bottom of the pot "to improve drainage". Recent research has shown that the pebbles do not improve drainage; they just limit the space for the roots.
To repot, remove the plant from the current pot, clearing away the old soil from the roots. I noticed that you have a "pup" in the corner of the current pot. You will want to cut the pup from the main plant. You can plant it separately if you want. Place the plant(s) in the new pots with the cactus mix. The main plant can be planted with the lowest leaves at the soil level, i.e., with the bare stem buried. Allow the plant(s) to rest out of direct sunlight without water for the first week or two after repotting. This allows time for roots that may have been damaged in the transplanting process to heal.
There are several environmental factors that could be causing the drooping problem. One is water. Aloes should be watered approximately once a week through the growing season (spring to fall). Aloes need less water during the winter, but you do need to make sure that it gets enough water to avoid shriveling. You especially want to make sure that the plant does not fully dry out once you start watering it this winter after the transplant waiting period is over. However, you should let it dry out the top 1-2" between waterings (you can stick your finger and/or popsicle stick to check, etc.).
A second factor is fertilization. The plant looks like it had some sudden new growth. Like many houseplants, aloes do well with regularly applied diluted fertilizer during the growing season, with no fertilizer during the dormant (winter) season.
A third factor is light. Your plant may need additional light. A west or south facing window is best. Care must be used when introducing additional light or moving the plant to a brighter location. The plant should be introduced to the additional light gradually to avoid scorching.
For more information on repotting and growing succulents and cactus see: http://www.csssj.org/welcome_visitors/basic_culture.html.
For specific information on aloes, see: http://homeguides.sfgate.com/plant-aloe-vera-container-80791.html and
for indoor succulents http://homeguides.sfgate.com/indoor-potted-succulents-dying-80564.html.
And for a view of Aloes and other succulents in a garden setting (with some in pots as well in the nursery), you should visit The Ruth Bancroft Garden in Walnut Creek. This is a world-class garden utiliizing succulents and other water-aving plants in settings that can be inspiration for your home and garden.
Good luck with your aloe.
Please let us know if you have further questions.
Contra Costa Master Gardeners Help Desk
Note: The Contra Costa Master Gardener Help Desk is available year-round to answer your gardening questions. Except for a few holidays, we're open every week, Monday through Thursday for walk-ins from 9:00 am to Noon at 75 Santa Barbara Road, 2d Floor, Pleasant Hill, CA 94523. We can also be reached via telephone: (925) 646-6586, email: ccmg@ucanr.edu, or on the web at http://ccmg.ucanr.edu/Ask_Us/
Leaf Mold
I spend a lot of time reading the gardening articles produced in England during the middle of the past century. I find the material soothing, as I can’t possibly be expected to actually do anything that is advised. I was interested however, in the vast amounts of “leaf mold” that was believed to be crucial in their gardens. I have since discovered that it is nothing more than compost with a more interesting name.
My own yard is small, steep, and accessible only by stairs on either side of the house. Weary of hauling things up and down in buckets and bags, I have made various attempts at composting on a small scale. One successful measure was to create a “leaf mold bucket” that produced a decent soil amendment about four times per year. The container is a 15 gallon plastic nursery pot that came with a tree. The key is to be selective about what goes into it. I start with leaves, but not just any leaves. Broadleaf deciduous leaves such as sycamore or maple will do well. I have kiwi vines that supply leaves both when they fall in November and again in April when they are pruned. So the pot is filled with leaves and then tamped (you can just step into the pot). Then it topped off with more leaves and tamped again, and again. This is why you have to be choosy about your leaves because they should be dry and brittle so they will crumble. It is surprising how long you can keep this up in such a small container, as the leaves really have little volume when crushed. This special bin hangs out with me for weeks as I periodically sweep the patio of leaves. When the pot really can accept no more leaves, it gets moved to an area of the yard that gets over-spray from lawn irrigation. A little added nitrogen in whatever form you like will help a lot. The top is covered with a scrap of landscape cloth and tied down. It sits in full sun as I am operating under the theory that thermophilic bacteria do not know why it is hot, and they are unaware that they lack the 1.5 feet of insulation they would have in a real compost pile. The black plastic does indeed keep the material warm and you can judge your success by how rapidly the volume decreases. If you want to aerate the leaves, just roll it along the ground for a bit. When the volume decreases to 50%, you should have something that looks like purchased compost and you can amend your soil or use it for mulch as needed.
I really should emphasize that this is not real composting and I am relying heavily on bacteria and fungi to break down the leaves. No kitchen waste is added except for rare doses of coffee grounds. It only works because the leaf particles are so small when the project begins and relatively free of weed seeds. However, if space is limited and you would like to do something with your leaves besides plunking them for curbside pick-up, leaf mold in a pot is an option.
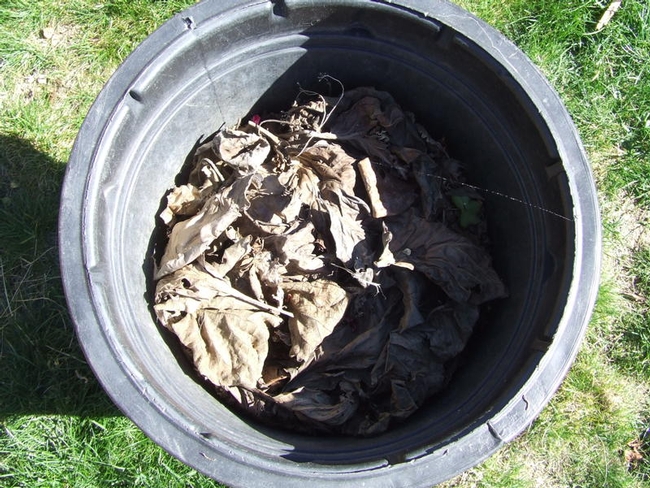
Leaf mold. (photo by Meg Grumio)
