- Author: Sherida Phibbs, UCCE Master Food Preserver
How to Join the Food Safety and Home Food Preservation Fun:
- Follow us on Facebook for updates and registration announcements: Link
- Sign up for our Preservation Notes Newsletter to receive registration links for each event. Sign up Here.
- Do you know we have a website? Click in and check out our website.
Remember - Don't miss out on the chance to enhance your preservation skills and share the joy of homemade goodness. See you there!
In-Person Workshops Learn It! Preserve It! Take it Home! 9am-noon, ($25 Advanced Registration Required):
1/20 – Citrus
3/16 – Herb Jelly
4/20 – Jams
5/18 - Pressure Canning
6/15 – Picnic/BBQ Safety and Preserving BBQ Sauce
7/20– Stone Fruits
8/17 – Tomatoes
9/21 – Pickling
10/19 – Gifts from the Kitchen
11/16 - Chutney
Free Fermenting Zoom Classes (10am-Noon):
2/17 – Fermenting – Sauerkraut and Yogurt
"Rise to the Occasion" A Four-part Zoom Sourdough Adventure:
6/1 - Unveiling the Science of Fermentation of Sourdough Culture
7/ 6 - Crafting, Nurturing, and Maintaining Your Healthy Sourdough Starter
8/ 3 - Crafting Sourdough Sandwich Loaves and Artisan Breads
9/7 - Troubleshooting Sourdough Culture and Baking Triumphs
- Author: Marcy Sousa
The Super Bowl is a time of excitement, camaraderie, and of course, indulging in delicious snacks and meals. As you gear up for the big game, it's crucial to prioritize food safety to ensure that your Super Bowl party is not only enjoyable but also free from potential health risks. In this blog, we'll explore some essential food safety tips, drawing reference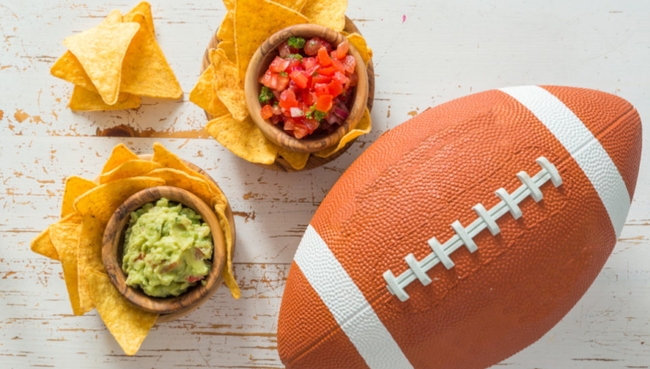
- Cleanliness is Key: Before you even start preparing your Super Bowl spread, it's important to ensure a clean and sanitized cooking environment. Wash your hands thoroughly with soap and water for at least 20 seconds before handling any food. Additionally, clean all utensils, cutting boards, and countertops with hot, soapy water.
According to the USDA, cross-contamination is a significant concern. Keep raw meat, poultry, and seafood separate from ready-to-eat foods to avoid the spread of harmful bacteria. Use different cutting boards for raw and cooked foods, and wash them between uses.
- Safe Food Handling Practices: When it comes to handling food, the USDA emphasizes the importance of following safe practices. Thaw frozen foods in the refrigerator, not on the counter, to prevent bacteria growth. Use a food thermometer to ensure that meats reach their recommended internal temperatures – for example, chicken should reach 165°F (74°C).
If you're serving perishable foods like dips, meats, and cheeses, make sure they don't stay at room temperature for more than two hours (or one hour if the temperature is above 90°F). Refrigerate leftovers promptly to prevent the growth of harmful bacteria.
-
Mindful Menu Planning: As you plan your Super Bowl menu, consider opting for foods that are less prone to contamination. The USDA recommends serving fully cooked and ready-to-eat foods, such as fruits, vegetables, and cheese. If you choose to serve raw or undercooked eggs, the USDA suggests using pasteurized eggs to minimize the risk of foodborne illnesses.
-
The Importance of Safe Grilling: Super Bowl parties often include outdoor grilling, and it's essential to grill safely. The USDA advises preheating your grill before cooking and using a food thermometer to ensure that meats, poultry, and seafood reach safe temperatures. Marinate foods in the refrigerator, not on the counter, and discard any leftover marinade that has come into contact with raw meat.
-
Educating Guests: Part of ensuring food safety at your Super Bowl party is educating your guests. Clearly label foods, especially those that may contain allergens, and provide serving utensils for each dish to prevent cross-contamination. Encourage guests to wash their hands before eating and to avoid double-dipping to maintain a hygienic environment.
-
After foods have been sitting at room temperature for 2 hours, either place foods in the refrigerator, change the cold sources or throw out foods you know have been sitting since pre-game coverage. Bacteria love temperatures between 40°F (4°C) and 140°F (60°C), and will grow rapidly if they are in this temperature environment for more than 2 hours. Read more about the Danger Zone.
By prioritizing food safety at your Super Bowl party and adhering to the guidelines provided by the USDA, you can ensure that your celebration is not only enjoyable but also safe for all your guests. Implementing these practices will help prevent foodborne illnesses and allow everyone to focus on the excitement of the game and the joy of good company and great food. For more info, visit the FoodSafety.org website
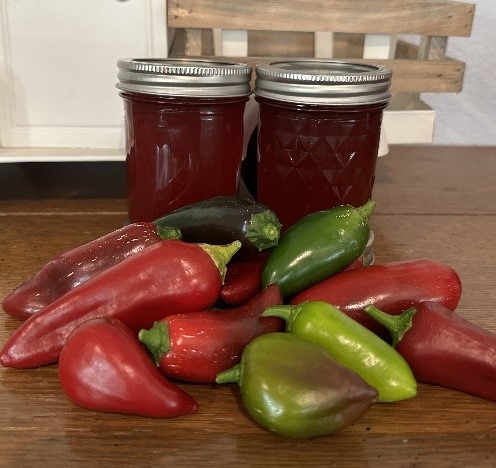
Jalapeño Jelly
Yields approximately five half-pint
Ingredients:
12 ounces Jalapeño Peppers (~12 medium)
6 cups Sugar
2 cups Cider Vinegar divided
2 three-ounce pouches Liquid Pectin
Food Coloring optional
Caution: Wear gloves and do not touch your face while handling or cutting jalapeño peppers. If you do not wear gloves, wash your hands thoroughly with soap and water before touching your eyes or face.
Procedure:
- Wash and rinse jars and lids; keep jars hot until ready to use. Follow the manufacturer's directions for lid preparation.
- Purée the jalapeños in a food processor or blender with 1 cup of vinegar until smooth. Do not strain.
- Combine purée with the remaining 1 cup cider vinegar and sugar. Bring to a boil over high heat. Boil for 10 minutes, stirring frequently.
- Quickly stir in the liquid pectin. Return to a full rolling boil. Stirring constantly, boil for precisely 1 minute. Remove from heat and add food coloring if you want. Skim foam if necessary.
- Ladle hot jelly into hot jars, leaving ¼-inch headspace. Remove air bubbles and adjust the headspace if needed. Wipe rims of jars with a dampened, clean paper towel; apply two-piece metal canning lids.
- Process in boiling water canner or atmospheric steam canner according to Table 1.
|
Processing time for Jalapeño Jelly with Added Pectin |
|
|
|
Process Time at Altitudes of |
| Style of Pack | Jar Size | 0-1,000 feet | 1,001-3,000 feet | 3,001-6,000 feet | Above 6,000 feet |
| Hot | Half Pints | 10 Minutes | 15 Minutes | 20 Minutes | 25 Minutes |
Now that you have produced your Jalapeño Jelly, I will share an original recipe and how I utilize it to create a delicious meal.
Sweet and Spicy Jalapeño Glazed Chicken
Yields about four servings
Ingredients:
4 boneless, skinless chicken breasts
Salt and pepper to taste
1 cup Jalapeño Jelly
2 tablespoons soy sauce
2 cloves garlic, minced
1 tablespoon ginger, grated
1 tablespoon olive oil
Instructions:
Season and Sear Chicken:
- Season the chicken breasts with salt and pepper. Add olive oil in a large skillet over medium-high heat and sear the chicken until golden brown on both sides. Remove and set aside.
Prepare the Glaze:
- In the same skillet, add minced garlic and grated ginger. Cook for about a minute until fragrant. Add Jalapeño Jelly and soy sauce, stirring until well combined.
Simmer and Glaze:
- Return the seared chicken to the skillet. Spoon the glaze over the chicken and let it simmer for 5-7 minutes until cooked.
Serve and Enjoy:
- Plate the chicken and drizzle with extra glaze. Garnish with chopped green onions or sesame seeds. Serve with rice and vegetables.
I hope with this Jalapeño Jelly in your pantry, you embark on a spicy culinary adventure. Whether you're glazing chicken, spicing up sandwiches, or serving it as my mother-in-law did with cream cheese and crackers, this homemade jelly will tantalize taste buds and elevate your dishes.
Until next time, keep canning and savoring the fruits of your labor!
Recipe - Ball Jalapeño Jelly Link
Photo credit: Nicole D George
FREEZING INSTRUCTIONS: Use rigid containers such as glass or hard plastic. Leave 1½” headspace for expansion. For best quality use within 1 year.
Butternut Squash and Pear Soup
Prep Time: 35 minutes Cook Time: 25 minutes Difficulty: Medium Servings: 12
INGREDIENTS
1½ cups onion, chopped
4 tablespoons butter
4 cups chicken broth
2 pounds* butternut squash, peeled, pared, seeded and cut into 1" cubes
12 ounces* ripe pears, peeled, pared and chopped
2 teaspoons finely chopped fresh thyme (or 1 tsp. dried crushed)
1½ teaspoon sea salt
½ teaspoon white pepper
½ teaspoon ground coriander
1 cup whipping cream
* Trimmed and pared weight
DIRECTIONS
- Cool and stir onion in butter in large Dutch oven until tender. Stir in broth, squash, pears, thyme, salt, white pepper, and coriander. Heat to boiling; reduce heat. Cover and simmer until squash is tender, 10 to 15 minutes.
- Working in batches, pour soup into food processor work bowl fitted with steel blade or into blender container. Cover and process until smooth. Repeat with remaining soup. (Hint: If necessary, strain through a colander to separate any large pieces).
- Return to Dutch oven; stir in whipping cream. Heat, stirring frequently, until hot.
- To serve, garnish with a thin slice of pear and toasted chopped pecans.
NOTES: 1 medium pear = approximate 8 ounces whole. If pears are hard, close them in a paper bag with either an apple or a ripe banana for 24 hours to ripen.
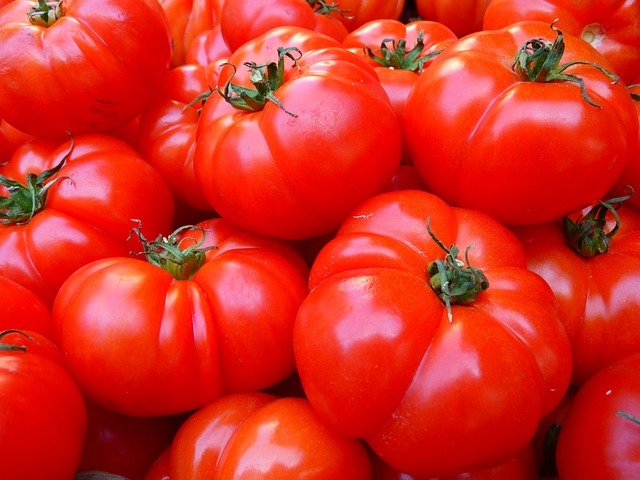
Response: Using overripe tomatoes in home canning is not recommended for several important reasons, primarily related to safety and the quality of the canned product. Here are some key points explaining why overripe tomatoes should be avoided in home canning.
Lower Acidity: Overripe tomatoes tend to have lower acidity levels than their ripe counterparts. High acidity is essential in-home canning because it helps preserve the contents and prevent the growth of harmful microorganisms, particularly the bacterium Clostridium botulinum, which can lead to botulism poisoning. The National Center for Home Food Preservation (NCHFP) emphasizes the importance of using ripe, not overripe, tomatoes to maintain proper acidity levels in canned products.
Texture and Flavor: Overripe tomatoes can be mushy and overly soft, which may result in a poor texture and flavor in the final canned product. Using tomatoes at their peak ripeness ensures a better-quality canned product with the desired taste and texture.
Spoilage Risk: Overripe tomatoes are more susceptible to spoilage, mold growth, and spoilage microorganisms. This can increase the likelihood of spoilage and reduce the shelf life of your canned tomatoes.
Quality Preservation: The goal of home canning is to preserve the highest possible quality of the food being canned. Overripe tomatoes may already have deteriorated in quality, so starting with the best-quality tomatoes is essential to maintain the desired taste, appearance, and nutritional value.
Safety Concerns: Home canning is a science that requires precision to ensure food safety. Using overripe tomatoes can introduce unpredictability in terms of acidity and spoilage risks, which can compromise the safety of your canned products.
Using overripe tomatoes in home canning is discouraged due to concerns related to acidity, spoilage risks, and the overall quality of the canned product. It's essential to follow reputable sources like the National Center for Home Food Preservation to ensure the safety and quality of your canned foods. Starting with ripe, but not overripe, tomatoes is a crucial step in successful home canning.
Source: NCHFP - "Selecting, Preparing, and Canning Tomatoes" https://nchfp.uga.edu/publications/publications_usda.html
Tomato Image by LoggaWiggler from Pixabay

