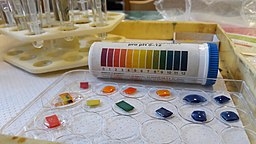
RESPONSE: Using home pH testing for home canning is not recommended for several important reasons, primarily related to the accuracy and safety of the canning process. Here are some key points explaining why home pH testing is discouraged in home canning:
- Professional Equipment: Professional equipment is required for consistent accuracy. It is extremely expensive and training is required which is not generally feasible for home use.
- Lack of Precision: Home pH testing methods often lack the precision and reliability required for safe home canning. pH meters and strips used in homes may not provide accurate readings, which can lead to unreliable results.
- Botulism Risk: Home canning relies on specific pH levels to ensure safety by preventing the growth of the bacterium Clostridium botulinum, which can cause botulism poisoning. If pH levels are not accurately measured and maintained within the safe range, there is a significant risk of botulism contamination.
- Inconsistent Results: Home pH testing can yield inconsistent results due to variations in testing equipment, user error, and environmental factors. Inaccurate readings may lead to a false sense of security, potentially putting the safety of the canned food at risk.
- Expertise Required: Accurate pH testing requires expertise and proper calibration of equipment. Many home canners may not have the necessary training or experience to perform pH testing accurately.
- Safety Standards: To ensure safe home canning, it is essential to follow established, science-based guidelines and standards set by reputable sources such as the USDA and the National Center for Home Food Preservation (NCHFP). These guidelines recommend specific recipes, processing times, and temperature control as the safest way to can various foods.
- Alternative Methods: Instead of relying on pH testing, home canners are advised to follow tested and approved canning recipes provided by trusted sources. These recipes are developed to ensure the proper acidity levels and processing times required for safe home canning.
In summary, using home pH testing for home canning is not recommended due to its potential lack of accuracy and reliability, which can compromise the safety of canned foods. To ensure safe home canning practices, it is essential to follow established guidelines and recipes from reputable sources like the USDA and the NCHFP, rather than relying on pH testing methods that may not meet safety standards.
National Center for Home Food Preservation https://nchfp.uga.edu/
Image: https://commons.wikimedia.org/wiki/File:PH_indicator_paper_with_multiple_colours.jpg
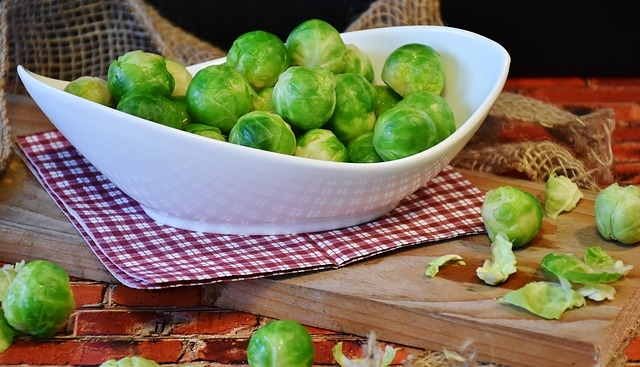
It wasn't until many years later that I stumbled upon the secret to enjoying Brussels sprouts - never overcook them! As Brussels sprouts simmer, a sulfur compound is unleashed, and the longer they cook, the more that infamous odor intensifies. Properly preparing Brussels sprouts eliminates this sulfurous affliction and transforms them into a delectable dish.
Could it be that our genetic makeup plays a role in the great Brussels sprouts divide? It's entirely possible.
In 2011, the renowned Eden Project in the UK's Cornwall delved into this culinary conundrum. Researchers uncovered a genetic explanation for why some adore Brussels sprouts while others recoil in disgust. The key player here is a chemical compound known as phenylthiocarbamide (PTC), which imparts a bitter taste to those who possess a specific gene variation. This fascinating study pinpointed the TAS2R38 gene as the culprit, working in tandem with PTC to create a bitter sensation on the palate. Astonishingly, roughly half of the global population carries a mutation of this gene. In other words, the fortunate half with the mutated gene cannot detect the bitterness, and I count myself among them, as I've come to relish properly prepared Brussels sprouts.
Brussels sprouts will never be universally adored. They remain a divisive vegetable, causing a culinary chasm that separates those who revel in their unique flavor from those who would rather steer clear.
As the fall harvest season rolls around, you may find yourself with an abundance of Brussels sprouts from your garden or the local market. While they're delightful when fresh, preserving these miniature cabbages can ensure you savor their deliciousness throughout the year. From freezing to pickling, there are several methods to home-preserve Brussels sprouts and keep their goodness intact.
- FREEZING - Freezing Brussels sprouts is one of the easiest and most popular methods of preservation. Follow these steps for optimal results: National Center for Home Food Preservation
- PICKLING - Pickled Brussels sprouts add a delightful tangy twist to your pantry. Try out this recipe: National Center for Home Food Preservation
- DEHYDRATING - Dehydrating Brussels sprouts is a space-saving method that results in crispy, nutritious snacks. Follow these steps:
- Preparation: Clean, trim, and cut the Brussels sprouts into thin slices or halves.
- Blanching: Blanch the slices for a few minutes to preserve color and nutrients, then cool them in ice water.
- Dehydrating: Arrange the blanched Brussels sprouts on dehydrator trays and dry them according to your dehydrator's instructions. This can take several hours.
- Storage: Once completely dehydrated, store the crispy Brussels sprouts in airtight containers in a cool, dry place.
Preserving Brussels sprouts at home allows you to enjoy their flavors and nutrients year-round. Whether you prefer the crispness of frozen sprouts or the tangy kick of pickled ones, these preservation methods ensure that you won't have to wait until the next harvest season to savor these delightful green gems. So, roll up your sleeves and start preserving your Brussels sprouts today!

- Plan Ahead - A successful tailgate party begins with thorough planning. Start by making a checklist of all the foods and beverages you intend to serve. Consider the number of guests and the duration of the event when planning your menu. Having a detailed plan will help you avoid last-minute trips to the store or rushed food preparation, which can lead to lapses in food safety.
- Keep it Cool - One of the most critical aspects of food safety at a tailgate party is maintaining proper temperature control. Perishable foods like meats, dairy products, and mayonnaise-based salads should be stored in a cooler with plenty of ice packs or ice to keep them at a safe temperature of 40°F (4°C) or below. Invest in a reliable cooler and a food thermometer to monitor temperatures regularly.
- Safe Food Handling - Proper food handling is essential to prevent cross-contamination and the spread offoodborne illnesses. Follow these guidelines:
a. Wash your hands thoroughly with soap and water before and after handling food.
b. Use separate cutting boards and utensils for raw meats and ready-to-eat foods.
c. Marinate meats in the refrigerator and discard any leftover marinade that has come into contact with raw meat.
d. Cook meat to the recommended internal temperature (e.g., 165°F/74°C for poultry) using a food thermometer. - Hygiene Matters - Encourage your guests to practice good hygiene, too. Provide hand sanitizers and disposable wipes at your tailgate party so that people can clean their hands before digging into the snacks. Consider setting up a handwashing station if possible.
- Keep Hot Foods Hot, and Cold Foods Cold - Hot foods should be kept at a temperature of 140°F (60°C) or above. Use chafing dishes or warming trays to maintain the heat of hot dishes. For cold foods, use a cooler with ice packs to keep them at or below 40°F (4°C). Remember to replenish the ice as it melts.
- Mind the Time -Don't let perishable foods sit out at room temperature for too long. The "two-hour rule" is a good guideline: discard any perishable foods that have been left out for more than two hours (or one hour if the temperature is above 90°F/32°C).
- Label Allergens - If you're preparing a variety of dishes, consider labeling them to indicate common allergens like peanuts, gluten, or dairy. This will help guests with allergies make informed choices and avoid potential health risks.
- Don't Forget About Leftovers - It's essential to store leftovers promptly. Divide them into small, shallow containers and refrigerate them within two hours. Leftover meats and dishes can make for great post-game snacks or meals.
A successful tailgate party is all about good food, great company, and cheering for your favorite team. However, it's equally important to prioritize food safety to ensure that your celebration is memorable for all the right reasons. By planning ahead, practicing proper food handling, and maintaining the right temperatures, you can ensure that your football season tailgate party is a touchdown in terms of both flavor and safety. So, gear up, get ready, and enjoy the season safely with your friends and family!
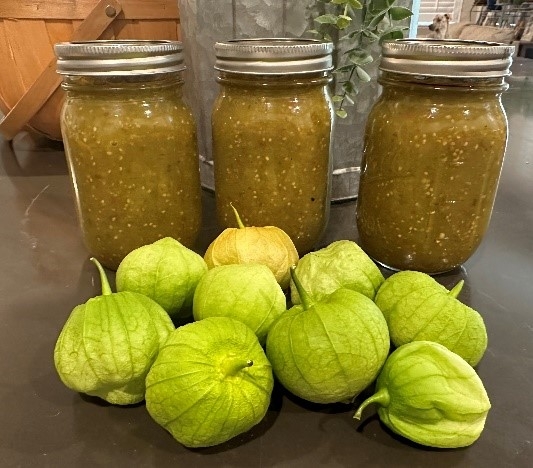
I found a particular delight in tomatillos in my journey of cultivating a sustainable lifestyle through gardening and home food preserving. These vibrant green gems have become a favorite among the many fruits and vegetables I grow and preserve. Here I share the versatility of tomatillos in this salsa-filled adventure!
Let me introduce you to one of the culinary treasures of Mexican and Central American kitchens - tomatillos, scientifically known as Physalis philadelphica. Tomatillos belong to the nightshade family and are small round fruits that captivate with their unique traits. Encased in a papery husk and sporting a vibrant green hue when ripe, tomatillos boast a tantalizingly tangy, citrus-like taste. They have a burst of flavor and offer a wealth of vitamins, minerals, and dietary fiber, making them a scrumptiously nutritious addition to your culinary journeys.
I have used the following tried-and-tested home canning recipe to capture the vibrant color and tangy flavor of my garden's tomatillos, ensuring I can enjoy them all year.
I hope this tomatillo salsa recipe opens up diverse culinary possibilities! Whether eating it as classic chips and salsa or as a marinade on chicken, this jar of salsa will infuse every dish with a distinctive, tangy taste. Embrace the joy of culinary exploration as you whip up delightful recipes and share the flavorsome results with your loved ones, amplifying the pleasure of home preservation to a whole new level!
Tomatillo Salsa
Yields approximately 5 pints
Ingredients:
5 cups Tomatillos (Cleaned, Husked, Cored, and Chopped)
4 cups Onions (Chopped)
1 ½ cups Green Chilies (Chopped)
½ cup Jalape?o peppers (Chopped Finely )
1 cup Bottled Lemon Juice
6 Garlic Cloves (Chopped Finely)
1 tablespoon Cumin
3 tablespoons Oregano Leaves (Chopped finely)
1 tablespoon Salt
1 teaspoon Black Pepper
Procedure:
- Wash and rinse jars and lids; keep jars hot until used. Follow the manufacturer's directions for lid preparation.
- Combine all ingredients in a large stainless steel saucepan. Bring to a boil over medium-high heat, stirring constantly. Reduce heat and simmer for 20 minutes. Be sure to stir occasionally.
- Fill jars with hot salsa, leaving ½ inch headspace. Remove air bubbles and adjust the headspace if needed. Wipe rims of jars with a dampened, clean paper towel; apply two-piece metal canning lids.
- Process in boiling water canner according to Table 1.
Table 1 Processing Time for Tomatillo Green Salsa
Process Time at Altitudes of:
| Style of Pack | Jar Size | 0-1,000 feet | 1,001-6,000 feet | Above 6,000 feet |
| Hot | Pints | 15 Minutes | 20 Minutes | 25 Minutes |
Recipe from the USDA Complete Guide to Home Canning.
Photo courtesy of Nicole D. George, UCCE Master Food Preserver
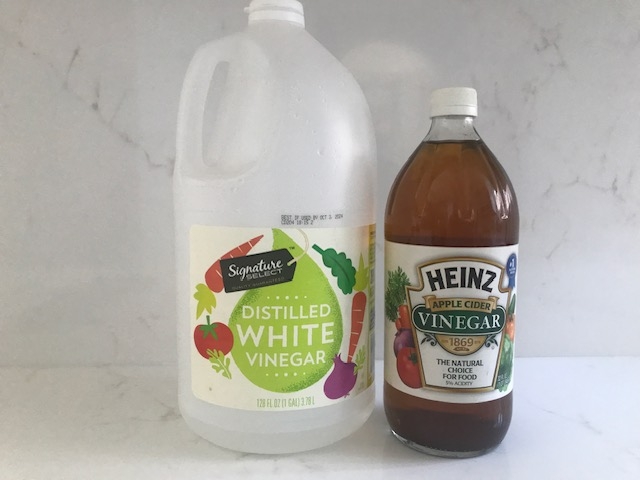
Vinegar products have various acidity levels. For canning, a 5% acidity level is required for safety reasons. The recipe requiring 5% vinegar level is because the produce that is being used in the recipe is low acid food. Any less than a 5% level will not destroy the dangerous bacteria that cause botulism. There are vinegars with a higher acidity level, and they aren't what you want either, as these have not been food safety tested and approved for home canning.
Homemade vinegars should never be used when canning. Using pH test strips is not reliable when it comes to food safety.
Distilled White Vinegar and Apple Cider Vinegar are the two 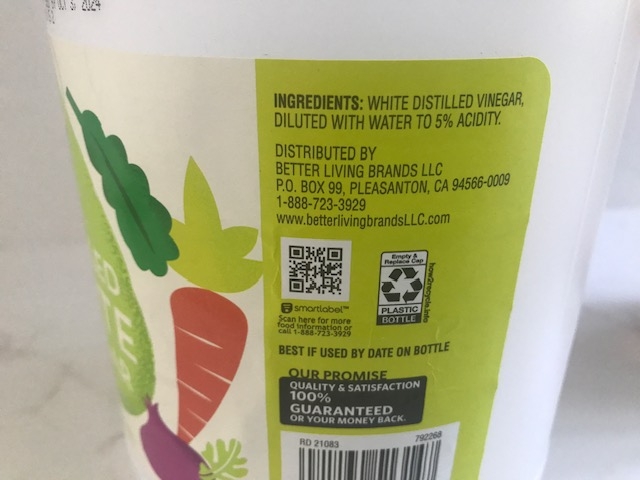
Distilled white vinegar is derived from grain alcohol. It has a sharp and pungent flavor. Since it is clear in color, it is preferred when you don't want the produce to change color. It also plays well with herbs and spices.
Cider vinegar is derived from apples. Its color is light golden, and it has a tart fruit flavor, being milder than distilled white vinegar. Because it is not colorless, it may darken light colored produce. If apple cider vinegar is not filtered, it will contain its mother. The mother is created naturally during the vinegar fermentation. The mother appears as a cloudy, sometimes stringy substance. If you want to avoid mother in your vinegar, then look for filtered or pasteurized apple cider vinegar.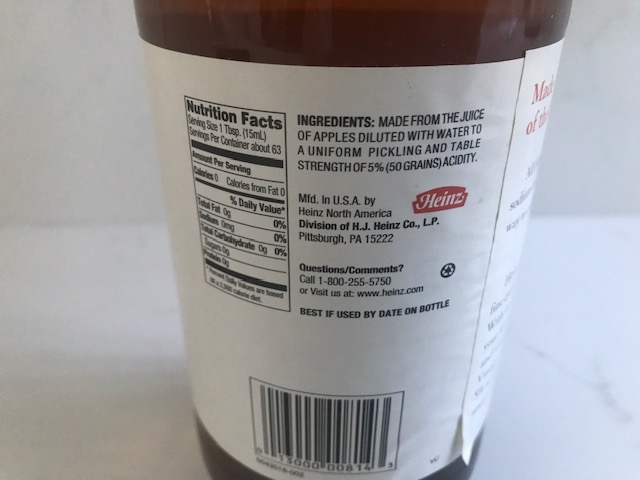
There are specialty vinegars, which include wine vinegars, balsamic, malts and various other flavors. They should not use these unless when specified in research tested (approved) recipe.
Disclaimer: The images are for illustration purposes only and are not an endorsement of any specific brand.
Photo Credit: Courtesy of Sherida Phibbs and used with permission.
Resources: PennState Extension, Advice About Vinegar https://extension.psu.edu/advice-about-vinegar

