- Author: Jim and Sue Farr
I love a well prepared turkey. The crisp skin, the juicy dark meat and the white meat leftover for sandwiches. Its too bad we only have turkey ba few times a year. But one thing we do have, and we have it often is chicken. If you're a hunter there are many other birds you might find pleasing to your palette... ducks, geese, pigeons. All of these fine birds fall under the poultry rules for preparation and cooking. A well cooked bird is also a safely prepared bird.
Today's article from Jim and Sue Farr gives us the "rules" to follow so that what we eat has been prepared safely. Enjoy!
FOOD SAFETY TIPS FOR COOKING POULTRY
In the year of Covid-19, our holiday gatherings may be quite different than usual. The group may be smaller in number but the holiday treats and meals still play an important role. So it is important to prepare, serve and store your food in accordance with the recommendations of the CDC.
The holiday season, is a great time to enjoy family meals together and by keeping food safety top of mind you will have meals that are safe for your family. Here are some food safety tips that you should keep in mind:
- DO NOT RINSE POULTRY IN SINK: Washing or rinsing poultry such as turkey or chicken is no longer recommended by the CDC. Washing poultry in the sink will spread the germs from the poultry to other surfaces in the kitchen.
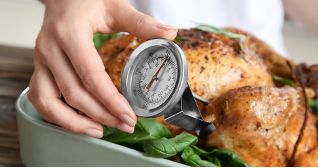
- COOK TO THE CORRECT TEMPERATURE: Cooking poultry to the correct temperature will guarantee that the poultry is safe to eat. Poultry should be cooked to an internal temperature of 165F. Make sure to use a thermometer to measure the internal temperature and do not rely on popup temperature indicators that sometimes are attached to turkeys.
- WASH HANDS: Wash hands with warm soapy water for 20 seconds before and after handling turkey and other poultry and is a good practice to get into when you handle any food in the kitchen.
- AVOID CROSS CONTAMINATION: Use a separate cutting board for poultry, remember to avoid cross contamination. Wash cutting boards, utensils, dishes and counter tops with hot soapy water after preparing and before you prepare the next item.
- REFRIGERATE LEFTOVERS at 40F or colder as soon as possible and within 2 hours of preparation to prevent food poisoning. It is always a good idea to check the internal temperature of your refrigerator with a thermometer to make sure that it is at or below 40F.
- REHEAT ALL LEFTOVERS TO 165F before serving. Again make sure that you use a thermometer to measure this temperature, guessing the doneness by time is no guarantee it will be at the proper temperature.
These and additional tips and food safety information is available at the following CDC websites:
Food Safety Tips for the Holidays:
https://www.cdc.gov/foodsafety/communication/holidays.html
Food Safety Tips For Your Holiday Turkey:
https://www.cdc.gov/foodsafety/communication/holiday-turkey.html
Four Steps to Food Safety: Clean, Separate, Cook, Chill:
https://www.cdc.gov/foodsafety/keep-food-safe.html
By keeping food safety top of mind, you will have food safe and enjoyable family meals.
- Author: Jim and Sue Farr
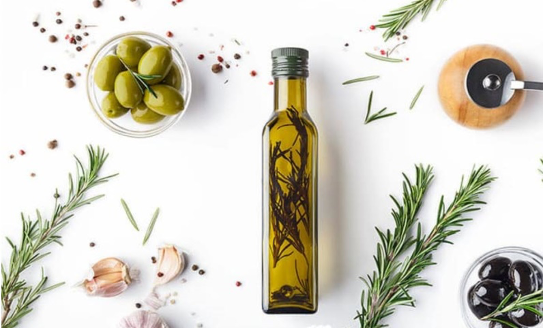
A few years ago our daughter gave us a few bottles of infused olive oils. They were really beautiful.
Many of us love making and receiving a personal hand made gift. With this gift it provided me the opportunity to explore what can be used to infuse flavors into olive oil. Commercially there are many flavors of infused oils, but when it comes to home preservation of infused oils there are but a few. The process is simple and when followed correctly produces a safe and beautiful product.
Our thanks to Jim and Sue Farr for this week's article.
Garlic and Herb Infused Olive Oils
A unique Christmas gift that you can make in your Kitchen is herb infused Olive Oils. Garlic and Herb infused olives oils can be pricey to purchase but are simple to make and safe when made according to the directions in the bulletin from several University extensions by clicking on this link.
Following the instructions in the above bulletin are important as garlic and herb infused oils can grow Clostridium botulinum, the bacteria responsible for botulism, if not properly prepared. The key to safe preparation of the herb infused oils is acidification of the garlic and herbs before addition to the olive oil. If the acidification step is followed as outlined in the University Extension link above, the resulting oil will be safe for storage at room temperature.
Key points to keep in mind, and are discussed in detail in the bulletin are:
- Garlic, and the herbs rosemary, oregano and basil are the only approved flavors for infusing Olive Oils since these are the only ones tested in University Food labs to result in a safe product.
- The key to making the oil safe and free from the risk of botulism, is the acidification of thegarlic and herbs. The garlic and herbs are soaked in a 3% citric acid solution for 24 hours prior to adding to the olive oil.
- Preparation of Citric Acid Solution: Citric acid powder can be purchased from most retail outlets carrying canning supplies or easily ordered online. A 3% citric acid solution is prepared by weighting out 3 parts of citricacid powder to 97 parts water. In ounces this would be 3 oz of citric acid powder to 97 oz or ¾ gallon of water. Citric Acid solutions are very stable at room temperature and excess citric acid can be stored for future use.
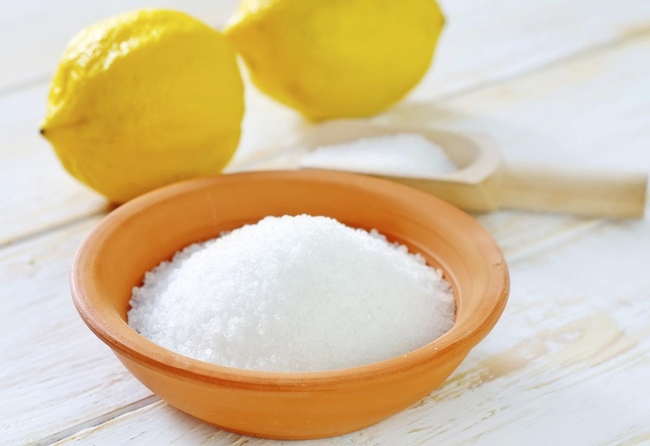 Citric acid powder
 - Only Citric Acid approved for Acidification: Vinegar cannot be substituted for citric acid because only citric acid has been tested to be safe for the acidification step. Also, ascorbic acid (vitamin c) is not the same as citric acid and should not be substituted in the recipe.
- Acidification of Garlic: take 2/3 cup of finely chopped garlic and add to 2 cups of 3% citric acid solution. Soak for at least 24 hours and keep entirely submerged.
- Acidification of the Rosemary, Basil and Oregano: take 1.5 cups of loosely packed herbs and add to 2 cups of 3% citric acid solution. Soak for at least 24 hours and keep entirely submerged.
- Addition of Garlic and Herbs to the Olive Oil: Any commercial olive oil can be used. Ideally choose an olive oil that you prefer for taste and also meets your budget. If giving as a gift, choose freshly cleaned, decorative bottles with tight fitting screw top caps. As a starting point the acidified garlic and herbs can be added to the oil in a ratio of 1 part garlic / herbs to 10 parts oil. Allow excess liquid to drain off onto paper towels before placing in the bottle. Then add in oil up to ¼ inch headspace. Depending on taste preferences you can adjust the level up or down for stronger or weaker taste. Once added, infusion of the flavors into the oil at room temperature will take minimum of 1 day but 10+ days should be allowed to get the full flavor infused into the oil.
Storage of infused oil: the oil is stable at room temperature but will last longer if stored in the refrigerator.Once the oil is prepared in the bottles, there are many options for making it presentable as a gift such as adding ribbon and a gift bag (like the type used for wines). Be sure to label the bottle indicating that it is an olive oil, what it is infused with and date that it was prepared.
- Author: William Loyko Jr.
Hello friends,
2020 is about to come to its rightful close. But before it does, many of us find ourselves in various “lockdown” situations. Some of us are just hunkering down because of our age and our health, or the age and health of those whom we could be caregivers.
Remember the date nights or family nights of just going to your favorite restaurant? I'm sure we all long for those days of a meal inside a restaurant.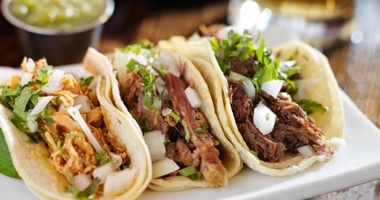
Being a Master Food Preserver volunteer is not only assisting folks with safe researched preservation techniques, its about food safety as well. It's about techniques to be sure that what we serve our friends and families is done in the safest manner possible.
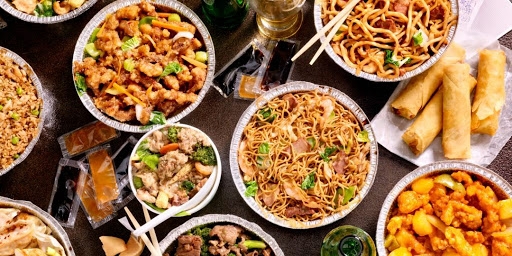
With that in mind, Covid-19 has influenced our dining habits. No more sitting IN a restaurant, sometimes no OUTSIDE dining, we are straddled with take-out.
There are two websites we recommend regarding food safety: Partnership for Food Safety and FoodSafety.gov. The following article comes from the Partnership website. Be safe. Be well.
TAKE-OUT SANITY
Busy, busy, busy. Multi-tasking Americans have a love affair with take-out foods, heat and eat entrees and other meal items they can pick up at a restaurant or grocery store on their way home.
Some foods are hot and some are cold when purchased. Sometimes you eat these foods right away, but other times you buy take-out foods in advance. Many of these perishable foods can cause illness if not handled safely on the trip home or in home preparation and reheating. Proper handling of these foods and any leftovers is essential to reduce your family's risk of foodborne illness.
Always start with clean hands – wash hands with warm water and soap for 20 seconds before and after handling food.
Keep it Hot — The 2-Hour Rule
- Never let hot prepared foods sit – in your car or on the counter – for more than two hours without refrigerating them.
- If you don't plan on eating the food immediately you have two choices: You can hold it hot in a preheated oven or preheated warming tray, at an internal temperature of 140 °F or above (use a thermometer to check the temperature); or you can put it in the refrigerator and plan to reheat it to a temperature of 165 °F just before serving
Chill it – Cold Food Know-How
- Cold foods should be kept at 40 °F or below.
- Refrigerate perishable foods as soon as possible, always within two hours after purchase or delivery. If you're someplace that's 90 °F or hotter (including in your car), make that one hour.
- When take-out or prepared food is purchased cold for an outdoor event—like a picnic, sporting event or outdoor buffet—a cooler well packed with ice or frozen gel packs is a practical alternative to a refrigerator. Keep the cooler in the shade. After food comes out of the cooler, remember the two-hour rule: Discard all perishable foods that have been left at outside temperatures longer than two hours; one hour in temperatures above 90°F.
- Reheat foods containing meat or poultry to an internal temperature of 165 °F. Always use a food thermometer.
- Reheat sauces, soups, and gravies to a boil.
- If reheating in the oven, set oven temperature no lower than 325 °F.
- Reheating in slow cookers and chafing dishes is NOT recommended because foods may stay in the “Danger Zone” (between 40 and 140 °F) too long.
- When reheating food in the microwave oven, cover and rotate food for even heating. Consult your microwave oven owner's manual for recommended times and power levels.
Think Before You Thaw
Many people are making home cooked meals to freeze for convenience, while others are freezing leftovers for later. Although the freezer inhibits bacterial growth, food can become contaminated both before and after freezing. Remember the basic food safety rules—clean, separate, cook and chill when preparing meals and handling leftovers.
- Thaw foods following these tips to reduce your risk of foodborne illness.
- Thaw the wrapped, cooked meat or poultry on a tray in the refrigerator. Allow about 24 hours for every 5 pounds. Small packages of cooked stuffing, gravy, potatoes, etc., will take less time to thaw.
- Once the cooked meat or poultry and side dishes thaw, plan to eat them within three to four days.
- Food should be heated to a safe internal temperature.
- Frozen food can be put directly into the oven without thawing, but will require a longer cooking time.
Ready-to-Eat vs. Not Ready-to-Eat
Use care when cooking up foods from the freezer, deli, or refrigerated sections of the grocery store. Not ready-to-eat products (NRTE) are identified as “raw” and require the consumer to cook thoroughly in order to be safe for consumption. Examples of these types of foods include frozen food entrees (pizzas, pot pies, TV dinners, etc.) and marinated, stuffed and/or breaded poultry, fish or meat. Foods that might appear to be fully prepared can still be classified as not ready-to-eat. Read and follow label instructions. Use a food thermometer to ensure food reaches a safe internal temperature.
Ready-to-eat foods include those foods that can be eaten straight from the packaging if held at the correct temperature. Ready-to-eat foods include cooked and prepared items from the deli, as well as canned meats. Be sure to hold ready-to-eat products at the correct temperature as some require refrigeration.
taken from:Partnership for Food Safety. https://www.fightbac.org/take-out-sanity/
- Author: William Loyko Jr.
Halloween and Thanksgiving are giving way to Christmas, New Year's eve celebration and other high holy days.
With this time of great celebration there is usually a meal with plenty of great food.
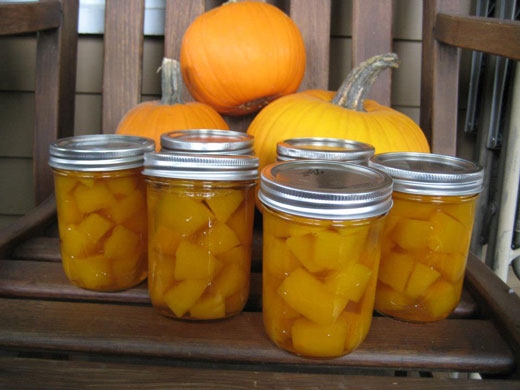
One of the vegetables of the season is the great pumpkin. It can be used pies and custards. It can also be preserved as a sweet pickled pumpkin. It's a sweetly tart taste that might be a new taste for many people.
Any pumpkin can be used but the "Cinderella" pumpkin, like the one used to make Cinderella's carriage, is usually best as it has the most pulp.
If you have never had or made sweet pickled pumpkin, here is an opportunity to expand your epicurean delights.
Merry Christmas, Happy Hanukkah, Happy Kwanzaa and Happy New Year! May 2021 be awesome!
Sweet Pickled Pumpkin
2 4" cinnamon sticks
12 whole allspice
10 whole cloves
1 lemon
6 cups granulated sugar
4 cups white vinegar
24 cups cubed seeded peeled pumpkin or butternut squash (¾ inch cubes)
- Prepare canner, jars and lids.
- Zest lemon, using a fine toothed grater, and set aside. Remove and discard white pith. Separate segments from
- membrane and coarsely chop. Squeeze any juice from membrane and add to segments. Set aside. Discard membrane and pith.
- In a large stainless steel saucepan, combine lemon zest, pulp and juice, sugar, vinegar and spices. Bring to a boil over medium high heat, stirring occasionally. Cover reduce heat and boil gently for 10 minutes. Add pumpkin, return to a boil, and cook for 3 minutes, until heated through.
- Pack hot pumpkin into hot jars to within a generous ½ inch of the top of the jar. Ladle hot syrup into the jar to cover pumpkin, leaving ½ inch headspace. Remove air bubbles and adjust headspace, if necessary, by adding more syrup. Wipe rim. Center lid on jar. Screw band down until resistance is met, then increase to fingertip tight.
- Place jars in canner, ensuring they are completely covered with water. Bring to a boil and process for 20 minutes. Remove canner lid. Wait 5 minutes, then remove jars, cool and store.
From page 301 in the Ball Complete Book of Home
preserving, 2012
- Author: William Loyko Jr.
Welcome to our first post of the new San Joaquin County Master Food Preservers newsletter via blog. We are excited to be able to provide you with information, tips for preservation and recipes, all while following the mission of the UC Master Food Preservers to provide tested and researched techniques for safe home food processing.
Winter has some really cool fruits and vegetables that can be enjoyed any time of the year. I particularly enjoy whole cranberry sauce, especially the homemade kind. 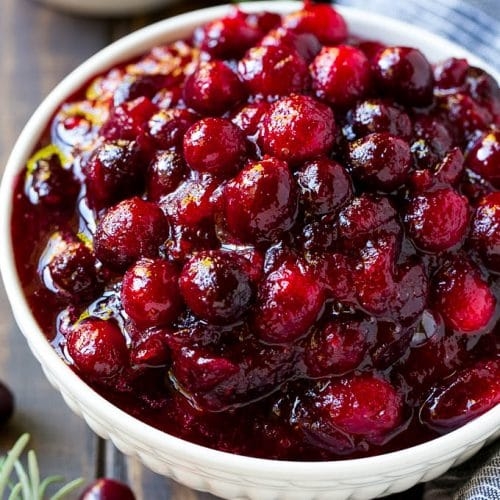
Thanks for joining our little group, don't forget to subscribe. Enjoy!
Cranberry Sauce
- 4 cups cranberries
- 1 cup water
- 2 cups sugar
Yield: About 4 half-pint jars (recipe may be doubled)
Please read Using Boiling Water Canners before beginning. If this is your first time canning, it is recommended that you read Principles of Home Canning.
Hot Pack – Wash cranberries. Cook berries in water until soft. Press through a fine sieve. Add sugar and boil 3 minutes. Pour boiling hot sauce into hot jars, leaving ½-inch headspace. Remove air bubbles and adjust headspace if needed. Wipe rims of jars with a dampened clean paper towel; adjust two-piece metal canning lids. Process in a Boiling Water Canner.
|
Table 1. Recommended process time for Cranberry Sauce in a boiling-water canner. |
|||||
|
|
Process Time at Altitudes of |
||||
|
Style of Pack |
Jar Size |
0 - 1,000 ft |
1,001 - 3,000 ft |
3,001 - 6,000 ft |
Above 6,000 ft |
|
Hot |
Half-pints |
15 min |
20 |
20 |
25 |
Preparation Note: To reduce foaming, cook berries until soft and then add ½ teaspoon of butter before berries are sieved or crushed and sugar is added.
Variations:
(1) To make crushed cranberry sauce instead of sieved, cook berries until soft and then mash with a potato masher or back of cooking spoon until desired consistency. Add butter (if desired to reduce foaming); stir to melt. Add sugar; bring to a boil, stirring to dissolve sugar, and then boil for 3 minutes. Following complete directions above, fill jars, wipe rims and process.
(2) To make whole cranberry sauce, cook berries until soft. Do not sieve or mash berries before adding butter (if desired to reduce foaming); stir to melt. Add sugar to softened whole berries; bring to a boil, stirring to dissolve sugar, and then boil 3 minutes. Following complete directions above, fill jars, wipe rims and process.
This document was adapted from "So Easy to Preserve", 6th ed. 2014. Bulletin 989, Cooperative Extension Service, The University of Georgia, Athens. Revised by Elizabeth L. Andress. Ph.D. and Judy A. Harrison, Ph.D., Extension Foods Specialists. November 14, 2012.

