Candidate Instructions
Academic Program Review candidates are academics who are submitting an Annual Evaluation or Advancement case for review. Project Board has an Academic Program Review - Candidate Dashboard, which is integrated with a workflow automation (WFA) software to facilitate the review process.
STEP 1 – Open a supported web browser: Google Chrome, Mozilla Firefox, or Microsoft Edge (NOT Internet Explorer)
STEP 2 - Access your Candidate Dashboard for ANR Academic Program Review:
In Firefox or Chrome go to https://projectboard.ucanr.edu/ and click on log in.

- You may receive a notice at the top of your web browser about pop-up windows. If so, please enable pop-up windows for projectboard.ucanr.edu.
A new tab or pop-up window will display a Microsoft sign in screen.

Enter your UC Davis or UCOP email address into the Microsoft sign in screen and click next. If there is another email address already displayed, click "User another account," and type in your UC Davis or UCOP email address into the Microsoft screen. You will be rerouted to the UC Davis or UCOP single sign on webpage.

- Enter your UC Davis Kerberos Login credentials or UCOP Web App Login credentials and click sign in.
- Complete DUO authentication. Project Board may take a few minutes to initialize and load for the first time. When in doubt, wait a few moments and refresh your screen.
- Navigate to the Academic Program Review candidate dashboard by clicking on the dropdown menu in the top right corner, then clicking Academic Program Review.
On the left of this Academic Program Review candidate dashboard, click on the most recent review cycle to see your current case.

- Click on the blue "Upload your review documents now" button.
- You may receive a notice at the top of your web browser about pop-up windows. If so, please enable pop-up windows for wfa.ucanr.edu.
Give it a moment, and WFA will open in a new tab in your web browser.
Image
STEP 3 - Upload your documents
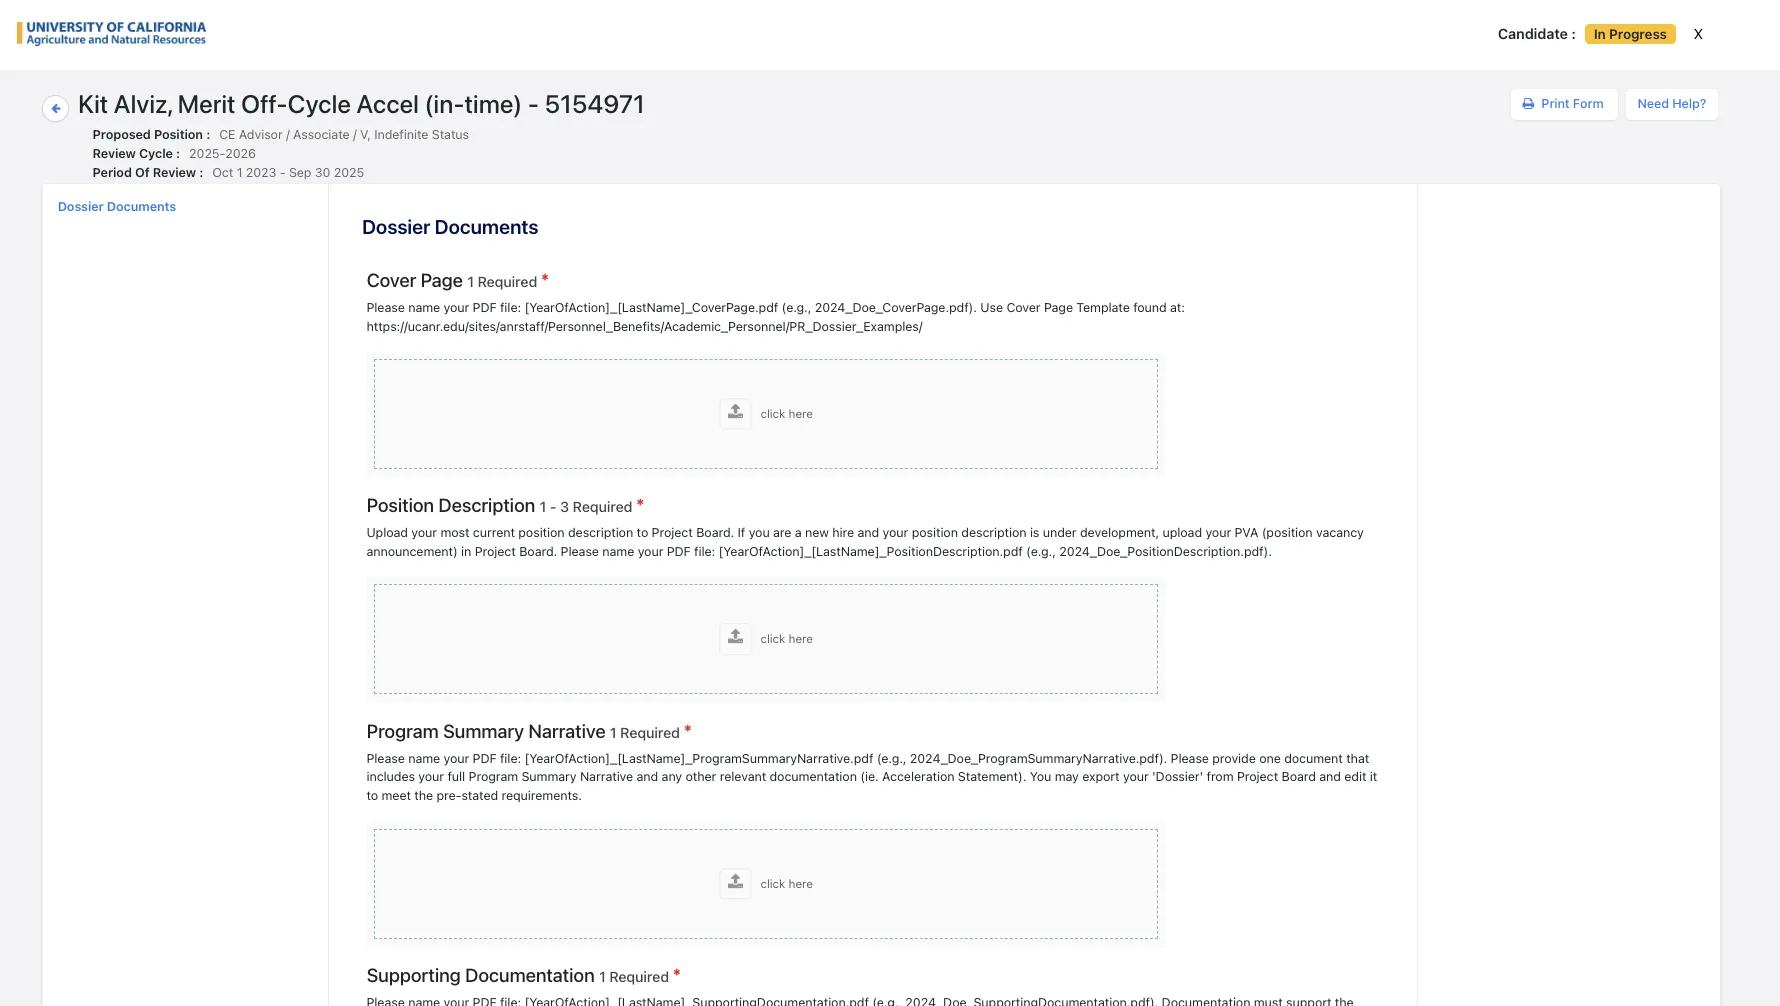
- After completing step 2, WFA will display your case for the review cycle.
- Each of the documents required for your annual evaluation or advancement case will be listed in the workflow automation software. You can refer to the E-Book for more information. Please note that the timeline on right by default lists all supervisor possible options (primary, secondary, and tertiary) even if you do not have a secondary or tertiary supervisor. This is a known current limitation.
- Upload your materials to each box by clicking in the box and navigating to the files on your computer.
- You can click the "Upload Documents" link at the bottom of the form (to the left of the submit button) to save your work and come back later.
- If you want to come back later, simply close the tab in your web browser.
- Click on the open tab that has your Academic Program Review candidate dashboard in your web browser from the previous step. Your uploaded documents should appear, although there may be a 5-15 minute lag time.
STEP 4 - Submit
- Once you are finished uploading all of your documents, you can click the Submit link at the bottom of the WFA screen.
- A confirmation page will appear. You can close that tab in your web browser.
Once you submit, you cannot change your documents. Changes can only be made by contacting AHR admin prior to the due date.
STEP 5 - Confirming submission
- Go to Project Board's Academic Program Review candidate dashboard (from step 2) at any time in the future to confirm/see the documents you've uploaded and status of your review. There may be a 5-15 minute lag time between uploading in WFA and seeing your documents in your candidate dashboard.
Please contact AHR with any questions.
Troubleshooting
I see a pop up about Project Board re-initializing.
Click OK. You may need to repeat this a few times. This popup is normal and a good sign that Project Board is working!
When I click on an icon, nothing happens.
You may need to enable pop-up windows for projectboard.ucanr.edu and wfa.ucanr.edu.
I can see Project Board, but when I go to my case in WFA, the screen is blank.
Please try the following steps:
- Visit https://outlook.com or https://office.com. If you're currently signed in, please sign out.
- Go to https://wfa.ucanr.edu and sign in again.
- If this still does not work, please try in an incognito/private window.
If the above steps do not work, please open a ticket.
