- Author: Denise Godbout-Avant

Pepper seedlings take anywhere from one to six weeks to germinate, depending on the variety. When the weather and soil are warm enough, if you want to have pepper plants ready plant in your garden, now is the time to start the seeds.
This is part one of a two-part series. This article focuses on growing and caring for your pepper seeds. The second article will cover potting the seedlings, “hardening-off,” and transplanting them into your garden.
What Is Needed

- 6-pack seedling tray(s) with a clear lid (humidity dome)
- Good quality seed-starting soil
- Seeds
- Water
- Heat mat (optional, but very helpful)
- Grow lights and timer
- Liquid plant starter fertilizer
- Oscillating fan (helpful, but not required)
- Latex gloves (if planting hot peppers, but not needed with dry seeds)
Beginning Steps: Planting the Seeds
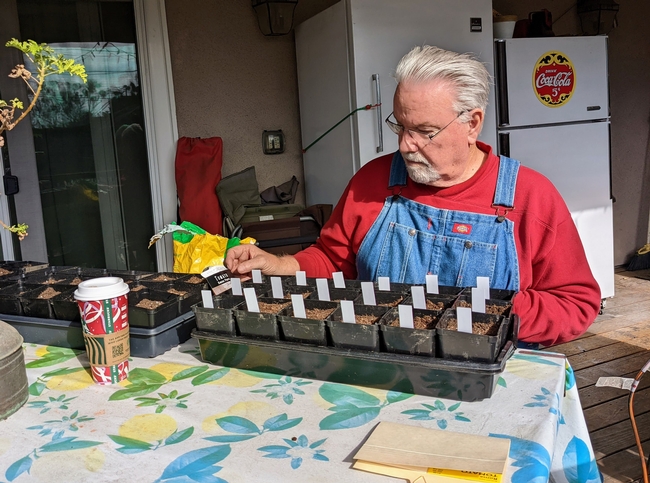
- Fill clean seed trays with damp seed starting soil.
- If using new seeds, plant one/cell; if older or have low viability rate, plant 2-3 seeds/cell. Follow instructions on the seed packet, but the rule of thumb is planting depth is twice as deep as the seed is wide. For pepper seeds, this would be about ¼ inch deep. Cover the seeds with soil.
- If the soil is not already wet, add water. It is best to always water from the bottom so not to disturb the seed. Add enough water into tray until it is about ¼ inch. Do not overwater! Dump out any excess water that has not been absorbed in 15 minutes. Peppers dislike soggy roots, so let the soil dry out a bit between watering.
- Cover the tray with the clear dome lid to help keep the soil warm and moist.
- Place the tray in a warm spot. It is recommended to put it on top of a heat mat, which provides a consistent heat source and helps speed up germination. The ideal temperature is 80-90°F. If it is too cold the seeds may not grow.
- Once the seedlings sprout, remove the dome cover and turn off heat mat.

Pepper Seedlings Care: Light, Fertilizer and Air Circulation
- The seedlings need to be watered consistently, but do not like wet soil. Always water from the bottom. Allow the soil to dry out a bit between waterings, but keep it moist, never letting it dry out completely.
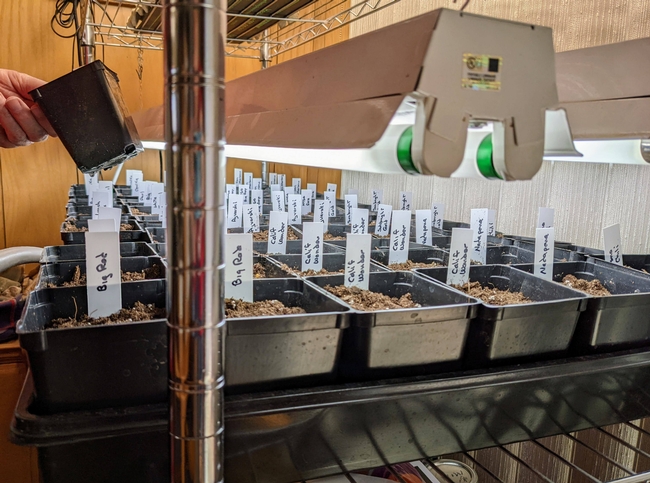
- Provide light as soon as they germinate! If pepper seedlings do not get enough light, they will get “leggy” because they are reaching for a light source. To keep them thick and compact, it is best to use a grow light, which is hung up a few inches above the tray and keep it on for 14-16 hours per day. The light should be close to the plants, but not touching. As they grow, move the light higher.
- Once the true leaves begin to form, it is time to start fertilizing using a liquid plant starter fertilizer. Following label directions, start with a weak dose at first, gradually increasing as the seedlings get larger.
- Once most or all the seeds in a flat have germinated, they need to have some airflow, so remove the plastic lids and run an oscillating fan over them on the lowest setting for a few hours each day (you can plug it into the same timer being used for the grow light). An alternative to the fan is to gently brush your hands over the top of the seedlings a few times each day. This will strengthen them and prevent mold in the trays.
Some pepper varieties grow faster than others, but in one to six weeks, your pepper plants will have started to outgrow the trays. Now will be the time for the next steps of transplanting to pots, “hardening” them (a vital step!), and finally, planting into your garden. This will be covered in the second part of this article, which will be posted towards the end of February.
With thanks to Tim Long, UC Master Gardener, for his expertise on growing peppers from seedlings.
Author: Denise Godbout-Avant, UC Master Gardener since 2020

