
- Author: Jan Rhodes

A Pretty Corny Story
Ahhhh...summer! Homegrown tomatoes, juicy watermelon and fresh corn on the cob. At least that's what comes to mind, especially in these chilly, late winter days. Many of you know the joy of backyard gardening that includes picking ripe ears of sweet corn, shucking them right there and popping them into boiling water. Along with sliced tomatoes, fresh basil and green beans from the garden, that is what I call “Summer Dinner.” Lucky as I am to have a sizeable backyard garden, I have always grown a good harvest of delicious sweet corn to enjoy in those dog days of August. Last year, however, I had a new adventure with field corn.
Last summer, my interest turned to growing corn that could be dried and ground into cornmeal or polenta, made into masa for tortillas or tamales, or even popped! A friend mentioned specialty grains and flours made by Anson Mills, and passed me a book that featured the story of how this business grew (The Third Plate by Dan Barber ). In his search for the heritage grains of his childhood, Glenn Roberts, founder of Anson Mills, re-discovered Floriani Red Flint Corn and sang its praises. So much so, that, being a good foodie, I had to order the polenta that Anson Mills makes from this corn. Of course, it was more than delicious – so much better that what can be purchased locally. And, though I enjoy cooked polenta, I adore it baked into sourdough rye bread. The Anson Mills Polenta didn't disappoint in that department, either. I decided then, and there, that I would try my hand at growing this special corn. After all, I have always maintained that gardening is just a big science experiment.
Not wanting to use my precious sweet corn space, I decided to procure a plot at the community garden. This was a great choice for a number of reasons. For one, there would be no danger of cross pollination with sweet corn, since very little is grown there. Also, there is plenty of sun there, no difficult shady spaces. Finally, it was really fun to visit the garden regularly and see what everyone else was growing and how it was doing.
I had to look around a bit to order my seeds. It seems there are not many sources for this increasingly popular variety. I finally found some at Southern Exposure Seed Exchange. I had never looked at their website before to order seeds as they are in Virginia. However, they have an impressive array of organic and heirloom vegetable, herb, and flower seeds, dedicated to “saving the past for the future.” They have several pages featuring dent, flint and flour corn. I never realized there was a difference! My Floriani Red Flint would take 100 days to grow 10 feet tall or more. The online catalog described it as a beautiful medium to deep red kernal that is slightly pointed, provides cornmeal with a pink cast, and makes polenta with a remarkably rich and complex flavor. Just what I was looking for!
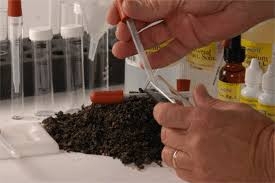
After a bit of research on planting practices and care, I prepared my plot and was able to put seeds in the ground around mid-June. I planted the same way I usually do for sweet corn. Lots of amendment as corn is a heavy feeder, rows three feet apart, two seeds in a hole to fool the birds. I planted in furrows and hilled up to prevent lodging (blowing down) and provide mini-canals for irrigation. When the plants emerged, I thinned to about 12 inches. I watered almost daily at first, then every other day, and withheld water for the weeks of drying on the stalk. I also added bloodmeal when the corn was 6 inches high and 12 inches high. The amazing part was how tall the plants grew, some were probably more that 10 feet! The tricky part was deciding when to harvest. With field corn, it is necessary to allow the ears to mature and dry on the stalk. I checked weekly when it looked like the corn was nearing readiness, and finally harvested the ears in early October. I shucked the ears and let them dry a bit more in net bags in my garage. Finally, one sunny day in November, I sat on the patio and laboriously removed the kernals from the ears (that's another story).

As for my next project (you knew this was coming), I put in a cover crop of red clover, both in my backyard garden and in my community plot. The plan is to plant hard red spring wheat. I have the seeds and am reading up on harvesting, threshing and winnowing. Perfect for these long winter nights.
Resources
Floriani Red Flint Corn: The Perfect Staple Crop - Real Food ...
Floriani Red Flint Flint Corn 42 g : Southern Exposure Seed Exchange ...
How to Grow Floriani Red Flint | Home Guides | SF Gate
Learn How to Make Hominy Corn - Real Food - MOTHER EARTH NEW
About Corn | Anson Mills - Artisan Mill Goods from Organic Heirloom ...
Corn Tortillas Recipe : Alton Brown : Food Network
The Easy Way to Make Fresh Corn Tortillas at Home | Serious Eat
- Author: Jan Rhoades


To provide a good home for our plants we need to incorporate some organic matter, usually compost – but not an overload – just the right amounts over time contribute to long term soil fertility, good soil structure and increase the soil's capacity to hold water and air.
All those amendments have their place and their purpose. What are you looking for? How much do you need? How is this product applied? What's in it? Keep in mind that this is an annual event, or even a seasonal event if your gardening season is long and you plant crops successively. Someone once said, “Begin with the end in mind.”

There are organic fertilizers such as compost, aged manure, rock phosphate, soybean meal, and fish meal, and there are inorganic fertilizers that are available either as a single nutrient or multi-nutrient product. These fertilizers can be slow release providing nutrition over time or soluble like an athlete's energy drink, providing quick nutritional value.
Most soil has some residual nutrients, however, only a soil test can assess what is there. Fertilizing without the results of a soil test is like eating everything in the pantry hoping to get the nutrition you need. Additionally, this practice can exacerbate an existing problem or imbalance. A soil test will also tell you the pH which, if too high or too low, can affect the uptake of nutrients present in the soil.
A soil test is a good place to begin to understand what kind of amendments might be needed to build your soil. Generally, DIY kits are not as reliable as sending a soil sample to be analyzed by professionals.
We all want to be thrifty, however, there are a few things you should never add to your garden soil:
- Un-decomposed wood chips or sawdust – these materials are high in carbon but lack enough nitrogen to decompose quickly – so they use up nitrogen that plants want and need.
- Fresh manure can harm plants due to elevated ammonia levels. – Use only aged, composted manure that has reached at least two heating cycles (130-140 degrees F) Also, know that nitrogen levels in composted manure are low and phosphorus and potassium levels are higher – so adjustments will have to be made. Also, salt levels will be higher.
A good way to remember all this is that fertilizers feed plants and compost feeds the soil. Nutrients alone cannot keep plants healthy if they are living in poor soil. Compost improves the mobility of air, water in the soil, and makes nutrients more available to plants.
Finally, there is such a thing as too much compost and too much fertilizer. Armed with the results of your soil test, you will be able to make wise choices about what to buy, how much to use, and when to apply it. When in doubt, a good quality all purpose composted soil amendment and an all purpose fertilizer are probably a reasonable way to get started. Of course, be sure to use them as directed on the bag.
For more in depth information on soil and composting be sure to use the links on the website. This year, biggest tomatoes ever – right??

- Author: Jan Rhoades
Well this rainy spring weather makes indoor gardening very attractive! And, I have been reminded that I promised some updates – mainly on trees with fire blight, sweet onions that overwintered and finding a microclimate for canna lilies. So, here are my promises kept, complete with photos.


The canna lilies did great! I cut them back and mulched them heavily with straw to protect them against the harshness of winter. As you can see, they are well established and promise to give a fine flower show, as they did last summer – a bit of Bali in my backyard.
http://ucanr.edu/blogs/blogcore/postdetail.cfm?postnum=19289

The sweet onions (Walla Walla) were planted from seed at the same time as I put in garlic to overwinter – about the middle of October. I mulched them with hay, though not too heavily, and they sprouted strongly, though they stayed small and managed to survive through the winter – even under a bit of snow, as you recall. They are now about a foot in height and I am thinning them – the green onions are lovely. I know that my garlic will be ready by June, and I am hoping that the onions will follow suit, as I plant sweet corn in that bed once the soil has warmed up and the winter crops have been harvested.
http://ucanr.edu/blogs/blogcore/postdetail.cfm?postnum=19933
So, that is the update on previous posts – in hopes that you will find inspiration for your gardening quests. Look for the microclimates in your yard, try out interesting ideas, and don't give up!
One parting tip – if you are looking for some easy gardening with big payoffs you might want to try berries. I have been busily picking strawberries daily for the last week, my boysenberries are blooming, my blackberries are budding and the raspberries are looking happy. I still have some of the bumper crop of berries from last summer in the freezer and it looks as though this year's grazing will be just as good. Just plant, add water and do a bit of pruning in the fall. Oh, come to think of it, same with grapes!
Happy gardening to you all!
- Author: Don Kunze
My wife, Mrs. Kunze, is a 2nd grade teacher at Bishop Union Elementary where she has taught for the past 31 years. She and her next door teacher, Mrs. Kubiak, also teaching second grade, often do class projects together and such was the case as they discussed how to teach the mathematical skill of making a line graph. Their idea involved planting something that would grow, that the kids could measure and graph, and would be fun for them while teaching them multiple skills. After 33 years of being the husband to a 2nd grade school teacher, it was no surprise that my name was quickly decided upon as someone that could help out on this project.
Finding ways to get my volunteer hours in that did not involve weeding the community garden demonstration plot was an opportunity I appreciated and this presented the chance to show the class not only how to plant a seed, but to also talk about how seeds grow, nutrition, the joy of gardening.
Cost of the presentation was kept to a minimum, I bought 1 cubic foot of potting soil, sixty blue and red 18-ounce Solo cups, and 1 packet of sugar snap peas. I chose the peas as they were easy for second graders handle and plant, and since they have a fairly quick germination time (8-12 days) it helps to keep the kids interested. Also, they were something that would produce a tasty treat that could be picked and eaten right off the plant when mature. The money spent was paid out of classroom funds raised at the Harvest Hoedown - a fundraiser which is held every fall to enable just these kinds of classroom projects.
I arrived at Elm Street School at 10:30 Monday morning, green Master Gardener apron on, name tag in place and proceeded to the classrooms to prepare for my presentation. Both classes joined together while I spoke to them about whom I was, the Master Gardner Program, how plants grow and the different ways to start them, along with the benefits of eating fresh vegetables right out of your garden. Although I had the official Master Gardner business cards, and said I could help them find online resources, being second graders they did not seem too interested in that part of my presentation. I answered several questions, many of which were actually stories about an individual student's gardening experience and then moved on to the next part of my presentation.
The classes separated and went back to their respective rooms and the process of sending students to meet with me four at a time began. I enjoyed this part the most as I was able to speak individually to each student, and assist them with planting their seed. After writing their name with a sharpie on the outside of the cup, then punching a hole in the bottom, I would give it to the student to fill with the potting mix then, I would add water and they would pack the soil down. After using their finger, to make a hole in the soil, they would pick and place the seed in the hole, and cover it back up and again, pack it down. From there they would take their cup outside and place it in a tray donated by Bishop Nursery. I would then repeat the process with the next student. It took several hours but by 1:30 that afternoon, all the seeds were planted and set outside.
Putting their hands in the soil was met with a reaction that ranged from joy to yuck, but mostly joy. Listening to them talk about how some of them did this at home and how much they enjoyed working in their own gardens was fun. I was especially taken back by how many worked in the garden with a grandparent and how close and inspired they felt by doing so. This was something we might all remember when we spend time with our kids or grandkids. For most of these children, gardening was a joy, but for far too many it was something they had never done.
I am now done with my part of this project unless Mrs. Kunze or Mrs. Kubiak has reason to bring me back. As I said, they are planning on doing a math lesson teaching line graphs that will require keeping track of dates and how much each plant has grown by particular date. For me, I anxiously await, hoping that the seeds will sprout and the kids will find that joy in eventually getting to pick sugar snap peas right off their own bush and enjoy that wonderful delight. I have about 15 extra cups planted just in case some seeds do not sprout but I can use them in my own garden or I'll have sugar snap pea plants for the next MG meeting to give away.

- Author: Dustin Blakey
If you open up a pest management guide for apple or pears—those books really exist, by the way—the first insect listed is always the dreaded codling moth. These are the creatures responsible for turning an apparent bountiful harvest of fruit into a brown, wormy mess in late summer. Codling moth is the main insect pest that attacks apples and pears in our region.

After overwintering as larvae, the moths emerge in spring, mate and then proceed to lay eggs on the fruit. These eggs hatch into tiny larvae that eat their way into your fruit, ruining it in the process. Fully grown larvae fall out of the fruit, pupate into adult moths (usually on the ground), and the process repeats. In the Owens Valley, there are usually two generations that we worry about controlling. Their development is mostly driven by temperature.
The first generation of adults usually emerges in April, and egg laying follows in a few weeks. The exact timing varies each year and by location, north or south, in the valley. The second generation lays its eggs over an longer period, but it is usually in July. Most of the complaints of ruined fruit by gardeners are from this second generation.

Because there are at least two generations to be concerned with, it is essential to get control during the first generation so that you have fewer moths to fight later on.
While it's possible to achieve control by just using continual sprays through the season with insecticides, this isn't usually how we deal with this pest since that's wasteful and carries risks. Codling moth is usually controlled through a combination of means.
Commercial codling moth control is a complex topic. There is a great body of peer-reviewed literature on the subject. In the home landscape it really isn't possible to implement a full, successful control program. UC has a simpler set of guidelines for landscapes and gardens here.
The approach I would recommend to is to watch your fruit closely. Ideally you should learn what a codling moth egg looks like and learn to identify it. If you want to control with sprays, egg laying is the only feasible time to apply an insecticide, Organic or otherwise.


Codling moth eggs are tiny and hard to see. They look like tiny translucent pancakes about as big around as a pencil's lead. These are usually laid near the blossom end of the fruit. I find them easier to see in the morning or late afternoon when the sun is low in the sky. They are slightly reflective and having sunlight reflecting on them is a big help. Check those fruits you can reach easily from the ground for the eggs by turning the fruit and looking around the blossom end. The third week in April is a good time to start looking in our area. Continue this through mid-May. Remember that Bishop is about 1 week behind Lone Pine in timing. Check for eggs again in late June through July. Egg laying is your best shot for applying controls.
If your eyes aren't good, you'll have a hard time knowing when to time sprays by finding eggs, but there are other options. A favorite home control technique of mine is to remove all fruit of the first generation that has a worm. This alone can go a long way in getting control, especially if you're not surrounded by neighbors with wormy fruit.
If you really want to have clean fruit, in June you can bag fruit to protect them from insect attack. Garden supply companies sell bags for this purpose, but you can improvise as well. Have bags on fruit before egg laying commences. Since we have wind issues, you'll need a way to secure the bags onto the fruit. Bagging is a lot of work! Anytime you see fallen or damaged fruit on the tree, you should remove it immediately whether you bag or not.
Unless you are committed to bagging fruit, most homeowners who demand high levels of control will need to spray some product. These vary from biological organisms that kill the target pest as well as naturally or synthetically derived insecticides. Because these products and recommendations change so often, I'll direct you here for current recommendations. (See bottom of that page.)
Codling moth control is definitely a challenge, but you can expect reasonable control with a little effort on your part. Even if you lose some crop each year, you should still have enough to make growing apples and pears worth your while.

