- Author: Vivian Patterson
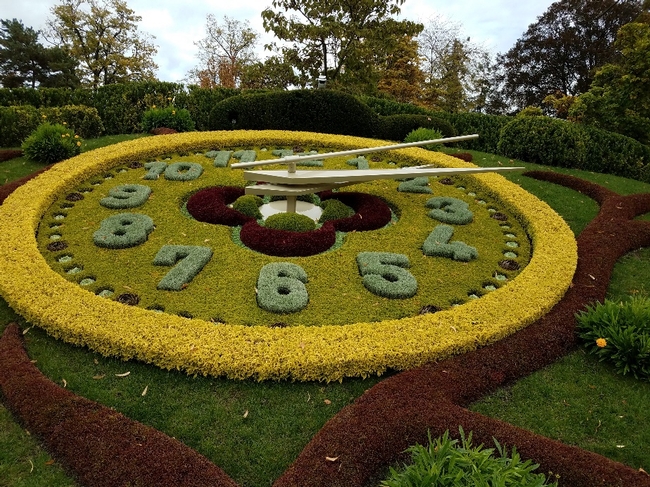
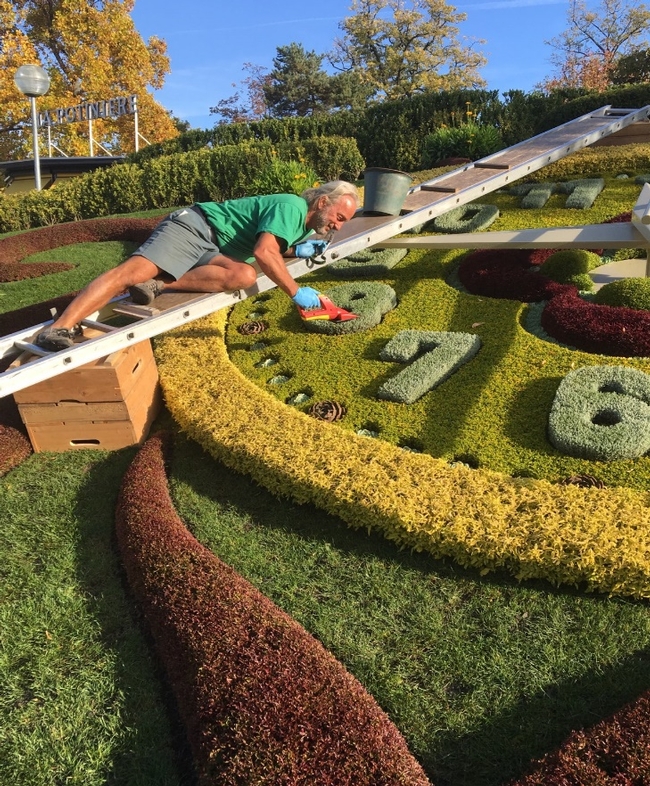
Viv Patterson and Trish Schlichting, both Inyo/Mono Master Gardeners, visited the Flower Clock in Geneva, Switzerland, this past October.
Geneva is recognized all around the world for its watch-making tradition. In 1955 Geneva created the biggest clock in the world made from flowers. The flower clock is in Le Jardin Anglais (the English Garden). The garden was constructed in 1855; the Flower Clock was built at the park's centennial to pay homage to Switzerland by perfectly combining watchmaking and horticultural know-how.
The Flower Clock was renovated in May 2017. A new floral concept consisting of more than 12,000 plants was carefully installed by mosaiculture* experts (see note) from the Greenspace Department of the City of Geneva. A watering system, essential for the survival of the plants and their full-sun exposure accompanies the installation. New hands, with an elegant design close to the original one, were manufactured and offered to the City by the firm Patek Philippe. The seconds hand is 2.5 meters long and is arguably the largest in the world. The clock has an electronic time setting via satellite.
_________
*Mosaiculture is the horticultural art of creating giant topiary-like sculptures using thousands of annual bedding plants to carpet steel armature forms.
- Author: Dustin Blakey
In case you hadn't noticed, our region is a bit different than most of California. For one thing we have this thing called "winter" to deal with. Although we may not get as much precipitation as we would like during the winter, we still have to deal with the effects of prolonged exposure to cold. In this way we are more like Missouri than California.
Recently I was asked about overwintering dahlias and gladiolus from the community garden. These are 2 plants that should not be left in the ground through the winter. In the case of gladiolus, in some winters many cultivars will survive but why risk losing your corms? (Corms are what gladiolus "bulbs" are really called.)
I was going to write a detailed post on overwintering glads and dahlias, but since I'm lazy, I checked to see if there wasn't something out there already written that would work. Fortunately Purdue's Cooperative Extension has a good fact sheet on keeping begonias, dahlias, geraniums, cannas and gladiolus through the winter.
Rather than reinvent the wheel, I'll just point you to this good resource. ⇒ https://www.hort.purdue.edu/ext/HO-085.pdf It mentions fungicides in the fact sheet. If you're in California, you should ignore those parts.
- Author: Laura Mogg.
Have you seen the new demonstration plot at Bishop's Community garden? If not, make a trip to the covered picnic area on the Pine to Park path at the back of the City Park, and find a plot with three pole tee-pees. This demo garden was created to inspire children, but instead of a sign saying, “Children's Garden" I think it should be labeled "The Enchanted Garden" to appeal to all who are young at heart.
The garden was planted in early May with flower transplants and seeds, pole beans around the tee-pees, and gourds along the trellis on the north side — very simple. Where there is nothing growing, we will lay a meandering stone path and that is all, apart from the fairy houses. If you don't know what fairy houses are, you'll have to come to find out!
In early June things started to grow, and by the end of summer we hope to have a maze of sunflowers around the beans with children hiding in the tee-pees and playing with fairy houses. By September there should be lots of extra fun with birdhouse and baseball-bat gourds.
Master Gardeners work with the Bishop Community Garden to demonstrate garden practices and to get the public excited about gardening.
Come with your children, grandchildren, or neighbors and watch this new garden grow through the seasons. See you there!
The continuing drought in California and the Western United States has made it necessary for all of us, no matter where we live, to find ways to save precious water. Now that our three sons are out of the house, Lori and I decided that the removal of some grass in our yard would be a start. We could remove grass in a sunny backyard area as a test, and as an added bonus use the newly-cleared space for growing less water intensive, sun-loving vegetables and flowers.
The main problem we had to tackle, aside from the labor required to dig out and dispose of the turf, was how to prevent the grass from growing back and weeds from encroaching on the exposed area. We considered a number of options to eliminate grass including initial removal and continuing weeding, herbicides, tilling, weed cloth, cardboard and newspapers.
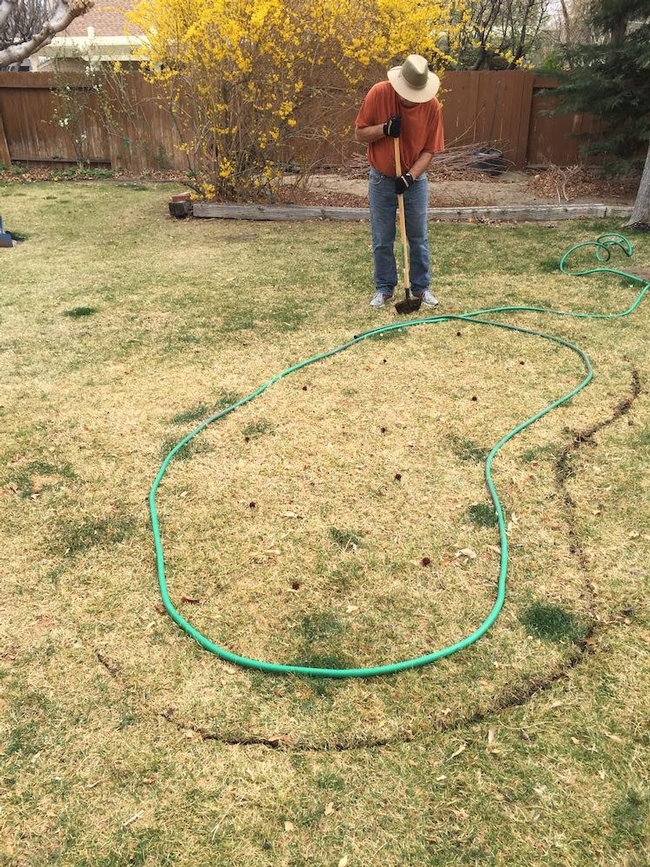 3/17/15: Cutting grass around hose used to mark test area. |
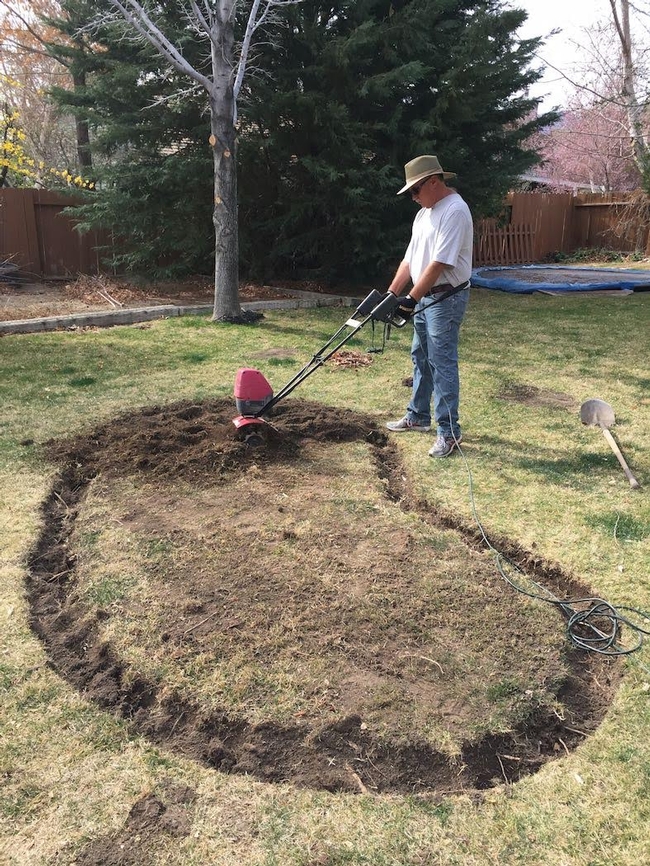 3/18/15: Tilling area prior to applying newspaper. Note dug out perimeter. |
|
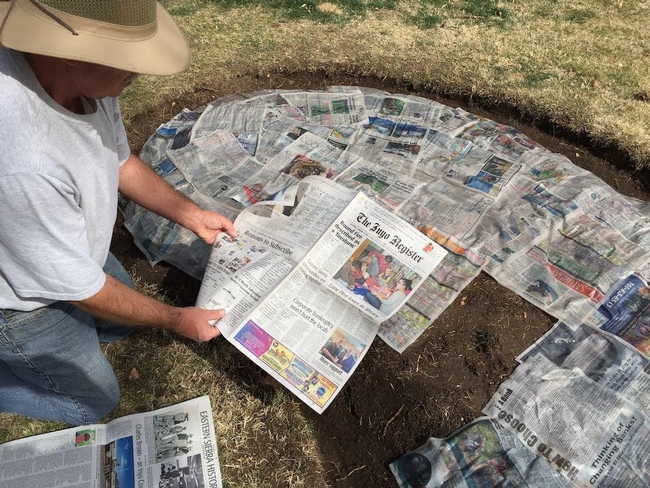
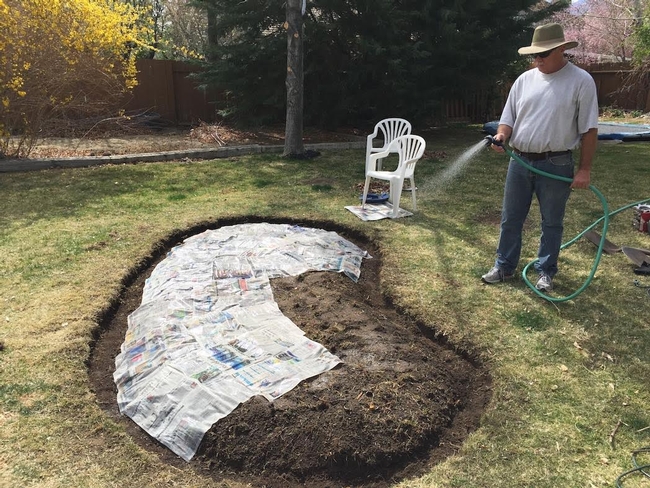
Each of those options brings with it its own advantages and disadvantages which had to be weighed. Continuing weeding to (hopefully) keep grass at bay would be a pain in the neck—and back—and we saw little upside in this option. Herbicides would probably get rid of the grass, but would probably require several applications. Most importantly to me, they are not good for the environment and any future planting we wanted to do, including vegetables. Tilling can harm the natural soil texture, spread seeds and chop up grass into small pieces that can grow. Weed cloth would probably work but it's expensive. Cardboard would probably work too but it's difficult to work with. Old newspapers reportedly work well and they are readily available from the local newspaper office for nothing, and using them carries the added benefit of recycling.
First we needed to select a location where the lawn would be removed. Because we have so many trees in the backyard that shade a lot of area, we selected a location in the middle of the yard that gets as much sun as possible. We wanted to have a sunny location where vegetables and flowers would grow well.
We began the test in mid-March 2015 hoping to get the new area ready to plant before summer. I started by outlining a spot on the lawn using a hose and then proceeding to remove the grass. First I used a cutter to make a nice edge along the hose. I then dug out the edge of the grass inside the cut to a full shovel depth, about six inches. This has the added benefit of minimizing the infiltration of adjacent grass as it cannot easily cross the open space. Next I tilled the grass in the rest of the area, and raked and pulled as much leftover grass as I could.
In mid-April we took on the task of getting water to the new planting area. We decided to tap into an existing drip irrigation line that's on a timer and about 25 feet away. I used the cutter to make a line in the grass then dug down and peeled back the grass leaving it attached at one edge to facilitate putting it back once I'd made the water connection. I then dug a trench about 12 inches deep. It was a bit tricky cementing the new connection to the existing pipe which was about two feet deep. Once I had made the connection I ran pipe in the ditch and covered it with the dirt I'd removed and the grass I'd peeled back. Finally Lori connected a drip irrigation system to the new pipe and put heads where we were going to plant.
Then we got to plant! We waited until early May hoping to avoid freezing (it's all a matter of risk tolerance). Lori planted squash seeds, peppers, cucumbers, a gerbera daisy, marigolds and one dahlia tuber we had left over after planting 39 in our existing garden. We've had problems in the past with bugs eating our young plants so we put a fence around the area to keep the dogs out and then Lori sprinkled a bit of snail/earwig bait to give them a chance to grow strong and better survive a pest onslaught.
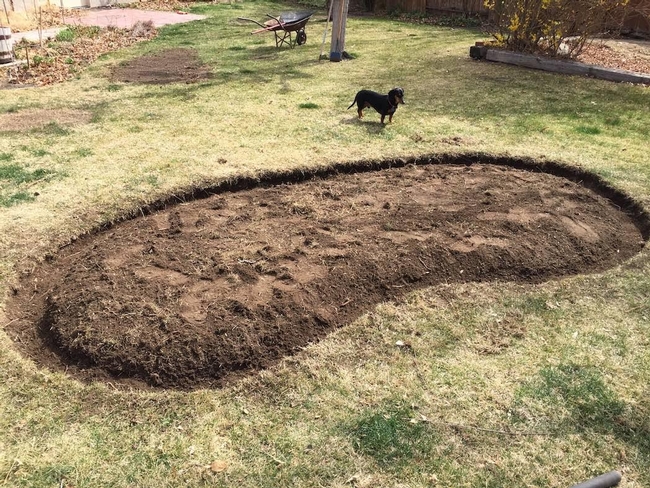 3/18/15: Test area with grass tilled, raked and removed, ready for newspapers |
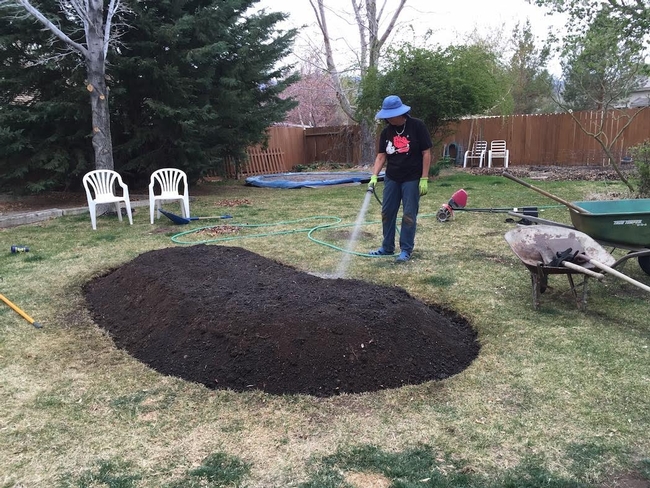 3/18/15: Ready to plant! Just waiting install the drip supply line and warmer weather. |
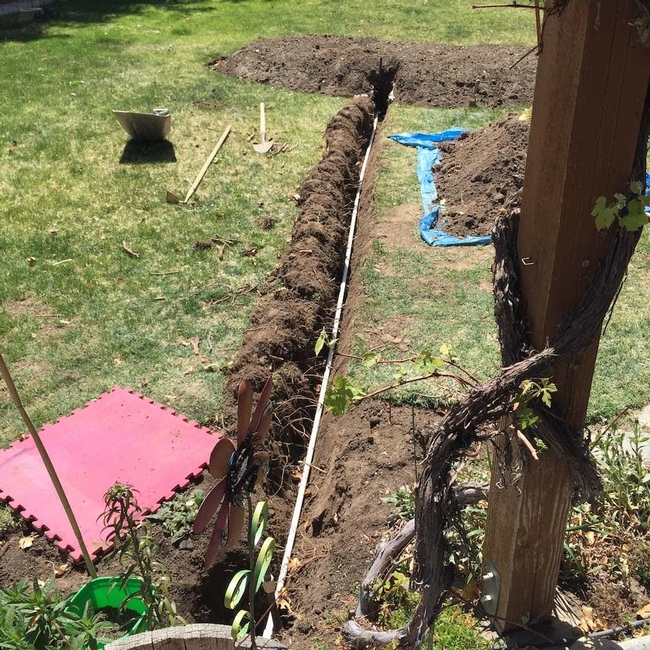 4/14/15: Trench dug and drip supply pipe installed and ready to backfill. Note the grass laid over to the left, making it easier to put it back where it came from. |
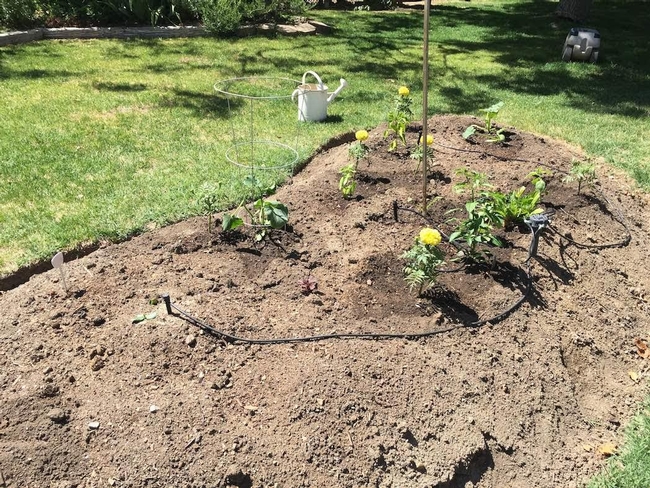 5/10/15: A few days after planting. No grass or weeds have come up. |
It's now June. Everything we planted is doing quite well. On May 26 Lori did some minor cleaning and mulching of the area and found minimal grass and weed infiltration. Since we created the new planting area very little grass has come up, and any that has mostly came from the surrounding grass, not through the newspaper. So, at this point I would call the test a success. I will update this report as the summer and fall growing seasons progress and we have a better handle on how successful the test has been. But, so far so good! If it continues to work this well we may remove more grass in the future using the same method.
I'll keep you posted.
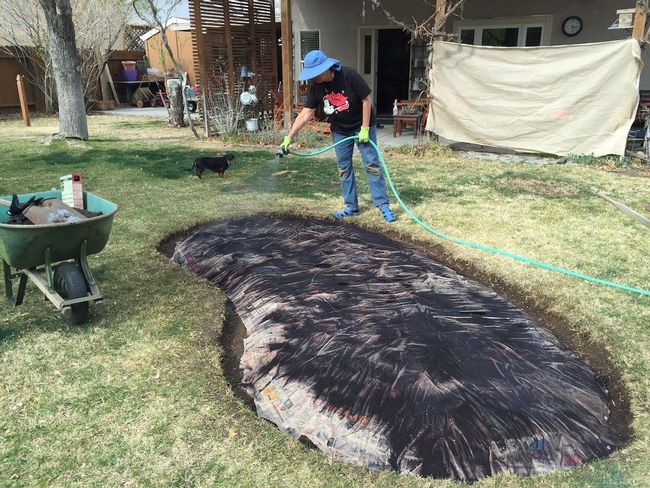 3/18/15: Lori wetting the blood meal spread on the newspapers. |
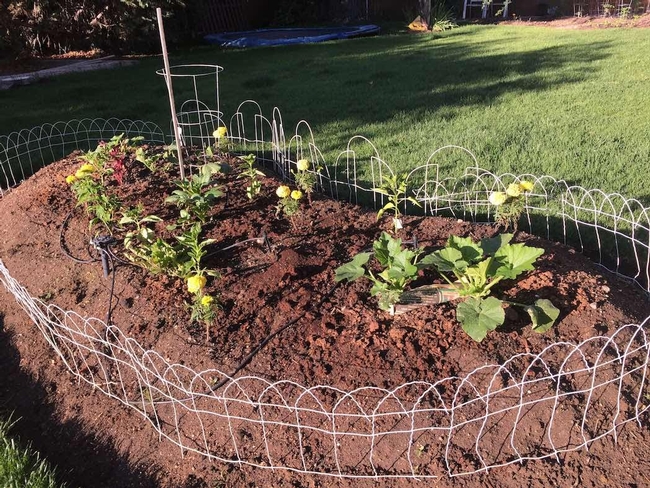 5/29/15: Looking good this morning! |
- Author: Dustin Blakey
My family and I just went up Bishop Creek to check out the fall color. You should, too. Its beauty may inspire you enough that you won't mind the drudgery of raking leaves that will be upon us in a few short weeks.
Your trees spend a lot of time gathering nutrients and resources to make leaves, and they're a valuable asset. Maybe not like gold or platinum, but useful anyway.
Leaves are a good way of adding organic matter to a garden or compost pile. You have to do something with them, so why not put them to use after spending all that effort gathering them?
On their own, leaves decompose very slowly. Oaks in particular seem to be in no hurry to break down. In order to speed this process up, the compost pile or garden needs to have adequate nitrogen and moisture available. UC has a couple fact sheets on composting:
- Why Compost?
- Compost in a Hurry (Probably not the most practical system with fall leaves, but good info.)
- SLO Backyard Composting Guide
CalRecycle has information on composting as well. Check out their website.
We tend to be dryer than these other places so our compost needs to be moistened and/or kept covered. Even in winter.
Small particles will decompose more quickly than big ones. I try to grind up my leaves. For everything but my oak tree, I have a leaf blower that reverses direction and turns into a vacuum that sucks and grinds leaves once they're dry. I find that the fastest way. For my oak leaves I have to be more creative...or just patient. It's remarkable how small a leaf pile gets after it has been chopped up.
I incorporate my chopped leaves into my garden and add a little nitrogen and water. By spring they have broken down. I am lucky that I have just the right number of leaves for this to work, but some yards have far too many. Compost piles are a better option in this case.
If you've accumulated pine needles, know that these make an excellent mulch for the landscape. Note that in some communities composting and mulching are frowned upon. Ask your fire department about mulches if you have questions.
We encourage you to make the most of what your landscape gives you. Look into composting yard waste or using it as a mulch.


