- Author: Dustin Blakey
In the western US our dry conditions keep many fungal diseases from becoming an issue. Since dry is something we do well in the Eastern Sierra, most of our garden diseases are viruses, not fungi. Things change some when we have summer monsoon conditions and rain.
For the past couple weeks, our humidity has been elevated with dew points above 50°F and temperatures are lower. If you cool your home with a swamp cooler you've probably felt the change. And last night it even rained!
When we get conditions like this in summer, we sometimes see diseases on vegetables that are normally not present.
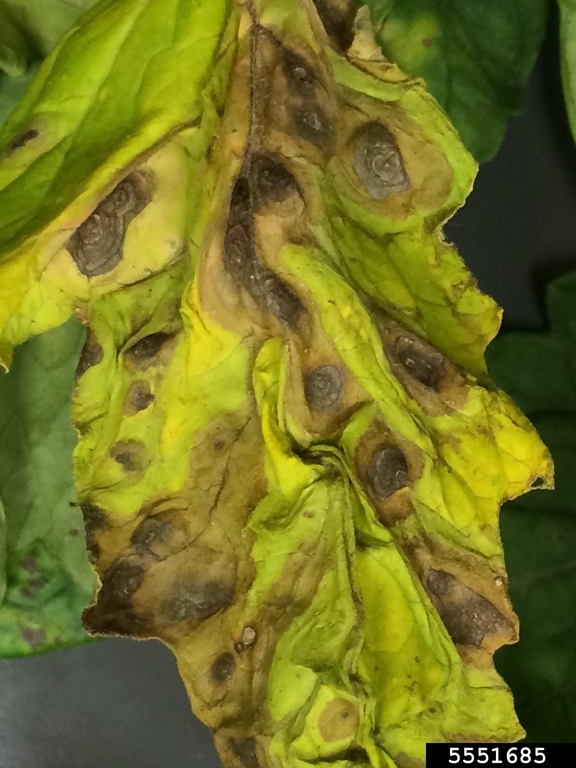
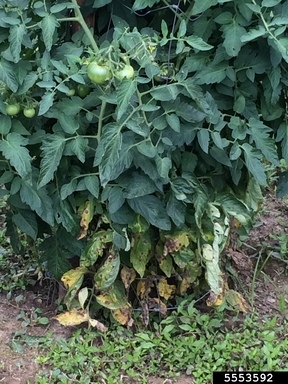
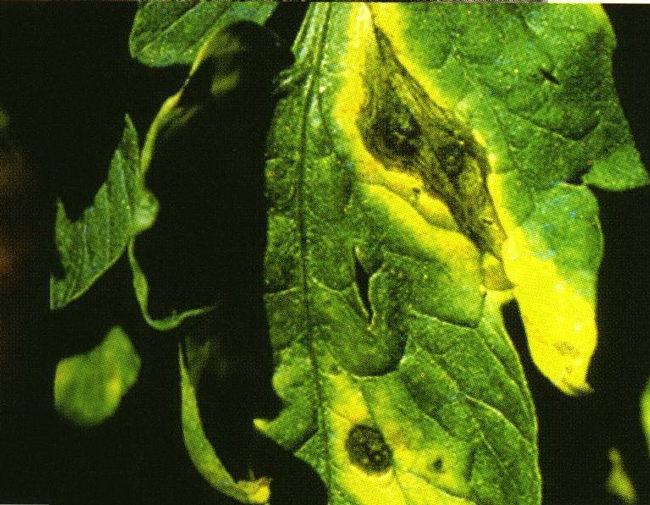
I remember the last couple times we've had mid-summer conditions like this a disease called early blight appeared on tomatoes. Early blight is caused by the fungus Alternaria solani. In California it's uncommon outside of coastal areas. It gets its name from being mostly a disease that occurs early in the growing season.
I've never seen it be fatal here, nor have I seen it get on fruit since our weather soon gets back to super-dry like normal, but it can be alarming when it shows up. At this point in the season, tomato canopies are large and dense. The already high humidity is worse inside the canopy and temperatures are lower, leading to more disease, especially in places where other plants in the nightshade family have been grown before (potatoes, tomatoes, eggplant, etc.).
In the garden, I've only ever seen it on tomatoes in our area. We don't usually plant resistant varieties.
This disease usually starts at the bottom and works its way up the vines. Symptoms are yellowing with lesions that look a bit like bullseyes to me.
Look for this disease in the coming days, especially if you've been gardening in the same place a few years.
If it appears, we can usually control it by removing affected leaves when you see them. Chances are the weather will dry out soon and it no longer becomes an issue. Try not to water tomatoes in the afternoon when it's humid, and if you do need to water, aim for the soil, not the foliage. UC IPM recommends copper fungicides, but sprays are not usually needed in our area. It's more of a temporary condition here; more alarming than anything else. It doesn't seem to get out of control, especially if you remove the yellow leaves.
If you have questions about this or other diseases in your garden, contact our local Master Gardener helpline at immg@ucanr.edu.
- Author: Alison Collin
In parts of the world where the growing season is short or there is a general lack of sunlight, tomatoes are often grown as cordons, which enables more of the available light to reach the fruit. In spite of being advised not to use this technique in the hotter parts of California, due to the risk of sunscald damage to the fruits, I thought that I would try it in the Owens Valley to see if I could increase my tomato plants' performance. Last year, I harvested only two red Brandywine tomatoes and was left with a huge crop of very green tomatoes at the end of the season.
This year I chose Pineapple, a large, yellow, low-acid, heirloom variety to see if there was a discernible difference between growing it as a cordon or the more traditional way.
Two closely matched 6” high plants were planted directly into the soil on April 22. Growing conditions could not be matched exactly, since the shrubby one was slightly more shaded than the cordon specimen; otherwise, cultural conditions such as soil and irrigation were the same. No covers or “walls of water” were used, liquid fertilizer was applied twice during the season, and the plants were not mulched, as they were grown adjacent to squash plants, and I wanted to minimize hiding places for squash bugs.
Method: Cordon tomatoes are grown by choosing an indeterminate variety, which is then tied to a tall, sturdy stake and trained as a single stem by removing all shoots from the leave axils as soon as they appear. Flower clusters develop from the main stem between the leaves, and the general advice is to allow the plant to produce about 6 trusses before pinching out the leading shoot to prevent further vertical growth. The stake was placed on the west side of the plant in order to protect the main stem from the most intense afternoon sun. The plant grew extremely well, and I had to be vigilant keeping it tied to the stake (using a soft tie which would not damage the delicate stem) and in removing the shoots which appeared and grew rapidly. If left for more than a few days, their removal caused a large wound which could potentially result in the entry of disease. Even with very little fertilizer, this plant soon reached 6ft and the lower clusters began to flower early, with about 5 flowers on each truss. On July 19, I picked my first fully ripe 10.5 oz tomato from this vine.
For the other plant, I staked and allowed it to sprawl over a 4-foot tomato cage made from field wire. No pruning was performed, and it soon made a thicket of healthy stems and foliage. I picked the first fruit from this plant on August 9, but had 3.5lbs of green tomatoes remaining in early October.
|
|
Cordon |
Unpruned |
|
First Fruit |
July 19 |
August 9 |
|
Last ripe fruit |
Sept. 19 |
Oct. 1 |
|
Fruit size |
Large |
Medium |
|
Total crop |
6 lbs |
15 lbs |
As can be seen from the above table, the cordon certainly produced ripe fruit much earlier than the unpruned plant, and the individual fruits were considerably bigger - often in the 13 oz range, while those from the unpruned plant averaged around 6oz. However, the cordon produced a much lower overall yield, stopped producing more noticeably during the very hot weather, and set far fewer individual fruit. Some of these issues could have been avoided by using better horticultural practices, such as mulch and regular fertilizer!
Although fruits on both plants suffered from some cracking, none was affected by sunscald in spite of having some very clear, hot days.
If space is limited and one wants to have a variety of different cultivars of tomatoes without having an enormous crop, then growing them as cordons might well be a useful method to try.
- Author: Dustin Blakey
Since the Eastern Sierra is very dry, we don't usually get fungal or bacterial diseases in the garden. Normally viral diseases affect our tomatoes and peppers instead. This year that trend continues. I've already encountered beet curly top virus, tomato spotted wilt virus, and at least one other unidentified virus on tomatoes.
We may be in for a spell of fungal diseases, however.
Due to high temperatures, we've been getting afternoon bouts of elevated humidity and sometimes even rain. This creates excellent conditions for the growth of fungal pathogens.
Who knows what—or if—we'll end up getting in terms of diseases as a result of the recent weather!
Here's what to look for: most of our usually fungal pathogens tend to create leaf spots of some sort. I find that all plants of a variety may be affected and have the same symptoms. It could be all your tomatoes will be affected. :-(
Viruses on the other hand tend to hit individual plants at random without respect to their variety. Growth will look weird, probably stunted, perhaps with weird fruit. There is no treatment for viruses. You need to remove the plant.
There are treatments for fungal pathogens, but it's best to try to avoid diseases altogether. Here are some tips to prevent diseases.
Prevention Tips:
- Water in the morning, not evening
- Prune out suckers on tomatoes to improve airflow
- Remove infected tissues (usually leaves) or dead plants as soon as you see them
- Keep the garden free of weeds to improve airflow
- Check plants often for early symptoms
If you decide to use a fungicide, know that most work to prevent new infections. They don't really cure existing problems.
This page has a list of common tomato diseases and their recommended treatments.
- Author: Jan Rhoades
It is definitely harvest time in my garden - I guess it has been for awhile. Like all good gardeners, I browsed the seed catalogs and found two new varieties to try out this season: Burbank Red Slicing Tomato and Crane Melon. My choices were inspired by a trip to Santa Rosa and the Luther Burbank Garden. What a treat to walk in the garden of a man that left such a horticultural legacy. Read on to find out more about these two winners. Both are listed by the The Slow Foods Ark of Taste, a catalog of distinctive foods deemed threatened by industrial standardization. They are definitely two to try!
Crane Melon
In Sonoma County, the last name of Crane is pretty much synonymous with the word melon. The Crane family has been farming melons there for more than a century.
It all started when Richard Crane was enticed to set down roots in the area because of the Gold Rush. But it was his son, Oliver Crane, who succeeded in breeding a golden melon that grew incredibly well in the unique clay soil and climate of Sonoma County, and without much irrigation. Named the Crane melon, it is a cross between several heirloom varieties: a Japanese melon, an ambrosia melon, a white melon and a Persian melon.
Beginning in the 1920s, Oliver sold his melons out of the farmstead's barn in Santa Rosa. Today, six-generations later, it has become an iconic landmark known affectionately as the “Melon Barn” where the family continues to farm and sell these melons. The Crane Melon is not found at grocery stores as it is vine ripened, and does not have the shelf life to be shipped. The Crane family claims that, “The Crane melon's flavor is due to its terroir. The melon was developed to be grown...in a particular soil, within a specific climate zone, farmed in a certain style.”
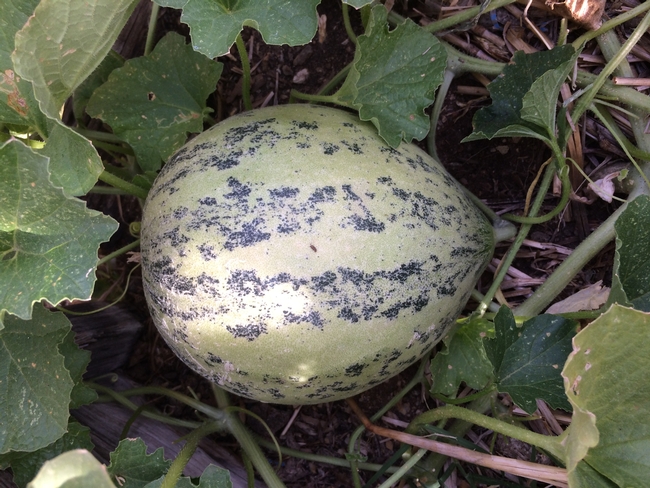
The Crane Melon has appeared in magazines, newspapers and TV shows. A Los Angeles Times article recognized it as a true heirloom. A striking melon it is slightly pear shaped with a gently tapering end and averages 4 to 7 pounds. Its exterior is a pale dusty green color with dark green blotches that become a rusty orange when fully ripe. The inner orange flesh is firm and succulent This melon is described as highly aromatic and exceptionally sweet and juicy with notes of honey, rose and orange blossom.
Over the past month, I have eaten several of these delectable melons from my own generous vine. They are quite big and make a lovely dessert. I am not sure that the soil here has the same terroir, but I can truly say they are the best melons I have ever tasted.
Burbank Red Slicing Tomato
Developed around 1914 by plant wizard Luther Burbank, this tomato was reportedly the only variety that Mr. Burbank raised for canning. It is a semi-determinate that grows on stocky bushes 18 - 36" tall and produces beautiful 6 - 8 oz fruits perfect for slicing and canning. Quite productive and a fairly early tomato, it has no problem with cool nights and even seems to tolerate drier climates. The fruit is a deep red color with a satisfying bold tomato flavor.
In his own words, Burbank described this tomato as, ”The earliest, smoothest, largest and most productive of all early tomatoes. It is of a bright red, the flesh being firm and of superior quality. The plants resist disease in an unusual manner, and unlike most early tomatoes, it produces heavily all summer. A fine home or market tomato, as it is a fine keeper and shipper."
The 1923 Burbank Seed Catalog reads, ”Fruit, bright crimson; thick, solid, heavy, smooth, medium to large in size, superior quality, unusually heavy and continuous bearer throughout the season. Good keeper and fare shipper. The Burbank has one other unique and most remarkable quality which will be appreciated by those who like fresh sliced tomatoes for the table. Unlike other tomatoes, the skin peels freely from the rich, firm flesh. “
All summer, I have been enjoying these fine tomatoes in sandwiches and salads, as well as cooking them down to paste for winter use.
- Author: Ariel Bohr
This year especially, many people have been eager to get an early start on their vegetable gardens. I felt the urge to get a head start on my garden as well, but unfortunately there are many variables outside of my control that determine when I can safely put plants in the ground without fear of them being killed by a spring frost. What to do when I'm ready to begin — my starts are an appropriate size, but I'm not “in the clear” with the weather?
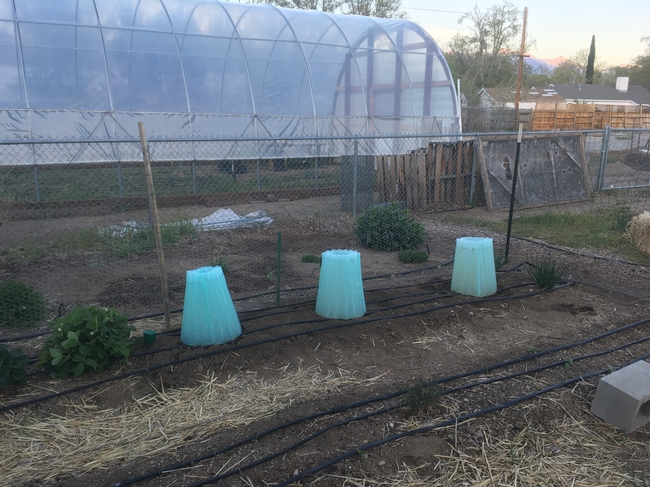
This year I decided to try using Wall-O-Waters, which at first glance resemble oversize freezer packs. In truth they are relatively simple structures about 18" tall and 17" in diameter which are designed to protect plants from the elements by forming a barrier to the wind and cold and extend the growing season by creating a warmer environment. While there are many materials that can be used to create a barrier between plants and the elements, the thing that makes Wall-O-Waters so special is the water.
Water is poured into vertical cells to give the Wall-o-Water its shape as well as its efficacy. Throughout the course of the day, sunlight heats up the water in the cells and warms the plants. Water retains heat very effectively and this warmth protects plants from frost damage. Counterintuitively, as water freezes it releases heat, which further protects the tender plants inside. Wall-O-Waters are most commonly used in conjunction with tomato plants because of their sensitivity to cold. This is the crop I will be using them on as well.
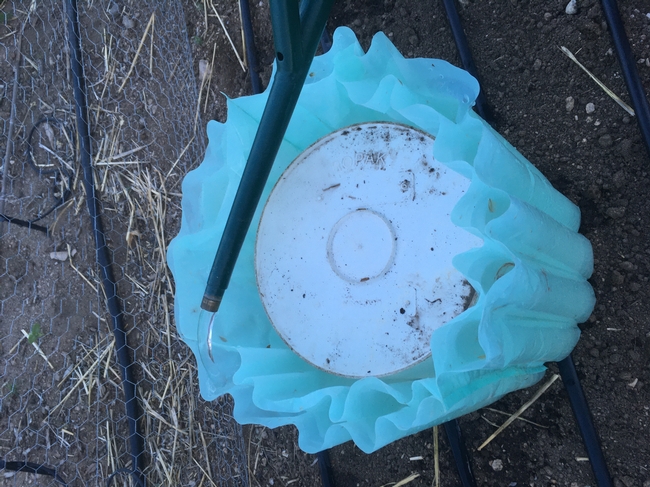
I found that the easiest way to set up Wall-o-Waters was with a 5-gallon bucket and a partner. The Wall-o-Water website recommends setting them up 6-8 weeks prior to the last frost date in order to warm up the soil to create an optimal environment for root growth. Unfortunately I did not see this advice until perusing their website while writing this post! Rather than setting up the Wall-O-Waters in advance, I set them up just after planting my tomato starts. To do so, I put the bucket face down so that it was protecting the plant. I then slid the empty Wall-o-Water onto and around the bucket, making sure that the “open” sides of the cells were facing up. As my partner held open each individual cell, I used a watering can with a narrow spout to fill each pocket. If you're setting up without a bucket, it's a good idea to remember to create counter balance during this process so that the whole thing does not tip over. Once I was done, I carefully removed the bucket. If the Wall-o-Waters act as advertised, they should protect my plant in temperatures as low as 12℉ and give the plants an extra dose of warmth on chilly nights.
Considering the recent heat wave, this whole exercise may have been unnecessary, but extra precautions are never a bad idea in the fickle Eastern Sierra.
Here's hoping this yields some early tomatoes! Updates to follow.
Sources: https://www.wall-o-water.com/


