- Author: Alison Collin
Following our many atmospheric rivers this wet winter of 2023, and with the advent of warmer days, weeds are now germinating in record numbers — and with record speed. This is the time to get the hoe out!
Hoes have been used for hundreds of years worldwide, but it surprises me that many local gardeners seldom consider using them.
It is so much easier and faster to stand upright and slice through the base and roots of seedling weeds than it is to kneel or bend over in order to pull or dig out the roots of mature weeds once they have grown. They can also be used around plants to loosen the soil surface where it has formed a pan or to break up compacted soil to prepare it for planting.
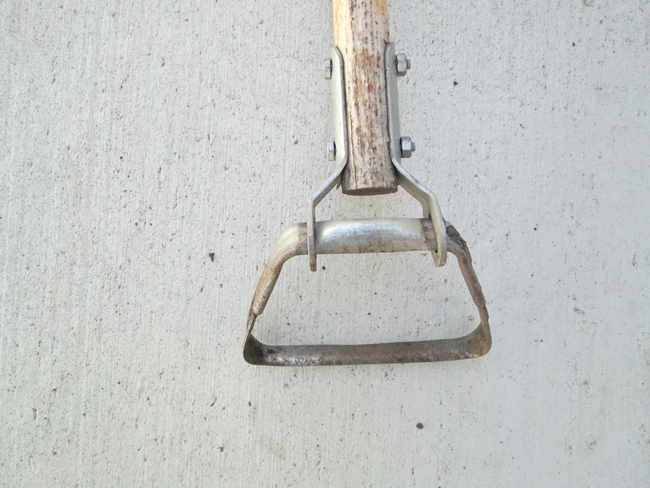
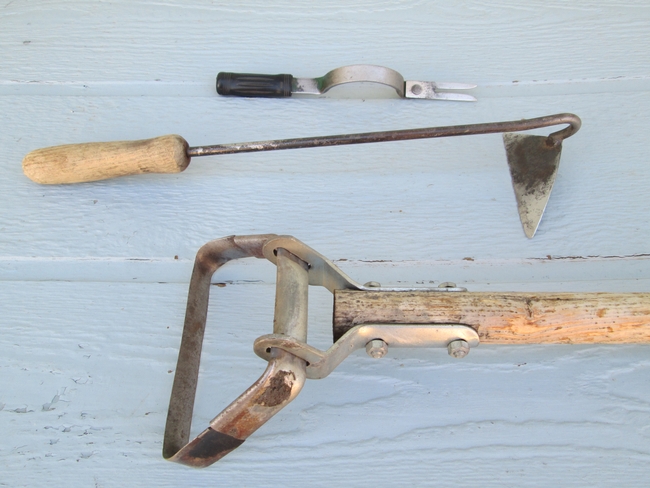
There are numerous types of hoe available, but my favorites are a hula hoe (also known as a stirrup hoe or scuffle hoe) and a Japanese hand hoe. The hula is a long handled hoe which works on the push and the pull strokes to slice through unwanted plants just below ground level. Some have a fixed blade, but I prefer those that have a jointed blade that moves very slightly. It is important to check that the handle is a length that allows comfortable use to lessen back strain.
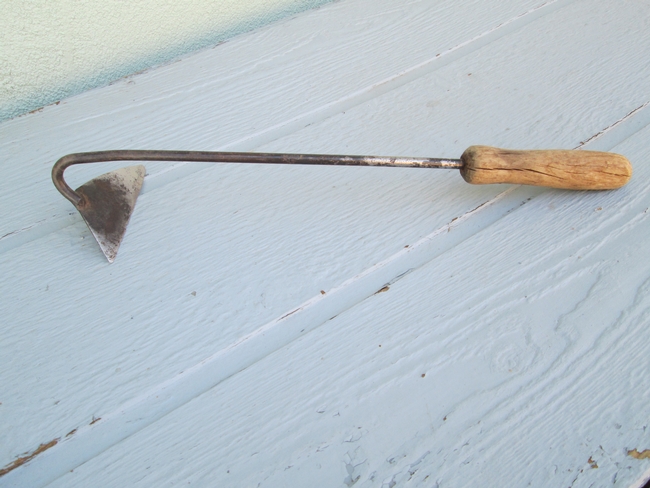
I also have a Japanese triangle hand hoe with an asymmetrical blade. It is a beautifully balanced tool, and it is great for reaching hard to get-at spots such as around the base of rocks or posts. With practice one can remove a weed growing right out of the base of a wanted plant using the point of the blade. One can also loosen soil by using the blade flat, or prepare a seed drill by using one of the points.
In order to hoe safely and not destroy desirable plants, one needs to be able to identify which seedlings or shoots are unwanted weeds as opposed a cherished plant.
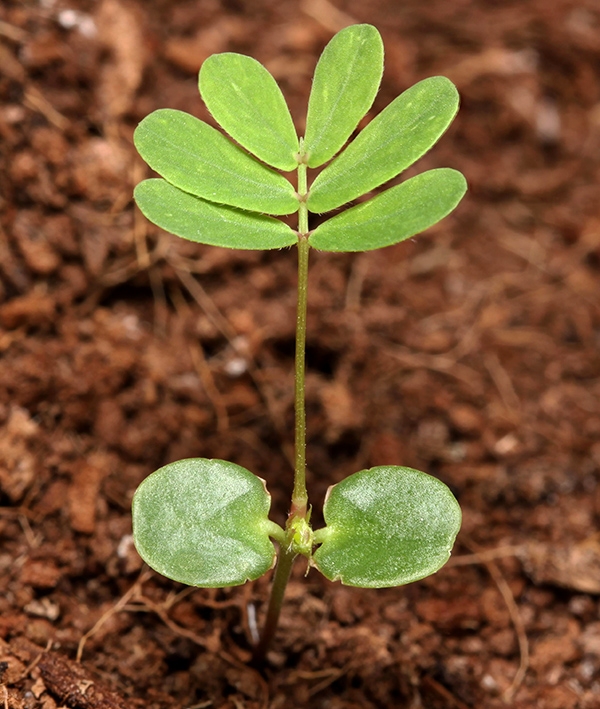
The seed leaves of both weeds and desired plants differ remarkably from the true leaves, so getting to recognize each is vital. One of the benefits of planting vegetables in traditional rows is that you will immediately be able to identify the seed leaves of carrots for example, and know that any other leaf shape in, or beside the row is obviously a weed. With good observation one soon gains enough knowledge to spot a dandelion or clover start, or a carpet of grass seeds that are germinating. Five minutes with a hoe and they are gone forever.
Spotting weeds in beds of ornamental plants is a little more challenging, especially if you garden naturally and encourage flowers to self sow. I am currently full of curiosity about a patch of bright green seedlings that have appeared in a fairly new flower bed. I have hoed out those that are simply too close to other plants, but have left some until I can identify them. I suspect that they are orange milkweed, a plant that I grew for the first time last year. I should be able to tell what they are as soon as the true leaves appear then, if they are worthy of cultivation, I can transplant them into an ideal spot.
I could plant up a good-sized herbaceous border with the many volunteers of different species that have sprung up in my flower beds — catmint, centrathus, larkspur, poppies and columbine — but of course I can't keep them all so I usually dig up and pot on some of the best ones and share them with friends. The rest get hoed.
Keeping weeds from establishing in my decomposed granite paths takes a few minutes once a week using a hula hoe and is a lot more enjoyable than trying to grasp the base of a weed from the surrounding “sand paper” since I find that wearing gloves prevents me from being able to grasp tiny plants.
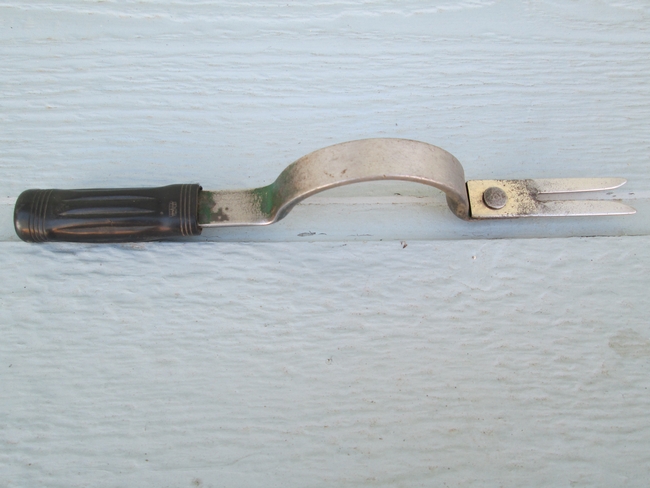
Although you won't kill a bed of established dandelions by hoeing it is possible to weaken them with regular hoeing, and at least prevent them from flowering until you have time to tackle the tap root removal using a hand weeder.
Hoeing with a hula hoe works on bare soil, but not on lawns or the tougher rhizomes of Bermudagrass or on very stony soil or gravel paths but in the right situation it is a gem of a tool!
- Author: Alison Collin
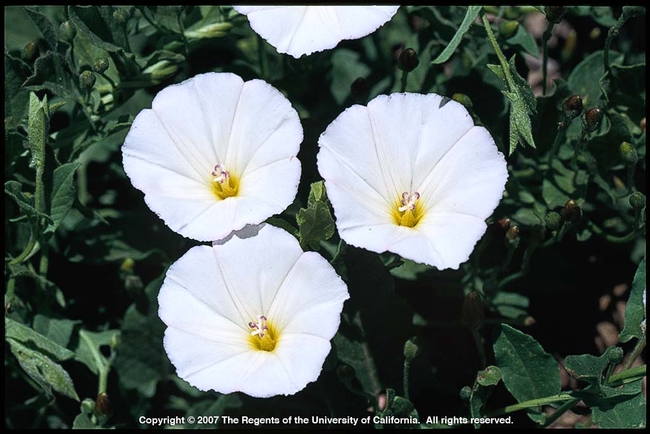
Although I'm familiar with bindweed from past experience, for some reason it had never put in an appearance in my West Bishop garden until three years ago. A year after removing a lawn and having some topsoil delivered I was upset to see a small, white, Morning Glory-like flower in a raised bed in the center of my new landscape!
How could I have missed its growth up to flowering point? I regularly inspect for all the other evil weeds such as spotted spurge, yellow oxalis, yellow clover and Russian thistle, so how had this specimen avoided detection? And where had it come from? It had grown up through a patch of gaura, winding itself around several stems and the flower that I saw was just the first of many waiting to bloom.
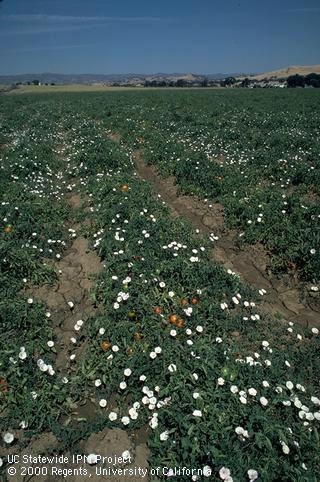
There are two types of bindweed. Field bindweed has smaller leaves and flowers which are pink or white while Hedge bindweed has larger white trumpet-shaped flowers more like ornamental Morning Glory.
Field bindweed (Convolvulus arvensis) grows extremely fast. It has become a serious threat to agricultural crops in some areas of the country, and it is never good news in our gardens. It is a perennial weed with a very deep root system, able to penetrate as far as 16 feet below soil level! To make matters worse, the roots are soft and rather fragile. They merely break off if one tries to pull the plant up, leaving behind pieces that easily regrow. The leaves can vary from spade-shaped seed leaves to arrow-shaped on mature plants and the stems are from 1 to 4 feet in length, sprawling over flat surfaces but winding around any vertical stems or structures. The flowers produce copious amount of seed which has been known to stay viable for 50 years!
Realistically, is almost impossible to eradicate completely and the best one can hope for is to keep it under control. If seedlings are recognized and dug out before their roots have spread and before it has flowered one might eradicate it, but other methods of weed control seldom work. Covering a patch with plastic and solarizing will thwart it briefly, but will not kill deep roots, carefully hand digging out plants with as much root as possible will weaken it so long as this process is repeated whenever new growth appears. It is best to use a fork for removal because spades will inevitably cut through the roots making it difficult to get every last piece out. Likewise mechanical cultivators will chop up the roots and drag them to a new area, but for large agricultural areas there is little alternative, and so to address a heavy infestation this is done on a regular cycle as soon as any new growth emerges until the plants are weakened.
In my own garden I have removed any growth as soon as I see it. Nevertheless, shoots have appeared more than 10 feet away in two different directions from the original growth. The plant is established at the base of a young specimen maple tree, and the roots of the bindweed are beneath those of the tree, so consequently they are impossible to reach. I am sure that this is one gardening battle that I will never win, but currently I feel that I do have the upper hand.
Prevent spreading bindweed by inspecting any new plants brought in to the garden from other sources, and if you already have it don't be tempted to move plants around from one area to another, or share any garden plants with friends and spread it to their gardens! I saved a rather precious salvia by digging it up, washing and meticulously inspecting the roots for any scraps of bindweed, then planting it into a large pot where I kept it for several months before finally installing it in its new home.
For more detailed information regarding control of bindweed: http://ipm.ucanr.edu/PMG/PESTNOTES/pn7462.html
- Author: Patricia Barni
Beat the Cheat
Part II: How to get rid of cheatgrass!
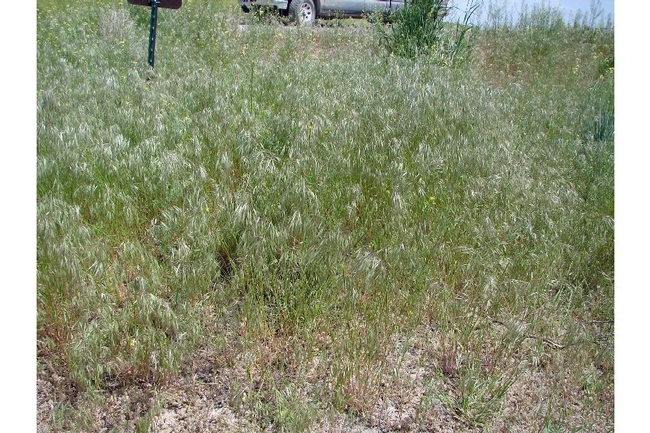
Part One of the cheatgrass story informed us of its invasive weed status and how it creates a fire risk around the home. But there is hope.
First, remember that any disturbance of the soil is an invitation to cheatgrass - maintaining an adequate cover of native plant species and biological soil crusts can render some communities more resistant to cheatgrass invasion.
Where soils have been disturbed, however, you must remove live plants and prevent seed production. This takes hard work and persistence and then more persistence! For small areas, hand pulling is effective if done diligently over many years. Cheatgrass is typically a winter annual grass. It grows early and rapidly (often before other annuals germinate) and is fairly easy to identify and manually pull during the cool temperatures of late winter and early spring, especially when it first appears.
For areas where mature communities persist, I have developed a 2-year eradication plan that works well. First, I lift the roots out of the ground a few inches below the soil (these fine, dry roots at the surface are another fire hazard) with a soil knife and remove as much of the plant, seeds, and roots as possible. Yes, the seeds germinate better in the light and fluffy soil left behind so I tamp down areas I have weeded to condense the soil structure. Once these nests of old grasses and seeds are gone, it is much easier to remove the new plants that might come up in year two (and three, and four...). You can also use a hula hoe but remember to rake up as much of the plants, roots, and seeds as possible.
If there is a community of cheatgrass that goes to seed before you have time to remove the plants, your neighbors will thank you if you at least remove the seeds. Using a string-trimmer when the seeds are still immature can be effective to reduce seed spread but you still need to go back and remove the plants so they do not regrow and to reduce the fire risk.
For larger infestations, chemical controls or grazing should be considered. Be careful using herbicides because those recommended for controlling cheatgrass can also harm nearby native species. UC IPM has information on controlling brome grasses including timing of herbicides, if used. Grazing by goats is another option. Grazing during the spring and fall must be used for at least two consecutive years to be effective.
The use of mechanical equipment is not recommended because it disturbs the soil and may exacerbate the problem. So plan some time for some old-fashioned weeding to get rid of this pest of a plant.
For more information:
- Author: Alison Collin
Having spent best part of a week painstakingly trying to remove every scrap of Dichondra which has overrun a blueberry patch I am firmly of the opinion that it ranks with Bermuda grass as one of the most obnoxious weeds.
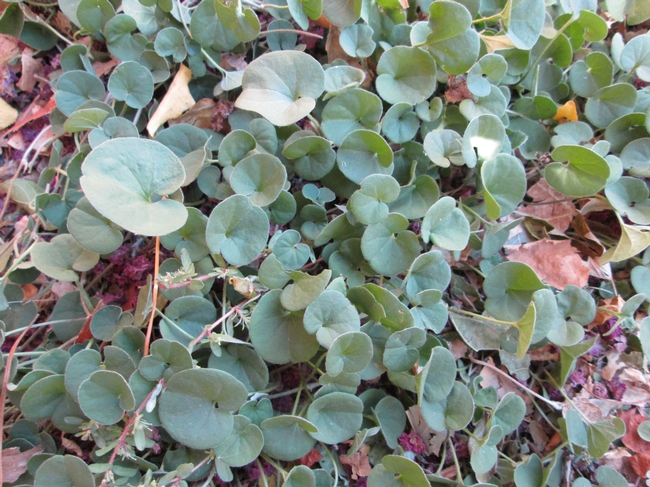
Dichondra micrantha was often planted as a lawn substitute until infestations of flea beetles proved devastating in some areas. It has small green leaves reminiscent of miniature water lily pads and spreads to make a dense mat by thread-like surface runners. It likes rich moist soil - just like blueberries.
We know not where the origination of this infestation began, but the blueberries were planted about seven years ago and have been mulched annually with a fairly thick top dressing of peat and fertilized using organic products. The first few strands of dichondra appeared about three years ago and grew quite rapidly, but it was fairly easy to remove from the soft peaty areas around the plant. However, this year the problem became much more serious, due mainly to lack of time to keep on top of it. 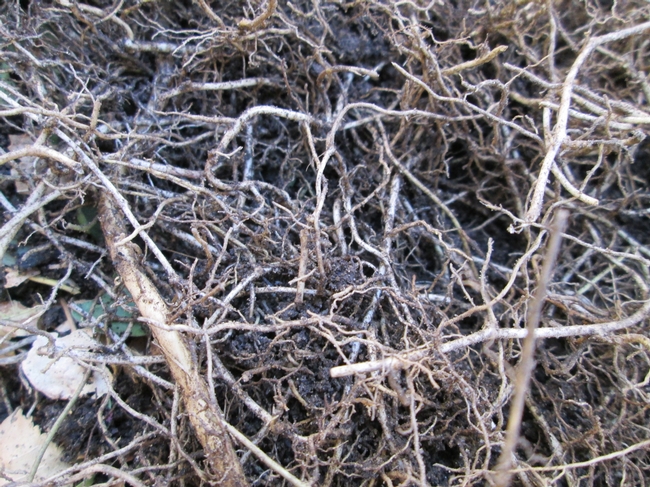
What to do? Blueberries hate to have their roots disturbed, so hoeing is not an option, neither would a selective weedkiller be safe, so there was nothing for it but to get down on ones hands and knees and try to undermine the mats of weed while taking great care not to move or damage the blueberry roots. The roots of the dichondra are very fragile, and tiny pieces easily broke off, and even with judicious use of my Japanese hand hoe, I was constantly aware of the fact that I was unearthing the blueberry roots.
When I had got the soil as clean as possible, I applied a layer of peat, and covered that with thick black landscape fabric cut to fit around the plants as best as the multi-stemmed growth would allow. Concerned that in our desert climate this might result in overheating of the blueberry roots, I then applied a thick layer of pine needles as a mulch.
Only time will tell if all this effort will pay off, but I know that we will have to be vigilant next season and pull out any dichondra as soon as it reappears from any area of the garden.
Has anyone else been able to manage such a weed in an effective and permanent way? If so we should love to hear from you!
The continuing drought in California and the Western United States has made it necessary for all of us, no matter where we live, to find ways to save precious water. Now that our three sons are out of the house, Lori and I decided that the removal of some grass in our yard would be a start. We could remove grass in a sunny backyard area as a test, and as an added bonus use the newly-cleared space for growing less water intensive, sun-loving vegetables and flowers.
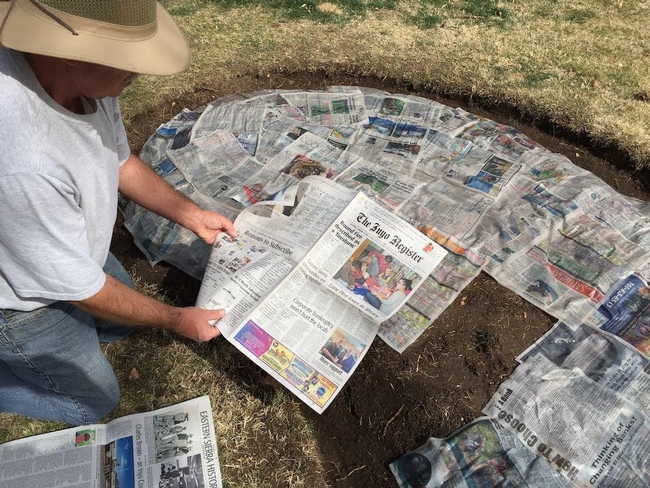
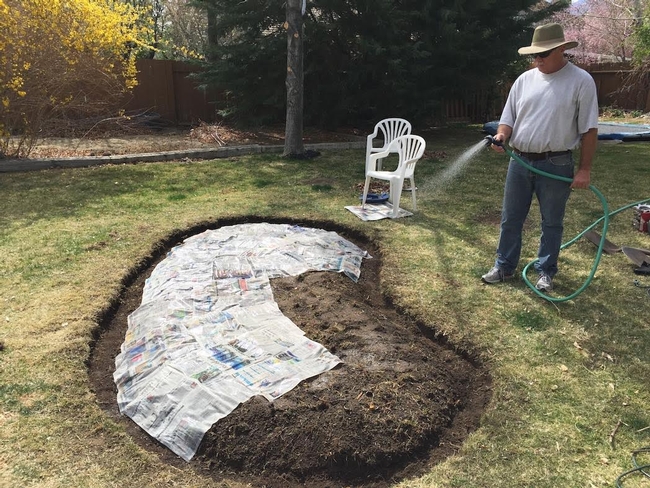
The main problem we had to tackle, aside from the labor required to dig out and dispose of the turf, was how to prevent the grass from growing back and weeds from encroaching on the exposed area. We considered a number of options to eliminate grass including initial removal and continuing weeding, herbicides, tilling, weed cloth, cardboard and newspapers.
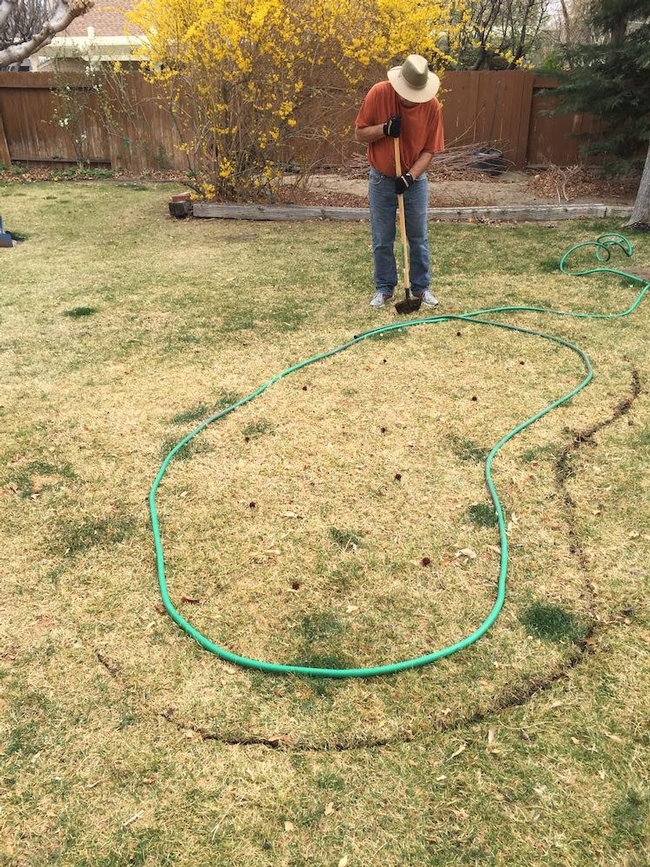 3/17/15: Cutting grass around hose used to mark test area. |
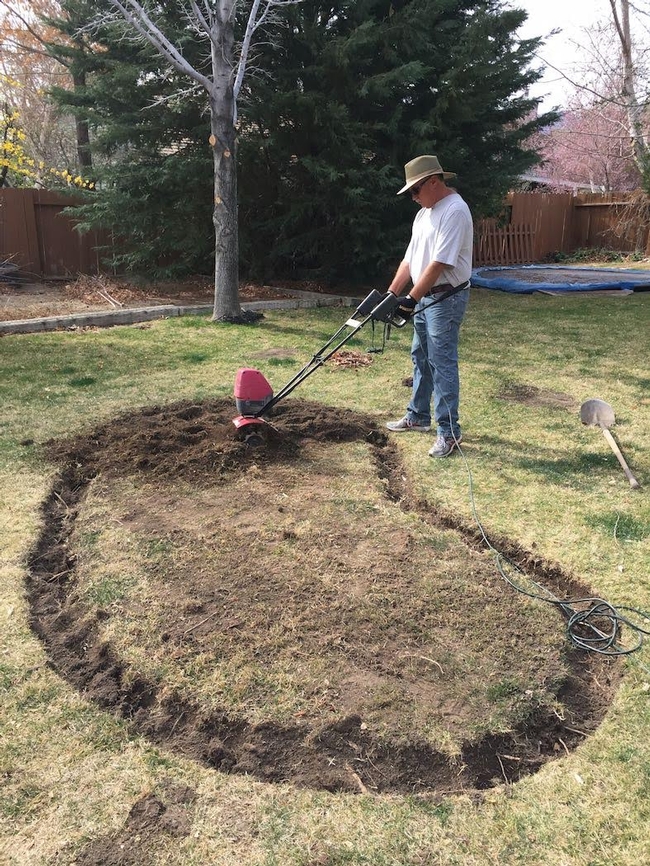 3/18/15: Tilling area prior to applying newspaper. Note dug out perimeter. |
|
Each of those options brings with it its own advantages and disadvantages which had to be weighed. Continuing weeding to (hopefully) keep grass at bay would be a pain in the neck—and back—and we saw little upside in this option. Herbicides would probably get rid of the grass, but would probably require several applications. Most importantly to me, they are not good for the environment and any future planting we wanted to do, including vegetables. Tilling can harm the natural soil texture, spread seeds and chop up grass into small pieces that can grow. Weed cloth would probably work but it's expensive. Cardboard would probably work too but it's difficult to work with. Old newspapers reportedly work well and they are readily available from the local newspaper office for nothing, and using them carries the added benefit of recycling.
First we needed to select a location where the lawn would be removed. Because we have so many trees in the backyard that shade a lot of area, we selected a location in the middle of the yard that gets as much sun as possible. We wanted to have a sunny location where vegetables and flowers would grow well.
We began the test in mid-March 2015 hoping to get the new area ready to plant before summer. I started by outlining a spot on the lawn using a hose and then proceeding to remove the grass. First I used a cutter to make a nice edge along the hose. I then dug out the edge of the grass inside the cut to a full shovel depth, about six inches. This has the added benefit of minimizing the infiltration of adjacent grass as it cannot easily cross the open space. Next I tilled the grass in the rest of the area, and raked and pulled as much leftover grass as I could.
In mid-April we took on the task of getting water to the new planting area. We decided to tap into an existing drip irrigation line that's on a timer and about 25 feet away. I used the cutter to make a line in the grass then dug down and peeled back the grass leaving it attached at one edge to facilitate putting it back once I'd made the water connection. I then dug a trench about 12 inches deep. It was a bit tricky cementing the new connection to the existing pipe which was about two feet deep. Once I had made the connection I ran pipe in the ditch and covered it with the dirt I'd removed and the grass I'd peeled back. Finally Lori connected a drip irrigation system to the new pipe and put heads where we were going to plant.
Then we got to plant! We waited until early May hoping to avoid freezing (it's all a matter of risk tolerance). Lori planted squash seeds, peppers, cucumbers, a gerbera daisy, marigolds and one dahlia tuber we had left over after planting 39 in our existing garden. We've had problems in the past with bugs eating our young plants so we put a fence around the area to keep the dogs out and then Lori sprinkled a bit of snail/earwig bait to give them a chance to grow strong and better survive a pest onslaught.
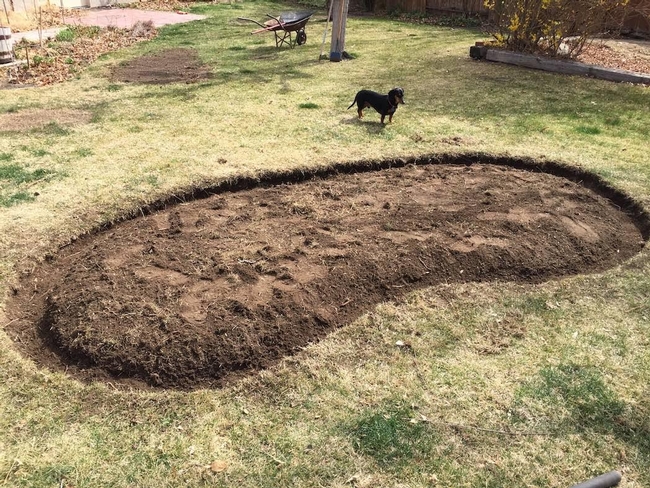 3/18/15: Test area with grass tilled, raked and removed, ready for newspapers |
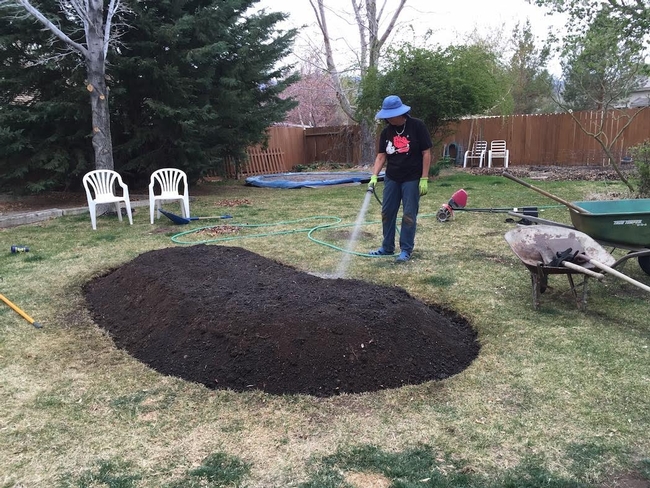 3/18/15: Ready to plant! Just waiting install the drip supply line and warmer weather. |
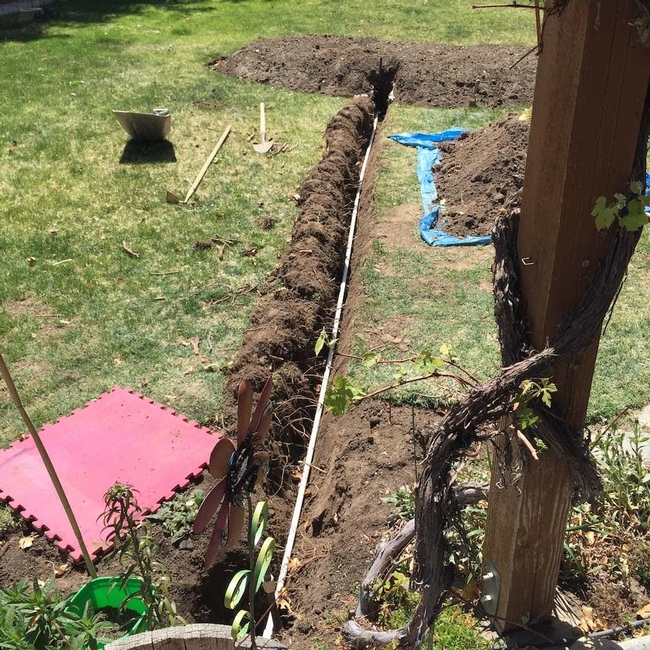 4/14/15: Trench dug and drip supply pipe installed and ready to backfill. Note the grass laid over to the left, making it easier to put it back where it came from. |
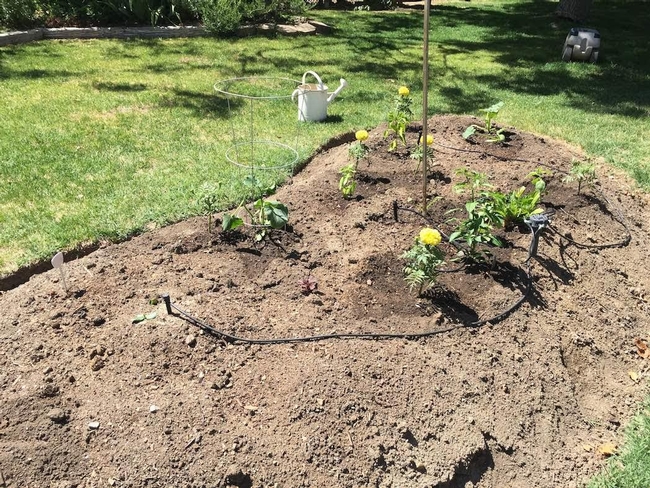 5/10/15: A few days after planting. No grass or weeds have come up. |
It's now June. Everything we planted is doing quite well. On May 26 Lori did some minor cleaning and mulching of the area and found minimal grass and weed infiltration. Since we created the new planting area very little grass has come up, and any that has mostly came from the surrounding grass, not through the newspaper. So, at this point I would call the test a success. I will update this report as the summer and fall growing seasons progress and we have a better handle on how successful the test has been. But, so far so good! If it continues to work this well we may remove more grass in the future using the same method.
I'll keep you posted.
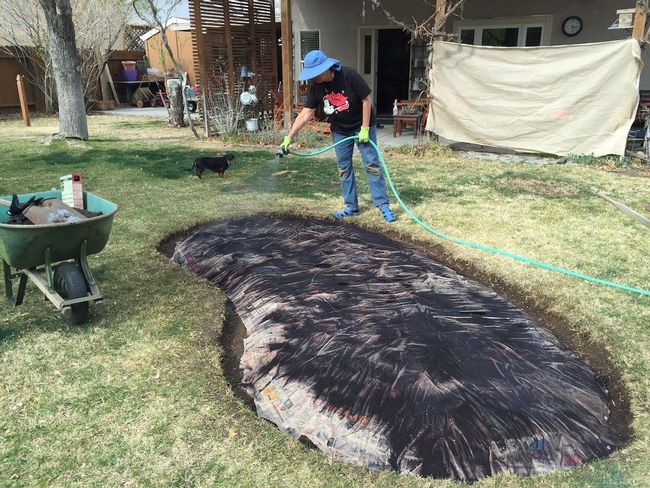 3/18/15: Lori wetting the blood meal spread on the newspapers. |
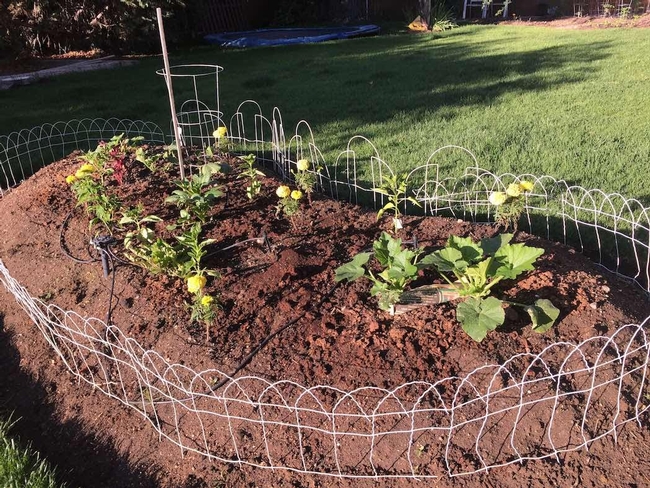 5/29/15: Looking good this morning! |


