- Author: Bobbie Stryffeler
Buyer Beware – Is that an Invasive Plant?
Have you ever wondered how many of your garden nursery purchases are potentially invasive? Not ever? Well me too - that is until I took a closer look at invasive species. Amazingly, in the United States 85% of the intentional introductions of non-native plants have been for landscape use and it's from these non-natives that we find our invasive plants. It's also astounding to consider that commercial nurseries propagate some of these invasive species as ornamentals.
California is home to 4,200 native plant species and recognized worldwide as a “biodiverse hot spot.” There are approximately 1,800 non-native plants growing wild in California with 200 of these considered invasive.
The problem is that people don't know they are buying invasive plants. The home gardener's first motive is that they are buying for aesthetic value and there is little information available indicating whether the plants are invasive. Buyer beware!
Here are a few to watch out for:
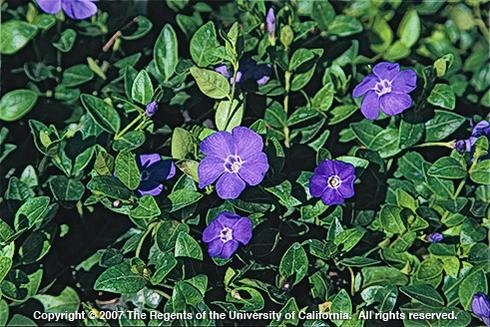
Invasive - Periwinkle (Vinca major) a tough competitor with an aggressive rooting system off each node on its sprawling stems.
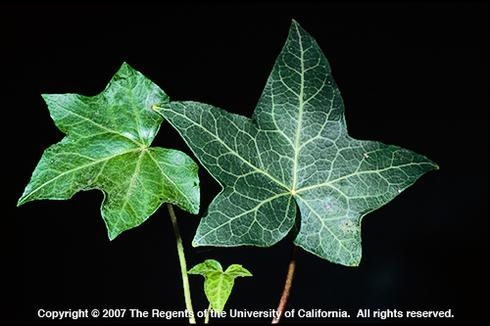
Invasive – English ivy (Hedera helix) is a vigorous, fast-growing vine.
Plant instead Star jasmine (Trachelspermum jasminoides) or Cranesbill geranium (Geranium sp.). (Ed. Note: Star jasmine is not reliable hardy north of Independence. Asiatic jasmine (T. asiaticum) should be fine up to Bishop in all but the worst years. They look very similar.)
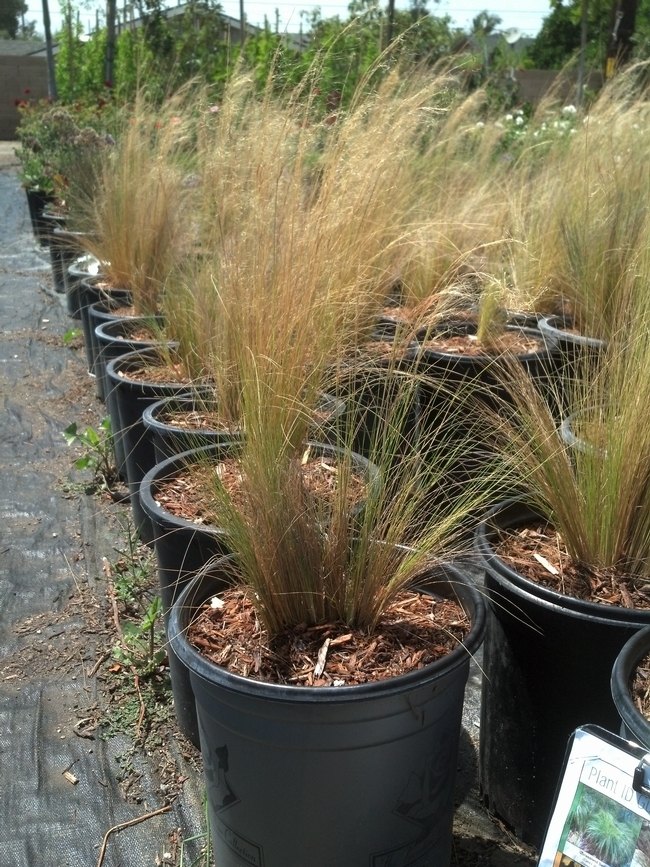
Plant instead Needle and thread grass (Hesperostipa comata) or Great Basin wildrye (Leymus cinereus)
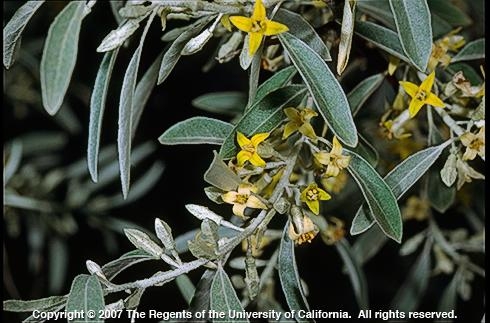
Invasive – Russian olive (Elaeagnus angustifolia) is known as an ornamental shrub with silvery-grey leaves that can grow into a 20-foot or more tree. It out competes with native vegetation and birds easily spread the seed as it provides desirable forage.
Plant instead Desert willow (Chilopsis linearis).
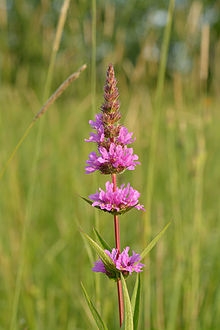
Invasive – Purple loosestrife (Lythrum salicaria) – lovely purple blooms that one mature adult plant can produce one to two million seeds each year.
Plant instead Penstemon firecracker (Penstemon eatonii) or Perry's beardtongue penstemon (Penstemon paryii)
To sum this up, do the research and don't buy invasive plants. The benefits are huge. Buying non‑invasive plants protects not only your home landscapes but also your local area's native plants and wildlife. You become part of the solution versus the problem.
You can also help rescue Inyo/Mono counties open space by assisting the local California Native Plant Society, the Eastern Sierra Land Trust, and Friends of the Inyo to manage or eradicate invasive species in our region. By doing this you will help sustain local open spaces or maintain the health of our waterways.
- Author: Dustin Blakey
A recent project that I've been working on has made me aware that there is some confusion about how to use hardiness zones.
First, let's talk a bit about what hardiness zones are. Each plant has inherent resistance to a minimum cold temperature in mid-winter. This, more than almost any other factor, determines which plants can grow in a given climate. For example, lemons are not hardy in the Owens Valley. Nor is papaya. The cold weather kills the plants. Can't grow them here. Period.
To get an idea of how cold each locale gets, we use a system of dividing the USA into a series of zones delineated, at 10 °F intervals, by the average minimum annual low temperature for a 30-year period. This map is derived from weather data and is available here. (And elsewhere.) If you're in Zone 7, the average minimum temperature in a year will be 0 °F. Zone 6 is -10°. Most of California is fairly mild due to coastal influences, but we're quite a bit colder so hardiness is important in the Eastern Sierra.
Because of the important role of hardiness in plant selection, it is the primary criterion for plant for most of the USA and Canada. Since we have lots of data on hardiness both in terms of understanding plant species AND the local climate we often find nurseries and catalogues group plants by their recommended zones. Here's an example: One of the nation's largest nurseries, Monrovia, has a plant selection tool for their product line. On the top row of options to filter the catalogue is "USDA Cold Hardiness." There are dozens of similar resources online for woody plants and perennials that you can find on Google.
Looking at my data, the thing that seems to confuse gardeners most is how to put to use the hardiness descriptions for plants. Most catalogues and reference materials will say something like "USDA Zones 4–8." And that's where the confusion creeps in.
I found this plant description I quickly found on the Internet as an example of what's usually encountered:
Marjoram (Origanum vulgare) Zones 4-8
Culinary and medicinal herb
Marjoram is sometimes used to treat minor ailments like cough and sore throat. It's also used in regional Italian and Greek cuisine. Marjoram is related to oregano.
This means the plant is grown successfully in USDA hardiness zones 4 through 8. Whether you grow it in Zone 4 or Zone 8, it is still a plant hardy in mid-winter to -30 degrees F. The reason there is a range is to guide our plant selection. This plant doesn't just grow in Zone 4. It also grows well in Zone 5, 6, 7 and 8! If plants only grew in one zone, then Lone Pine would have entirely different plants than Bishop. But that's not what we see. Why not 9 and above? Well, maybe it is typically too hot overall there in those warmer zones. There's no telling why, exactly, from this. It's a guide of where the plant is commonly grown.
So when you see a plant description that says "Zones 5 to 8" that means it's hardy to Zone 5 conditions (-20°) but it can be grown in Zones 5, 6, 7, and 8. It doesn't mean there is an average hardiness of Zone 6.5 or that we're not sure but it's somewhere between the two extremes.
Generally the safest bet is to chose plant materials that are suitable for both a colder and warmer zone than your location when a span is listed. So If you live in Zone 6, a plant hardy in Zones 4 — 9 is probably a safe bet in terms of cold and heat tolerance.* If a plant just said "Zone 4" and you planted it in Zone 6 it would still be hardy.
In most of California, resources like the Sunset zones are more useful, but here in the mountains Sunset zones can be overly conservative and we have great differences due to elevation in our two counties.
Instead of Zones it would be more useful to have a statement of "Hardy to -10°F" in plant descriptions, but historically we've used this system because it's easy to convey which plants work, and most states have a more homogeneous climate than California.
Now you should be well armed to choose plants for your landscape.
_____________
*If you really like the idea of climate zones, there is also a Heat Zone Map for you to consider as well.
- Author: Dustin Blakey
In case you hadn't noticed, our region is a bit different than most of California. For one thing we have this thing called "winter" to deal with. Although we may not get as much precipitation as we would like during the winter, we still have to deal with the effects of prolonged exposure to cold. In this way we are more like Missouri than California.
Recently I was asked about overwintering dahlias and gladiolus from the community garden. These are 2 plants that should not be left in the ground through the winter. In the case of gladiolus, in some winters many cultivars will survive but why risk losing your corms? (Corms are what gladiolus "bulbs" are really called.)
I was going to write a detailed post on overwintering glads and dahlias, but since I'm lazy, I checked to see if there wasn't something out there already written that would work. Fortunately Purdue's Cooperative Extension has a good fact sheet on keeping begonias, dahlias, geraniums, cannas and gladiolus through the winter.
Rather than reinvent the wheel, I'll just point you to this good resource. ⇒ https://www.hort.purdue.edu/ext/HO-085.pdf It mentions fungicides in the fact sheet. If you're in California, you should ignore those parts.
- Author: Lori Plakos
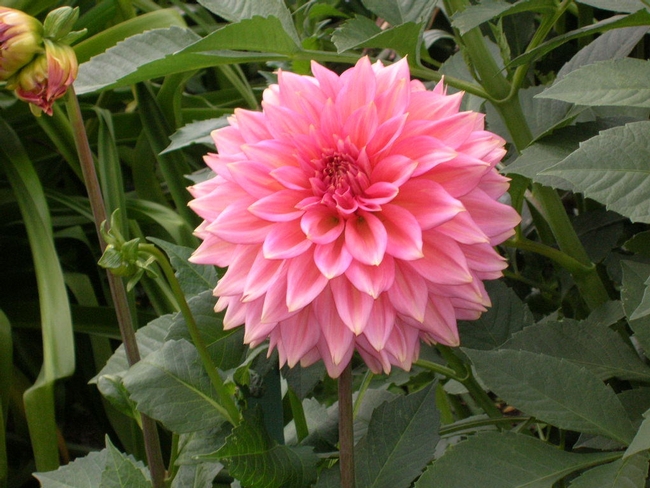
During one August vacation my husband and youngest son happened upon the Swan Island Dahlia farm in Canby, Oregon (dahlias.com). “WOW!!” I was hooked.
I have now been growing dahlias for many years. There have been more successes some years that others, and I share my experiences below. Dahlias can be temperamental, so be patient until you find what works for you.
Location: Dahlias like warm sun, not hot shade and they don't tolerate frost. They are best located in a situation that gets morning sun, but is protected some from the hot afternoon rays. Since they bloom late in the summer, the sooner you can get them started the better. They will wait for the soil to warm up before starting growth which can be hastened by planting in raised beds that warm quickly.
Preparation: Dahlias like acid soil so I add 1 cup of sulfur per 100 square feet when preparing the ground. My dahlias performed best on the southwest side of the house in raised beds with good drainage.
Planting: The tender tubers need to be planted well down in a 10-12 inch deep hole. Incorporate 2 tablespoons of bone meal into the bottom of the hole. Place the tuber on its side and drive in a sturdy stake next to it. By placing the stake now it serves as a marker, and also avoids the risk of damaging the roots or growing shoots which can happen once the hole is filled. I used 5ft 1inch redwood stake for my larger varieties. Cover the tuber initially with 4” of soil. Watch for sprouting and gradually fill in the hole as the plant grows.
Timing: Because you plant your tuber underground, and you build soil around the new growth as it comes up, you can start your dahlias early. Spring planting is always a gamble in the high Desert. We have recorded frosts as late as June 8th. Getting a head start in the spring gives you more rewards from your plants. Be prepared to protect your dahlias from a sudden frost - Walls of water, frost cloths, etc.
I started my tubers on April 5, 2014 and had my fist flower on June 1st. Choose an early blooming variety if possible. I have had late varieties that never bloomed before the first frost in the fall! If your plant does get hit with a frost, it won't kill it, but it will have to start over.
You can also start your tubers indoors. When I tried this last year, I had more success with the tubers started outdoors. Although I can see where this might be a good option during a big winter and cold spring (If we ever get one of those again.)
Water: Dahlias love water but usually the tubers don't need water until they sprout. In our climate (high desert) a light watering is often necessary until the plants emerge. When established you will want to give your plants a through deep watering about three times a week. I recommend a system that can deliver water to each individual plant so you don't waste the precious resource. Hand watering is not recommended because you won't get the necessary deep soaking needed. I have mine on a drip system which runs three times a week with a 1GPH emitter for 20 minutes. I supplemented that with a hose bubbler and flooded the beds every other week.
Fertilizer: Use a fertilizer with a lot of Phosphorus for the blooms (this is the middle number of an NPK fertilizer.) A good choice is the same one you would use for your tomato plants. Follow the package directions. Fertilize after the first 3 weeks and then once a month until September. Stop fertilizing in September to promote a healthier tuber for winterizing.
Pests: Slugs and snails love dahlias, especially little tender baby ones. Once you've filled in your planting hole, apply snail control around the top of your hole before the plant emerges to discourage them. Continue to apply throughout the season if the snails persist.
Later in the season as things warm up, watch for mites. If the lower leaves of your plant dry out and look like they need water, but you've been watering, you may have mites. Rinse the lower part of your plant to discourage mites. If you catch it early you may be able to wash them off, and remove the affected leaves. Mites won't kill the plant right away and you'll still get flowers on top. Normal fall frost is the first of October, so take all that into account before you resort to chemicals. Pesticides kill. Nature needs all of its checks and balances. For integrated pest management see http://www.ipm.ucdavis.edu/PMG/GARDEN/FLOWERS/dahlia.html .
Pruning: This is the hardest part. As the stem emerges from the ground, the main stalk develops two branches on either side. After three of these branching pairs form on the stalk you have to pinch out the center. This encourages lower branching of the plant and will give you a stronger plant and more blooms on top!
Staking: Staking is a must. Dahlias have hollow stems which often have to support very large (totally awesome) flowers that fall over easily, especially in our windy conditions.
Using the stake you placed at planting, every once in a while check and wrap a piece of garden twine around the entire plant with the stake in the middle, it will hold the plant up (unless you guessed wrong and your plant got too big, just add a second taller stake on the other side.) You don't need to tie up each individual stalk.
Harvest: Sometimes this is a hard part - you might think that if you cut the flowers the plants will finish sooner, but the more you cut the more you get. One Fall I had several blooms on a couple of plants and thought we might get a frost so I cut them all off thinking that they were going to die anyway. Turns out we had a late frost that year and I was loaded with blooms after that! So now I feel guilty if I let a bloom expire on a plant without anyone enjoying it.
Cut your flowers in the cool of the morning, or evening before they are at the end of the bloom cycle. Not all dahlias are suitable for cutting, but I choose varieties that have long stems so I don't have to cut off the immature blooms in the same bunch. Have a pail of water handy to put them in as you harvest.
In the late summer, if your plants have a lot of buds, but don't seem to be blooming, they need more water.
Set the Bloom: Some growers feel setting the bloom extends the life of the cut flowers. One way to set the blooms is to get several small containers of plastic, or metal (not glass, it holds heat.) Put 2-4 inches of hot (160-180 degrees F) in the bottom of the container. I use an electric hot water pot. I've also used the microwave, but don't use the container you use in the microwave to put your blooms in; it will be too hot since it is usually glass. Put the blooms in the cool containers with the couple inches of hot water with plenty of room for the steam to escape without affecting your flowers. Let the water cool for an hour or so, then transfer them to your vase.
Floral preservative will further extend the life of your cut flowers, although I just give my arrangements fresh water every day. The internet has many homemade preservative recipes, or you can buy commercial preservative.
A simple homemade preservative:
- 1gallon water
- 2 Tablespoons Sugar
- 2 Tablespoons Vinegar
- 1/2 Teaspoon Bleach
This is a good recipe to have, although I just give my arrangements fresh water every day. I'd like to do an experiment testing preservative vs daily fresh water or a combination to see what works best. But keeping it simple works best for me.
A subsequent article will cover lifting and storing the tubers at the end of the season.


