- (Public Value) UCANR: Safeguarding abundant and healthy food for all Californians
- Author: Alison Collin
This year I was determined to create the “model garden” that I have long dreamed about, but those dreams of neat, weed-free rows of vegetables, trees hanging with fruit, and armfuls of flowers are far from being fulfilled. In fact, I have had a garden of pestilence and disease on a scale that I have never faced before.
In accordance with modern ideas of “gardening with nature” last fall, I spread compost and rotted manure in liberal quantities. I left leaves on the ground in order to afford some protection to plants and beneficial insects in our high desert location. This resulted in my seeing the first grasshopper – a whopper – on January 26, followed shortly after that, by clouds of leaf-hoppers erupting from some mulch that I had put over my strawberry plants and blackberry roots. It was not apparent that the beneficial insects gained the same advantage.
Carefully nurtured spring transplants, often consisting of rare or unusual species were rapidly chewed to stubs before I had managed to get any protection set up. As the weather warmed a large crop of fence lizards appeared, and it gave me immense satisfaction to see grasshopper legs protruding from their mouths. Nothing seemed to eat the leaf-hoppers and spraying with horticultural oil failed to reduce their numbers.
The blossom on the fruit trees was a joy to behold until early May when a frost damaged the flowers and destroyed the early fruit set, so no plums, peaches, or cherries this year, and only a few pears. Potato shoots were frosted and a tomato which was covered with two layers of insulating cloth was cut to the ground.
I thought how pretty the gray foliage of the California poppies looked in the pollinator garden before I realized that they were suffering from a hefty dose of powdery mildew which also severely affected all the larkspur and older roses, although the modern hybrids were largely resistant. This problem, which likes dry conditions affected only one side of the house, while the better irrigated areas of fruit trees and vegetables showed no signs of it.
By early June it became evident that our irrigation system had problems. With drip irrigation, much of it is out of sight, and it is not always apparent when things go wrong. I lifted the lid of the irrigation vault and found it full of water and a mass of fibrous roots from the nearby grape vine which was growing vigorously. This led to a redo of the vault and installation of new valves. The grape immediately took umbrage at the disturbance, and the loss of roots and water and went into a state of shock; the leaves already much damaged by leaf hoppers crisped and the few bunches of grapes stopped swelling. Within a couple of weeks the vault had been invaded by a ground squirrel which had managed to follow a pipe into the vault and thrown soil all over the valves.
Through all this my usually trusty potatoes stopped growing and the foliage turned yellow and looked awful. I left them for a month to see if they would improve then began to dig them up. Each plant had a cluster of small potatoes with many enlarged lenticels - indicative of too much water. There were a lot of symphylans present so I suspect that they had damaged the roots or tubers somehow. The carrot patch had also received too much water so that the well grown ones have split from crown to root tip.
Low growing fruits – strawberries, figs, raspberries and blackberries began to disappear into the gut of the ground squirrel and various birds but netting the awkward shapes of all these plants was challenging and did not solve the problem. Next, a rat discovered the joy of eating grapes and most of the remaining bunches became bare stalks – a reminder of what could have been.
The annual thrips infestation of onions began early and I only managed partial control with insecticidal soap sprays. Luckily the onions don't look too bad. Rhubarb leaves were skeletonized by European earwigs, which also took a shine to the foliage of a precious new dahlia plant.
I tried to grow fillet French beans for the first time, but they very quickly became infected with a virus, some almost as soon as they got their first true leaves. Yesterday I noticed that my best Japanese eggplant is laced with holes from flea beetles and there are now large yellow patches on the newer leaves, possibly caused by some disease.
Ants have dominated every corner of the garden and one variety has taken to building mounds of organic matter over the crowns of the strawberry plants. The zucchini was taken over by one species of large ant. They were particularly drawn to the flowers, and although they prevented the squash bees from getting close, the ant must have pollinated the flowers since we had an excellent crop, and only one squash bug all summer! However, they have now started to farm aphids on this plant and also the nearby cucumbers which became so badly affected by sooty mold that I had to dispose of them. As it happens that is not such a loss since many of the cucumbers have been extremely bitter – a problem that I have never had before.
In the fourteen years that I have gardened in Bishop I have had very few serious pests or diseases, of any sort, apart from the ever present Bermudagrass, spotted spurge, and purslane which seem minor compared to the problems that this year has brought.
On the brighter side: My tomatoes have done well and stayed disease free so far, the pear tree seems to no longer be infected with blister mites or fireblight, there were few aphids on the peach trees and cherry and all the fruit trees have put a lot of energy into growth rather than fruiting, so I have had a restful summer, well away from the preserving pan, although now I have to get the pole pruner out!
You never know what's in store for one's garden. I hope that I will achieve my “model garden” next year...
- Author: Alison Collin
Do you agonize over whether a particular fruit is ready to pick?
With the harvest season upon us, it pays to learn which fruits will ripen once picked, and which will not ripen beyond the stage that they had reached when harvested.
Knowing which produce will further ripen will go a long way to preventing the spoilage and wastage of food crops.
Ripening Fruits
Fruits (including those often termed "vegetables" like tomatoes) that continue to ripen are called climacteric. If mature at harvest and kept in ideal conditions, the respiration rate and production of ethylene, a plant hormone, increase leading to pigment and sugar development until the peak of ripeness is reached. After this point the respiration rate drops and the fruit begins to degrade. Maturity is a term describing the point at which a fruit has completed its natural growth and development. This is followed by ripening.
Once mature, climacteric fruits can be encouraged to ripen after harvest if placed in a paper (or other breathable) bag with another riper climacteric fruit such as a banana that releases high levels of ethylene. Ripe apples that do not have a wax coating can also be used for this purpose. Check regularly to make sure that there is no rot, and after a few days the fruit will have ripened.
Occasionally ripening will not occur, most likely because the fruit had not been allowed to develop sufficiently before harvest and was just too immature or the fruit was improperly stored at too cold a temperature.
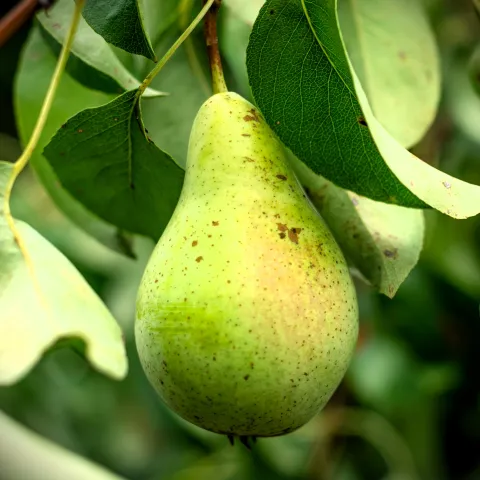
Climacteric fruits which we may be growing locally include apples, apricots, honeydew melons, nectarines, peaches, plums, pears, persimmons, tomatoes, winter squash. Cantaloupe flesh may soften, but they will not become sweeter.
Non-Ripening Fruits
Non-climacteric fruits do not ripen after harvest, but many often store better after harvest than the climacteric fruits since they are not so actively respiring. These fruits need to be left on the plant to mature and ripen. For example a green bell pepper will not turn red after it is picked.
Non-climacteric fruits include: Bell pepper, berries, figs, grapes, cucumber, eggplant, muskmelon, strawberry, summer squash, watermelon, and most of the common citrus – oranges, lemons, grapefruit and limes.
We will soon be approaching frost season with the attendant rush to harvest our tender vegetables and fruits before they get ruined by one cold night. It pays to know which fruits can picked and left to ripen, and which need to be processed into pickles and jams in order to preserve them for later use. The following links contain information about the storage and slow ripening of popular fruits.
For More Information
Because fruit are such an important item of commerce, there has been extensive research on their post-harvest care. To get a sense of what's known about many common crops, one can peruse UC's Postharvest Research Center. There is a lot there to digest!
Here are some tips for ripening tomatoes indoors.
How to harvest and store winter squash.
Harvesting and storing apples or pears.
Of course, you can also contact your local UC Master Gardeners for more information. The Inyo-Mono Master Gardeners can be reached at immg@ucanr.edu or on Facebook.
/h3>/h3>/h3>- Author: Vivian Patterson
I have a small growing area at the side of my house in Bishop that gets lots of heat and very little sun. I started planting onions in this area about 10 years ago but found that the bulbs never got more than 1-2” in diameter. Now I intentionally plant onions there every January that I freeze whole.
Here is my process.
After the onions have been picked, dried, & cleaned up, separate into groups according to size.
Peel onions keeping sizes separated.
Blanch Onions for 3 minutes. (Here is how to do this.)
Drain and Prepare to Individually Freeze, Freeze until frozen solid. Overnight is good.
When frozen, remove from freezer. Label Bags. Put desired portions into bags.
Seal all bags. Remove air before sealing.
Notes about Frozen Onions:
- Frozen Onions should only be used for cooking. They are no longer used raw.
- Very small frozen onions may be used in recipes calling for frozen pearl onions.
Uses for Frozen Onions:
- Stews*
- Roast Meats*
- Boeuf Bourguignon*
- Coq au Vin*
- Braised as a side dish (https://www.food.com/recipe/braised-onions-a-la-julia-child-148656)
- Sauteed as a side dish
- Soups
*Braise your onions first. See braised Onion recipe link. Always thaw your onions before braising.
Editor's Note: The Master Food Preservers have a demonstration plot at the Bishop Community Garden. They use the produce from that garden to share safe food preservation practices. As many readers of this blog may have onions ready in your garden, this may be of interest to you. If you have questions about home food preservation, please send your questions to the helpline: immg@ucanr.edu. To learn more about raising onions in the Eastern Sierra this this fact sheet: https://ucanr.edu/sites/
- Author: Carolyn Lynch
Tomatillos (Physalis ixocarpa) are so easy to grow, they are almost weeds. Since I first grew them long ago, they have returned to my garden every year, reseeding with gusto and growing like… weeds. They have been productive and trouble free for me, until last year.
Late last summer, when fruit was forming but hadn't ripened, I noticed holes in the leaves, lots of them. On inspection, I found numerous small larvae all over the plants. They looked like tiny slugs with little piles of brownish stuff on their backs that looked kind of like poop. As I searched among the plants, I brushed against their leaves, and on leaving the garden I noticed that my hands and clothing were covered with a brown substance that looked and felt just like poop.
I couldn't find anything about this beetle on the UC IPM website or in any UC ANR publications, but there was information on agricultural extension websites from Maine, New Hampshire and Minnesota. Closer to home, I found a good info sheet from Utah State University. This pest may be a relative newcomer to our state. In any case, it has made itself at home in my garden.
I learned that these beetles may overwinter either as larvae or as adults. Although they did not appear until late last season, they seem to have spent last winter in or near my garden and thus were able to get a much earlier start this year.
Some of the sources I consulted dismissed the potential for crop damage as minor, but that has not been my experience. Last year's plants were largely defoliated and I didn't get much of a crop. If you notice that something is chewing on your tomatillos' leaves, it is time to take immediate action.
If you see the larvae, adults, or eggs, you can try hand picking them; sources recommend dropping them into a container of soapy water. If you try this with the larvae, you may want another container of soapy water for your hands. This is truly the most disgusting pest I have ever encountered. They are less smelly than squash bugs, but the ick factor is real. Since the infestation in my garden was too extensive for me to hand pick individuals, I tried washing them into a bucket with the hose, which didn't work as well but did keep everything cleaner.
If you suspect that these beetles have arrived in your neighborhood, a proactive approach will be more effective. Solanaceous weeds, especially Physalis species (ground-cherries), act as alternate hosts and should be removed (by the same token, cultivated ground-cherries should be protected). Although I didn't see it mentioned, Datura, either wild or cultivated, would presumably be another target. Floating row covers placed early in the season can exclude the overwintering generation from your tomatillos.
Pesticides are not recommended except where there's the potential for real economic damage, an unlikely scenario in a home garden. Despite their name, three-lined potato beetles are reportedly not very interested in potatoes, or tomatoes, peppers, eggplants or almost any other solanaceous vegetables except tomatillos.
I have been gardening in the Eastern Sierra for more than forty years, and this beetle is new to me. Based on the paucity of information I've been able to find, I'm guessing it may be new to this part of the country. I hope my story will help other gardeners prepare for their arrival in their own gardens, and to recognize and manage them when they get there.
Here's a link to the fact sheet from Utah State University, with more information and pictures:
https://extension.usu.edu/pests/research/three-lined-potato-beetle
- Author: Alison Collin
Everbearing, or daylight neutral, bare-root strawberries become available for planting at this time of year. Successful growing is dependent on careful soil preparation.
They need a sunny position in slightly acidic, well-drained soil with a lot of organic matter, and regular irrigation. If you cannot provide these it is best to grow them in containers.
Dig the soil some weeks before planting and be meticulous in removing any perennial weeds such as Bermudagrass, dandelions or bindweed since once planted the strawberries will produce undisturbed for about 3 years. Incorporate plenty of compost, leaf mold, or organic soil amendments.
Because it has been such a dry winter this year, I ran the drip irrigation a few times prior to planting. This has the advantage of settling the dug soil, enabling me to spot any clogged emitters and also to see the pattern and extent of moist soil around each emitter.
This year I planted 'Seascape' in a slightly raised bed (the result of adding compost). The plants were just breaking dormancy, and each had a mass of roots about 8” long. I put the roots in a bucket of water while I dug the planting holes. I then dug a v-shaped hole beside each emitter deep enough to easily accommodate the roots and wide enough to take the roots well fanned out along the dripper line so that they could take advantage of any moist soil. I added a teaspoon of slow-release organic fertilizer to the bottom of each hole and mixed it in well with the soil there.
The soil that I dug out of each hole was teaming with minute baby worms, and I worked quickly so as to return them as quickly as possible before they dried out.
When planting, I placed the roots in the hole, fanned out as described, and gently backfilled, making sure that the crown of each plant (where the roots and top growth meet) was level with the surrounding soil. This is really important because if it is below soil level it will rot, and if planted too high the roots dry out.
I also made sure that the crown was clear of the irrigation tubing by about 1.5” since that can get extremely hot in the sun and would burn the crown if it came in contact with it.
Holding the base of the crown in the correct position and at the correct level I watered the soil around the plant to settle the soil around the roots, topping up any low spots.
I then mulched around each plant with a generous amount of sawdust/wood shavings which, although of little nutritional value, will retain moisture and keep the soil at a more even temperature.
For further reading on how to grow Strawberries in California: https://cagardenweb.ucanr.edu/Berries/Strawberries/