- Author: Samantha Dowdall
- Editor: Noni Todd
Foxtail Agave
By Samantha Dowdall UCCE Master Gardener
Common name: Foxtail Agave
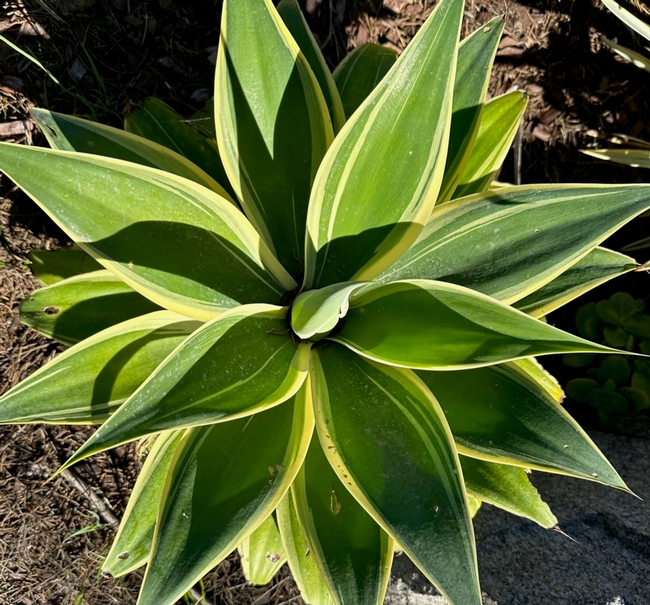
Scientific name: Agave attenuata variegata ‘Ray of Light'
Planting areas: USDA zones 9b to 11
Bloom season: All of the nearly 300 species of agave are monocarpic, meaning they will bloom only once after many years, then die. The mother plant will leave behind offsets (“pups”) that are easily grown into beautiful new plants. This particular agave is commonly called ‘foxtail' because the tall flower spike curves such a way that resembles the tail of a fox.
Exposure: Full to part sun. This agave can become scorched in very hot weather, so some dappled light will keep your plant happiest. It is sensitive to the colder microclimates along our central coastal region. Covering your plant with frost cloth or soft sheeting at night during frosts conditions will provide good protection. It will grow quite happily in pots as well, either in a protected area outdoors or inside to wait out the storm.
Pruning needs: Damaged leaves can be removed to maintain a tidy appearance.
Water needs: Water young plants every 4-5 days to get the roots established. Mature agaves only need to be watered 2-3 times a month in the summer, unless you live in a dry, hot area.
Snapshot: Agaves are native to the arid and semiarid regions of the Americas, especially Mexico, and parts of the Caribbean. While most species have sharp, pointed tips, this agave distinguishes itself from its cousins by having tips that are soft and harmless, making it a living sculpture of beautifully shaped leaves of bright green, with light yellow or white stripes.
With plenty of room, this specimen can grow 4-6 feet tall, 6-8 feet wide. Left to its own devices, pups growing along the edges will mature and turn your plant into a very large display. Pups can be easily propagated by cutting the stems just long enough to put into well-draining soil to spread about your landscape or to give as gifts to lucky recipients. Grown in pots, agaves grow much smaller, making them ideal for spreading light and beauty around a patio.
Advice to Grow By Workshops
Our next San Luis Obispo Advice to Grow By Workshop will be January 21st, 2024. The subject will be “Fruit trees-How Winter Care Can Aid Warm Weather Success”. More information to follow.
You can view workshops on Instagram live at slo mg or visit our You Tube channel at “San Luis Obispo County UC Master Gardeners.”
Visit our website at ucanr.edu/sites/mgslo/ or email questions to anrmgslo@ucanr.edu.
UCCE Master Gardener Helpline offices:
San Luis Obispo: 805-781-5939 (Monday and Thursday 1:00 to 5:00)
Arroyo Grande: 805-473-7190 (Wednesday 10:00 to 12:00)
Templeton: 805-434-4105 (Wednesday 9:00 to 12:00)
- Author: Jutta Thoerner
- Editor: Noni Todd
Hollyhock
By Jutta Thoerner UCCE Master Gardener
Scientific name: Alcea species
Plant size: 3-8 feet tall, 1-3 feet wide.
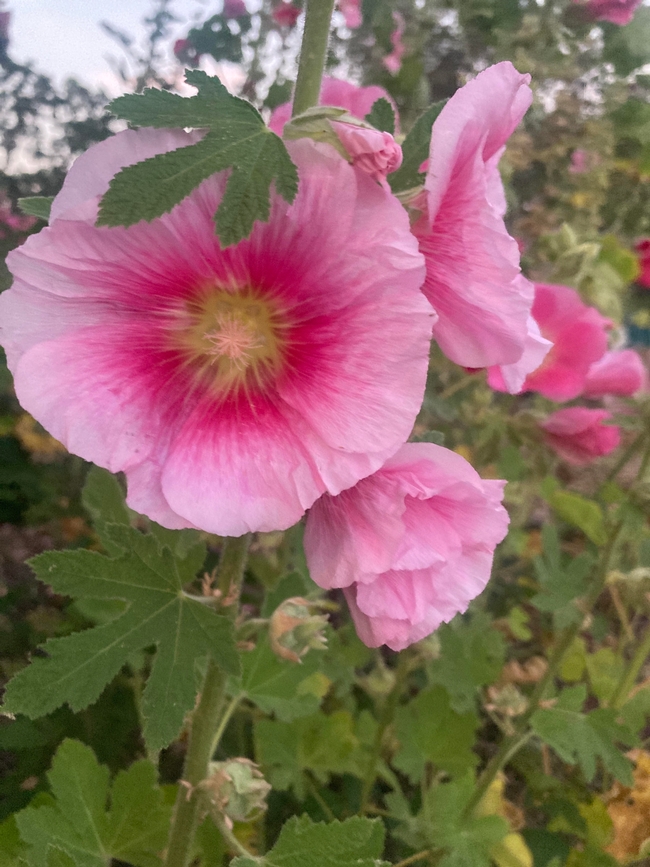
Bloom description and season: Flowers are single or double, cup shaped and start at the bottom of the stalk and continue all the way up. Colors are blue, orange, pink, purple, red, white, yellow and black. Bloom time is May-August.
Pruning needs: none
Exposure: partial shade to full sun
Water needs: none
Hollyhocks never seem to go out of style. Seeing these towering plants in full bloom can evoke nostalgic memories of a grandparents' cottage garden. A defining feature is their size, easily reaching 6-8 feet with the entire stalk lined with stunning flowers that attract bumble bees and hummingbirds. Most hollyhocks are biannual, meaning they bloom during their second year. However, Crème de Cassis is a variety that will bloom its first year.
Hollyhocks require no water, even in the heat of the summer. They'll accept acidic, neutral or alkaline soil that is clay, silty or sandy. And like most plants, hollyhocks do prefer well drained soil. Strong winds can bend these tall flowering stalks, therefore, planting by a fence or in front of a wall is recommended.
Hollyhocks are easily grown by seed. When the flowers are spent, each flower turns into a large seed pod. Allow the seed pod to mature on the plant until the husk is dried, and they can be easily picked off. Simply drop the seeds on the ground in the location where you want hollyhocks to grow and bloom next year. No need to cover the seeds with soil or water. These self-sufficient seeds need no additional assistance. Damp or foggy climates can lead to rust on hollyhock leaves. Picking off the infected leaves and disposing of them is sufficient for managing this issue.
I can't think of a single reason not to add hollyhocks to your garden for next year! If you have extra seeds, consider adding hollyhock seeds to your gift giving list so your friends and family can enjoy the plant that draws your eye to the sky!
Advice to Grow By Workshops
Our next San Luis Obispo Advice to Grow By Workshop will be January 21st, 2024. The subject will be “Fruit trees-How Winter Care Can Aid Warm Weather Success”. More information to follow.
You can view workshops on Instagram live at slo mg or visit our You Tube channel at “San Luis Obispo County UC Master Gardeners.”
Visit our website at ucanr.edu/sites/mgslo/ or email questions to anrmgslo@ucanr.edu.
UCCE Master Gardener Helpline offices:
San Luis Obispo: 805-781-5939 (Monday and Thursday 1:00 to 5:00)
Arroyo Grande: 805-473-7190 (Wednesday 10:00 to 12:00)
Templeton: 805-434-4105 (Wednesday 9:00 to 12:00)
- Author: Polly Nelson
- Editor: Noni Todd

Winter Fruit Tree Care
By Polly Nelson UCCE Master Gardener
How confident are you when it comes to planting and pruning fruit trees?
Whether you need a refresher or if you're new to this topic, we have a workshop for you. On January 13, 2024, from 10 am - 12 pm, the UC Master Gardener Program will offer practical advice on selecting fruit trees, proper planting, and pruning.
Purchasing a new fruit tree is exciting, but often leads to more questions. Do you know which type of fruit trees will grow well in your yard? Knowing the chill hours required for different trees will help you determine which tree to choose.
When and how does your fruit tree need to be pruned?
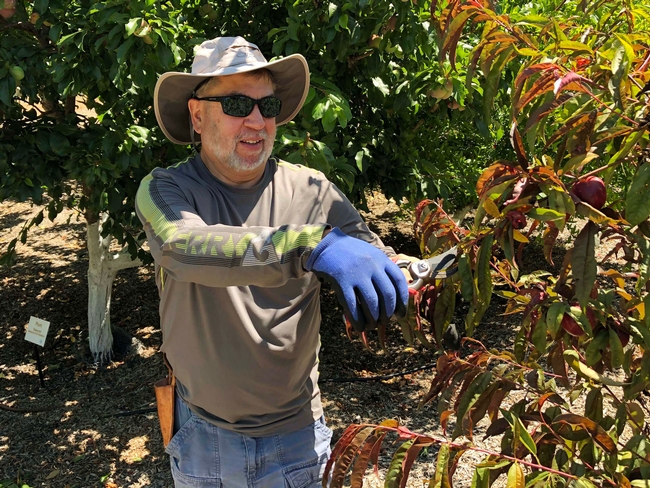
Many people are squeamish about pruning trees, fearing making mistakes and hurting the tree. Knowing why the tree needs to be pruned helps to take the guess work out of this necessary task. Most trees need regular pruning and pruning offers many benefits. Pruning trains young trees to develop a strong limb structure. As trees age, pruning helps to maintain a manageable size to making them easier to maintain. Proper pruning also improves penetration of sunlight in the center of the tree, eliminates dead or diseased branches, and improves fruit production.
Knowing when to prune is just as important. December to mid-February is the recommended time frame, with January being a good target. Fruit trees are best pruned while dormant. If not pruned, suckers will grow, and direct energy away from the fruit-bearing branches, thereby decreasing fruit production. An exception to this is the apricot tree. Pruning in the fall, ahead of winter rains, is recommended to prevent infection from entering cut wounds.
The next step is knowing how to prune. Heading cuts and thinning cuts are two basic types of cuts. Heading cuts increase lateral branch formation, and thinning cuts remove unwanted lateral branches or shorten them.
Attend the January workshop and get these and other fruit tree questions answered. Trained UC Master Gardner volunteers will also demonstrate how to make different types of pruning cuts.
Make a plan to attend this Advice to Grow By workshop. We'll be there rain or shine. Bring your questions and join us for an informative, lively program.
Advice to Grow By Workshops
Our next San Luis Obispo Advice to Grow By Workshop will be January 13th, 2024. For January only, the ATGB will be on the 2nd Saturday of the month. The subject will be “Fruit Trees-How Winter Care Can Aid Warm Weather Success”. Check our website for more information.
Our next north county Advice to Grow By Workshop will be on February 10th, 2024. The subject will be “Success with planting annuals & perennials in north county”. It will be located at Centennial Park, 600 Nickerson Dr. Paso Robles. Check our website for more information.
You can view workshops on Instagram live at slo mg or visit our You Tube channel at “San Luis Obispo County UC Master Gardeners.”
Visit our website at ucanr.edu/sites/mgslo/ or email questions to anrmgslo@ucanr.edu.
UCCE Master Gardener Helpline offices:
San Luis Obispo: 805-781-5939 (Monday and Thursday 1:00 to 5:00)
Arroyo Grande: 805-473-7190 (Wednesday 10:00 to 12:00)
Templeton: 805-434-4105 (Wednesday 9:00 to 12:00)


