- Author: Alison Collin
As winter turned into spring and the 'Bartlett' pear tree flowered and leafed out, I celebrated my great gardening success. In fact I was jubilant because it looked as though I had finally won the battle against fire blight! For the first time in four years there were none of the telltale signs of this disease - no blackened leaves or "shepherd's crook" stem tips. For a time it looked as though I would never win, but careful pruning and rigorous attention to hygiene had finally paid off.
My only problem now was how to restore the tree into something that would justify my title of Master Gardener.
The tree had put on a lot of growth last year, and in typical pear fashion, all the new growth was fastigiate, shooting skywards with nothing but weakly attached, narrow crotch angles around the trunk and vertical stems emanating further out from the old, lateral branches. It looked a complete mess, and in spite of studying this problem over several months I had no idea how to tackle it. I became paralyzed with indecision and did nothing.
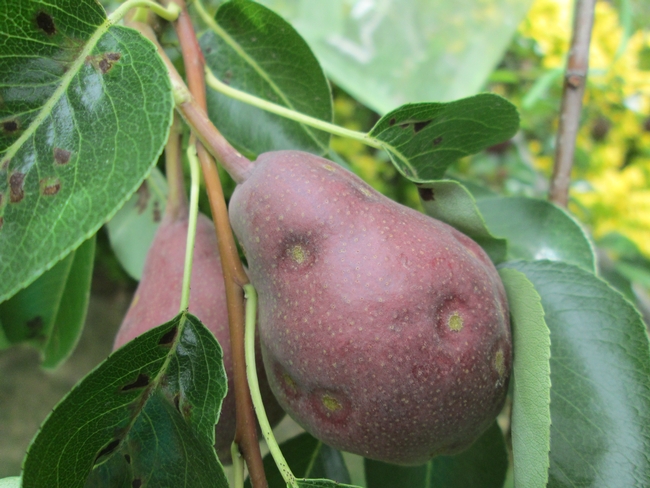
This spring, the tree was covered in flowers and set a good crop, which for once were not damaged with frost rings, and there was still no sign of fire blight. However, as I thinned the fruits I noticed that some of them were distorted, and a few of the leaves were developing blisters and brown spots suggesting that the tree had a new problem: pear blister mites.
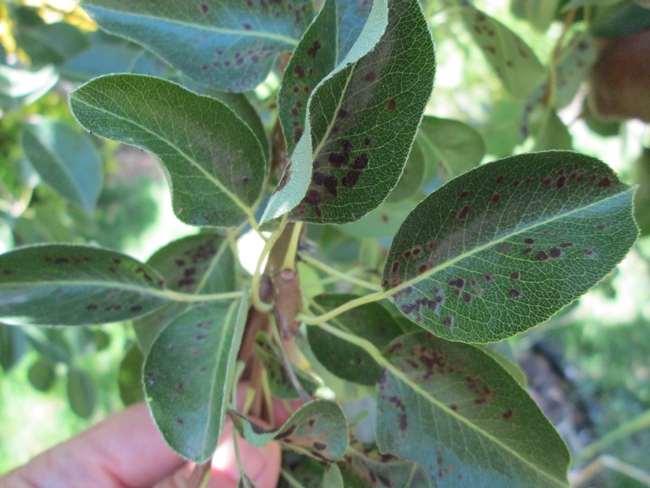
By this time of year there was no hope of getting any control by spraying, so my next chance will be after harvest, in October or November when the mites travel away from the leaves and take up residence in the developing buds for the winter where they are again protected from the effects of sprays.
There is a small window of opportunity during this migration, and I will check for mite activity by sampling buds at various intervals and looking at them under a strong magnifying lens in order to monitor mite activity, and then spray to control. In order to comply with organic growing principles the chief methods of control available are either oil sprays or sulfur sprays. Some pears such as comice or Anjou are damaged by sulphur which cuts down on options for those varieties.
I think that I would rather deal with fire blight!
Maybe next I will be luckier.
For more information:
- https://ipm.ucanr.edu/agriculture/pear/pearleaf-blister-mite/
- https://ipm.ucanr.edu/agriculture/pear/dormant-to-delayed-dormant-sampling/
- Author: Carmen Kappos
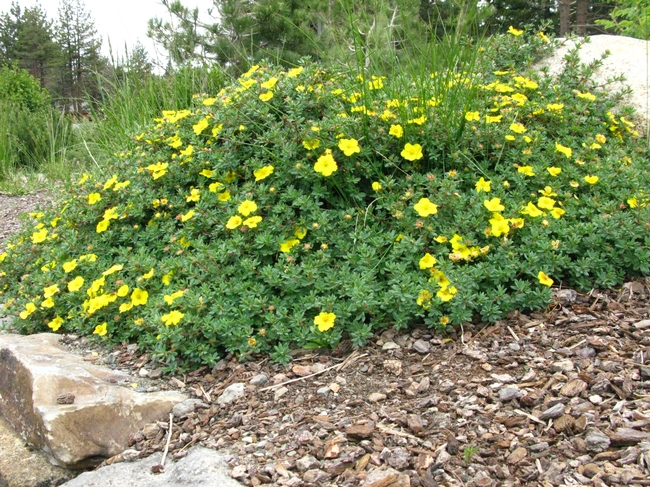
If you want an easy care, hardy addition to your garden, then shrubby cinquefoil is great to consider. It's a tough garden plant that keeps producing its carefree flowers all summer long. The species name was updated to Dasiflora fruticosa, but it is still sold under an older name of Potentilla fruticosa. A native plant to northern United States and Canada as well as Europe and northern Asia, it's well-loved with many cultivated varieties. Shrubby cinquefoil is easy to grow, even in poor soil. For high altitude gardens it tolerates very cold temperatures and handles crushing snow well.
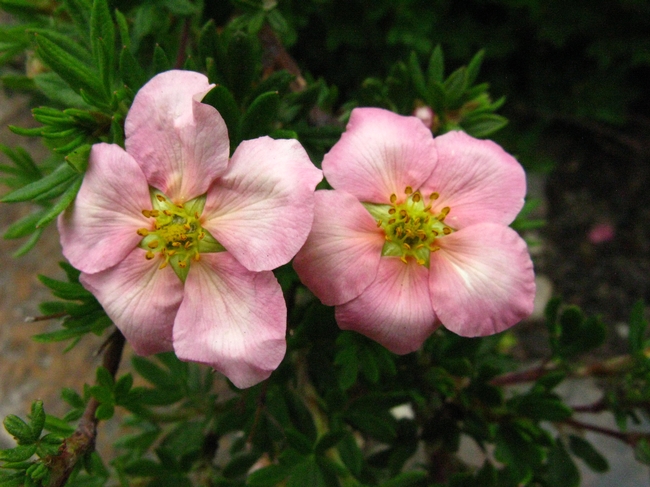
Here's a list of features for this hardy shrub that works well in borders, as a foundation plant, or in mass plantings.
Plant Facts:
- USDA Hardiness Zone 3 – 7
- Once established is considered “water wise”
- Grows well in poor soil
- Low maintenance
- Medium fire resistance
- Easy to grow
- Few pest problems
- 3' tall to 6' wide, can be pruned to height
- Rounded growth habit
- Dark green, soft pinnate leaves
- Deciduous
- Cold hardiness
- Handles crushing snow
- Long summer blooming
- Non-toxic to dogs and cats
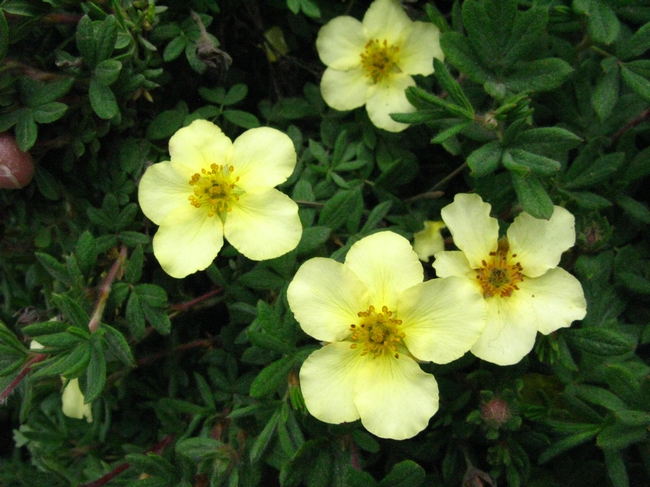
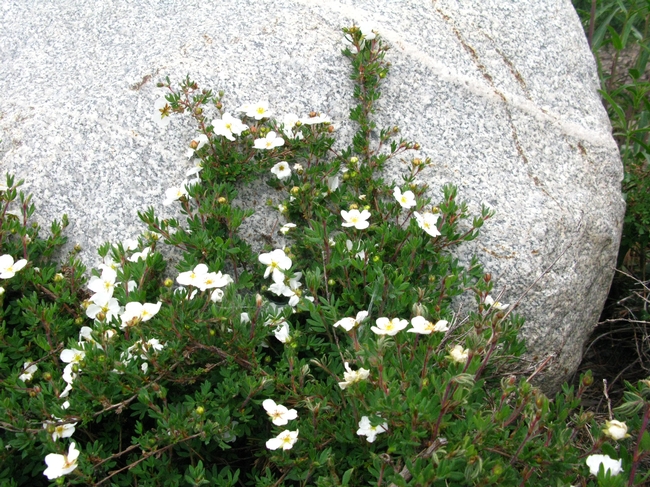
- Cultivated plant flower color choices: bright yellow, light yellow, white, cream, apricot, coral, pink or yellow tinged with orange.
Four different flower color specimens may be seen at the pocket park at the base of the Mammoth Lakes entrance sign. There you can see bright yellow blooms, light yellow blooms, pink blooms and white blooms during the summer months. To visit, park in the lot for the Police Department and courthouse and walk over to the small water-wise demonstration garden created by the local water district.
- Author: Dustin Blakey
I control most of my garden weeds by hoeing and pulling. This morning I was doing a quick once-over with the hoe before work when I was inspired by the abundance of purslane present in the garden to write a quick post on hoeing. Maybe we'll call it Advanced Hoeing? (Done!)
If you've read Alison Collin's previous article on hoes you should be familiar with these tools. I primarily use a hula hoe.*
If you look at how a hula hoe works, it kills weeds by cutting the top of the plant off of its roots. I have very good luck controlling annual grasses, lambsquarters, and Russian thistle. Two weeds that the hoe doesn't work well on are taboose (AKA yellow nutsedge) and purslane.
The lack of control by hoeing taboose makes sense. It has small nutlets that regrow new plants if the top is cut off. I have to dig those out. Taboose control is mostly just a factor of how much effort I want to put into the task. I mostly just live with it, digging a few out when I'm feeling a surge of ambition.
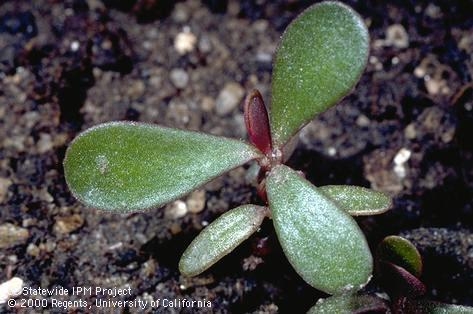
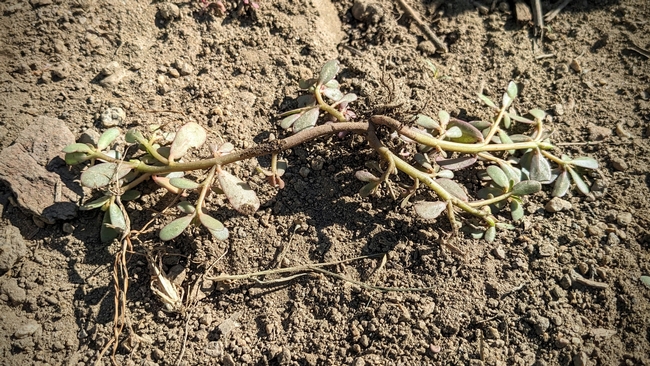
More interesting is the issue with purslane. Purslane is an annual with a fleshy taproot. You would think that hoeing would be very effective in controlling it. But it isn't. If you're not careful, hoeing can just spread it around.
I started this summer with just a little bit of purslane in the garden. Mostly I was fighting grasses, and being my usual lazy self, just hula-hoed up everything and moved on to other tasks. I knew that was probably a bad idea, but: laziness. I ended up spreading purslane all over the place!
Here's the problem: purslane is succulent and easily re-roots. (In fact, you can propagate it that way on purpose!) My hula hoe basically just chopped it up and spread it around. If it's a tiny plant, you may get some control by cultivation or hoeing, but soon thereafter it's no longer effective. All I did was transplant it!
If you're using a hoe, there are some extra steps you need to take with weeds like this that can both tolerate drought stress and have the potential to grow new roots.
First, make sure that the surface of the ground is going to be dry during the heat of the day. Adjust your watering schedule if needed. Next, when you hoe (or pull) purslane, make sure the whole plant ends up upside-down. It will not root easily if it is inverted, and the dry, hot conditions will hopefully kill it quickly. If you really want to be sure you're not going to spread it around, you should rake it out after hoeing. That's good advice for any weeds. Lazy me just leaves it if it's not too giant.
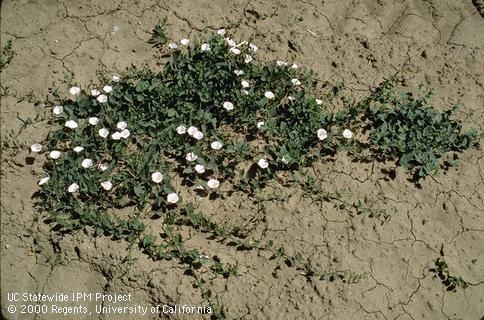
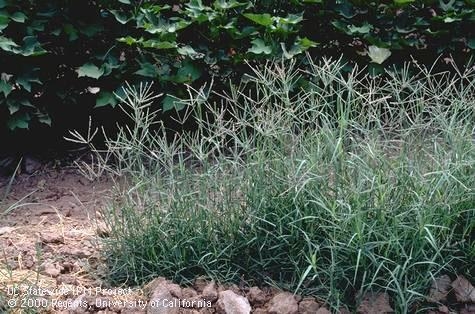
There are two other common weeds that you should also handle differently when hoeing. Field bindweed and bermudagrass tend to spread if chopped up and spread around. These need to be either dug out thoroughly and removed or controlled using other methods. See the pictures below to learn to identify these.
You are better off not jumping in and hoeing these two baddies since they are easy to spread. Consult UC IPM for control advice first.
If you have more questions on controlling weeds in the garden, or you're just a hoeing enthusiast who would like to swap stories with like-minded individuals, contact our Master Gardener helpline at immg@ucanr.edu.
_____
* It's probably better to call it something generic like a stirrup or scuffle hoe, but those neural connections fused in my brain decades ago, so I'm calling it a hula hoe. Whatever you call it, it's a great garden tool.
- Author: Joan Nash
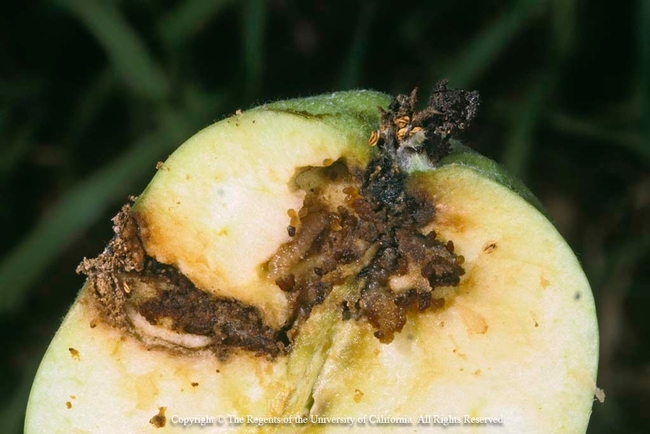
In 2013 I declared war against the codling moth. Why? I have two beautiful apple trees and by July 80% to 90% of the apples are riddled with nasty, little worms.
Know Your Enemy: The codling moth life cycle is pretty basic. Moths emerge mid spring, fly into apple, pear, walnut trees. They mate, lay eggs, eggs hatch, worms slink to the fruit, burrow in and make a mess. Fruit falls to the ground, worms burrow underground, pupate and wait for mid-summer to do it all again. Sometimes three times!
Disrupt The Life Cycle: I went to UC Pest Notes for advice. They advise cultural modification first. Best to have nothing growing under the tree, pick up any apples that have fallen from the tree. This helps prevent the worms from going underground and pupating. Next, thin the apples in the tree. When the apples are in clusters leave one apple (painful but it helps). Also, space the apples 4” to 6” apart. Prune some of the suckers or branches in the canopy of the tree. This eliminates any infested apples that are hard to harvest.
I cleaned under my trees, thinned and pruned. What if that's not enough? Again, UC IPM's Pest Notes! Along with some graphic photos, these guide supply you with other ways to disrupt the codling moth life cycle.
Be Relentless: So in 2013 I did it all. I cleaned, thinned, pruned, trapped, calculated and sprayed. Then repeated it again for the next codling moth generations. It was a lot of work!
Harvest time arrived and guess what? IT WORKED! I DID IT! I CRACKED THE CODE! Couldn't wait to spread the word! But, before I went on the road,
I decided to use the 2014 apple season to tighten up my presentation.
The 2014 season was a disaster! Worms in almost every apple.
Persevere: I continued through the seasons using the Pest Note's advice and added a few new steps. One year, with a minimal apple crop, I removed every apple I could reach, thinking no apples for the worms = no food, no pupa, no moths. Didn't work. Another year, I spent the summer in my trees trying to remove every infested apple. HA!
2023. I was nosing around YouTube for some apple inspiration, and I found an apple grower in Australia with a few, new to me, codling moth ideas.
This farmer layers cardboard mulch under the tree. Thinking, if the pupa can't emerge as moths, it might reduce the worm population. And when the moths are flying in the tree (a few hours in the evening for 2 or 3 days) this same smart farmer lightly sprays the tree in hopes of wetting the moth's wings to inhibit their flying and egg laying.
Well, I can do that. So, this year I covered all the steps from previous years and added the cardboard mulch and water spray steps.
The first generation for this year has passed. I see little damage. After the second and possibly third generation come and go, victory? We will see.
Stay tuned.
UC ANR's pest notes for codling moth can be found here: https://ipm.ucanr.edu/PMG/PESTNOTES/pn7412.html
- Author: Alison Collin
Following our many atmospheric rivers this wet winter of 2023, and with the advent of warmer days, weeds are now germinating in record numbers — and with record speed. This is the time to get the hoe out!
Hoes have been used for hundreds of years worldwide, but it surprises me that many local gardeners seldom consider using them.
It is so much easier and faster to stand upright and slice through the base and roots of seedling weeds than it is to kneel or bend over in order to pull or dig out the roots of mature weeds once they have grown. They can also be used around plants to loosen the soil surface where it has formed a pan or to break up compacted soil to prepare it for planting.
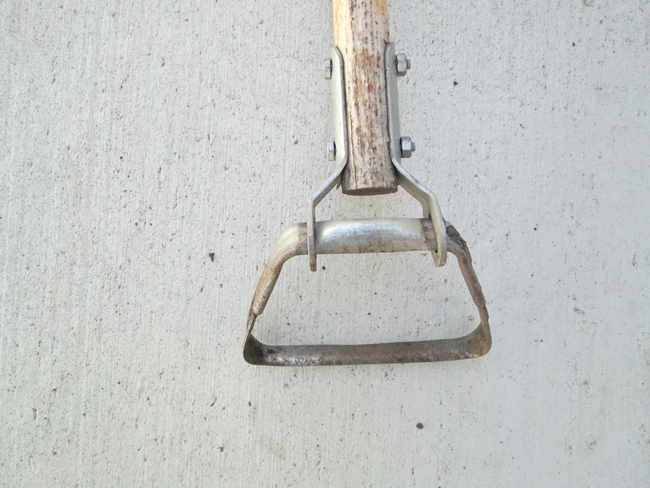
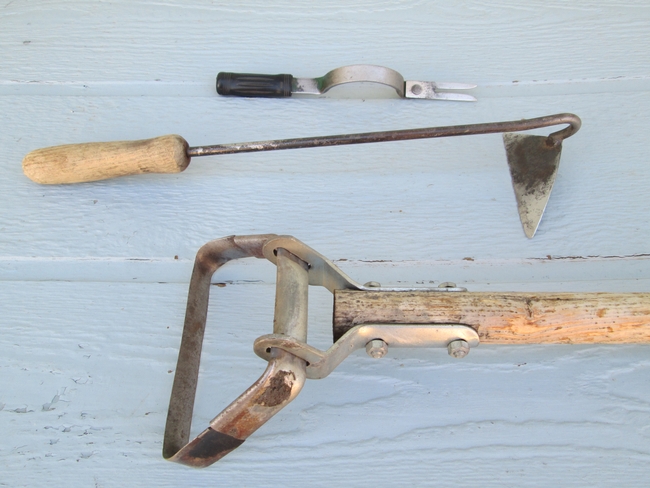
There are numerous types of hoe available, but my favorites are a hula hoe (also known as a stirrup hoe or scuffle hoe) and a Japanese hand hoe. The hula is a long handled hoe which works on the push and the pull strokes to slice through unwanted plants just below ground level. Some have a fixed blade, but I prefer those that have a jointed blade that moves very slightly. It is important to check that the handle is a length that allows comfortable use to lessen back strain.
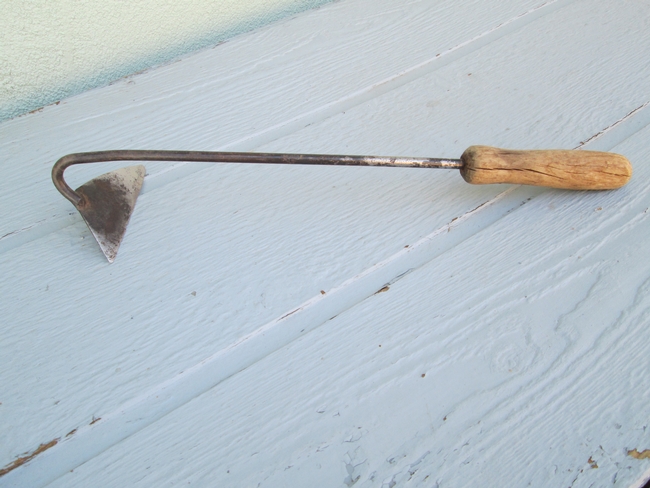
I also have a Japanese triangle hand hoe with an asymmetrical blade. It is a beautifully balanced tool, and it is great for reaching hard to get-at spots such as around the base of rocks or posts. With practice one can remove a weed growing right out of the base of a wanted plant using the point of the blade. One can also loosen soil by using the blade flat, or prepare a seed drill by using one of the points.
In order to hoe safely and not destroy desirable plants, one needs to be able to identify which seedlings or shoots are unwanted weeds as opposed a cherished plant.
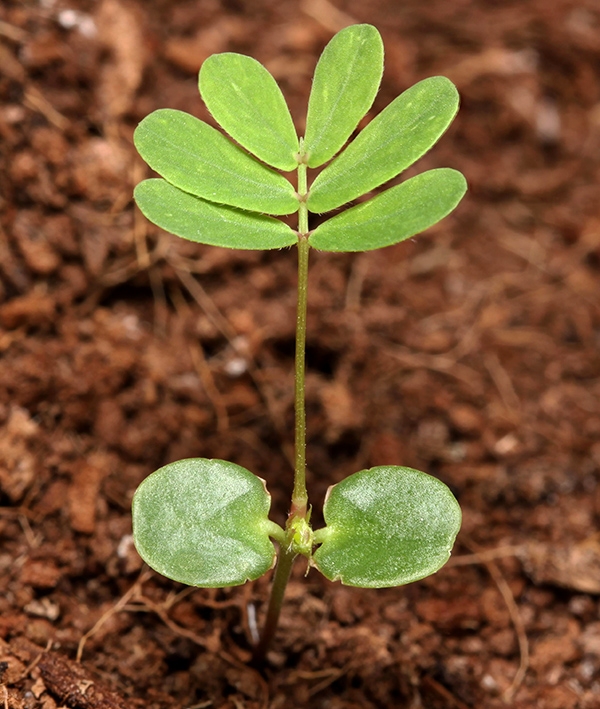
The seed leaves of both weeds and desired plants differ remarkably from the true leaves, so getting to recognize each is vital. One of the benefits of planting vegetables in traditional rows is that you will immediately be able to identify the seed leaves of carrots for example, and know that any other leaf shape in, or beside the row is obviously a weed. With good observation one soon gains enough knowledge to spot a dandelion or clover start, or a carpet of grass seeds that are germinating. Five minutes with a hoe and they are gone forever.
Spotting weeds in beds of ornamental plants is a little more challenging, especially if you garden naturally and encourage flowers to self sow. I am currently full of curiosity about a patch of bright green seedlings that have appeared in a fairly new flower bed. I have hoed out those that are simply too close to other plants, but have left some until I can identify them. I suspect that they are orange milkweed, a plant that I grew for the first time last year. I should be able to tell what they are as soon as the true leaves appear then, if they are worthy of cultivation, I can transplant them into an ideal spot.
I could plant up a good-sized herbaceous border with the many volunteers of different species that have sprung up in my flower beds — catmint, centrathus, larkspur, poppies and columbine — but of course I can't keep them all so I usually dig up and pot on some of the best ones and share them with friends. The rest get hoed.
Keeping weeds from establishing in my decomposed granite paths takes a few minutes once a week using a hula hoe and is a lot more enjoyable than trying to grasp the base of a weed from the surrounding “sand paper” since I find that wearing gloves prevents me from being able to grasp tiny plants.
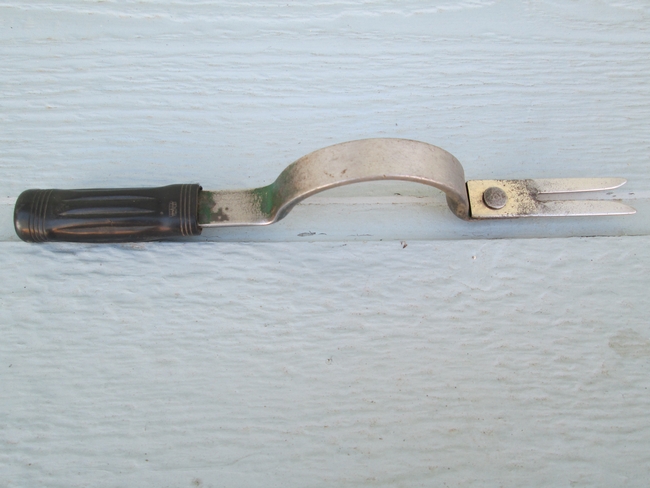
Although you won't kill a bed of established dandelions by hoeing it is possible to weaken them with regular hoeing, and at least prevent them from flowering until you have time to tackle the tap root removal using a hand weeder.
Hoeing with a hula hoe works on bare soil, but not on lawns or the tougher rhizomes of Bermudagrass or on very stony soil or gravel paths but in the right situation it is a gem of a tool!


