- Author: Ariel Bohr
This year especially, many people have been eager to get an early start on their vegetable gardens. I felt the urge to get a head start on my garden as well, but unfortunately there are many variables outside of my control that determine when I can safely put plants in the ground without fear of them being killed by a spring frost. What to do when I'm ready to begin — my starts are an appropriate size, but I'm not “in the clear” with the weather?
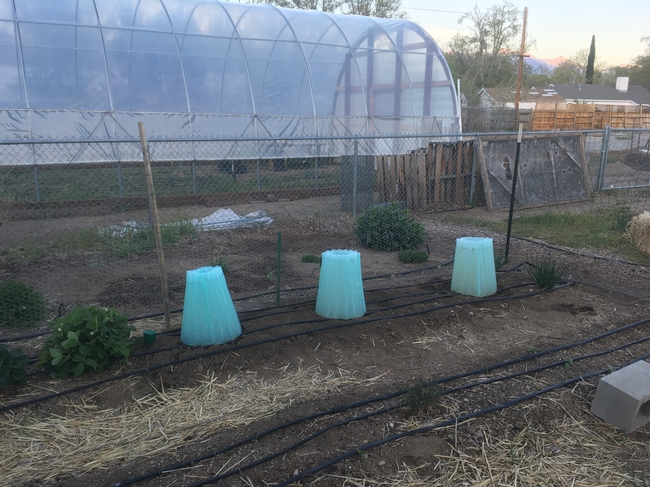
This year I decided to try using Wall-O-Waters, which at first glance resemble oversize freezer packs. In truth they are relatively simple structures about 18" tall and 17" in diameter which are designed to protect plants from the elements by forming a barrier to the wind and cold and extend the growing season by creating a warmer environment. While there are many materials that can be used to create a barrier between plants and the elements, the thing that makes Wall-O-Waters so special is the water.
Water is poured into vertical cells to give the Wall-o-Water its shape as well as its efficacy. Throughout the course of the day, sunlight heats up the water in the cells and warms the plants. Water retains heat very effectively and this warmth protects plants from frost damage. Counterintuitively, as water freezes it releases heat, which further protects the tender plants inside. Wall-O-Waters are most commonly used in conjunction with tomato plants because of their sensitivity to cold. This is the crop I will be using them on as well.
I found that the easiest way to set up Wall-o-Waters was with a 5-gallon bucket and a partner. The Wall-o-Water website recommends setting them up 6-8 weeks prior to the last frost date in order to warm up the soil to create an optimal environment for root growth. Unfortunately I did not see this advice until perusing their website while writing this post! Rather than setting up the Wall-O-Waters in advance, I set them up just after planting my tomato starts. To do so, I put the bucket face down so that it was protecting the plant. I then slid the empty Wall-o-Water onto and around the bucket, making sure that the “open” sides of the cells were facing up. As my partner held open each individual cell, I used a watering can with a narrow spout to fill each pocket. If you're setting up without a bucket, it's a good idea to remember to create counter balance during this process so that the whole thing does not tip over. Once I was done, I carefully removed the bucket. If the Wall-o-Waters act as advertised, they should protect my plant in temperatures as low as 12℉ and give the plants an extra dose of warmth on chilly nights.
Considering the recent heat wave, this whole exercise may have been unnecessary, but extra precautions are never a bad idea in the fickle Eastern Sierra.
Here's hoping this yields some early tomatoes! Updates to follow.
Sources: https://www.wall-o-water.com/
- Author: Dustin Blakey
If you are just planting a garden for the first time you will, no doubt, want to grow tomatoes.
Once you tell someone you're putting in a new garden you likely will receive helpful(?) advice from friends and family.
No matter where you live there are a lot of funny rules for planting tomatoes. Some of this handed down wisdom is legitimate, but others are clearly just made up and passed along because they are memorable. When I first moved here, several people told me never to plant tomatoes before White Mountain Peak is snow-free. That's clearly too late most years, but it is easy to remember.
The thing about gardening is that every year is different. That's part of the challenge! For this year, at least if you live below 5,000 feet, you should already have planted your tomatoes. As I write this, it's April 27. If you haven't planted your tomatoes, get them in soon. It's probably about time in Coleville and Walker, too.
A good tomato for new gardeners is 'Juliet.' It's a grape tomato, but large for that type. It is good in salads and dehydrates wonderfully. Unlike some fussy slicing tomatoes, it will continue to set fruit all summer. A larger tomato that is tough to screw up is 'Celebrity.' I've had good luck with it in containers. It hasn't been a huge producer for me, but it has been very consistent all the way until fall. Many gardeners in our area raise 'Early Girl' without problems. All of these varieties are (usually) easy to find in our area. If you can't find these, just plant what you can get.
For almost everything in the garden, you should plant transplants level with the soil in the pot you get it in. That's true with tomatoes, too, but there is an exception: tall tomato transplants can be planted deeply if you pinch off the lower leaves. They will grow some new roots on their stems and survive the deep planting. You can do this to shorten the plants so your trellis has more room to support the vines. They also do fine if you don't plant deep.
Make sure that your plants are well-watered before transplanting, and them water them afterward.
For the first week or so after transplant, you may need to water more frequently than you expect since the roots are confined to a small area. Check on the plants a couple times during the day for the first week. You will see what they need.
Your plants will probably need some fertilizer. I use 1 tablespoon of water soluble fertilizer in 1 gallon of water, and give each plant 1 cup of that solution within a few days of transplanting. You can use 1/3 cup of fish emulsion instead if you prefer, but it's stinky and of interest to skunks and raccoons. Repeat this in about a month or so.
Tomatoes are vines and require support. It is not a good idea to let them sprawl all over the ground. There are as many ways to stake tomatoes as there are gardeners. Anything that holds them up is fine, even a bamboo stake with the plants gently tied on works OK.
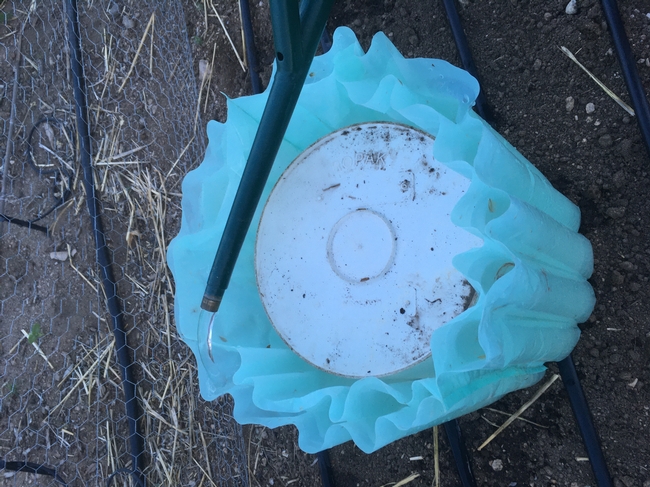
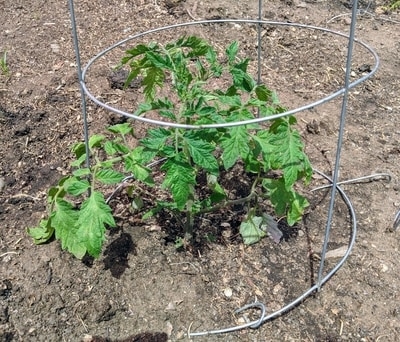
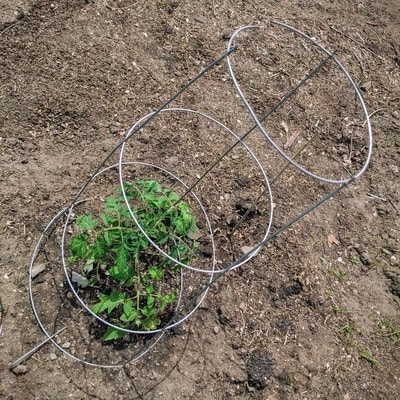
I use modified cheap tomato cages from the hardware store. Straight from the store, these things have a terrible design with the wide part at the top, so I cut off the 3 "legs" and bend them into hooks like tent stakes. I then turn the cage upside-down (small end up) and pin them to the soil with my newly made hooks. These are very secure, and hold plants well. The 2 pictures on this post show how it's done.
Whatever system you decide use is fine. Just be sure that it is secure.
The rest of the work of raising tomatoes is keeping the weeds and pests under control. If you check your plants daily, it's not that big a deal. Most tomato pests can be blasted off with water or plucked off by hand.
Hopefully you'll have a successful crop this year!
If you have questions contact the Master Gardener help line at immg@ucanr.edu .
- Author: Dustin Blakey
Sure our area is hot and dry for much of the year, but the silver lining is that we have very few fungal diseases to deal with in the garden. I swear in Arkansas you cold hear fungi growing on tomatoes from the heat and humidity. (And on roses, too, but that's a different topic.)
While fungi aren't a big deal here, we do have some serious issues with three viral diseases on tomatoes:
- Tobacco Mosiac Virus
- Tomato Spotted Wilt Virus
- Beet Curly Top Virus
Since planting season is here, I thought this would be a great time to cover these diseases. I recorded a lecture on the topic. It's a slide show, but it has useful information for you tomato lovers.
Although these diseases happen throughout California, this is aimed at gardeners in Inyo and Mono counties and reflects what we see in our area. The symptoms and prominence of each may be different elsewhere.
Hopefully you find it useful. (It's posted on our Facebook page as well.)
For more information on tomato diseases, check out this page at UC IPM
- Author: Dustin Blakey
Our dry climate on the east side works wonders to control fungal diseases. Most fungi prefer moist environments. While we still get an occasional fungal pathogen, we seem to have greater problems with insects and viruses. In many cases the insects and viruses team up to cause real mayhem in the garden.
In our area we have been subject to continual attacks on tomatoes by viruses. Our most common viral issue is beet curly top virus spread by the beet leafhopper. It is widespread from Coso Junction through Bishop. You may be familiar with its distinctive symptoms: curled up leaves, possibly with a purple tint, along with small, undersized fruit. But it isn't the only viral issue we have to deal with.
Of lesser importance in our area is tomato spotted wilt virus (TSWV), but this year it has had a good showing in the Owens Valley.
This virus can affect dozens of plants, but tomatoes, being so common, are the most usual victim reported.
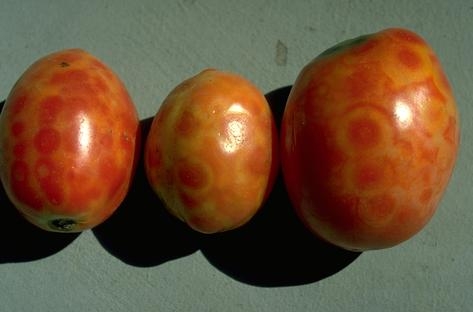
The easiest symptom to recognize is the distinctive color pattern on ripe fruit. (See picture.) If you see this (probably with some leaf spots) there is a good chance this virus is the culprit.
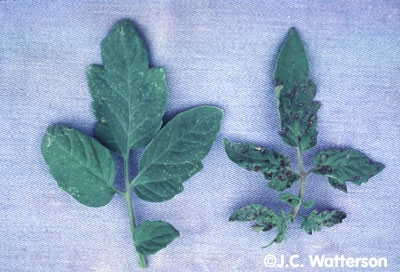
In some cases the virus attacks early or is more virulent and does a number on the foliage and new shoots. The leaf symptoms start on new shoots and at first may look bronze, eventually turning into dead spots. On tomato I usually see these spots more toward the base of the individual leaflets, but this isn't always the case. Other crops respond differently. Sometimes the virus kills shoots entirely! By the time I usually get to see the plants the disease has progressed to the point where there is a mess of dead shoots, and half-dead leaves. I cross my fingers and hope there is symptomatic fruit for me to see. Viruses can be hard to diagnose by symptoms alone.
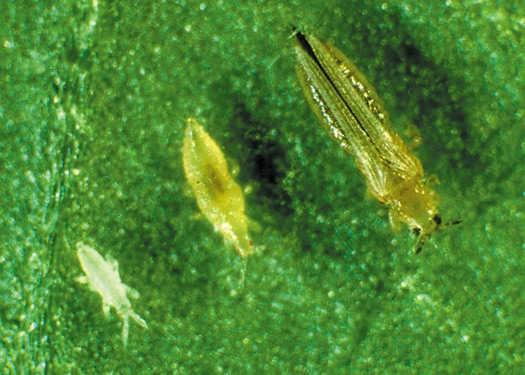
This virus is spread by tiny, hard-to-kill insects called thrips. Unless you have eagle eyes, you'll need a lens to see them. These small insects have frilled wings and rasping mouthparts that tend to tear up new buds and leaves, leading to malformed growth. While feeding, they infect the plants with the virus. Even if you kill the insects, once infected the plant is a goner.
So what do you do? First look for symptoms to confirm this is the problem. I usually check to see if there are thrips present as well with a hand lens or microscope. If I'm sure I have the virus I remove the infected plants and try my best to control the thrips population. UC IPM suggests insecticidal soap.
I wouldn't lose a lot of sleep worrying about whether my garden was going to be attacked. Some years are worse than others. Keeping weeds under control and watching for pests diligently is your best plan. Using yellow or blue sticky traps in the plant canopy is a good technique to monitor insect population.
As always, if you aren't sure what's going on, please contact the Master Gardeners at immg@ucanr.edu for help.
- Author: Sarah Sheehan
Set in the middle of an elder community in Bishop, the Sunrise Garden has flourished for seven years providing information to Inyo-Mono Counties Master Gardeners and delectable bounty for its residents.
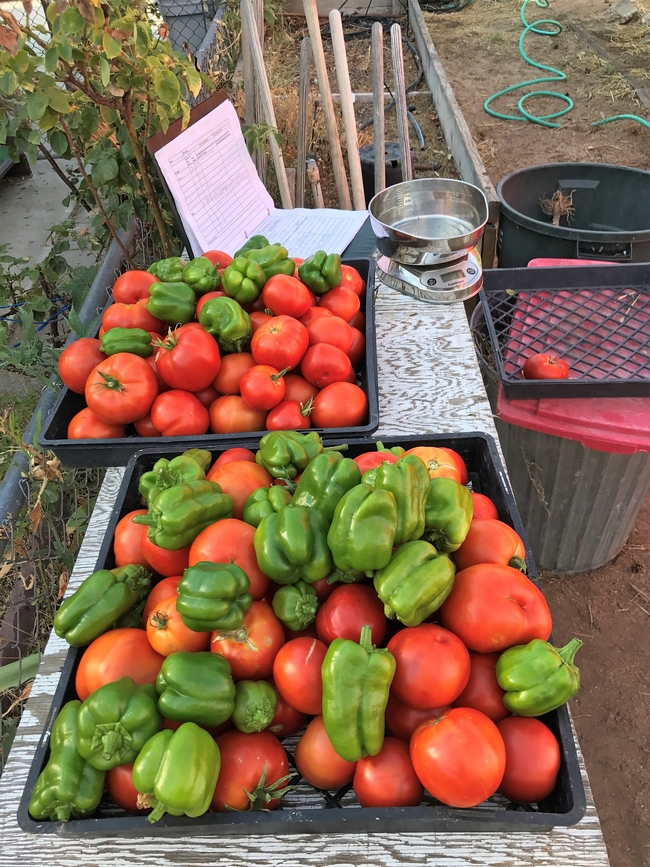
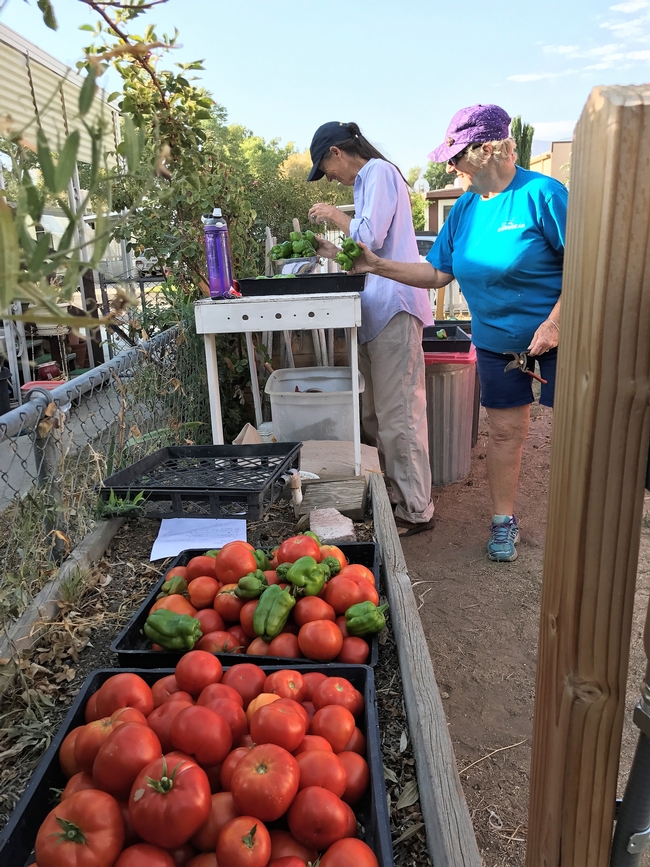
So far this season, the six varieties of tomatoes grown both in sun and shade are yielding impressive numbers. The tomatoes are counted and weighed as well as notated for their size, color, shape, flaws and flavors twice a week. The varieties this year are: Better Boy, Big Beef, Carmello, Champion II, Early Girl and Jetsetter. On August 29th we picked more than 44 lbs of tomatoes which we donated to the residents.
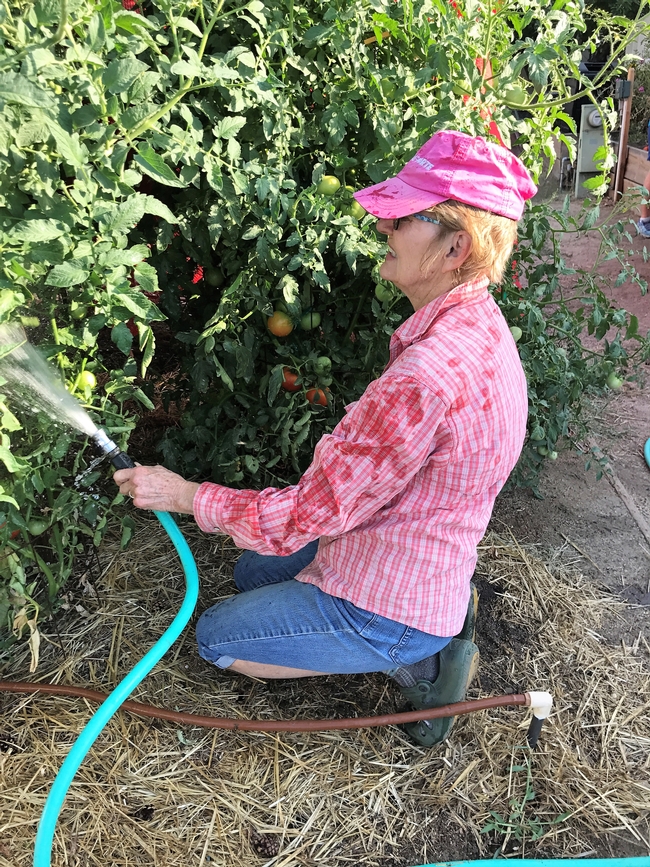
While tending the garden a careful watch is made for any evidence of pests or decline. To this end, the watering system is regularly checked, plants are water sprayed from below to dislodge pests and their cages shaken to rid them of excess water.
Green bell peppers are also grown in sun and shade and they too are thriving with 18 inch plants having as many as 24 peppers. So our task is to thin and cheer these green jewels on. The only issue we have had thus far is a little sunburn as it has been an unusually warm summer in the Eastern Sierra.
These tomatoes are grown in two other sites around Bishop and it has been noted that the same tomato variety has a slightly different taste dependent on which location it was grown. At the end of season we will be posting our results.
The tomato gang: Carolyn Lynch, Joan Nash, Marti Holton, Sarah Sheehan, and Denyse Racine.


