- Author: Vivian Patterson
A summer garden in the hot Owens Valley can produce oodles of Tomatoes, Eggplant, Peppers, Zucchini, Garlic, and Onions. Ratatouille is a classic French Provençal stew made from these exact fresh vegetables. Over the years I've tried making every recipe of Ratatouille I could find and while some were better than others none was as good as the Ratatouille from Provence where it had its origin. On a trip to Provence last month, I made it my mission to find out how it is made there and why it is so much better than any I've made here.
Several helpful hints I found:
- Use equal quantities (by weight) of Tomatoes, Eggplant, Peppers, and Zucchini
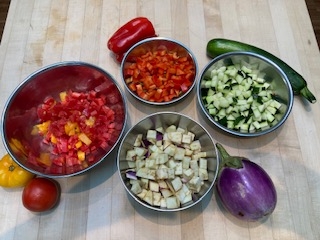
- Cut all the above vegetables in ½” cubes
- Mise en Place: Cut ALL vegetables before you begin to cook. This will keep everything cooking at the correct amount of time without the worry of the phone ringing or other interruptions.
- There is a certain order that the vegetables are added to the pot. Follow this order. After the addition of each vegetable, cook for 15 minutes before adding the next vegetable.
Best of All: Ratatouille can be frozen. You must let it cool all the way before freezing it. It should be thawed in the refrigerator. I tried this and it works!
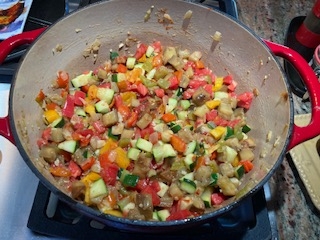
Ratatouille de Provence
The recipe:
- Extra Virgin Olive Oil
- Chopped Onion –1-2 large
- Minced Garlic – About 1-2 Tbs
- Tomato Paste – ½ Small Can
- Fresh Basil chopped
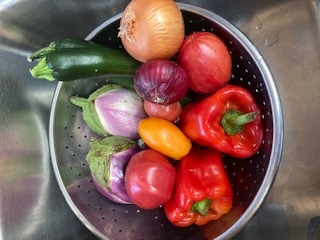
Use 1½ pounds of each of the following. Cube everything the same size. About 1/2 inch. For smaller or larger batches, select fairly equal quantities (by weight) of the following.
- Sweet Peppers
- Eggplant
- Zucchini
- Tomato (cored and seeded, but leave skin on)
Cook the following slowly at a Medium Low heat.
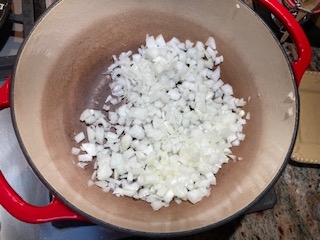
- Sauté Onion in extra virgin olive oil until soft. Add Garlic at the end just before Step 2.
- Add Peppers to Onion and cook 15 minutes, stirring as necessary.
- Add Eggplant and cook 15 minutes, stirring as necessary. Add more oil if needed.
- Add Zucchini and cook 15 minutes, stirring as necessary.
- Add Tomato, Tomato Paste, and Basil. Stir to combine. It will seem like there is not enough liquid. There is! Cook slowly to release liquid.
- Continue cooking until done and you have a desirable consistency. Vegetables will still be distinguishable and have some texture.
- Taste for salt and pepper.
Let cool. Serve at lukewarm, room temperature, or cool.
Refrigerate for 3 days or freeze.
Freezing: It is recommended that you freeze in usable quantities. Ratatouille must completely cool before freezing. Pint-size freezer jars are great for this. Leave one-inch head space. Be sure to label with product name and date.
If frozen, let thaw slowly in the refrigerator.
- Author: Alison Collin
Do you agonize over whether a particular fruit is ready to pick?
With the harvest season upon us, it pays to learn which fruits will ripen once picked, and which will not ripen beyond the stage that they had reached when harvested.
Knowing which produce will further ripen will go a long way to preventing the spoilage and wastage of food crops.
Ripening Fruits
Fruits (including those often termed "vegetables" like tomatoes) that continue to ripen are called climacteric. If mature at harvest and kept in ideal conditions, the respiration rate and production of ethylene, a plant hormone, increase leading to pigment and sugar development until the peak of ripeness is reached. After this point the respiration rate drops and the fruit begins to degrade. Maturity is a term describing the point at which a fruit has completed its natural growth and development. This is followed by ripening.
Once mature, climacteric fruits can be encouraged to ripen after harvest if placed in a paper (or other breathable) bag with another riper climacteric fruit such as a banana that releases high levels of ethylene. Ripe apples that do not have a wax coating can also be used for this purpose. Check regularly to make sure that there is no rot, and after a few days the fruit will have ripened.
Occasionally ripening will not occur, most likely because the fruit had not been allowed to develop sufficiently before harvest and was just too immature or the fruit was improperly stored at too cold a temperature.
Climacteric fruits which we may be growing locally include apples, apricots, honeydew melons, nectarines, peaches, plums, pears, persimmons, tomatoes, winter squash. Cantaloupe flesh may soften, but they will not become sweeter.
Non-Ripening Fruits
Non-climacteric fruits do not ripen after harvest, but many often store better after harvest than the climacteric fruits since they are not so actively respiring. These fruits need to be left on the plant to mature and ripen. For example a green bell pepper will not turn red after it is picked.
Non-climacteric fruits include: Bell pepper, berries, figs, grapes, cucumber, eggplant, muskmelon, strawberry, summer squash, watermelon, and most of the common citrus – oranges, lemons, grapefruit and limes.
We will soon be approaching frost season with the attendant rush to harvest our tender vegetables and fruits before they get ruined by one cold night. It pays to know which fruits can picked and left to ripen, and which need to be processed into pickles and jams in order to preserve them for later use. The following links contain information about the storage and slow ripening of popular fruits.
For More Information
Because fruit are such an important item of commerce, there has been extensive research on their post-harvest care. To get a sense of what's known about many common crops, one can peruse UC's Postharvest Research Center. There is a lot there to digest!
Here are some tips for ripening tomatoes indoors.
How to harvest and store winter squash.
Harvesting and storing apples or pears.
Of course, you can also contact your local UC Master Gardeners for more information. The Inyo-Mono Master Gardeners can be reached at immg@ucanr.edu or on Facebook.
- Author: Vivian Patterson
I love Bread & Butter Pickles! One of the things I love best about them are the onions. We have just harvested our onions but don't have our cucumbers yet. I decided to make a version with just onions.
Step by Step Preparation for Bread & Butter Style Pickled Onions
Adapted from Ball's "Red Onions in Vinegar" recipe.
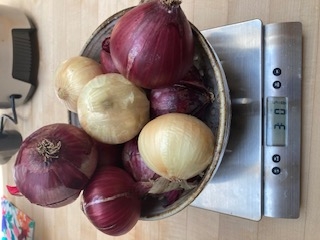
2½ - 3 pounds Onions, thinly sliced
¼ cup Kosher Salt
½ gallon cool water
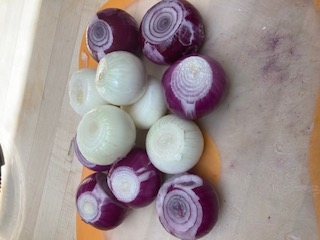
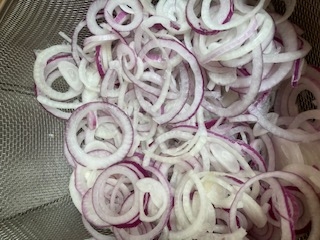
- Weigh, peel and slice the onions.
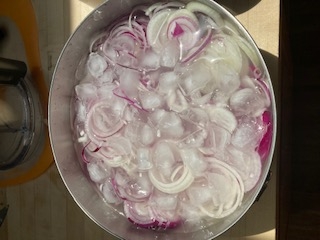
- Cover the onions with a brine of the Kosher Salt dissolved into the ½ gallon cool water. Crack a tray of ice over the top and set aside for 2 hours. Stir from time to time, turning over the layers.
- Make the Vinegar syrup: Combine the following ingredients in a saucepan. Bring to a boil, then remove from the heat and set aside.
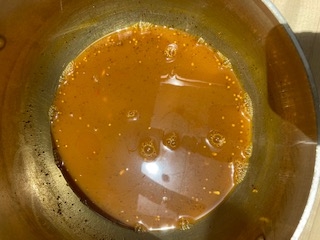 Make Vinegar Syrup
½ cup Water
1 ½ cups apple cider vinegar
¾ cup brown sugar
1 ½ tsp. ground turmeric
1 ½ tsp. mustard seeds
½ tsp. celery seeds
½ tsp. coriander seeds
1 ½ tsp freshly grated ginger root
1 small fresh or dried red chiles, diced
- Prepare jars, lids and rings.
- Drain the brined onions and rinse them with fresh water. Bring the vinegar syrup back to a boil, add the onions, and cook for 5 minutes.
- Using a slotted spoon, divide the onions among the prepared pint jars, then ladle the syrup into the jars, leaving ½ inch headspace. Seal, and process in a water bath or steam canner for 10 minutes (sea level.)
Altitude Adjustment—Increase Processing Time:
1,001 – 3,000 feet: Increase by 5 minutes
3,001 – 6000 feet: Increase by 10 minutes
6,001 – 8,000 feet: Increase by 15 minutes
Over 8,001 feet: Increase by 20 minutes
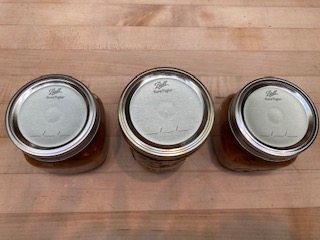
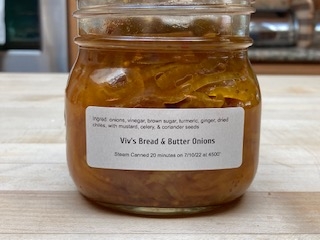
- Check that jars have sealed then clean jars, label, and prepare for storage.
Notes about this recipe:
I sliced 3 lbs. onions, but I only used about 2½ lbs.
Yield: 3 pints.
Although this recipe used spices from a recipe in Saving the Season by Kevin West to obtain the bread and butter pickle flavor, it is essentially the same as the "Red Onions in Vinegar" tested recipe in Ball's Complete Book of Home Preserving with safe additions of salt (as brine), sugar and spices, but substituting 5% apple cider vinegar for red wine vinegar. Not all substitutions are safe to can. If you don't know what can be done, contact the helpline at immg@ucanr.edu, or just refrigerate your custom creation instead of canning it. More information about canning pickles as well as good recipes is available at this site.
Editors note: The Master Food Preservers have a demonstration plot at the Bishop Community Garden. They use the produce from that garden to share safe food preservation practices. As many readers of this blog may have onions ready in your garden, this may be of interest to you. If you have questions about home food preservation, please send your questions to the helpline: immg@ucanr.edu. To learn more about raising onions in the Eastern Sierra this this fact sheet: https://ucanr.edu/sites/
- Author: Vivian Patterson
I have a small growing area at the side of my house in Bishop that gets lots of heat and very little sun. I started planting onions in this area about 10 years ago but found that the bulbs never got more than 1-2” in diameter. Now I intentionally plant onions there every January that I freeze whole.
Here is my process.
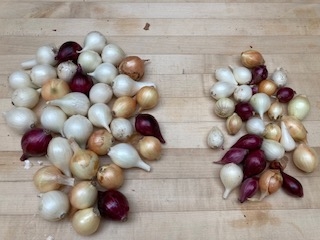
After the onions have been picked, dried, & cleaned up, separate into groups according to size.
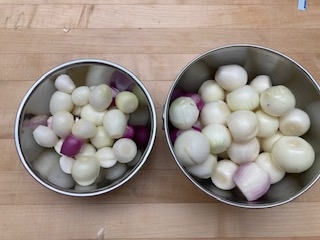
Peel onions keeping sizes separated.
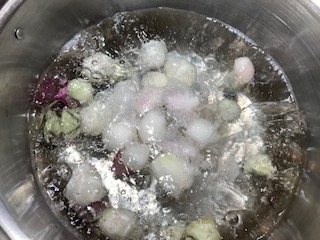
Blanch Onions for 3 minutes. (Here is how to do this.)
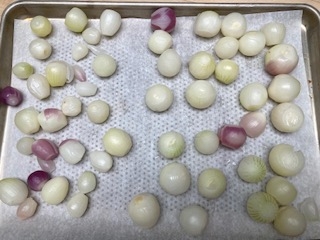
Drain and Prepare to Individually Freeze, Freeze until frozen solid. Overnight is good.
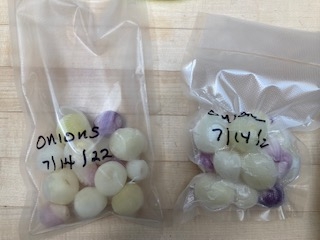
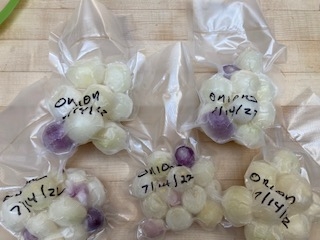
When frozen, remove from freezer. Label Bags. Put desired portions into bags.
Seal all bags. Remove air before sealing.
Notes about Frozen Onions:
- Frozen Onions should only be used for cooking. They are no longer used raw.
- Very small frozen onions may be used in recipes calling for frozen pearl onions.
Uses for Frozen Onions:
- Stews*
- Roast Meats*
- Boeuf Bourguignon*
- Coq au Vin*
- Braised as a side dish (https://www.food.com/recipe/braised-onions-a-la-julia-child-148656)
- Sauteed as a side dish
- Soups
*Braise your onions first. See braised Onion recipe link. Always thaw your onions before braising.
Editor's Note: The Master Food Preservers have a demonstration plot at the Bishop Community Garden. They use the produce from that garden to share safe food preservation practices. As many readers of this blog may have onions ready in your garden, this may be of interest to you. If you have questions about home food preservation, please send your questions to the helpline: immg@ucanr.edu. To learn more about raising onions in the Eastern Sierra this this fact sheet: https://ucanr.edu/sites/
- Author: Jan Rhoades
This season, we decided to grow peanuts in the Edible Plants Plot at the Community Garden Demonstration Garden. Why not? They are as pretty as any pea plant and just as easy to grow. I ordered peanut seeds from the Urban Gardener website. They were inexpensive and offered a few different kinds — so I chose 'Jumbo Virginia' peanuts. The catalog described them as productive for home gardens.
I ordered a quarter of a pound — it doesn't take a lot of seeds to grow these plants. They want plenty of room and each plant will yield lots of peanuts. I will be starting these indoors in March since they must be planted after all danger of frost (in Bishop that usually means May), and it will take 4 months of growing to harvest our peanuts.
There are four main types of peanut plants grown in the United States: runner peanuts, Virginia peanuts, Spanish peanuts, and Valencia peanuts. The most commonly grown type of peanut plants are runner peanuts, which make up about 80% grown. Virginia peanuts account for 15%. Runner peanuts are primarily grown in Georgia, Alabama and Florida, with Georgia producing 40% of the U.S. peanut crop. Runner peanuts are most commonly used in the production of peanut butter. Virginia peanuts (Arachis hypogaea) are primarily grown in Virginia, North Carolina, and South Carolina. They produce the largest nuts and are most often used as snacking peanuts. Virginia peanuts have also become very popular in gourmet, all-natural peanut butters. Spanish peanuts (Arachis fastigata) are primarily grown in Texas and Oklahoma. These peanuts are used in candies or sold as salted, shelled peanuts for snacking and are also used in the production of peanut butter. Valencia peanuts (Arachis fastigata) are mostly produced in New Mexico. They are known as the sweetest tasting peanuts and are, therefore, very popular for all natural and homemade peanut butters. Valencia peanuts also make delicious boiled peanuts.
According to some sources, it's not really necessary to get peanut seeds from a seed company, though quite a few offer them. Word (on the internet) has it that peanuts from the grocery store will work just fine — with a few caveats: the peanuts need to be in the shell and raw — not boiled in salt water or roasted, as some are. You could try the feed store or a pet store since some birds — think parrots — like to eat peanuts, and generally the ones for pet birds are raw and in the shell. If you want to be sure of the variety, you should plan to order them, however.
Peanuts can be planted directly as well as started inside. They need average soil — no need for fancy stuff since they are really a legume, not a nut, and they actually put nitrogen into the soil. That's another bonus besides the peanut butter. They do need soil that is loose and deep, since the peanuts, like potatoes, grow underground. And, as I mentioned, they need space — so, no crowding. An addition of calcium (bonemeal works) is recommended, too. Peanuts are tropical natives of South America — so, they need lots of sunlight (at least 8 hours a day) and moisture, though not too much. The common wisdom is 1” of water a week — though in this climate, more might be needed.
You can plant them by just pushing the shell into the soil or you can remove the shell and put the peanut in the soil. Be careful not to remove the red seed coat if you take them out of the shell. Push them in about 1 1/2 to 2 inches deep. The seeds will germinate into a lovely green plant with pretty yellow flowers. Sow seeds indoors 6 to 8 weeks before the last frost or directly outdoors when soil has warmed to 60 to 70 degrees F. Plant seeds 4 to 6 inches apart and leave 3 feet between the rows. Keep the soil moist to ensure germination. Seeds will germinate in 10 to 15 days. Thin the seedlings when they are about 2 inches tall, to a spacing of 8 to 12 inches. Plant indoor starts 8 to 12 inches apart. As the plants grow to about a foot tall, "hill" them by heaping additional soil around the base of the stem, along with light mulch for weed control.
Peanuts grow in a very unusual way, so watching them form is almost as much of a treat as getting to eat the peanuts themselves. About six to eight weeks after germination, bushy, 1- to 2-foot-tall plants produce yellow flowers that are self-pollinating. When the flower petals fall, the tip of the flower stalk begins to elongate until it reaches the ground, but it doesn't stop there. “Pegging down” is the term that describes how this stalk continues to grow into the ground until it reaches a depth of 1 to 2 inches (2.5-5 cm.). At the end of each peg (actually called peduncles) is where the seed pods begin to form, encasing the seeds, or peanuts. Since peanuts bloom over a period of several weeks (up to three months), the pods mature at various intervals. Each pod yields two to three peanuts. Again, It's important to hill up and mulch around each plant when they begin to flower so that the peduncles have good deep soil to dive into. Be sure to keep the plants moist at this stage.
Most peanuts are ready to harvest anywhere from 120-150 days after planting, usually in late summer/early fall when the foliage turns yellow. You should also pull a couple of pods from the ground and inspect them carefully. Ready-to-harvest pods have the typical veined surface, the seed coats are colored, and most of the pods have a darkened inside surface. When you harvest the peanuts, the soil must be dry, so stop watering about two weeks before you harvest. Loosen the soil around plants with a garden fork and lift them by grasping at the base and pulling. Shake the dirt from the roots and pods and let the plants dry in the sun for a week (with the pods on top). Remove the pods from plants and spread them on newspaper in a cool, dry place (such as a garage) for several weeks. Store the peanuts in a mesh bag in a cool, dry place.
Peanuts, like any other garden plant, can be affected by a wide range of pests and diseases, especially hungry squirrels, mice, and chipmunks. Leaf-feeding insects may include army worms and caterpillars. Common diseases are leaf spot, rust, blight, and viral diseases. To help identify what is harming the plants, seek assistance from your local Master Gardeners. (immg@ucanr.edu)
In researching and writing this article, I am reminded of George Washington Carver, a prominent American scientist and inventor in the early 1900s. He also was a champion of crop rotation and agricultural education. Born into slavery, today he is an icon of American ingenuity and the transformative potential of education.
Carver was determined to use his knowledge to help poor farmers of the rural South. He began by introducing the idea of crop rotation. Carver settled on peanuts because it was a simple crop to grow and had excellent nitrogen fixing properties to improve soil depleted by growing cotton. He took his lessons to former slaves turned sharecroppers by inventing the Jessup Wagon, a horse-drawn classroom and laboratory for demonstrating soil chemistry. Farmers were ecstatic with the large cotton crops resulting from the cotton/peanut rotation, but were less enthusiastic about the huge surplus of peanuts that built up and began to rot in local storehouses.
In response, Carver developed approximately 300 products made from peanuts; these included: flour, paste, insulation, paper, wall board, wood stains, soap, shaving cream and skin lotion. He also experimented with medicines made from peanuts, which included antiseptics, laxatives and a treatment for goiter. Contrary to popular belief, while Carver developed a version of peanut butter, he did not invent it. The Incas developed a paste made out of ground peanuts as far back as 950 B.C. In the United States, according to the National Peanut Board, Dr. John Harvey Kellogg, of cereal fame, invented a version of peanut butter in 1895.
So, have a gardening adventure…grow your own peanut butter. Better yet — make chili lime roasted peanuts to eat while you watch a movie. George Washington Carver once said, ”Learn to do common things uncommonly well; we must always keep in mind that anything that helps fill the dinner pail is valuable."
For more information about peanuts, see these resources.
- What Is A Virginia Peanut: Information On Planting Virginia Peanuts https://www.gardeningknowhow.com/edible/vegetables/peanuts/planting-virginia-peanuts.htm
- Plant Your Own Peanuts – How To Grow Peanuts https://www.gardeningknowhow.com/edible/vegetables/peanuts/growing-peanuts.htm


