- Author: Alison Collin
Do you agonize over whether a particular fruit is ready to pick?
With the harvest season upon us, it pays to learn which fruits will ripen once picked, and which will not ripen beyond the stage that they had reached when harvested.
Knowing which produce will further ripen will go a long way to preventing the spoilage and wastage of food crops.
Ripening Fruits
Fruits (including those often termed "vegetables" like tomatoes) that continue to ripen are called climacteric. If mature at harvest and kept in ideal conditions, the respiration rate and production of ethylene, a plant hormone, increase leading to pigment and sugar development until the peak of ripeness is reached. After this point the respiration rate drops and the fruit begins to degrade. Maturity is a term describing the point at which a fruit has completed its natural growth and development. This is followed by ripening.
Once mature, climacteric fruits can be encouraged to ripen after harvest if placed in a paper (or other breathable) bag with another riper climacteric fruit such as a banana that releases high levels of ethylene. Ripe apples that do not have a wax coating can also be used for this purpose. Check regularly to make sure that there is no rot, and after a few days the fruit will have ripened.
Occasionally ripening will not occur, most likely because the fruit had not been allowed to develop sufficiently before harvest and was just too immature or the fruit was improperly stored at too cold a temperature.
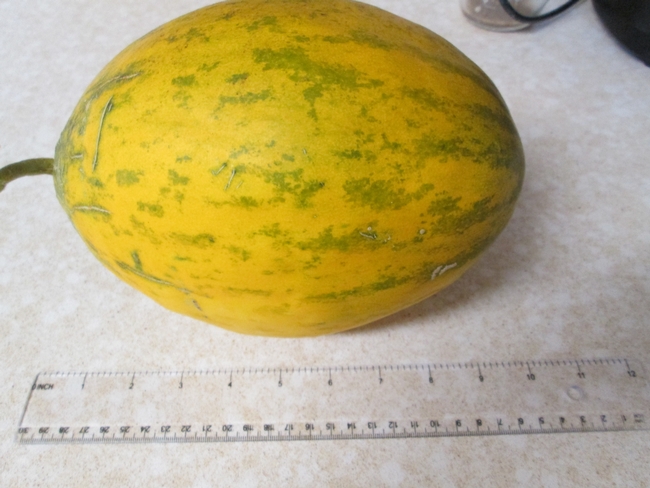
Climacteric fruits which we may be growing locally include apples, apricots, honeydew melons, nectarines, peaches, plums, pears, persimmons, tomatoes, winter squash. Cantaloupe flesh may soften, but they will not become sweeter.
Non-Ripening Fruits
Non-climacteric fruits do not ripen after harvest, but many often store better after harvest than the climacteric fruits since they are not so actively respiring. These fruits need to be left on the plant to mature and ripen. For example a green bell pepper will not turn red after it is picked.
Non-climacteric fruits include: Bell pepper, berries, figs, grapes, cucumber, eggplant, muskmelon, strawberry, summer squash, watermelon, and most of the common citrus – oranges, lemons, grapefruit and limes.
We will soon be approaching frost season with the attendant rush to harvest our tender vegetables and fruits before they get ruined by one cold night. It pays to know which fruits can picked and left to ripen, and which need to be processed into pickles and jams in order to preserve them for later use. The following links contain information about the storage and slow ripening of popular fruits.
For More Information
Because fruit are such an important item of commerce, there has been extensive research on their post-harvest care. To get a sense of what's known about many common crops, one can peruse UC's Postharvest Research Center. There is a lot there to digest!
Here are some tips for ripening tomatoes indoors.
How to harvest and store winter squash.
Harvesting and storing apples or pears.
Of course, you can also contact your local UC Master Gardeners for more information. The Inyo-Mono Master Gardeners can be reached at immg@ucanr.edu or on Facebook.
- Author: Alison Collin
When my daughter moved to the East Coast in spring 2021, I inherited a tin containing numerous old seed packets which mainly represented her enthusiastic optimism followed by dashed hopes.
The first crop that I risked were seeds from a packet of 'Endeavor' beans packed for the year 2014. The seeds looked fine – not dry and withered at all and since my own choice of fresh seed that I had planted earlier in the year had steadfastly refused to germinate I really had nothing to lose. I raked over the row from which I had just harvested potatoes and on July 19 planted the beans fairly close together. In just a few days they had all burst through the soil looking healthy and vigorous, and they went on to provide me with the best crop of tender beans ever.
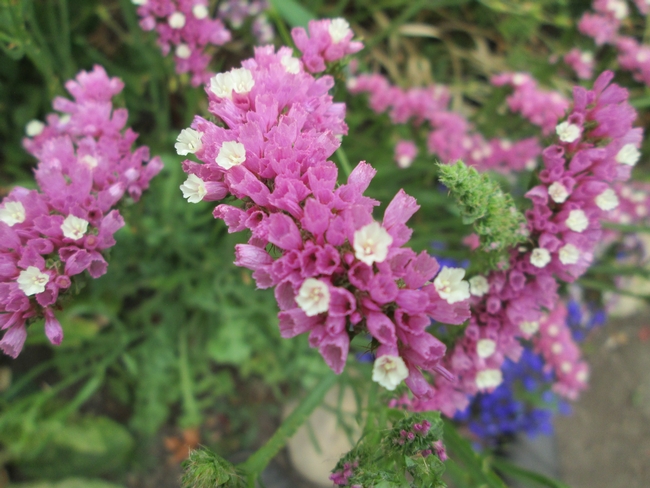
Emboldened by this success, I decided this year to plant some seeds from the oldest packet of the collection which proved to be a few seeds of the everlasting flower, statice (Limoniun sinuatum). I have never grown these before and since the packet stated that one should sow them before the end of 2006 I knew that I was really pushing my luck!
There were just five statice seeds in the packet which I planted in a cell pack in spring. Once again they all germinated. I potted them on, and luckily I kept them inside until after our last frost. Once planted out they sat rather forlorn-looking for several weeks but then the rosettes of basal leaves suddenly grew rapidly and the next thing was that flower spikes shot up giving a lovely display of pink and blue. It is the calyx of the flowers that give the pink, blue or violet color while the corolla is white, or sometimes yellow. Apparently these flowers keep their color very well if dried although I shall have a hard time cutting them to see if this is true!
I also planted some seeds of Gallardia 'Arizona Sun' (2009 seed). They have grown and even produced a couple of flowers, although the plants are still small.
My only failure were old Echinacea seeds, none of which germinated.
For reliable yields, especially of food crops, one should always plant fresh seed that has been packed for the current growing year. Some plants simply will not germinate at all if the seeds are not fresh, e.g. parsnips. With our hot climate during the summer, and heated houses in the winter it is often impossible to find a consistently cool temperature in which to store seeds in order to maintain viability.
Sometimes it is just fun to experiment!
- Author: Vivian Patterson
I love Bread & Butter Pickles! One of the things I love best about them are the onions. We have just harvested our onions but don't have our cucumbers yet. I decided to make a version with just onions.
Step by Step Preparation for Bread & Butter Style Pickled Onions
Adapted from Ball's "Red Onions in Vinegar" recipe.
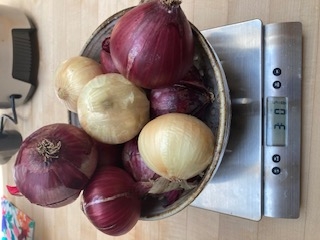
2½ - 3 pounds Onions, thinly sliced
¼ cup Kosher Salt
½ gallon cool water
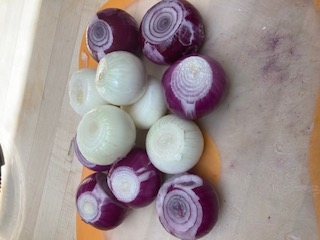
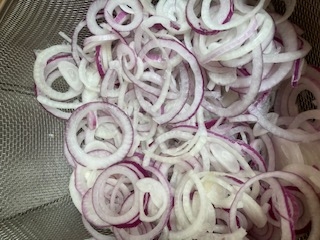
- Weigh, peel and slice the onions.
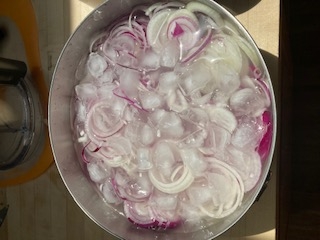
- Cover the onions with a brine of the Kosher Salt dissolved into the ½ gallon cool water. Crack a tray of ice over the top and set aside for 2 hours. Stir from time to time, turning over the layers.
- Make the Vinegar syrup: Combine the following ingredients in a saucepan. Bring to a boil, then remove from the heat and set aside.
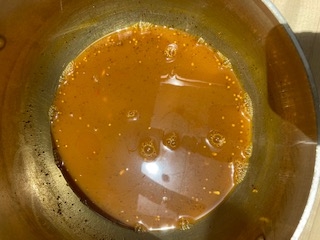 Make Vinegar Syrup
½ cup Water
1 ½ cups apple cider vinegar
¾ cup brown sugar
1 ½ tsp. ground turmeric
1 ½ tsp. mustard seeds
½ tsp. celery seeds
½ tsp. coriander seeds
1 ½ tsp freshly grated ginger root
1 small fresh or dried red chiles, diced
- Prepare jars, lids and rings.
- Drain the brined onions and rinse them with fresh water. Bring the vinegar syrup back to a boil, add the onions, and cook for 5 minutes.
- Using a slotted spoon, divide the onions among the prepared pint jars, then ladle the syrup into the jars, leaving ½ inch headspace. Seal, and process in a water bath or steam canner for 10 minutes (sea level.)
Altitude Adjustment—Increase Processing Time:
1,001 – 3,000 feet: Increase by 5 minutes
3,001 – 6000 feet: Increase by 10 minutes
6,001 – 8,000 feet: Increase by 15 minutes
Over 8,001 feet: Increase by 20 minutes
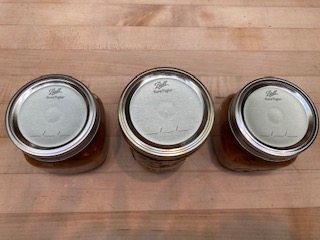
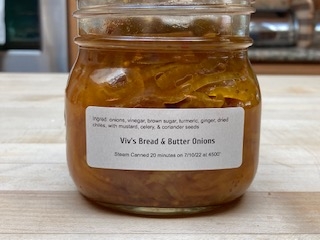
- Check that jars have sealed then clean jars, label, and prepare for storage.
Notes about this recipe:
I sliced 3 lbs. onions, but I only used about 2½ lbs.
Yield: 3 pints.
Although this recipe used spices from a recipe in Saving the Season by Kevin West to obtain the bread and butter pickle flavor, it is essentially the same as the "Red Onions in Vinegar" tested recipe in Ball's Complete Book of Home Preserving with safe additions of salt (as brine), sugar and spices, but substituting 5% apple cider vinegar for red wine vinegar. Not all substitutions are safe to can. If you don't know what can be done, contact the helpline at immg@ucanr.edu, or just refrigerate your custom creation instead of canning it. More information about canning pickles as well as good recipes is available at this site.
Editors note: The Master Food Preservers have a demonstration plot at the Bishop Community Garden. They use the produce from that garden to share safe food preservation practices. As many readers of this blog may have onions ready in your garden, this may be of interest to you. If you have questions about home food preservation, please send your questions to the helpline: immg@ucanr.edu. To learn more about raising onions in the Eastern Sierra this this fact sheet: https://ucanr.edu/sites/
- Author: Dustin Blakey
In the western US our dry conditions keep many fungal diseases from becoming an issue. Since dry is something we do well in the Eastern Sierra, most of our garden diseases are viruses, not fungi. Things change some when we have summer monsoon conditions and rain.
For the past couple weeks, our humidity has been elevated with dew points above 50°F and temperatures are lower. If you cool your home with a swamp cooler you've probably felt the change. And last night it even rained!
When we get conditions like this in summer, we sometimes see diseases on vegetables that are normally not present.
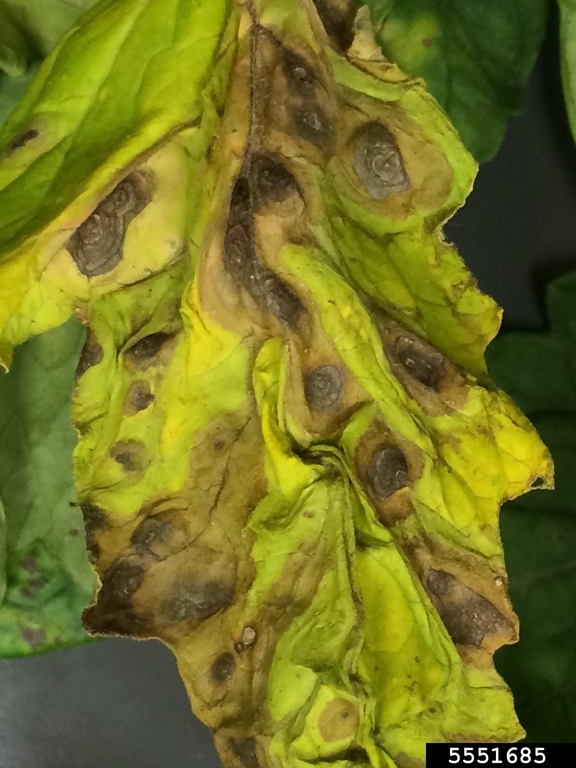
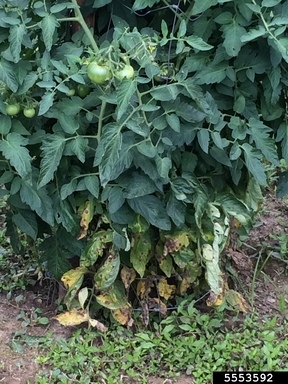
I remember the last couple times we've had mid-summer conditions like this a disease called early blight appeared on tomatoes. Early blight is caused by the fungus Alternaria solani. In California it's uncommon outside of coastal areas. It gets its name from being mostly a disease that occurs early in the growing season.
I've never seen it be fatal here, nor have I seen it get on fruit since our weather soon gets back to super-dry like normal, but it can be alarming when it shows up. At this point in the season, tomato canopies are large and dense. The already high humidity is worse inside the canopy and temperatures are lower, leading to more disease, especially in places where other plants in the nightshade family have been grown before (potatoes, tomatoes, eggplant, etc.).
In the garden, I've only ever seen it on tomatoes in our area. We don't usually plant resistant varieties.
This disease usually starts at the bottom and works its way up the vines. Symptoms are yellowing with lesions that look a bit like bullseyes to me.
Look for this disease in the coming days, especially if you've been gardening in the same place a few years.
If it appears, we can usually control it by removing affected leaves when you see them. Chances are the weather will dry out soon and it no longer becomes an issue. Try not to water tomatoes in the afternoon when it's humid, and if you do need to water, aim for the soil, not the foliage. UC IPM recommends copper fungicides, but sprays are not usually needed in our area. It's more of a temporary condition here; more alarming than anything else. It doesn't seem to get out of control, especially if you remove the yellow leaves.
If you have questions about this or other diseases in your garden, contact our local Master Gardener helpline at immg@ucanr.edu.
- Author: Vivian Patterson
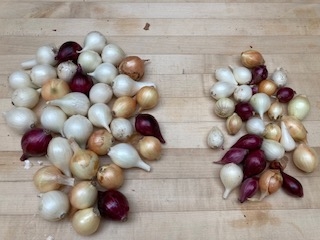
I have a small growing area at the side of my house in Bishop that gets lots of heat and very little sun. I started planting onions in this area about 10 years ago but found that the bulbs never got more than 1-2” in diameter. Now I intentionally plant onions there every January that I freeze whole.
Here is my process.
After the onions have been picked, dried, & cleaned up, separate into groups according to size.
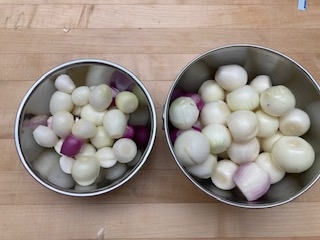
Peel onions keeping sizes separated.
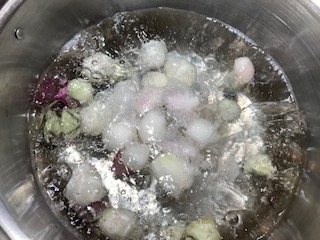
Blanch Onions for 3 minutes. (Here is how to do this.)
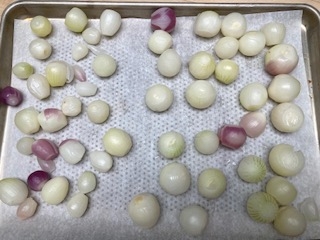
Drain and Prepare to Individually Freeze, Freeze until frozen solid. Overnight is good.
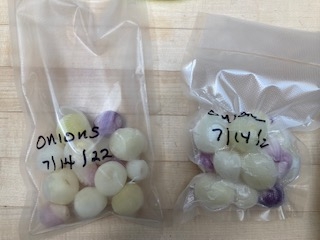
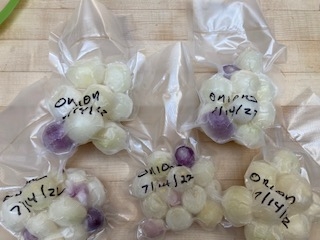
When frozen, remove from freezer. Label Bags. Put desired portions into bags.
Seal all bags. Remove air before sealing.
Notes about Frozen Onions:
- Frozen Onions should only be used for cooking. They are no longer used raw.
- Very small frozen onions may be used in recipes calling for frozen pearl onions.
Uses for Frozen Onions:
- Stews*
- Roast Meats*
- Boeuf Bourguignon*
- Coq au Vin*
- Braised as a side dish (https://www.food.com/recipe/braised-onions-a-la-julia-child-148656)
- Sauteed as a side dish
- Soups
*Braise your onions first. See braised Onion recipe link. Always thaw your onions before braising.
Editor's Note: The Master Food Preservers have a demonstration plot at the Bishop Community Garden. They use the produce from that garden to share safe food preservation practices. As many readers of this blog may have onions ready in your garden, this may be of interest to you. If you have questions about home food preservation, please send your questions to the helpline: immg@ucanr.edu. To learn more about raising onions in the Eastern Sierra this this fact sheet: https://ucanr.edu/sites/


