- Author: Vivian Patterson
I love Bread & Butter Pickles! One of the things I love best about them are the onions. We have just harvested our onions but don't have our cucumbers yet. I decided to make a version with just onions.
Step by Step Preparation for Bread & Butter Style Pickled Onions
Adapted from Ball's "Red Onions in Vinegar" recipe.
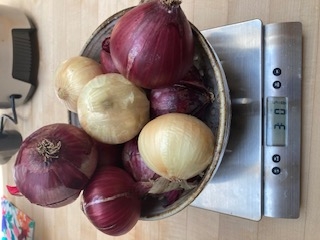
2½ - 3 pounds Onions, thinly sliced
¼ cup Kosher Salt
½ gallon cool water
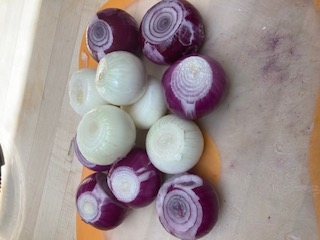
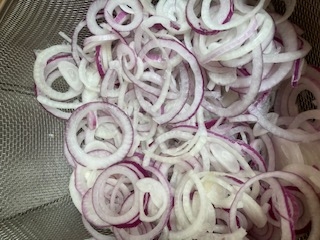
- Weigh, peel and slice the onions.
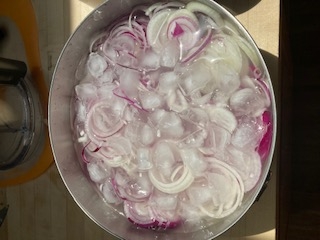
- Cover the onions with a brine of the Kosher Salt dissolved into the ½ gallon cool water. Crack a tray of ice over the top and set aside for 2 hours. Stir from time to time, turning over the layers.
- Make the Vinegar syrup: Combine the following ingredients in a saucepan. Bring to a boil, then remove from the heat and set aside.
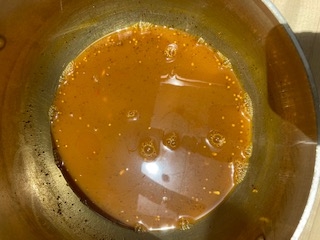 Make Vinegar Syrup
½ cup Water
1 ½ cups apple cider vinegar
¾ cup brown sugar
1 ½ tsp. ground turmeric
1 ½ tsp. mustard seeds
½ tsp. celery seeds
½ tsp. coriander seeds
1 ½ tsp freshly grated ginger root
1 small fresh or dried red chiles, diced
- Prepare jars, lids and rings.
- Drain the brined onions and rinse them with fresh water. Bring the vinegar syrup back to a boil, add the onions, and cook for 5 minutes.
- Using a slotted spoon, divide the onions among the prepared pint jars, then ladle the syrup into the jars, leaving ½ inch headspace. Seal, and process in a water bath or steam canner for 10 minutes (sea level.)
Altitude Adjustment—Increase Processing Time:
1,001 – 3,000 feet: Increase by 5 minutes
3,001 – 6000 feet: Increase by 10 minutes
6,001 – 8,000 feet: Increase by 15 minutes
Over 8,001 feet: Increase by 20 minutes
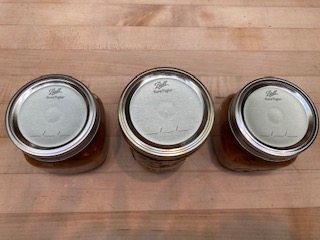
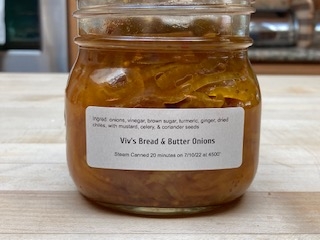
- Check that jars have sealed then clean jars, label, and prepare for storage.
Notes about this recipe:
I sliced 3 lbs. onions, but I only used about 2½ lbs.
Yield: 3 pints.
Although this recipe used spices from a recipe in Saving the Season by Kevin West to obtain the bread and butter pickle flavor, it is essentially the same as the "Red Onions in Vinegar" tested recipe in Ball's Complete Book of Home Preserving with safe additions of salt (as brine), sugar and spices, but substituting 5% apple cider vinegar for red wine vinegar. Not all substitutions are safe to can. If you don't know what can be done, contact the helpline at immg@ucanr.edu, or just refrigerate your custom creation instead of canning it. More information about canning pickles as well as good recipes is available at this site.
Editors note: The Master Food Preservers have a demonstration plot at the Bishop Community Garden. They use the produce from that garden to share safe food preservation practices. As many readers of this blog may have onions ready in your garden, this may be of interest to you. If you have questions about home food preservation, please send your questions to the helpline: immg@ucanr.edu. To learn more about raising onions in the Eastern Sierra this this fact sheet: https://ucanr.edu/sites/
- Author: Vivian Patterson
I have a small growing area at the side of my house in Bishop that gets lots of heat and very little sun. I started planting onions in this area about 10 years ago but found that the bulbs never got more than 1-2” in diameter. Now I intentionally plant onions there every January that I freeze whole.
Here is my process.
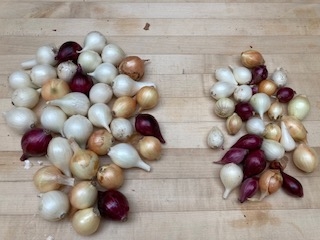
After the onions have been picked, dried, & cleaned up, separate into groups according to size.
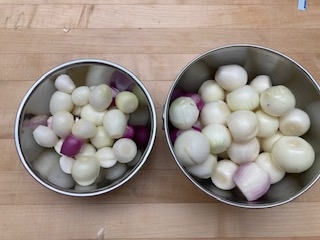
Peel onions keeping sizes separated.
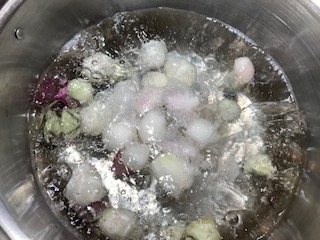
Blanch Onions for 3 minutes. (Here is how to do this.)
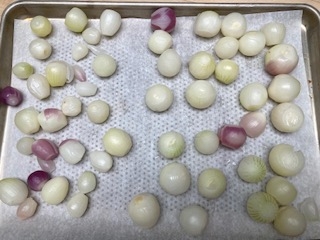
Drain and Prepare to Individually Freeze, Freeze until frozen solid. Overnight is good.
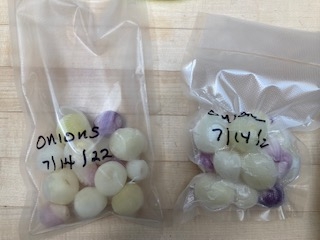
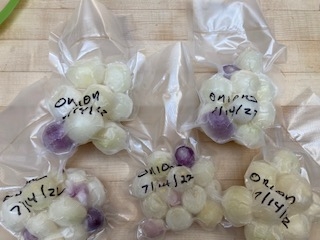
When frozen, remove from freezer. Label Bags. Put desired portions into bags.
Seal all bags. Remove air before sealing.
Notes about Frozen Onions:
- Frozen Onions should only be used for cooking. They are no longer used raw.
- Very small frozen onions may be used in recipes calling for frozen pearl onions.
Uses for Frozen Onions:
- Stews*
- Roast Meats*
- Boeuf Bourguignon*
- Coq au Vin*
- Braised as a side dish (https://www.food.com/recipe/braised-onions-a-la-julia-child-148656)
- Sauteed as a side dish
- Soups
*Braise your onions first. See braised Onion recipe link. Always thaw your onions before braising.
Editor's Note: The Master Food Preservers have a demonstration plot at the Bishop Community Garden. They use the produce from that garden to share safe food preservation practices. As many readers of this blog may have onions ready in your garden, this may be of interest to you. If you have questions about home food preservation, please send your questions to the helpline: immg@ucanr.edu. To learn more about raising onions in the Eastern Sierra this this fact sheet: https://ucanr.edu/sites/
- Author: Alison Collin
Cultural Requirements.
Onions need full sun and prefer a loose, rich, well-drained soil. They are very shallow rooted so need regular irrigation to avoid drying out, and benefit from careful mulching. They do not perform well if they are crowded or have to compete with weeds.
Growing from Seed
This is an economical way to grow onions and gives a chance for several different varieties to be compared. Onions may be sown directly into the ground early in the year for intermediate day varieties, or in fall for short day types. Sow in rows ¼” deep and 15” apart. They should be gradually thinned until they are about 4”-6” apart - the thinnings can be used as green onions or may be transplanted.
For intermediate day onions I have a much greater success sowing indoors in cell packs in mid-January. I harden them off (outside in a protected place during the day, but in at night) ready to plant them out as tiny plants once they have two true leaves which is about one month after sowing. I put one seed per cell so that there is little disturbance to the plants when I plant them out.
I have also used cardboard fruit boxes such as tangerines come in, filled with seed compost and placed on a tray. The box usually lasts for about one month by which time the cardboard is on the point of disintegrating which makes removing the little transplants easy.
Commercially grown transplants
These are an easy way to grow onions if seed-starting is not possible. Many catalogs now carry Intermediate day onions as small plants, and even sell them in mixed bunches of red, yellow and white varieties as a convenience. They have their roots and tops trimmed, and depending on the company may have been lifted some time before they arrive so they may be rather dried out. Also some companies don't send them out very early in the season to zone 7 – a point worth checking.
They are comparatively expensive and come in large bundles of about 50-70 plants which is generally more than I need so it may help to find someone willing to share an order.
Onion Sets
These are tiny onion bulbs which are grown the previous season in crowded conditions to keep them under-developed and are then lifted and dried. They appear in net bags and are usually just labeled “white” or “yellow” with no varietal name and are most often long-day types. My experience with trying to grow these is that they bolt very readily or just grow foliage and some very small bulbs. In this area they are usually planted in the fall, but are often already woody in the middle before they are lifted. They may be planted to provide a supply of green onions, and can be planted close together for this purpose.
My experience has been with using drip irrigation with ½ pipes and emitters every 1 foot and this I bury about just under the surface. During the recent drought years I have planted a row on either side of the pipe with those plants on one side about 2” to the left of an emitter, and the ones on the other side about 2” to the right so that they were checkerboarded and the plants were about 4”-5”away from each other. If growing with soaker hoses or overhead irrigation they can be planted about 4” apart depending on the cultivar. Closer spacing will give smaller onions.
One month after planting I mulch the growing plants to conserve moisture and prevent sunscald of the developing bulbs, and then just leave them to grow.
I have good, regularly amended soil so I fertilize only a couple of times using a general liquid fertilizer early in the growing season (March and May). If growing sweet onions avoid using fertilizers containing sulfur. It is important not to fertilize once bulbing has begun. The areas between the plantings remained dry because of lack of water, and very few weeds appeared through the mulch but these were removed when small to avoid disturbing the onion roots.
As the foliage grows take care not to break or bend it at the neck as this will inhibit nutrition from the foliage reaching the bulb.
Harvesting and Curing.
When the bulbs have grown to full size, usually around early August for intermediate-day varieties, the foliage begins to turn brown and bend over at the necks. At that point I remove the mulch, reduce the irrigation, and as the onions dry I disconnect the irrigation pipe completely. When the foliage is dry I lift the onions very carefully so as not to damage them or tear off the drying skins. They have usually grown so that the bulb is almost sitting on top of the soil. Then the onions are traditionally laid out on the soil surface to dry, with the foliage of one plant laid over the next to prevent sunburn. However, I have found that since this is often at the hottest time of year in our area, they tend to get sun damage anyway, so I have found that using an old mesh window screen supported on a couple of saw horses and placed away from strong, direct sunlight often gives better results.
Once the necks are completely dry, and the outer skins papery, the onions may be placed in mesh bags, or if suitable braided and stored in a cool, airy place. (Unfortunately, almost an impossibility here in the height of summer). I use a spare bedroom for the hotter months before transferring to the garage once the outside temperature cools off. Inspect for softening or rotting and remove those that are affected immediately; use any with thick or soft necks first.
Pests and Diseases.
I grew onions without any noticeable problems for a few years, but two years ago I began to get thrips infestations which affect onions grown in dry conditions, and appeared in July. The foliage became streaky and slightly grayish and sticky. Insecticidal soap has proved effective in controlling this pest, which is not so likely to occur where onions have sprinkler irrigation. Damage to the crop was not severe since by that time the bulbs were well formed.
Onion pink root is a fungal disease and can be devastating. So far I have never seen any evidence of it in my crops.
For other pests and disease symptoms check the California Master Gardener Handbook.
Bolting
Bolting, or sending up a premature flower spike during the first year of growth, is often the result of a sudden change in temperature, irregular irrigation or other stress. Some varieties are more prone to bolting than others, so check for this when choosing varieties. If a flower spike emerges, snip off the top of the stem, and use that onion quickly because it will not store. The center of the bulb may be woody, but the rest is still usable.
Yields vary but in 2016 I grew one 17' row of Candy from seed started early indoors and planted out as tiny plants in mid-February - a total of 35 plants which yielded just under 31lbs of onions, the largest being 1lb 6¾oz, and the smallest 9 oz. They stored through mid-December.
However another Master Gardener in a nearby neighborhood grew Candy from commercial transplants planted out on March 29 as part of a comprehensive trial of onions in 2014. She grew 30 plants of Candy yet the yield of those was only 11lbs 9oz, and they grew to only 2.5” in diameter.
Resources
http://ucanr.edu/blogs/blogcore/postdetail.cfm?postnum=16873 (Bishop trial of 9 different varieties)
http://www.dixondalefarms.com/learn
http://www.rodalesorganiclife.com/garden/onions-growing-guide
http://ucanr.edu/blogs/blogcore/postdetail.cfm?postnum=19933 Fall planted onions in Bishop
http://ucanr.edu/blogs/blogcore/postdetail.cfm?postnum=21030
- Author: Alison Collin
Onions (Allium cepa) are biennial members of the Amaryllidaceae family and Allium genus which also includes leeks, garlic and chives and shallots. They are an important food crop worldwide, and feature in the cuisine of many different cultures.
Numerous varieties of onions are available. Most are easily grown, but not all varieties make good bulbs at this latitude so it pays to understand the specific requirements in order to meet with success and not to waste time, money and effort planting varieties which are not likely to do well.
The most important criteria for growing onions is the length of daylight available. This is called photoperiodism.
Onions grow foliage during the cooler weather – each leaf representing one layer in the bulb - until a specific daylight length is reached. Once this point has occurred, foliage growth stops and bulb formation begins, so the larger and stronger the plant is at that point the bigger the mature onion will be. If you plant the wrong type at the wrong time they will grow tops but not produce onions, or will simply bolt and flower.
They are divided into the following groups:
- Short day onions bulb up when the daylight length reaches 10-12 hours. (Note: This is in spring, and NOT when the days are getting shorter)! These are best started in the fall or early winter so that they can bulb up early the following year – they will be ready to use around late May -July. They are hardy, and overwinter well, although one has to remember to maintain irrigation and not let them dry out at any time. These are generally the sweeter flavored onions and do not store well.
- Intermediate day onions which are not so temperamental and will bulb when the light length is about 12-14 hours. In this area, if seed is started early in the year (January), or transplants are planted out in February they will have several months in which to grow into good sized plants by the time bulb production begins. This will enable them to develop quite large bulbs which can then be dried and stored by the end of August/September.
- Long day onions that require 14-16 hours of daylight in order to bulb up. These grow well in the north of the USA but do not do well in this area. In general, they are the more pungent varieties and tend to be the better keepers. An exception to this are the Walla Walla onions which although technically they are long day onions can be grown in intermediate day areas with good light since they mature early. These are very sweet onions and do not store well.
Onions can also be further divided by color of their skins -- yellow, white or red, or by their taste -- sweet, pungent, or mild. Each daylight length group contains a variety of these possibilities. Some store well, while others only keep for a limited amount of time.
Mature bulbs vary in shape and size conical, round, flattened disc, and some, such as the Cippolini types, only grow to 2”, while some aficionados attempt to grow individual onions weighing over 10lbs!
The Egyptian "walking onions" (Allium × proliferum) make clumps of bulbs at their bases which are rather pungent. Clumps, which are more generally eaten, also appear on the end of stalks in place of flowers. If left, these flower stems bend over and the bulblets will root when they reach the ground. This is why they are called walking onions.
Onions germinate and grow easily from seed. January is a good time to sow intermediate-day onions inside, or alternatively, transplants become available a little later. These often come in large bundles of single varieties which makes it difficult to try several different varieties in the garden unless one has a lot of space.
I have had good luck growing the variety 'Candy' but although they had a very good yield and flavor, they did not store well. It was disheartening to find their middles softening before I had used them all. Recently I have grown 'Zoey' as a good storing yellow onion, but they may be rather large for some people -- many weighing in at nearly 2lbs. each! For red onions I like 'Monastrell', a slightly flattened onion with a good flavor, beautiful color, and excellent keeping ability. I harvested both these varieties at the end of August last year, and am still finding them in excellent condition as I am about to sow a new crop.
A onion problem diagnosis chart can be found at the bottom of this document.
Onions are a great crop in our area and are certainly worth growing.
- Author: Alison Collin
2014 Onion Trial Results
Conducted by Pat West, Master Gardener Volunteer
In an attempt to show which of the three types of onions are best suited to growing conditions in the Eastern Sierra a small-scale trial was performed by one of our Master Gardeners. The plants were grown in as similar conditions as possible and included 9 different varieties, three each of short day, intermediate and long day.
Location: West Bishop, full sun.
Soil: Raised bed, garden soil heavily amended with compost and some chicken manure. Pre-treated with 10-20-10 feed and weed mixed into the top three inches of soil. Mulched with grass clippings.
Irrigation: Drip, with lined buried 1” under the surface. Watered as necessary.
Varieties:
- Short day: Red Creole (red), Texas Early White, Texas Super Sweet (yellow)
- Intermediate day: Red Candy Apple, Super Star (white), Candy (yellow)
- Long day: Red Zeppelin, Ringmaster (white), Walla Walla (yellow).
Planting date: March 29, 2014 (all varieties), plants spaced at 4”
Fertilizing:
- 3/29 Side dressing at time of planting.
- 4/28 Side dressing
- 6/21 Spray of Fish Emulsion Mix
- 7/21 Spray of Fish Emulsion Mix.
Pests: The plants were affected by thrips later in the summer.
Results
Short day:
- Bulbed up June 1
- Tops tipped over July 1
- Stems browned by July 12
- Harvested July 16 and set to cure for 2 weeks.
Yield:
- 3 Red = 8oz.
- 35 White = 6lbs 9oz.
- 12 Yellow = 2lbs 9oz.
- Total: 50 plants yielded 8lbs 9 oz., averaging 2.1oz. each and 2¼ inches in diameter.
Intermediate:
- Bulbed up June 14
- Red tipped July 14, foliage dried, harvested July 22,
- White tipped Aug 1, foliage dried, harvested by Aug 10
- Yellow tipped Aug 8, foliage dried, harvested by Aug 1
Yield:
- 15 red = 1lb 14oz., aver. diameter 1¾”
- 26 white = 12lb 3oz., aver. diam. 2½”
- 80 yellow = 11lb 9oz., aver. diam. 2¼”
- Total: 71 plants yielded 25lbs 10 oz., averaging 5.8oz each.
Long Day:
- Bulbed up: Red Aug 1, White July 16, Yellow July 9
- Red tipped over Aug 15, foliage dried and harvested Aug 20
- White had thick necks which did not tip over and did not dry. Harvest Sept 6.
- Yellow tipped Aug 10, foliage dried and harvested Aug 15
Yield:
- 24 red =6lb, average diameter 1½”
- 19 white = 7lbs 5oz., average diam. 2½”
- 23 yellow = 11lb, average diam 2½”
- Total: 66 plants yielded 24lbs 5oz., averaging 5.2oz. each.
Curing: All onions were stored on racks for a couple of weeks until the outer skins were well dried.
Comments
In all cases the red varieties were considerably smaller than either the white or yellow varieties.
The short day varieties performed poorly with the tops tipping over and drying up before the bulbs had developed any appreciable size.
The intermediate or day neutral varieties performed best all round. They bulbed up well, were a nice size, were firm and round and cured well with a nice dry skin and neck. Candy also stored very well.
The long day ones grew and bulbed up well but the Ringmaster had very thick necks which refused to tip over and dry. They remained moist even after harvest and curing, so had to be used quickly. Interestingly, another Master Gardener had the same problem with Long day yellow onions (Golden Grande) grown in very similar conditions, although the same variety grown the previous year did not have the thick necks and had dried and stored well. The only obvious difference being that 2014 was a very hot summer, that crop had been mulched, and was much affected by thrips.
Conclusion: From this small study it would appear that the intermediate or day neutral varieties perform reliably in the Eastern Sierra high desert.


