- Author: Lauria Watts
Are you leery of some of the canning instructions on the web? Can you volunteer to teach or help with classes to teach the public safe, effective, USDA approved home canning techniques and recipes?
Please go to this link: San Bernardino County Master Food Preservers and then click on "Master Food Preserver Application 2019" above Uncle Sam's Picture for more information!
- Author: Lauria Watts
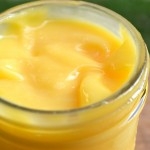
Recently I got together with a friend and helped her make the following Lemon Curd. It was De-LISH! Follow the instructions exactly for a good boiling-water-bath-preserved lemon curd. Make sure you get lots of lemons, organic or home-grown lemons, for the most excellent zest.
Previously I had ONLY made lemon curd using the "coat the back of a spoon" test for thickness. This test can be dicey as if you are not familiar with how the curd coating the spoon should look, you will overcook the curd wind up with scrambled bits of egg in your batch.
This recipe has you use a good thermometer--if you don't have one, I highly recommend you get one. That thermometer makes things easy. Our curd was carefully cooked and was pulled off the heat just when if hit 170º F. It was perfect, and perfectly delicious.
Use your new-found hands-on water bath abilities to make Canned Lemon Curd. You can do it! Just read through the instructions and follow them; they look involved but are very easy to follow. And I dare you NOT to eat it out of the jar with a spoon!
Canned Lemon Curd
- 2½ cups superfine sugar*
- ½ cup lemon zest (freshly zested), optional
- 1 cup bottled lemon juice**
- ¾ cup unsalted butter, chilled, cut into approximately ¾" pieces
- 7 large egg yolks
- 4 large whole eggs
Special Equipment Needed: lemon zester, balloon whisk, 1½ quart double boiler*** (the top double boiler pan should be at least 1½-quart volume), strainer, kitchen thermometer measuring at least up to 180°F, glass or stainless steel medium mixing bowl, silicone spatula or cooking spoon, and equipment for boiling water canning.
Yield: About 3 to 4 half-pint jars
Please read Using Boiling Water Canners before beginning. If this is your first time canning, it is recommended that you read Principles of Home Canning.
Procedure:
| 1. | Wash 4 half-pint canning jars with warm, soapy water. Rinse well; keep hot until ready to fill. Prepare canning lids according to manufacturer's directions. | |
| 2. | Fill boiling water canner with enough water to cover the filled jars by 1 to 2 inches. Use a thermometer to preheat the water to 180°F by the time filled jars are ready to be added. Caution: Do not heat the water in the canner to more than 180°F before jars are added. If the water in the canner is too hot when jars are added, the process time will not be long enough. The time it takes for the canner to reach boiling after the jars are added is expected to be 25 to 30 minutes for this product. Process time starts after the water in the canner comes to a full boil over the tops of the jars. |
|
| 3. | Combine the sugar and lemon zest in a small bowl, stir to mix, and set aside about 30 minutes. Pre-measure the lemon juice and prepare the chilled butter pieces. | |
| 4. | Heat water in the bottom pan of the double boiler until it boils gently. The water should not boil vigorously or touch the bottom of the top double boiler pan or bowl in which the curd is to be cooked. Steam produced will be sufficient for the cooking process to occur. | |
| 5. | In the top of the double boiler, on the counter top or table, whisk the egg yolks and whole eggs together until thoroughly mixed. Slowly whisk in the sugar and zest, blending until well mixed and smooth. Blend in the lemon juice and then add the butter pieces to the mixture. | |
| 6. | Place the top of the double boiler over boiling water in the bottom pan. Stir gently but continuously with a silicone spatula or cooking spoon, to prevent the mixture from sticking to the bottom of the pan. Continue cooking until the mixture reaches a temperature of 170°F. Use a food thermometer to monitor the temperature. | |
| 7. | Remove the double boiler pan from the stove and place on a protected surface, such as a dish cloth or towel on the counter top. Continue to stir gently until the curd thickens (about 5 minutes). Strain curd through a mesh strainer into a glass or stainless steel bowl; discard collected zest. | |
| 8. | Fill hot strained curd into the clean, hot half-pint jars, leaving ½-inch headspace. Remove air bubbles and adjust headspace if needed. Wipe rims of jars with a dampened, clean paper towel; apply two-piece metal canning lids. | |
| 9. |
Process in the prepared boiling water canner according to the recommendations in Table 1. Let cool, undisturbed, for 12 to 24 hours and check for seals. |
|
Table 1. Recommended process time for Canned Lemon Curd in a boiling-water canner. |
||||
| Process Time at Altitudes of: | ||||
| Style of Pack | Jar Size | 0 - 1,000 ft | 1,001 - 6,000 ft | Above 6,000 ft |
| Hot | Half-pints | 15 min | 20 | 25 |
Shelf Life: For best quality, store in a cool, dark place (away from light). Plan to use canned lemon curd within 3 to 4 months. Browning and/or separation may occur with longer storage; discard any time these changes are observed.
Prepared lemon curd can also be frozen instead of canned for up to 1 year without quality changes when thawed. Package in freezer containers after straining and cooling to room temperature. To thaw, place container in a refrigerator at 40°F or lower for 24 hours before intended use. After thawing, consume within 4 weeks. (See Freezer Lemon Curd, http://www.uga.edu/nchfp/publications/nchfp/factsheets/freezer_lemoncurd.pdf)
Preparation Notes:
* If superfine sugar is not available, run granulated sugar through a grinder or food processor for 1 minute, let settle, and use in place of superfine sugar. Do not use powdered sugar.
** Bottled lemon juice is used to standardize acidity. Fresh lemon juice can vary in acidity and is not recommended.
*** If a double boiler is not available, a substitute can be made with a large bowl or saucepan that can fit partway down into a saucepan of a smaller diameter. If the bottom pan has a larger diameter, the top bowl or pan should have a handle(s) that can rest on the rim of the lower pan.
For more detailed information on boiling water canning, see "Using Boiling Water Canners" at http://www.uga.edu/nchfp/publications/uga/using_bw_canners.html
Variation:
For Lime Curd, use the same recipe but substitute 1 cup bottled lime juice and ¼ cup fresh lime zest for the lemon juice and zest.
Other citrus or fruit curds are not recommended for canning at this time.
Developed at The University of Georgia, Athens, for the National Center for Home Food Preservation. Released by Elizabeth L. Andress, Ph.D., Department of Foods and Nutrition, College of Family and Consumer Sciences. December 2004.
This material is based upon work supported by the Cooperative State Research, Education, and Extension Service, U.S. Department of Agriculture, under Agreement No. 00-51110-9762.
- Author: Lauria Watts
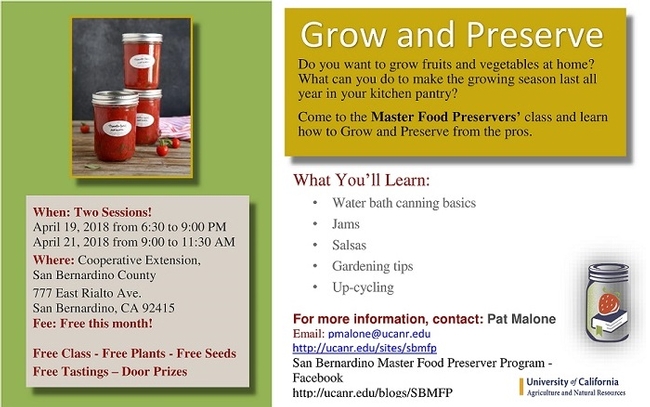
Somehow this seems to have been posted much earlier this year--perhaps something is wonky on this website. But, here is a reminder about--THE WONDERFUL GROW AND PRESERVE CLASS--Don't miss it!
- Author: L. Watts
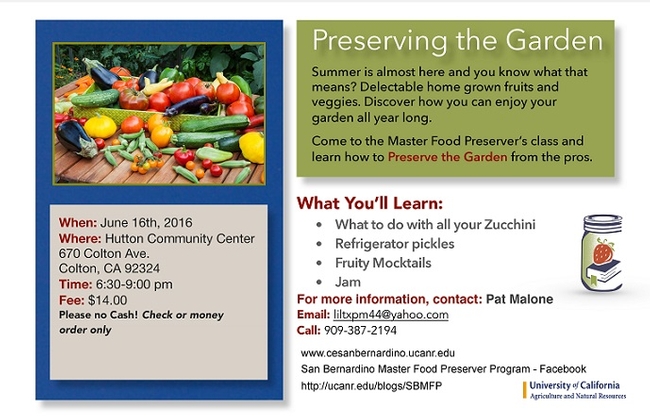
Here it is, just in time for to use that stuff from the garden, farmer's market, next-door-neighbor. . . We hope to see you there.
- Author: L. Watts
What a meeting! You missed it!
Market! Link! Social Media! Pictures! SB County expectations! Gray-scale flyers! Photo album! Out-reach! Class opportunities! Great ideas, good food (of course we had good food!)
These are just a few of the things we brain-stormed in the Marketing Brainstorming meeting we had this past Saturday. There was a good turn-out at Susan Israel's very nice house—thank you Susan for hosting.
Check out some pics:
Complete with Post-its! You cannot see all the ideas flying around here, but look at the number of post-its on the windo in the back and you will get an idea of the number. And there were even more by the end of the meeting.
This picture did not include one of Suzy's dogs that climbed up on the back of the couch and and licked Lane's head to get his attention!--all very sweet dogs.
There were a lot of very good Ideas to help publicize the MFP program. Many things to think about and start to take action on.
For starters, one easy Idea for you all: If you post anything, anywhere on the web as a response to a food/canning article, item, blog, picture or such, please include in your signature “Master Food Preserver of San Bernardino County.” If you have a webpage of any sort, please link to us ! This will help us to come up in results for searches about canning/food preservation. If you can make this a link to our Home page or blog or Facebook page it would be even better. If you need help with this just e-mail me!
COMING UP: Brining, smoking a bird for T-Day, from Darrell Fluman. It's a good one so don't miss it.
Now I leave you with the recipe for the delicious Meyer Lemon Polenta cake that Suzy served at our meeting. Not a preservation recipe, but it uses optional candied lemon slices and we TALKED about canning stuff!!!
Meyer Lemon Almond Cake
http://www.sfgate.com/recipes/article/Meyer-Lemon-Almond-Cake-6036459.php
Serves 8-10
This cake pairs the bright flavor of Meyer lemons with a moist, buttery crumb made of almond flour. This is naturally gluten-free (as long as you use gluten-free flour blend to coat the pan). It can be gussied up with a topping of candied lemons, or served without.
Tips From Suzy: The recipe is hard to follow. I've learned to do some prep first: A small bowl of just the almond flour, a small bowl of the lemon zest/lemon juice/vanilla, and a small bowl of polenta (just cornmeal--don't tell anybody)/baking powder/salt/cardamom powder. They get mixed in with the butter/sugar/egg mixture in that order. And any lemons will do.
The cake:
8 ounces (2 sticks) unsalted butter, softened
1 to 2 teaspoons all-purpose flour or gluten-free flour blend
1 cup sugar
2 cups almond flour
3 large eggs
½ teaspoon vanilla extract
¼ cup Meyer lemon juice (about 1 large lemon)
2 tablespoons finely grated Meyer lemon zest (about 2 large lemons)
½ cup medium-grind polenta (cornmeal!)
1 teaspoon baking powder
¼ teaspoon kosher salt
¼ teaspoon ground cardamom
Candied lemons (optional):
1½ cups sugar
2/3 cup water
3 to 4 medium Meyer lemons (about 10 to 14 ounces), sliced 1/8-inch thick, seeds removed
For the cake: Preheat the oven to 325 degrees, and place a rack in the middle.
Place the butter in a large mixing bowl or the bowl of a stand mixer fitted with the paddle attachment; set aside. Use the butter wrappers to grease the inside of a 9-inch springform pan and sprinkle with the flour, rotating to coat the bottom and sides of the pan; discard excess flour. Cut a circle of parchment paper to fit the bottom, place inside the pan and set aside.
Add the sugar to the butter; mix at medium-high speed until light and fluffy, about 4 minutes, scraping down the sides of the bowl once or twice. Add the almond flour and mix slowly to combine.
Add the eggs, one at a time, beating thoroughly to combine, scraping down the sides of the bowl, before adding the next. The batter should have a light, mousse-like texture.
Remove the bowl from the mixer. Using a large spoon or rubber spatula, gently fold in the vanilla, lemon juice and zest. Add the polenta, baking powder, salt and cardamom, continuing to fold carefully.
Spoon the batter into the prepared pan and smooth out to the edges. Set the cake pan on a rimmed baking sheet and bake 45-50 minutes, until the top is golden brown and the center is set.
Remove the cake from the oven and let sit 10 minutes. Run a butter knife around the edge of the cake to loosen, then remove the sides of the pan. Leave the cake on the bottom of the springform pan, place on a rack and let cool. The cake can be made a day ahead; loosely wrap or place in a cake carrier and store at room temperature.
For the candied lemons: Combine the sugar and water in a shallow saucepan and heat over medium-high until the sugar dissolves and the mixture comes to a strong simmer. Working in batches, add the lemon slices and continue to simmer, turning the slices occasionally, until the peels turn translucent, about 6-7 minutes, depending on the thickness of the slices. Remove from heat and let cool. The candied lemons can be made a day or two ahead; refrigerate in the syrup.
To finish the cake: Remove the candied lemon slices from the syrup and blot with paper towels. Overlap the slices atop the cake.
Note: Reserve the remaining syrup to mix with mineral water or club soda for a light spritzer, or to add to a citrus-based cocktail that calls for simple syrup. Or, use it to sweeten lemonade.


