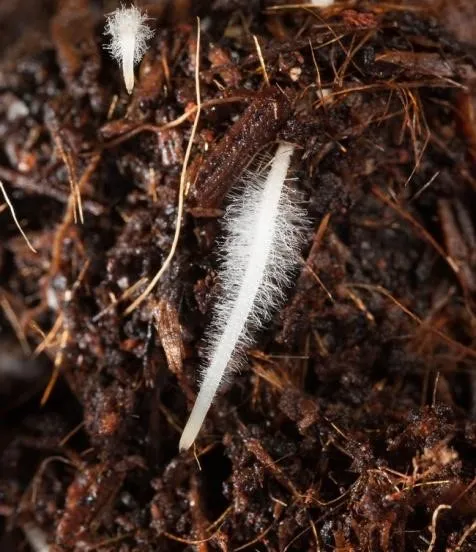
California's cattle producers and agricultural communities are all too familiar with the rising challenge of antibiotic resistance, making common bacterial infections harder to treat in livestock. But imagine a future where we could tackle these infections with a natural, powerful alternative. Our research points to just that: antimicrobial peptides (AMPs) found in African catfish.
We're really excited about these peptides because African catfish thrive in pathogen-rich freshwater, naturally producing these robust immune compounds in their skin mucus as a defense. This natural origin makes them highly appealing alternatives to synthetic drugs.
Predicted Safety and Potent Action
One of the most compelling aspects of these AMPs is their predicted safety for mammals. Our initial computer analyses suggest that various catfish AMPs are generally recognized as safe (GRAS). We predict they'll be absorbed in the human intestine without causing liver, brain, or heart toxicity. Furthermore, lab tests on a promising peptide, NACAP-II, confirmed it was non-hemolytic, meaning it didn't damage rabbit red blood cells—a strong indicator of its potential safety for mammalian cells.
Beyond safety, these peptides demonstrate effectiveness against problematic bacteria. One study revealed NACAP-II's strong activity against Extended-Spectrum Beta-Lactamase (ESBL)-producing Escherichia coli—a critical concern for both animal and human health due to its resistance to many common antibiotics. Another peptide, ACAP-IV, also showed antibacterial activity against E. coli and Staphylococcus aureus. We believe these AMPs work by directly disrupting bacterial cell membranes, a mechanism that makes it harder for bacteria to develop resistance compared to how they resist traditional antibiotics.

Creating a Winter Habitat for Wildlife by Providing Food and Shelter


Winter in Contra Costa County tends to be mild, but it is still important to think about supporting wildlife in our urban and suburban gardens during this season. The term “wildlife” can have different meanings, in the context of this article however, it refers to birds, bees, butterflies, reptiles, amphibians, insects, but not necessarily mammals, especially those that are considered pests. Mammals, such as squirrels, mice, rats, deer, and raccoons, thrive in our urban environments because their populations aren’t naturally controlled by their predators. Creating a habitat for that wildlife is generally not advisable as it can disrupt our gardens and communities.
With that context in mind, the primary habitat needs for winter wildlife are shelter and food. While many articles about wildlife habitat also mention water as a key element, providing water for wildlife can be problematic since it needs to be cleaned and refilled often to prevent the spread of disease. Additionally, because winter is our rainy season, water should be generally available for wildlife, unless there is a drought.
Both food and shelter are best provided through native plants, which the native wildlife have evolved with and are adapted to.
Shelter
Many insects are dormant during our winter. For example, many native bees spend the winter sheltering underground, or in dead plant material, (such as leaf-cutter bees.) https://ucanr.edu/sites/ccpestmanagement/files/237336.pdf. This is why it’s important to leave some ground bare for ground-nesting bees.
For birds, it is important to have shrubs and trees which provide shelter from both weather and predators. Evergreen, dense shrubs and trees will provide the best protection.
Food
You can provide food for wildlife with native plants, which naturally produce nectar, pollen, seeds, and fruit, rather than relying on artificial feeding stations to provide that service.
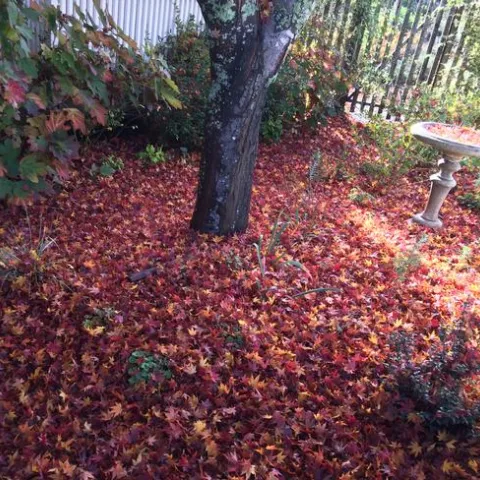
Most native plants provide food for birds, depending on their diet. Letting plants go to seed in the fall will provide food for seed-loving birds into the winter. Leaving leaves on the ground (see the article “Messy is Good for the Planet” in this newsletter), which provide habitat for various stages of insects, will be consumed by insect-eating birds. And berry-producing plants will provide food for many different birds.
The western population of the Monarch butterfly spend their winters on the California coast, and their needs during that time are not milkweed, because that is food for their caterpillars, and the butterflies should be in reproductive diapause (i.e., not producing caterpillars) when overwintering. What they need most is nectar from plants that bloom in the winter.
Native plants that provide shelter and food

Many plants native to Contra Costa County offer both food and shelter for wildlife in the winter. As discussed in the article Winter Blooms for Garden Pollinators, several shrubs and small trees can provide both shelter and food.
These include:
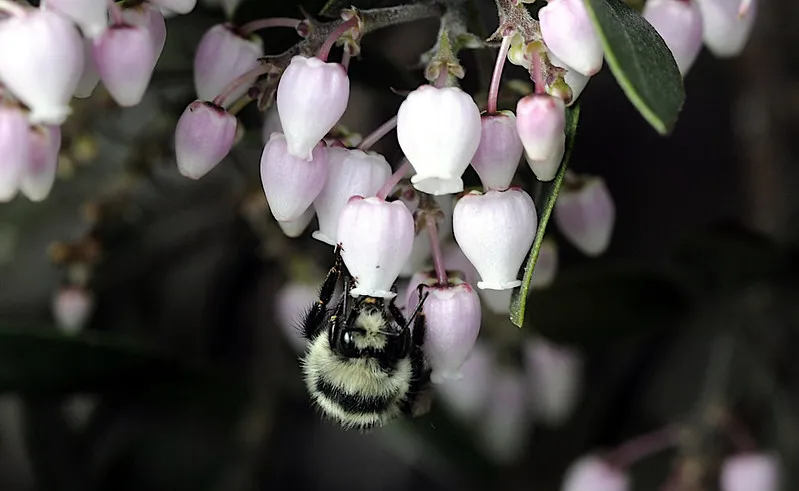
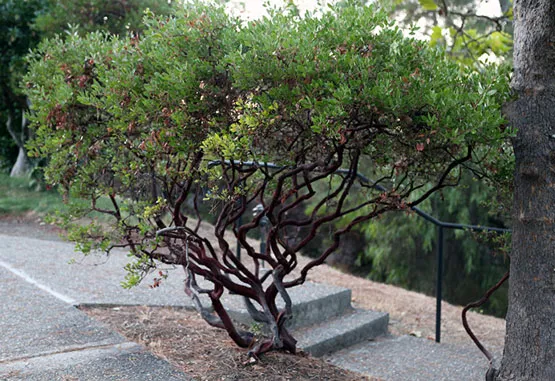
- Manzanita (Arctostaphylos manzanita): Their winter blossoms provide nectar for Monarch butterflies, native bumble bees, and hummingbirds; their berries are food for birds; their dense foliage provides shelter for birds.
- California Lilac (Ceanothus): winter and early spring blossoms provide pollen and nectar for bees and other insects; their berry-like fruits provide food for birds; their dense foliage provides shelter
- Toyon (Heteromeles arbutifolia): Their bright red fruits mature in fall and winter and provide food for many bird species
- Silktassel (Garrya elliptica): Coast silktassel flowers in winter and early spring, providing pollen and nectar for native bees and butterflies; later the small berry-like fruits provide food for birds and other wildlife
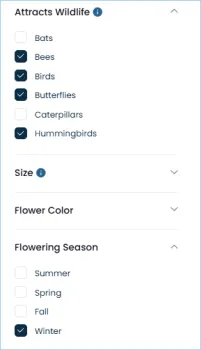
You can use Calscape, the web-based native plant database developed by the California Native Plant Society, to filter for plants that bloom in the winter, are wildlife-friendly, and are local to a specific area.
Resources
Winter Blooms for Garden Pollinators
https://ccmg.ucanr.edu/News_to_Grow_By/?story=2705
Plant Native Shrubs Now for Winter and Spring Bloom
https://ccmg.ucanr.edu/News_to_Grow_By/?story=2664
Winter Gardens for the Birds
https://ccmg.ucanr.edu/News_to_Grow_By/?story=2663
Creating a Wildlife Habitat
https://ccmg.ucanr.edu/News_to_Grow_By/?story=2461
California Native Bees
https://files.constantcontact.com/c2115e3d101/cf28e3ea-97b4-4111-af36-12a27317389d.pdf
Gardening for Butterflies
https://files.constantcontact.com/c2115e3d101/b67fe1b6-e9ce-428f-8602-a37a20b37052.pdf
What are Our Perennials Doing in Winter?
by Cynthia Engers
It’s clear that with the sun low in the sky, shorter days, and cooler temperatures, plant growth has slowed, almost to a stop. Most of the plants are going dormant and will be in full dormancy by January. What is going on? We know they’re not dead, but is anything happening below the soil, if not above it?
Dormancy, which in our area can also occur in summer, is a means for plants to withstand unfavorable conditions, such as drought or cold. The plants enter a period of minimal activity – most of which happens underground.
Preparation for dormancy starts well before winter arrives. When the average temperature falls and the sun moves lower in the sky, hormones such as abscisic acid trigger a slowing of photosynthesis and respiration. Plant enzymes that drive metabolism work poorly in cooler temperatures and growth stops. We all enjoy the beauty of fall color in leaves – but what we primarily see with slowed photosynthesis is the result of the absence of chlorophyll in the leaves which masks carotenoids responsible for yellow and orange colors. The slow growth of the plant also leads to excess sugars in the leaves which produce anthocyanins that create red and orange colors.
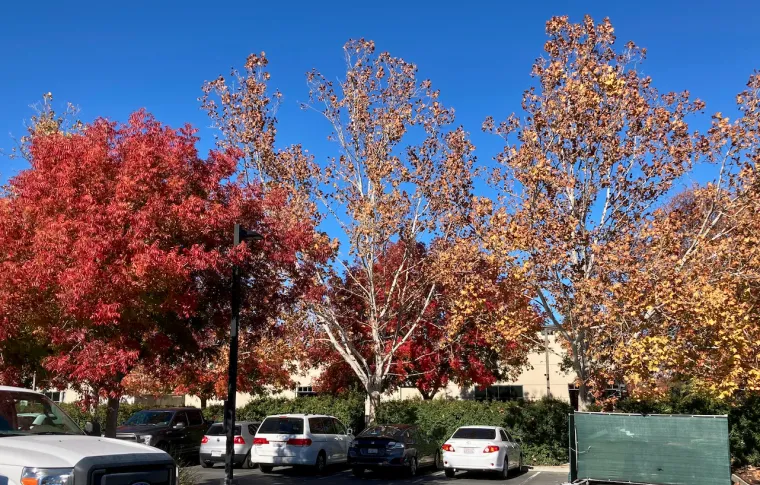
"Green, yellow, and orange colors are always present in leaves, but chlorophyll – the green pigment responsible for photosynthesis – is so dominant during most of the year that it masks out the other colors," says Igor Lacan, UC Cooperative Extension Urban Forestry Advisor.
Because plant growth has slowed, any remaining leaves producing carbohydrates via photosynthesis route the carbohydrates to the plant’s storage areas; the stem and especially the roots. These “sinks” will provide the minimal energy for the plant to get through the winter and will provide the energy to resume growth in the spring before the plant has new leaves to generate new carbohydrates and energy. Cool-season vegetable gardeners benefit from this mechanism when they harvest their carrots, beets, and radishes.
But our dormant plants are even more clever than that. Particularly needed in climates colder than ours, perennials also have mechanisms to protect themselves from freezing temperatures. Individual plant cells, especially in roots, accumulate sugars and salts which decrease the freezing point of the cells. In addition, water moves from within plant cells into the spaces around them, thus protecting the actual cells from freezing (though ice crystals may form between cells.)
Do all plants have these mechanisms to survive the winter? No, they don’t. Annuals funnel all their surplus energy into seed production rather than storing it in the roots for the upcoming season. And plants like tomatoes, which are technically perennials in tropical climates, lack the mechanisms to store sufficient salts, sugars, and certain proteins within the cells to protect them from freezing.
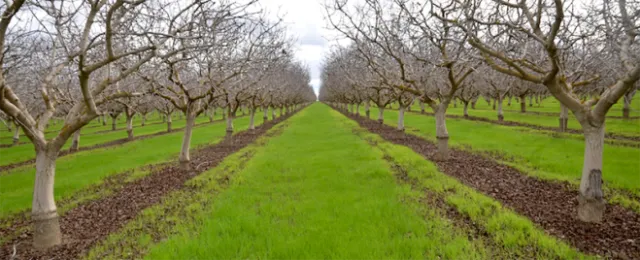
Winter months can actually benefit plants that require chill hours

As we know, many plants, including deciduous fruit and nut trees, appreciate this period of dormancy and, in fact, require it. To break out of dormancy, the growth inhibitors must be broken down by sufficient hours of chilling temperatures below 45 degrees. This is called “winter chill” or “vernalization.” Once warm temperatures resume and the number of chill hours for a specific variety of trees has been achieved, the tree will break out of dormancy.
On average, Northern California receives between 800 and 1500 chill hours each winter which is ideal for our famous fruit and nut production. On the other hand, as many home gardeners have discovered, this is not enough chill time for various other plants and bulbs, particularly hybrid tulips, which require up to 2500 chill hours. It also explains why apples, cherries, plums, and peaches grow more readily in Northern California than in Southern California.
What else is happening to our plants in the winter?
Let’s consider the soil around the roots of our plants. We’re all aware of the value of adding organic matter such as compost to our soils. This organic matter feeds the billions of microbes that live in the soil and breaks down residue to make mineral forms that roots can absorb and use. Do all these billions of organisms below ground disappear in winter? Fortunately, they do not, though some of them will die.
Soil microbes are especially active in the fall. However, like the perennial plants themselves, microbes living in the soil generally just slow down in winter. During winter here in Contra Costa County, the soil maintains a more constant temperature than the air and is unlikely to freeze beyond the surface, so our soil denizens can continue their work, albeit at a slower pace. In addition, organic mulch and cover crops provide a sort of blanket for the cool soil, further facilitating microbial activity.
While a complete discussion of the relationship between plant roots and organic matter is beyond the scope of this article, it is pertinent to know that many of the beneficial soil microorganisms associated with plant roots, such as bacteria and fungi, synthesize plant hormones. One of these, abscisic acid noted above, is vital for managing plant dormancy.
In conclusion, it is fair to say that, although our plants may appear inert in the winter, they are still very busy executing their life functions during this season. We just have to look a little deeper to understand how!
References:
Where do fall colors come from? - Green Blog - ANR Blogs
Home Page - Healthy Soils for a Healthy California
California Master Gardener Handbook [Link removed]
University of California Agriculture and Natural Resources
Dormancy: A Key to Winter Survival, University of New Hampshire Master Gardeners
Microbes in Your Soil
By Veda Scherer, University of California Cooperative Extension Master Gardener of Calaveras County
Your Fruit Trees Need Their Chill Time - HOrT COCO-UC Master Gardener Program of Contra Costa - ANR Blogs [LINK removed]
Cover Crops & Good Gardening Videos - HOrT COCO-UC Master Gardener Program of Contra Costa - ANR Blogs [LINK removed]
Growing Microgreens
by David George

What are Microgreens?

Getting Started
Seed packets can be purchased in garden centers or online. A word of advice: buy organic (untreated) seeds and check packet expiration dates. You will need one or more shallow 1-2” growing trays with bottom holes for water drainage and absorption. Or you can use sealed hydroponic trays with a fine mesh separating seeds on top from a water basin. You will also need a spray bottle for tap water spritzes, sterilized scissors for harvest, a location with 6+ hours per day of indirect light (or a grow lamp), and a tray cover for the first week or so. Aluminum foil works well for this.
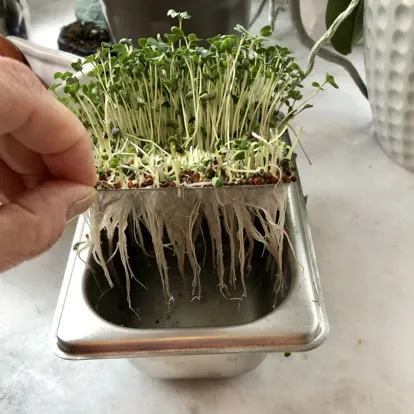
Growing Technique

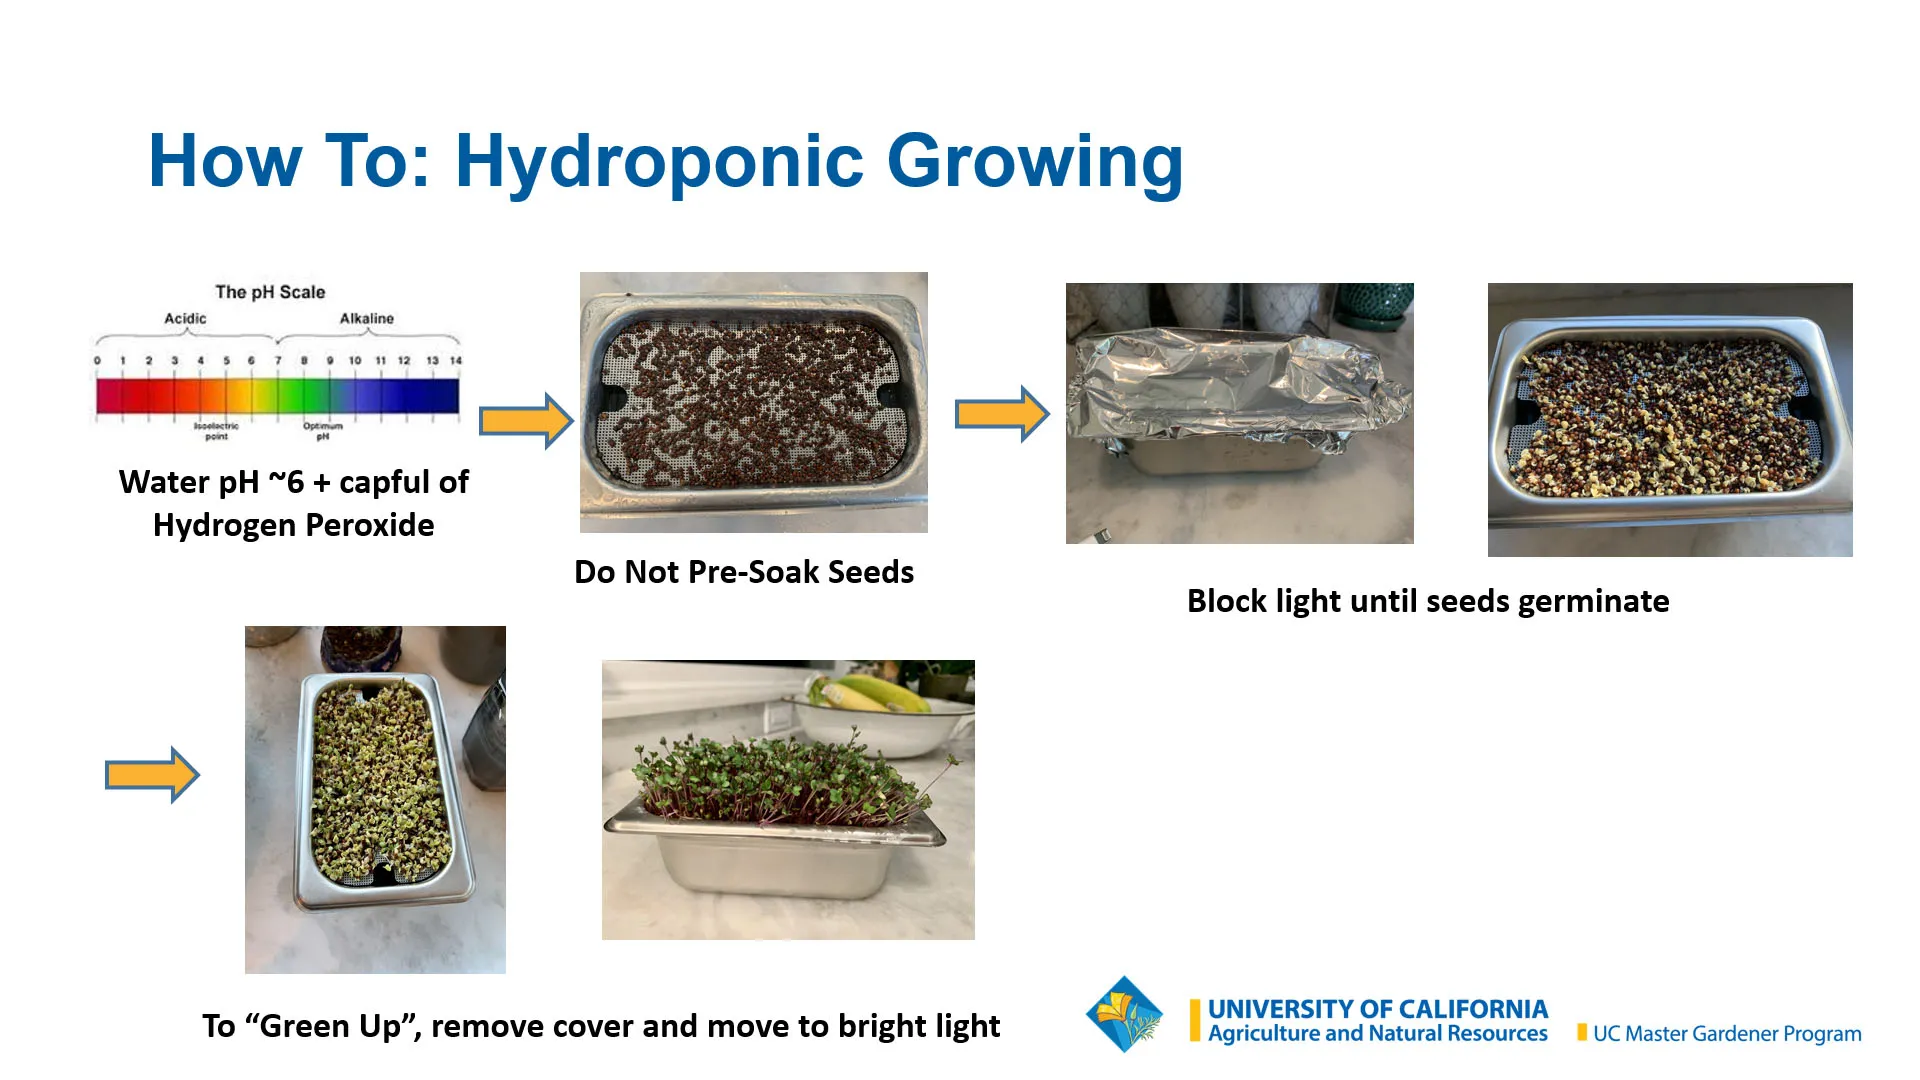
Harvest time varies by plant type but generally is about 2 weeks after germination when seedlings are 2-4” tall, and starter leaves are fully formed and green. Use scissors to clip seedlings just above soil level and wrap them in paper towels (without washing them) and they’re ready to eat, but they can be refrigerated for up to a week. Compost the remaining plant material and throw out the old growing medium. Sanitize reusable trays in a dishwasher or hot soapy water.
Good Choices to Get Started
Microgreens can spice up morning eggs, salads, pasta, taco salads, spring rolls, or other entrees. They add freshness, taste, color, variety, and interest to any meal.
Link to webinar: Growing Microgreens, by Andrea Salzman
https://www.youtube.com/watch?v=QHq968jFyA0
Short video demonstration of Growing Microgreens, by Andrea Salzman (3:32 mins.)
Landscaping for Fire Safety in Zone 2
by Pam Schroeder and Robin Harper
Unfortunately, living with the threat of wildfire is a fact of life for Californians. While we cannot control wildfire, we can help minimize its potential destruction by practicing fire-safe strategies that harden the landscape by reducing the vulnerability of your home and property to wildfire.
Hardening the Landscape
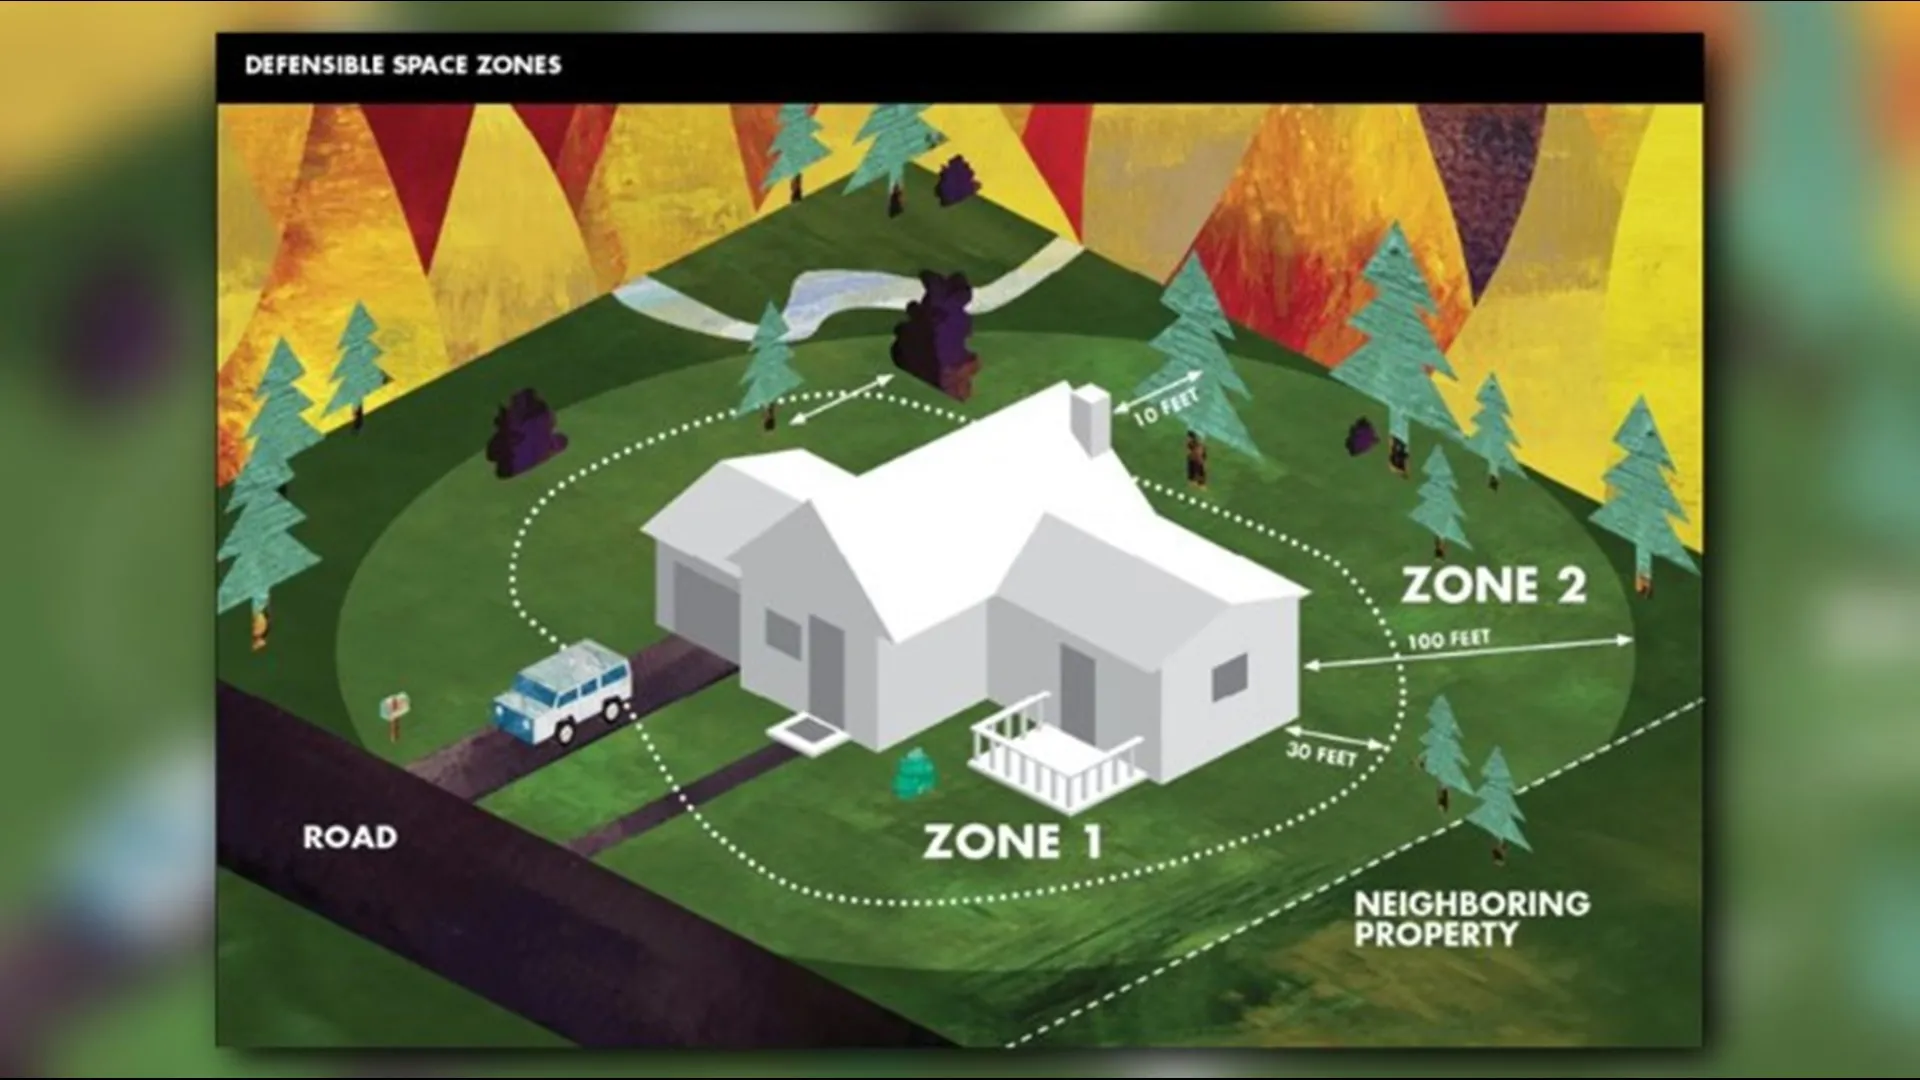
Creating a beautiful and functional landscape as well as a fire-protected property can be accomplished using the concept of Defensible Zones. Your property can be viewed as 3 Defensible Zones each with its own unique characteristics. Zone 0 (0-5 feet from the house) and Zone 1(5-30 feet from the house) have been covered in prior issues of “News to Grow By”. In the event you missed those articles the links are here:
Understanding Defensible Zone 0
Understanding Defensible Space Zone 1
For an illustration of all 3 zones and information on creating defensible space:
Introduction to Home Landscaping for Fire Safety
https://ucanr.edu/sites/fire/Preparedness/Landscaping/DefensibleSpace/
Zone 2, the Reduced Fuel zone
Zone 2 covers the outermost area of your property and represents the furthest reach of your responsibility. It is defined as 30-100 feet out from the buildings, structures, and decks of your home or up to your property line.

The goal is to reduce the fuel load (anything flammable) in this zone to slow down or stop the approach of a potential fire before it ever gets to your home. Fuel is anything that will burn including dead vegetation, downed branches, overgrown areas, low-hanging trees, flammable plants, furniture and wooden fencing.
Keeping this area clear of dead material, spacing plants properly, reducing density (both horizontally and vertically), and adding hardscape will help eliminate fuel load and help slow or stop a wildfire from spreading across your property.
Where to Start
Before creating an action plan for firescaping, start by familiarizing yourself with the fire codes and ordinances specific to your fire district, as these standards vary and are enforced by local authorities.
Walk your property in zone 2 from 30-100 feet out from your house, then create a strategy, and make an action plan:
Create a Strategy
Walk around your property and identify problem areas to include in your plan
- Note the sloped areas on your property (see below for more details)
- Identify plants that need to be removed
- Be aware of the dead vegetation on your property
- Identify areas that may need new or additional irrigation
Make a Plan
Create a written plan that incorporates:
- Fire-safe planting and spacing (both vertical and horizontal)
- A list of plants/trees that need to be removed on sloped areas
- Areas where annual grasses have dried out
- What fire-safe plants can replace those that are to be removed
- Where you might want to add hardscape
- Irrigation to keep plants and trees from drying out
Take Action
Time to execute your plan:
- Remove all trees, plants, and vegetation that you have identified above
- Trim up low-hanging branches and thin out overgrown trees especially where there is undergrowth on the ground
- Think about hiring an expert for help with tree removal and/or above-roof pruning of branches
- Add plants that are fire-safe to your new fire-scaping plan and plant in an island format
- Trim all annual grasses to 3 inches or down to bare soil
- Make liberal use of hardscaping (rocks, cement, gravel, rock walls, boulders, etc.)
Recognize the Impact of Slope

In a hilly area, fire will travel faster, and flames will shoot higher uphill; therefore it is important to add 10 feet of additional space between trees for every 10% increase in slope. This extra space can help keep the fire from laddering from tree to tree up the hill.
Remove Flammable Plants
Fire-prone plants are plants/trees that:
- Have leaves that are dry due to low moisture content and are small, fine, or needle-like. Examples are Cypress and Juniper
- Have natural aromatic or resinous oils. An example is rosemary which is highly flammable
Plants that produce a lot of debris increase fire danger as well. For example, eucalyptus trees have bark that is loose and papery, which creates a lot of debris making these trees very dangerous.

Mulch Strategically
Mulch plays an important role in your landscape. Besides looking good it provides many benefits including:
- water retention
- soil temperature control
- weed inhibition
- soil erosion prevention
Keep in mind that some mulches can also be a highly combustible material in your landscape. The bigger and heavier the pieces the better. But remember, with enough heat, it all burns.
Maintenance - the final element in a fire-safe landscape
Be diligent in your maintenance efforts to keep your property fire-safe.
Ongoing:
- Remove dead plants, leaves, and branches
- Remove vines from trees and fences
- Compost or remove all debris
Annually:
- Thin vegetation and remove weeds or cut weeds back to 3 inches
- Cut back woody plants
- Ensure sufficient space between shrubs, house, outbuildings, and trees
Every few years:
- Cut back vines, groundcovers
- Prune tree branches to 10’ above ground and 10” above roof
Conclusion
This concludes our series on Home Landscaping for Fire Safety. By following the series guidelines, you can dramatically reduce the risk of fire spreading, creating a safer, more resilient landscape that not only protects your home but also strengthens the safety of your entire community. Fire safety starts with you—every action you take has the power to make a life-saving difference.
More Firewise information:
About the Fire Network
https://ucanr.edu/sites/fire/Home_430/
Creating a defensible space
https://ucanr.edu/sites/fire/Preparedness/Landscaping/DefensibleSpace/
CalFire information, including creating checklists
https://readyforwildfire.org/
More information on fire-safe planting
https://ucanr.edu/sites/fire/Preparedness/Landscaping/Plant_choice/
UCANR.edu information on Mulch
UCANR Fire Network: Maintenance of Trees