This guide outlines how to add, edit, and manage group menus within Drupal. Group menus allow for structured navigation, helping users find relevant content.
While we recommend utilizing Group Menus for a minimal number of parent links, we do not recommend using the Group Menus for a large number of links to parent and child pages. The number one reason for this is that more of our traffic comes from mobile devices, and a large number of links creates an unpleasant user experience. We recommend using links to child pages on the page itself.
Adding to Group Menu When Editing Content
While editing content, you can add or remove the item from your group menu using the sidebar's Menu settings. To learn more about the Group Menu, please refer to Group Menu.
1. Navigate to edit your content.
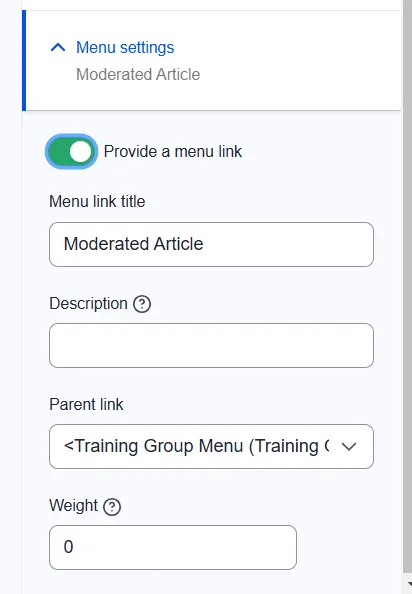
2. On the sidebar, click to expand the Menu settings section.

3. Toggle on the Provide a menu link. This will display menu options.
- In the Menu link title field, enter the title as it will be displayed in the menu.
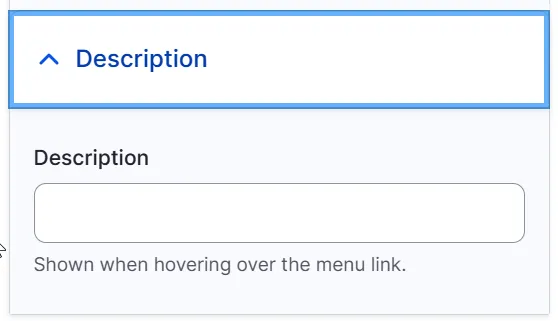
- In the Description field, enter the text that will be displayed when a user hovers over the link.
- In the Parent link list, choose the menu that should display this item. When adding a new menu item, choosing a "parent link" allows you to nest it under another menu item, forming a submenu.
- (Optional) In the Weight list, select the relative weight of the link. Menu links with lower weights are displayed before links with higher weights.
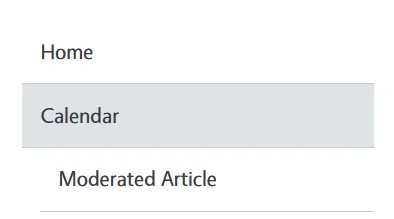
5. Save content and the content will be added to the menu.
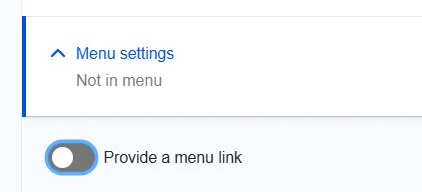
To Hide: Remove the content from appearing on the Menu, turn off the menu item by turning off the Provide a menu link toggle.
Navigate to Edit Group Menu
1. Login to IWP and click My Account.
2. Select the group you want to update the Group Menu.
3. Click on the Group Menus tab to manage the group’s menu.

4. Click Edit on the Group menu to start editing the menu.

Adding a Menu Item
To help with populating the group menu, it is recommended to add the menu link directly when editing the content to ensure the correct menu link is added.
1. In the Group Menu, click Add Link button.

2. Populate in following details for the new menu link:
- Menu Link Title: Enter the title for the menu link (e.g., "Home"). This text will be used as the display label for the menu item.
- Link: For better navigation, use the Drupal path (/site/training-group-demo/article/moderated-article) or full URL rather than manually searching. Copy the path from the content type or node you’re linking to and paste it here for accuracy. Enter <nolink> to display link text only. Enter <button> to display keyboard-accessible link text only.
- Search for Internal Content (Recommended): Click the Search for Internal Content button that will open the ability to search IWP content or groups for a link. On the Content tab, use you can filter results by specific Groups. Once a content or group is selected, scroll to the bottom of the window and click use selection. This will populate the Link field on the menu.

- Option to Get Menu Links: In other window, go to the specific page or content type where you want to add the menu link. Edit the content and then copy the URL path from this content (e.g., /group/12345 or /node/23022). Use that URL path for the link.
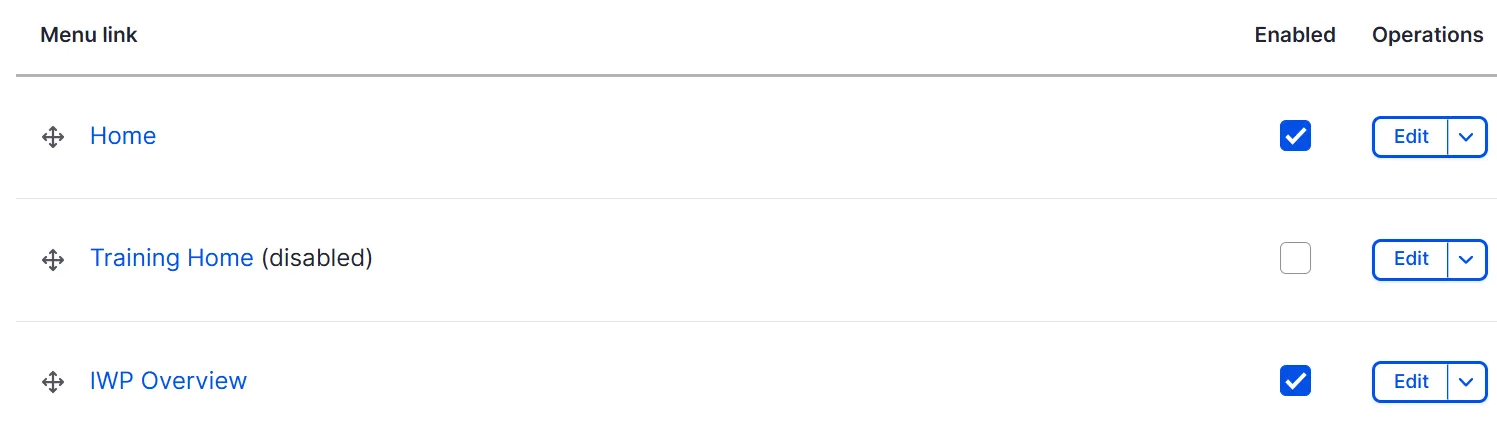
- Enabled: Make sure toggled is enabled for the menu item to display or item will be hidden.
- Parent link: Organizes menu items within a hierarchy by assigning a Parent Link. The link (or section) that the content is associated with. The maximum depth for a link and all its children is fixed. Depending on the list of Menu items, some menu items may not display due to the depth limit.

- Display Settings - Weight: The weight determines the order of links. Lower weights appear higher in the menu. You can hide row weights if preferred and use Drag control instead of weight to re-organize.
- Display Settings - Show As Expanded: Toggle on to always show its child links when the menu is displayed, specifically for menu with subpages.

- Description: Add a brief description, which will appear when users hover over the menu item.
3. Click Save to create the new menu link.
4. Make sure the menu items corresponding checkbox for Enabled is checked. If left unchecked, the link will be hidden.
5. Scroll to the bottom on the list and click Save to confirm all changes.
Editing, Re-Ordering and Show/Hide Group Menu Items
1. Login to IWP and click My Account.
2. Select the group you want to update the Group Menu.
3. Click on the Group Menus tab to manage the group’s menu.
4. Click Edit button for Default Group Menu.
5. To reorder menu items:
- Use the Drag control at the start of each menu item to reorder items in the list.
6. To re-structure the hierarchy of the menu items:
- Use the Drag control at the start of each menu item to reorder items in the list. Nested can be performed by dragging to the right.
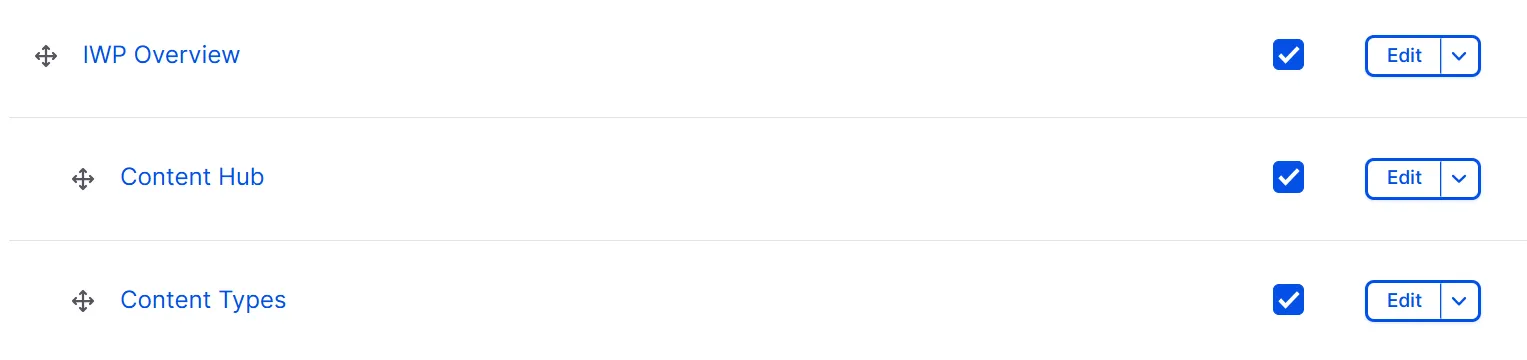
7. To show menu links, select the Enabled checkbox. To hide, de-select.
8. After making edits, click Save to confirm changes.
Hierarchy of Menu Links
- Parent Link Structure: Set a Parent Link to organize links into a clear hierarchy, making navigation intuitive.
- Drag-and-Drop: Arrange links by dragging them into the desired order. Child links appear as nested items under parent links.
- Menu Weight: Fine-tune link order by adjusting weights; lower weights appear higher in the list.